

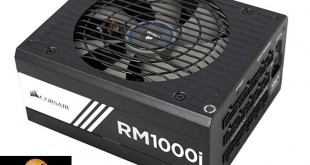
Today we look at two new power supplies in the new Corsair RMi Series. In this particular review we look at the higher capacity RMi 1000 watt unit – designed to serve the ultra high end enthusiast user. If you visit the front page of KitGuru.net today you will see we have also published a review of Corsair's lower cost 750 watt supply. This 1000 watt model is ideal for powering two or three high demand graphics cards. Priced at £144.95 in the UK, it firmly targets the audience with deeper pockets. It carries 80 Plus Gold certification, is fully modular and has a switchable +12V configuration – offering single or multi rail operation. Corsair have focused on the build quality, incorporating all Japanese 105c capacitors.
Corsair have incorporated a fluid dynamic bearing fan in all RMi Series power supplies, designed to reduce noise output. Additionally Corsair have spent time selecting the components to ensure coil whine isn’t an issue – extremely important as this issue has been raised many times by KitGuru readers in recent months.
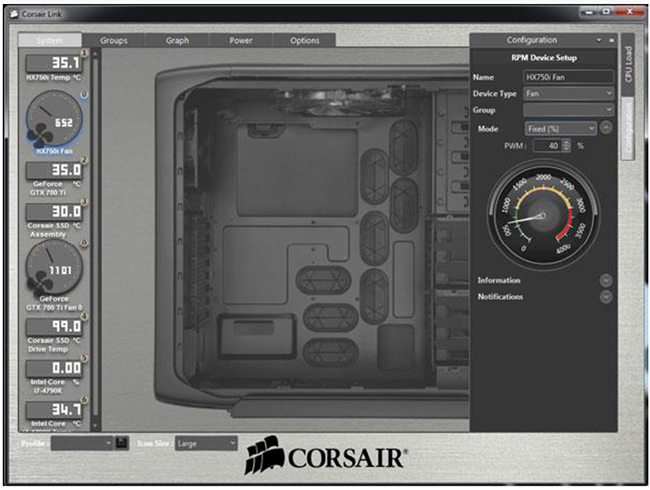
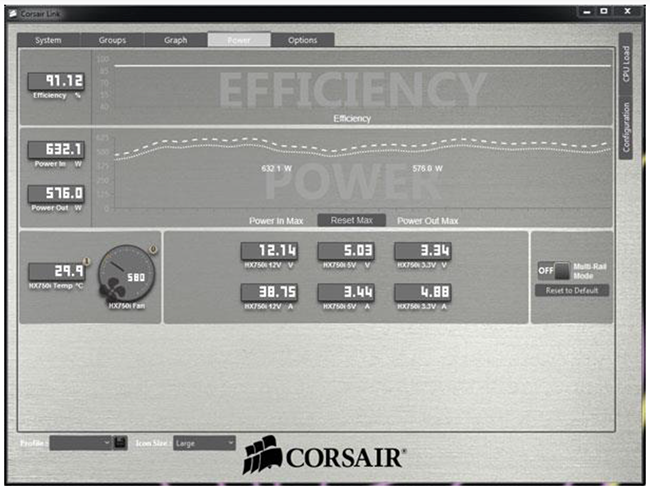
The RMi supply has a digital output for Corsair Link monitoring capabilities. There is also a Zero Fan mode to ensure minimum noise levels when the power supply is running with a low power demand – the fan should only spin when the unit is placed under heavy demand. Corsair Link version 3.1.5570 or newer is needed for full RMi support.
RMi vs. RM: The Similarities
- 80 PLUS Gold Certified: Less heat generated and lower operating costs
- Fully Modular Cable Interface: Allows users to only install the cables they require, thus reducing clutter and improving airflow
- ZeroRPM Fan Mode up to 40% Load: Near silent operation at low and medium loads
- Silent Component Selection: Stringent QC implementation minimizes “coil whine” issues
- LLC Resonant Mode Topology w/ DC to DC: Improves efficiency, voltage regulation and ensures compatibility with 4th Generation and newer Intel processors.
RMi vs. RM: The Differences
- 7 Year Warranty: Upgraded from RM’s 5 year warranty
- ALL Japanese Capacitors: Ensures long life and best in class performance throughout the life of the product
- Rated for Full Output at 50°C: 10°C higher operating temperature than RM at 40°C
- Fluid Dynamic Bearing Fan: Longer life than RM’s rifle bearing and lower noise than dual ball-bearing fans
- Digital Output for Additional Corsair Link Monitoring Capabilities: Adds features to RM’s Link capabilities, such as the ability to monitor power in, out, efficiency, output voltages and temperature, as well as DC load and fan speed
- Additional Corsair Link Control Capabilities: Create a custom fan profile and toggle +12V rail from multiple to single rail mode.

Corsair box artwork is not hard to recognise and as I mentioned in the 750 watt review, I am not so keen on the yellow accenting.
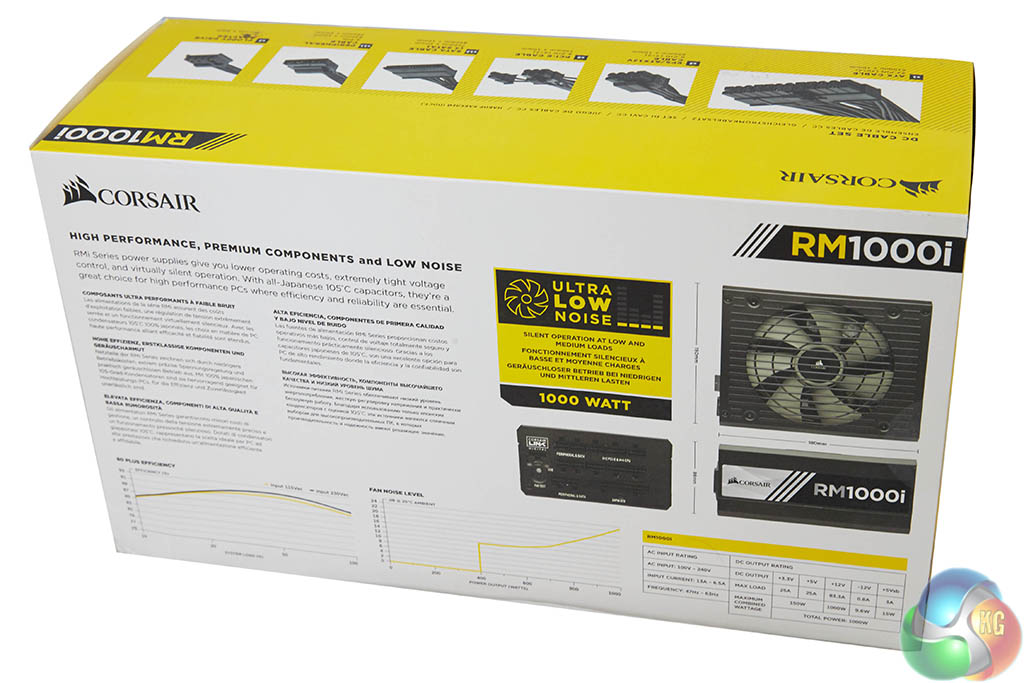
Some technical data is listed on the rear of the box including fan noise and efficiency levels.
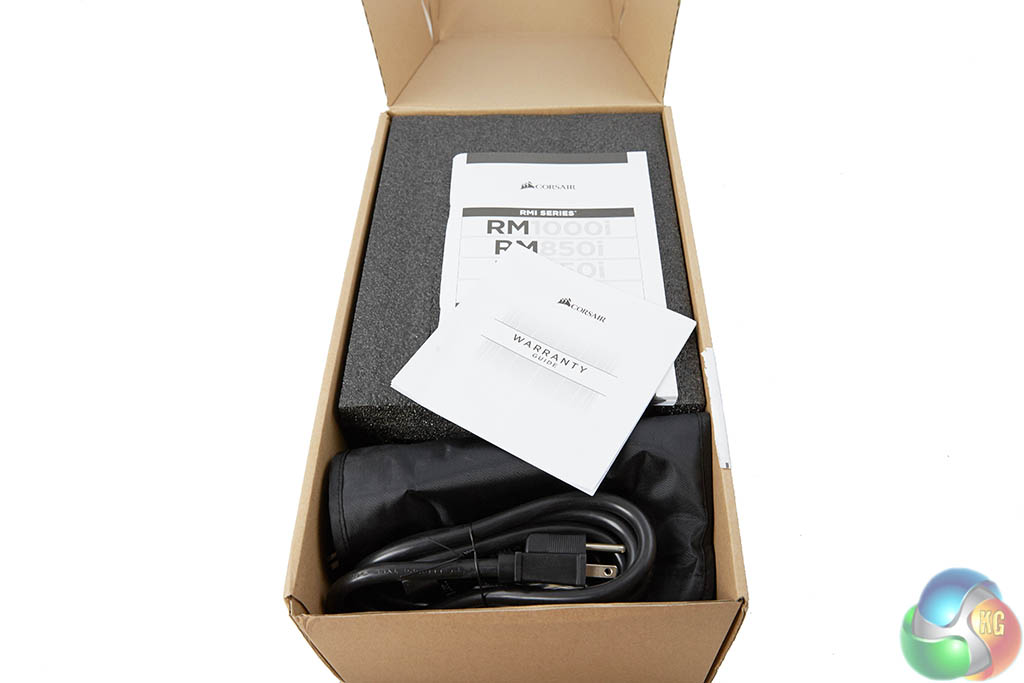
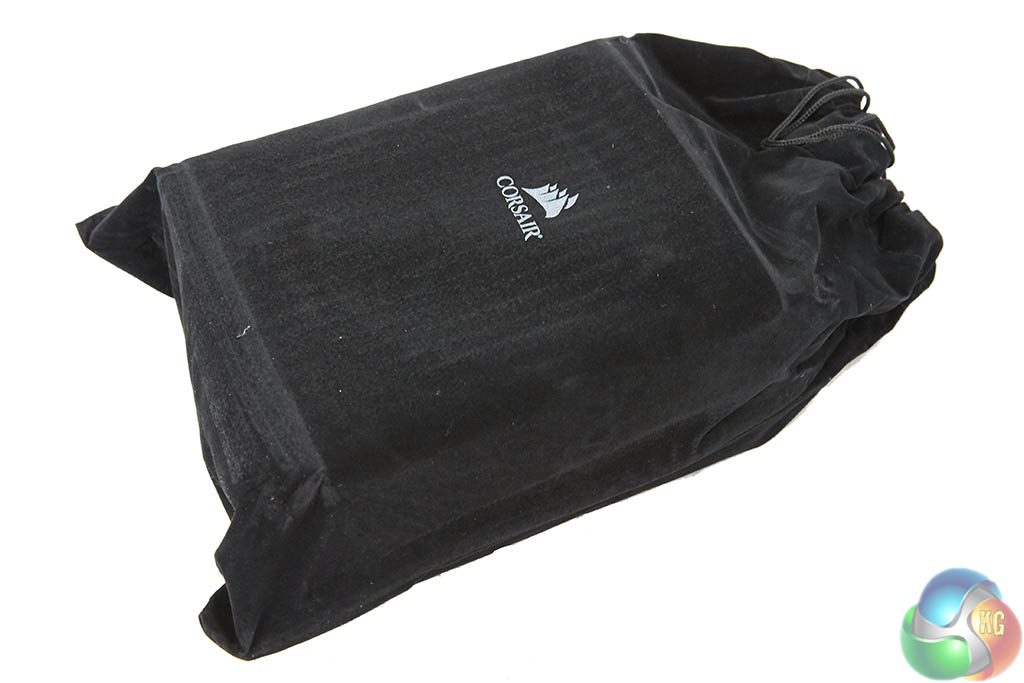
Inside the box, the power supply is protected between two thick foam pads and it is wrapped inside a felt bag for further protection. We take a look at the power supply up close, on the next page.
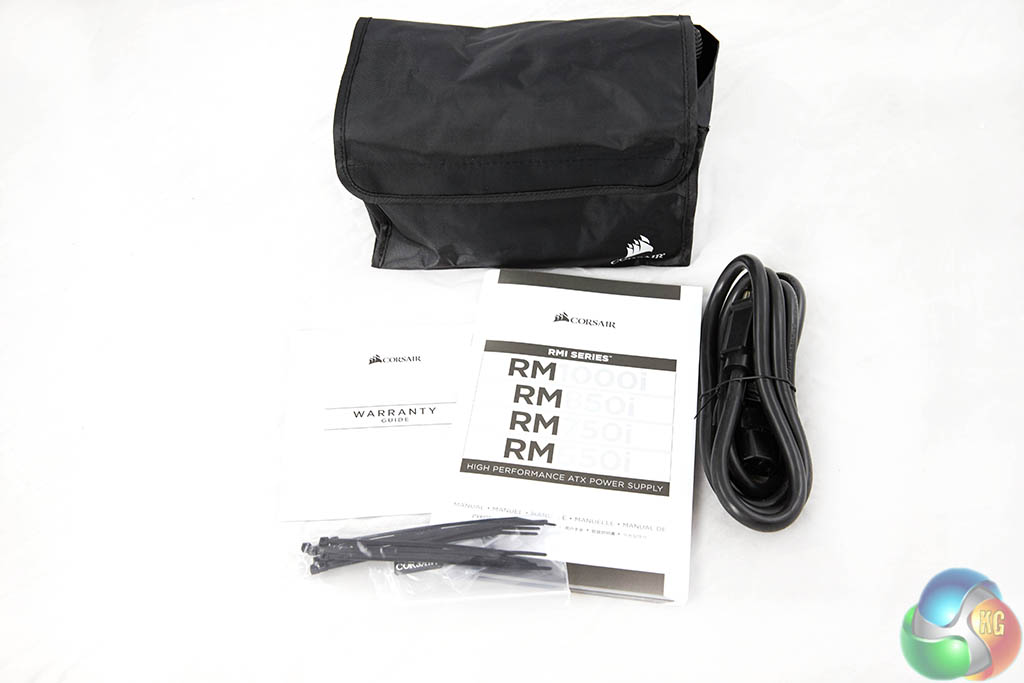
Corsair include a regional specific power cable, literature on the product and a bag of modular cabling.
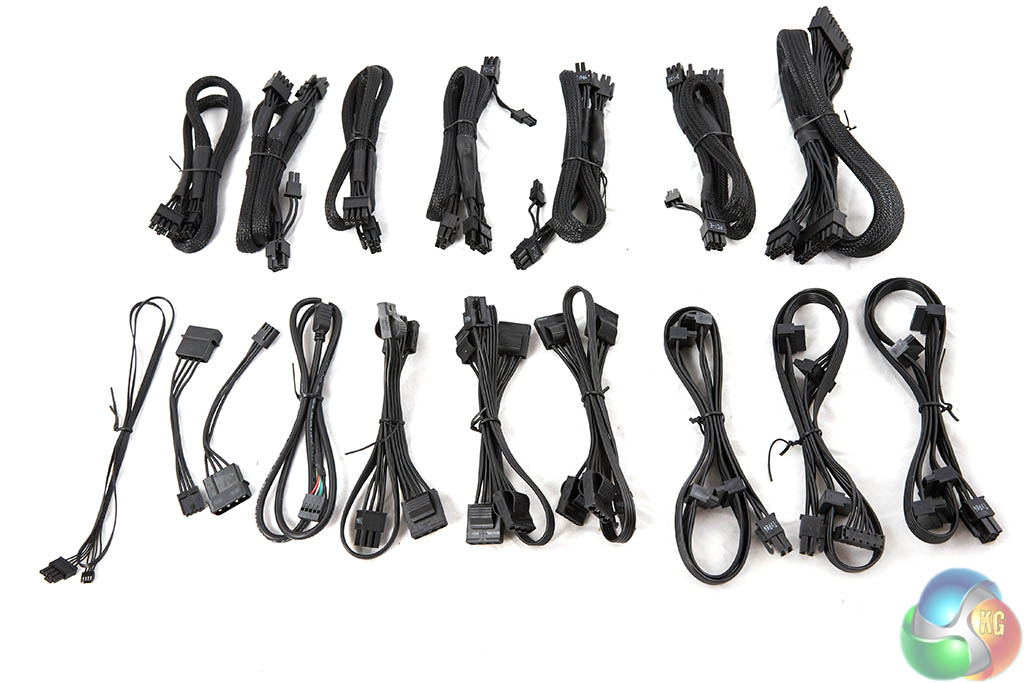
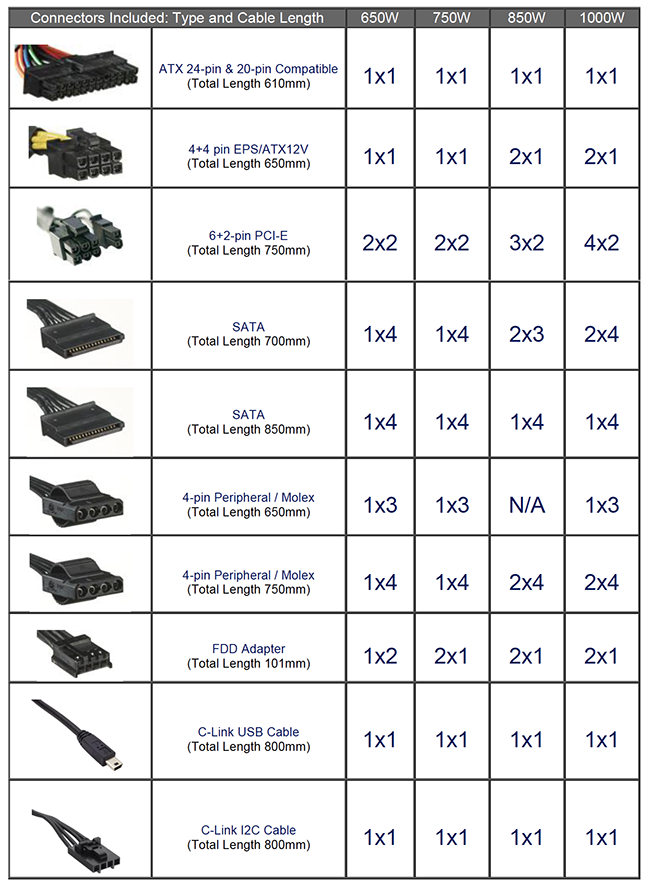
There are a mixture of sleeved and flat ribbon cables included with the RMi power supply and a total of eight PCIe power cables with the 1000watt unit – ideal for a Tri or quad SLI or Crossfire system build. If you are running dual R9 295X2 graphics cards, we recommend a 1,500 watt power supply.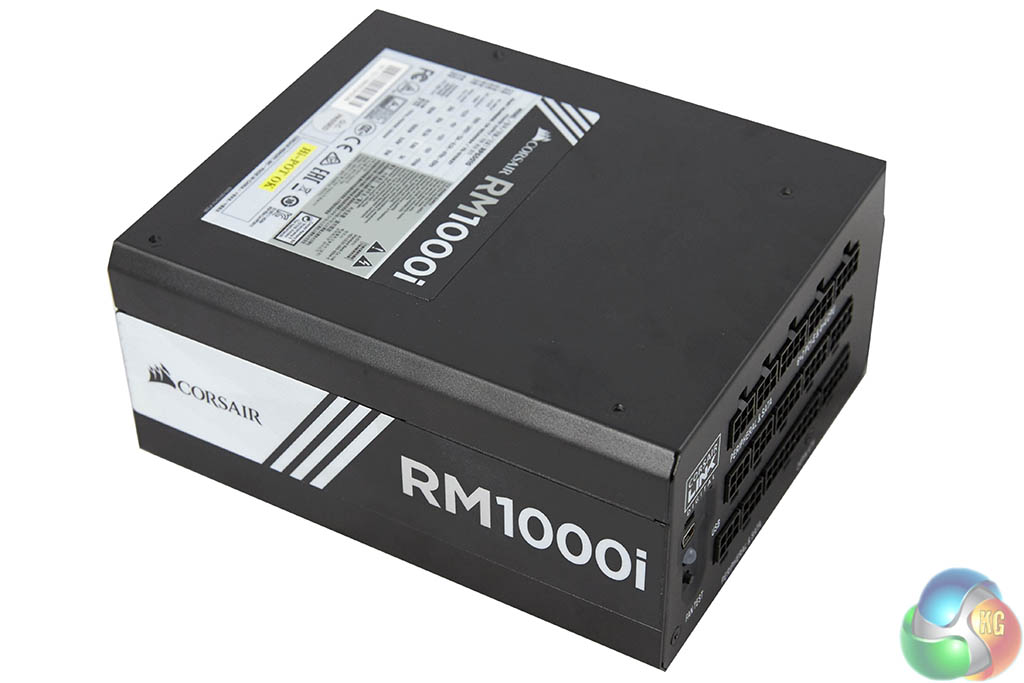
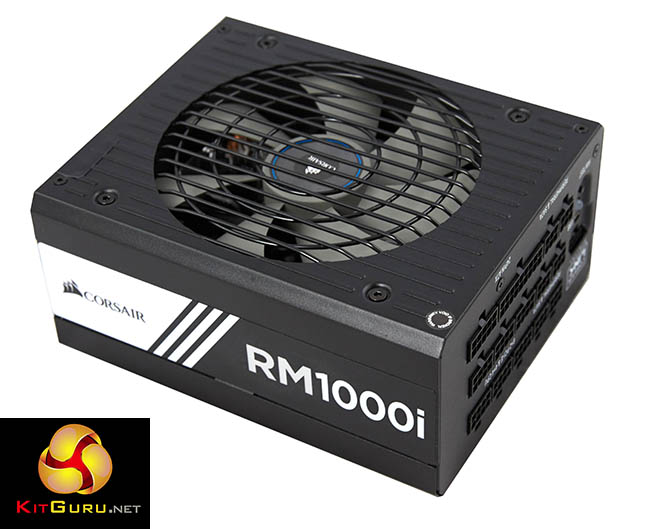
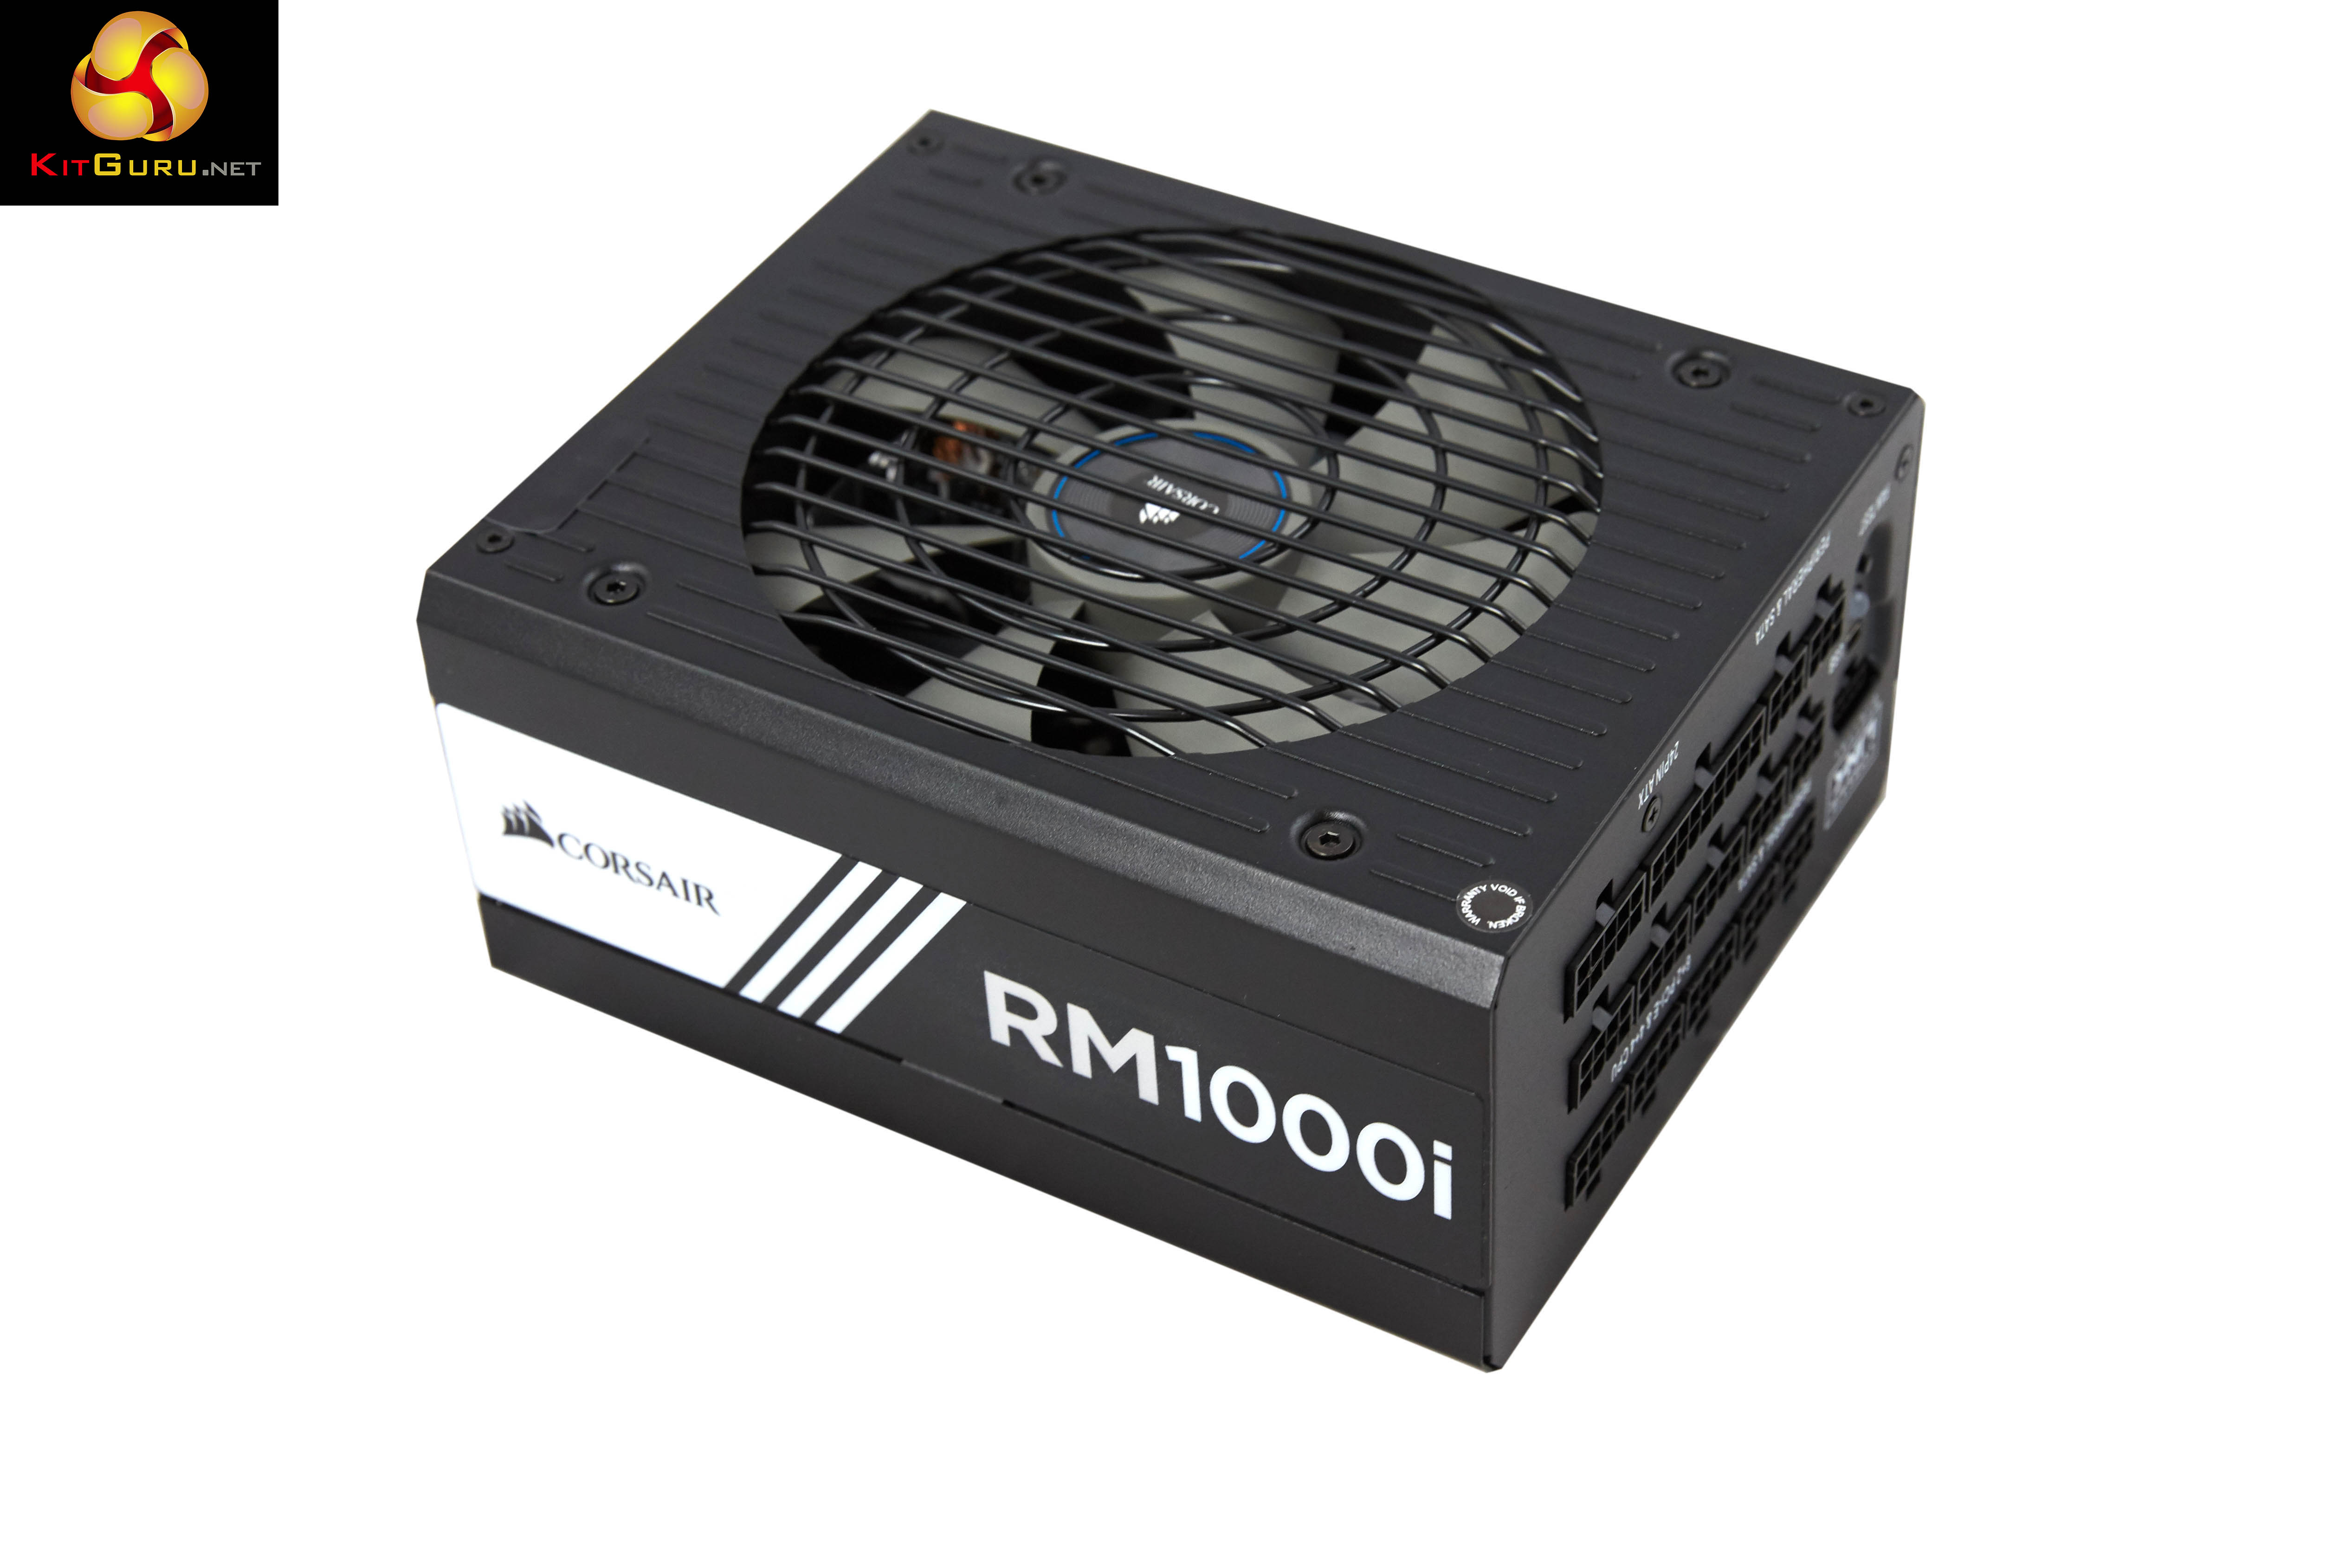
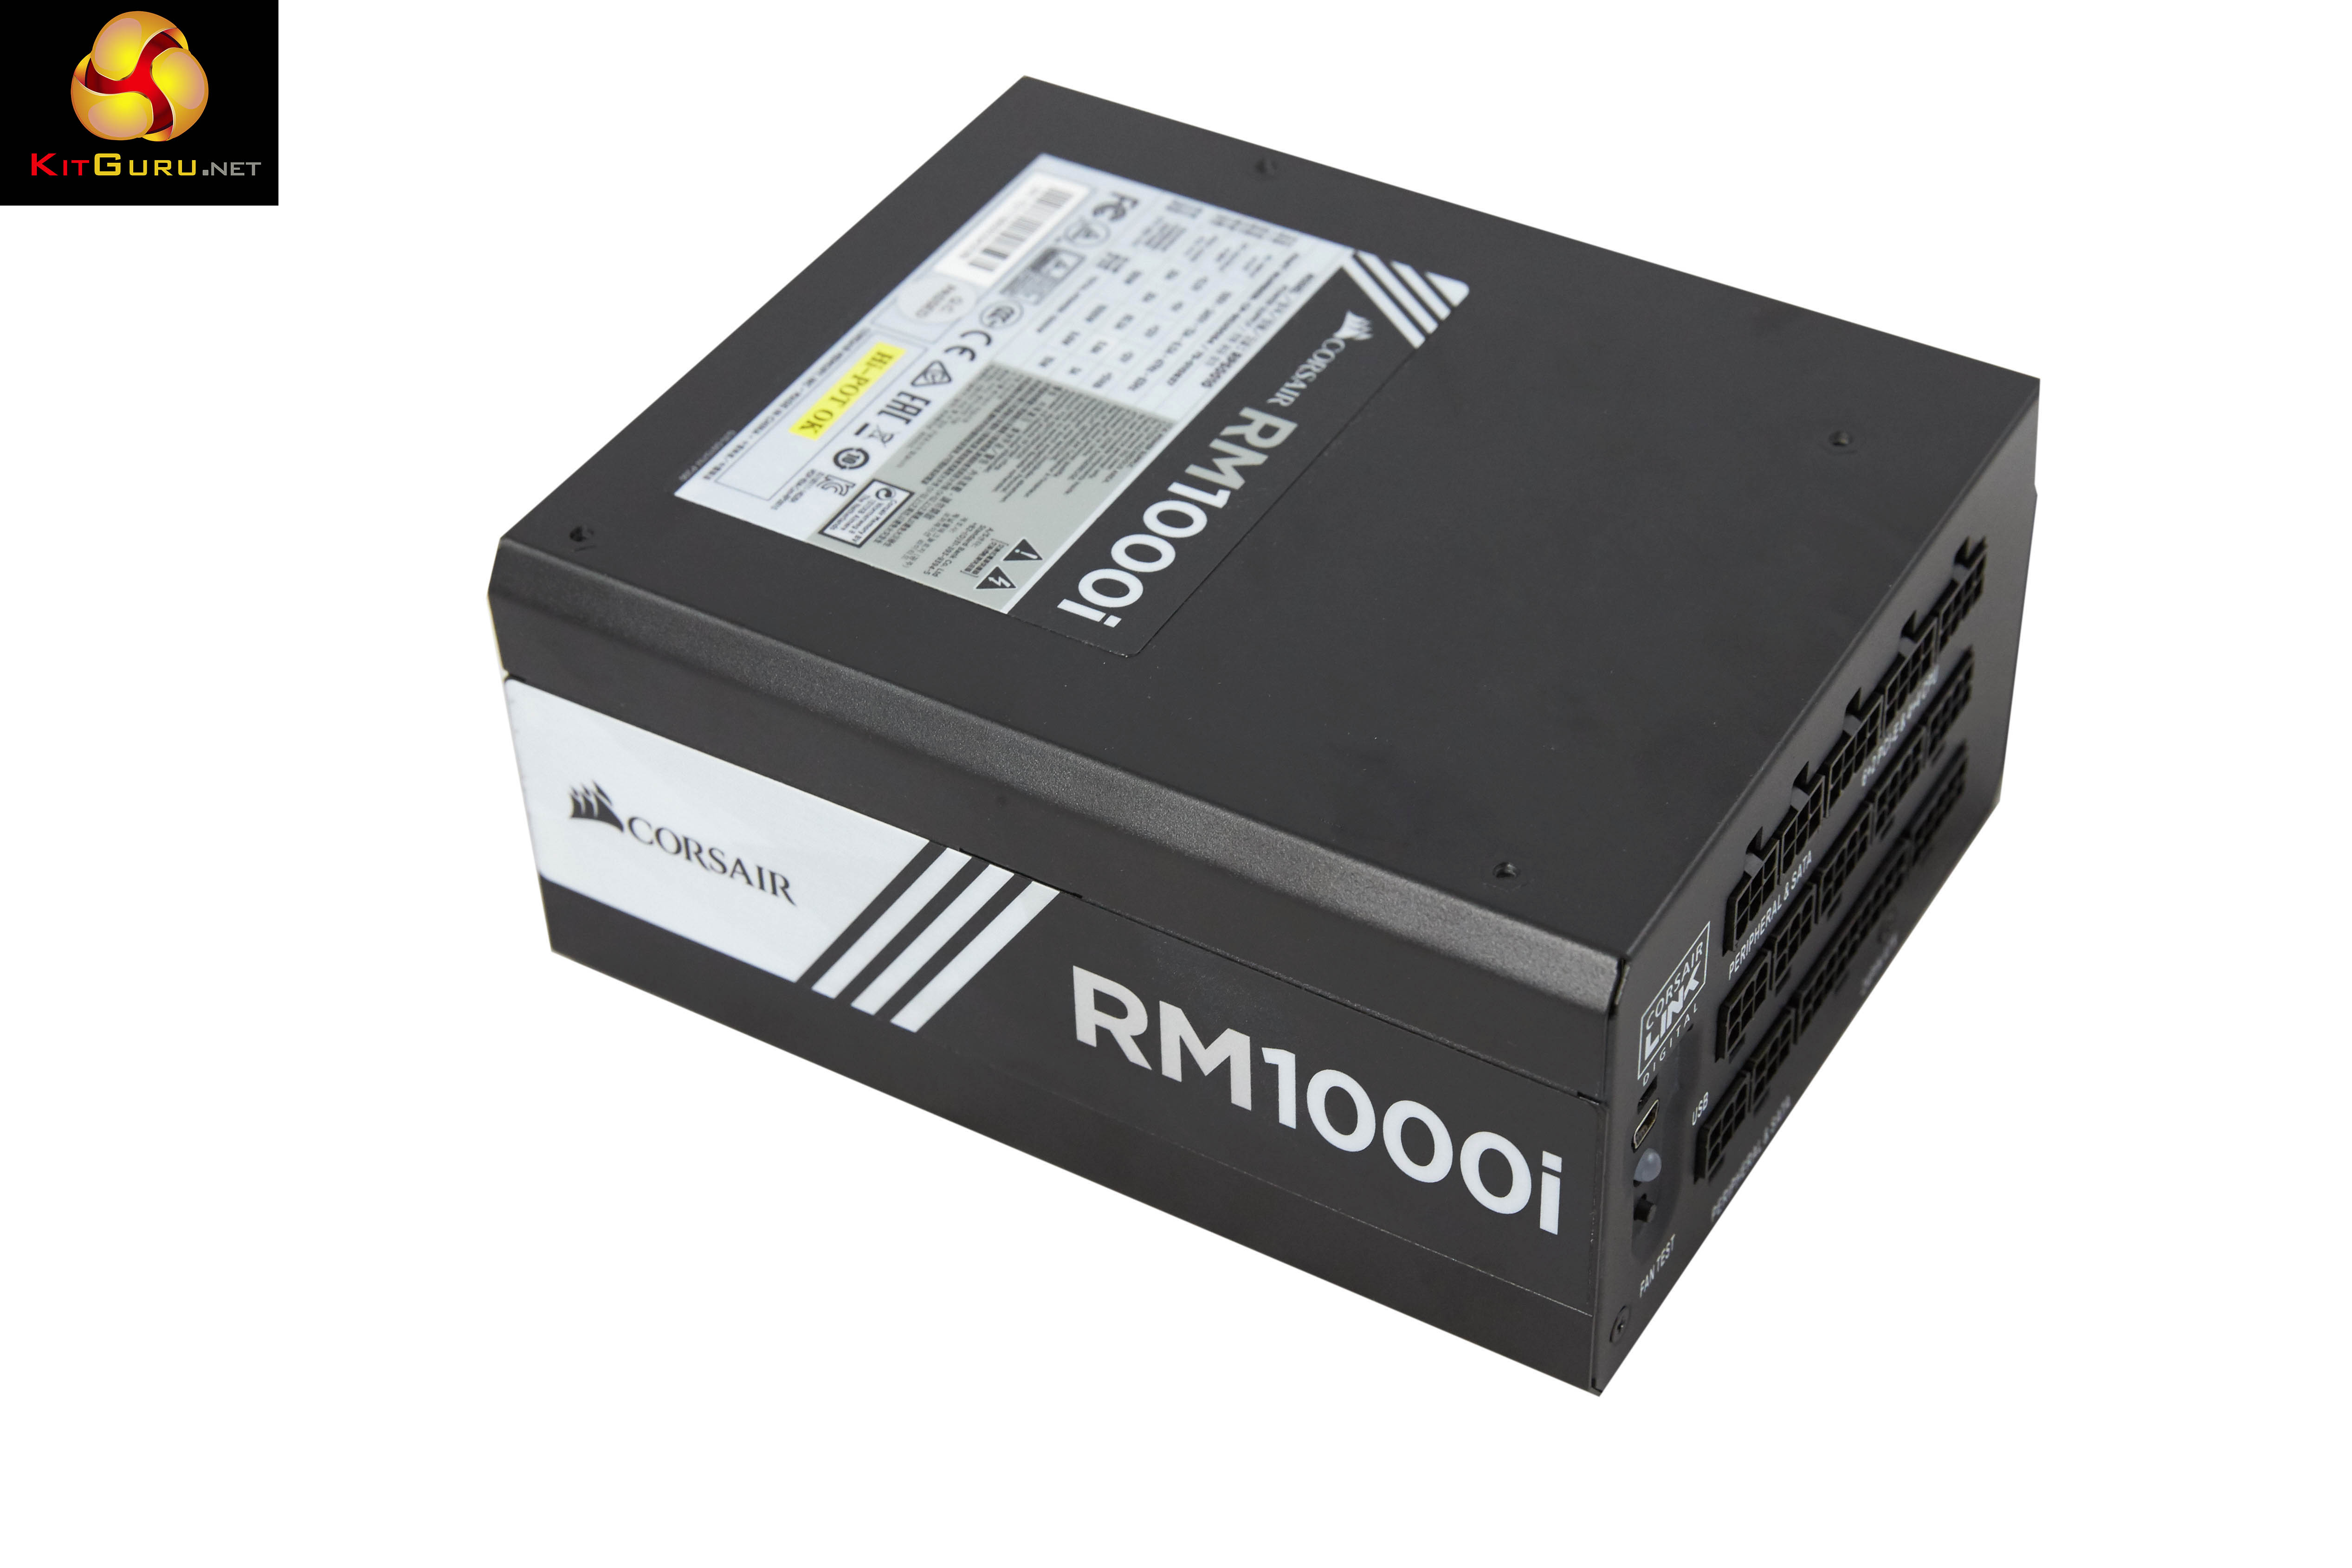
The Corsair RM1000i is immediately recognisable as a Corsair power supply – we like how the company follow a design ethic throughout their range, even though the various ranges have different coloured accents and stickers. Luckily enough Corsair didn't opt for yellow tones with the power supply itself, just the box.
Finish quality is high and it passed our screwdriver test. This involves running the head of a Philips head driver down the side of the chassis with light to medium force. After all, how many times have you accidentally connected with a power supply during a system build?
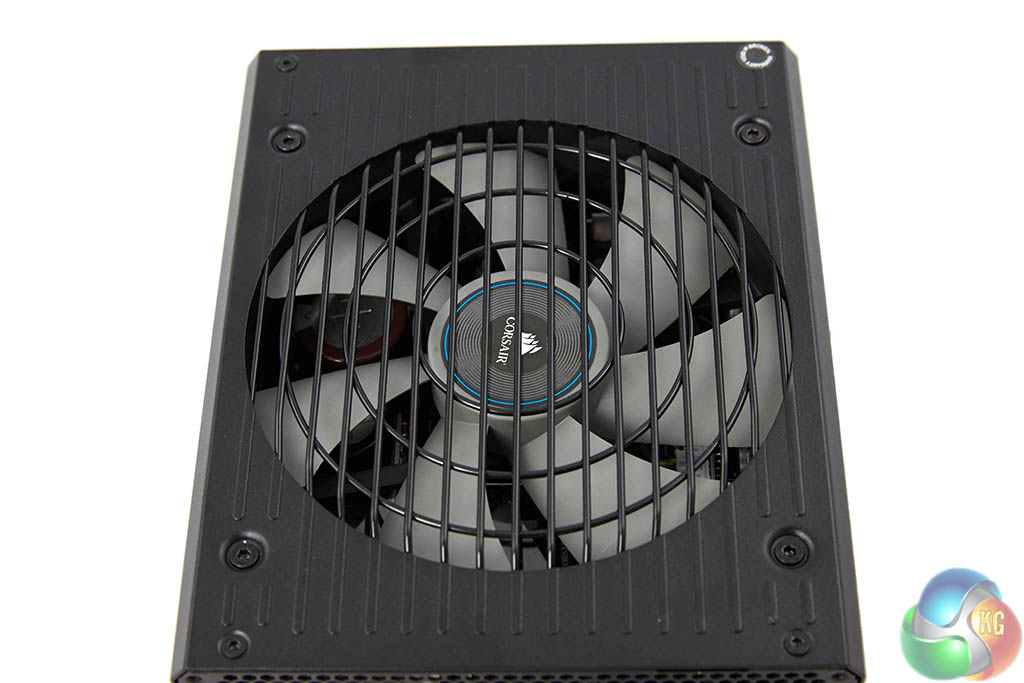
There is a large pale fan visible behind the black metal grill. We will take a closer look at the fan when we open the unit shortly.
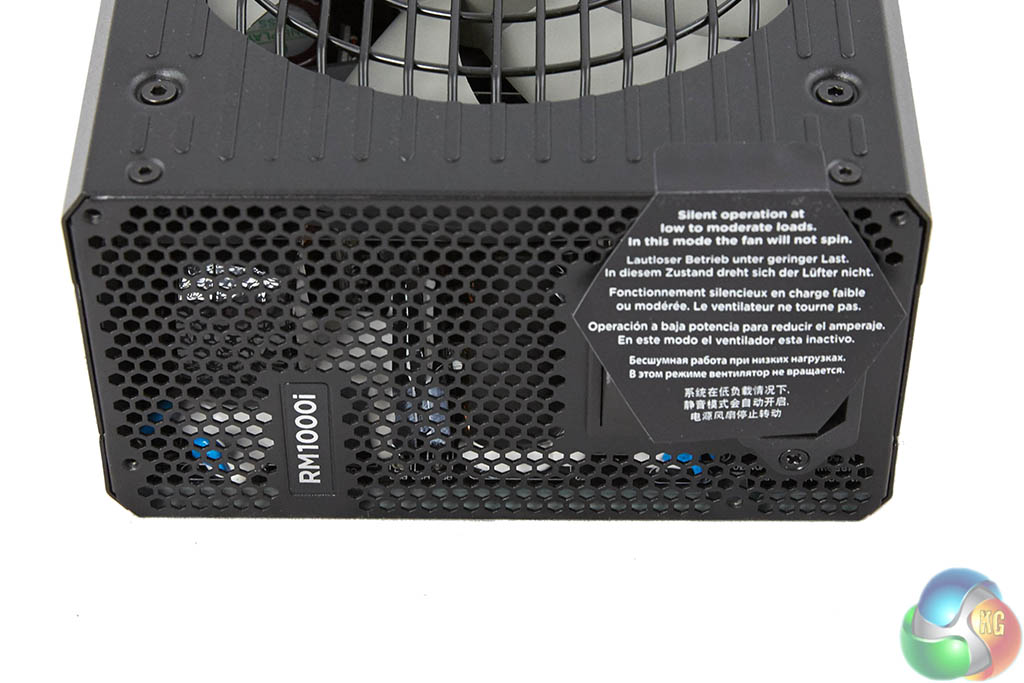
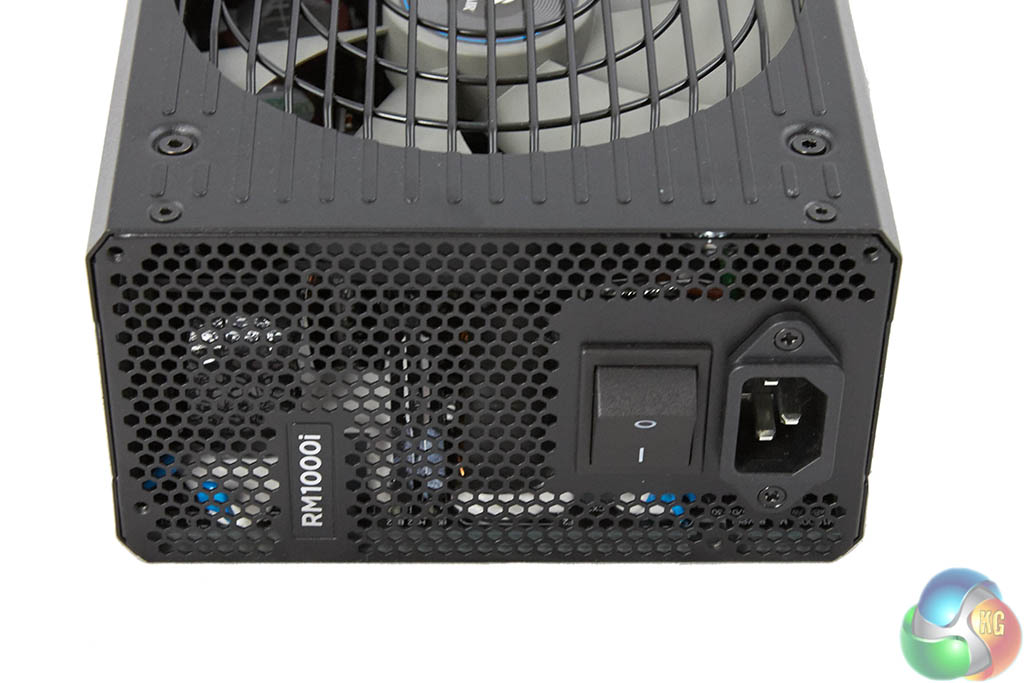
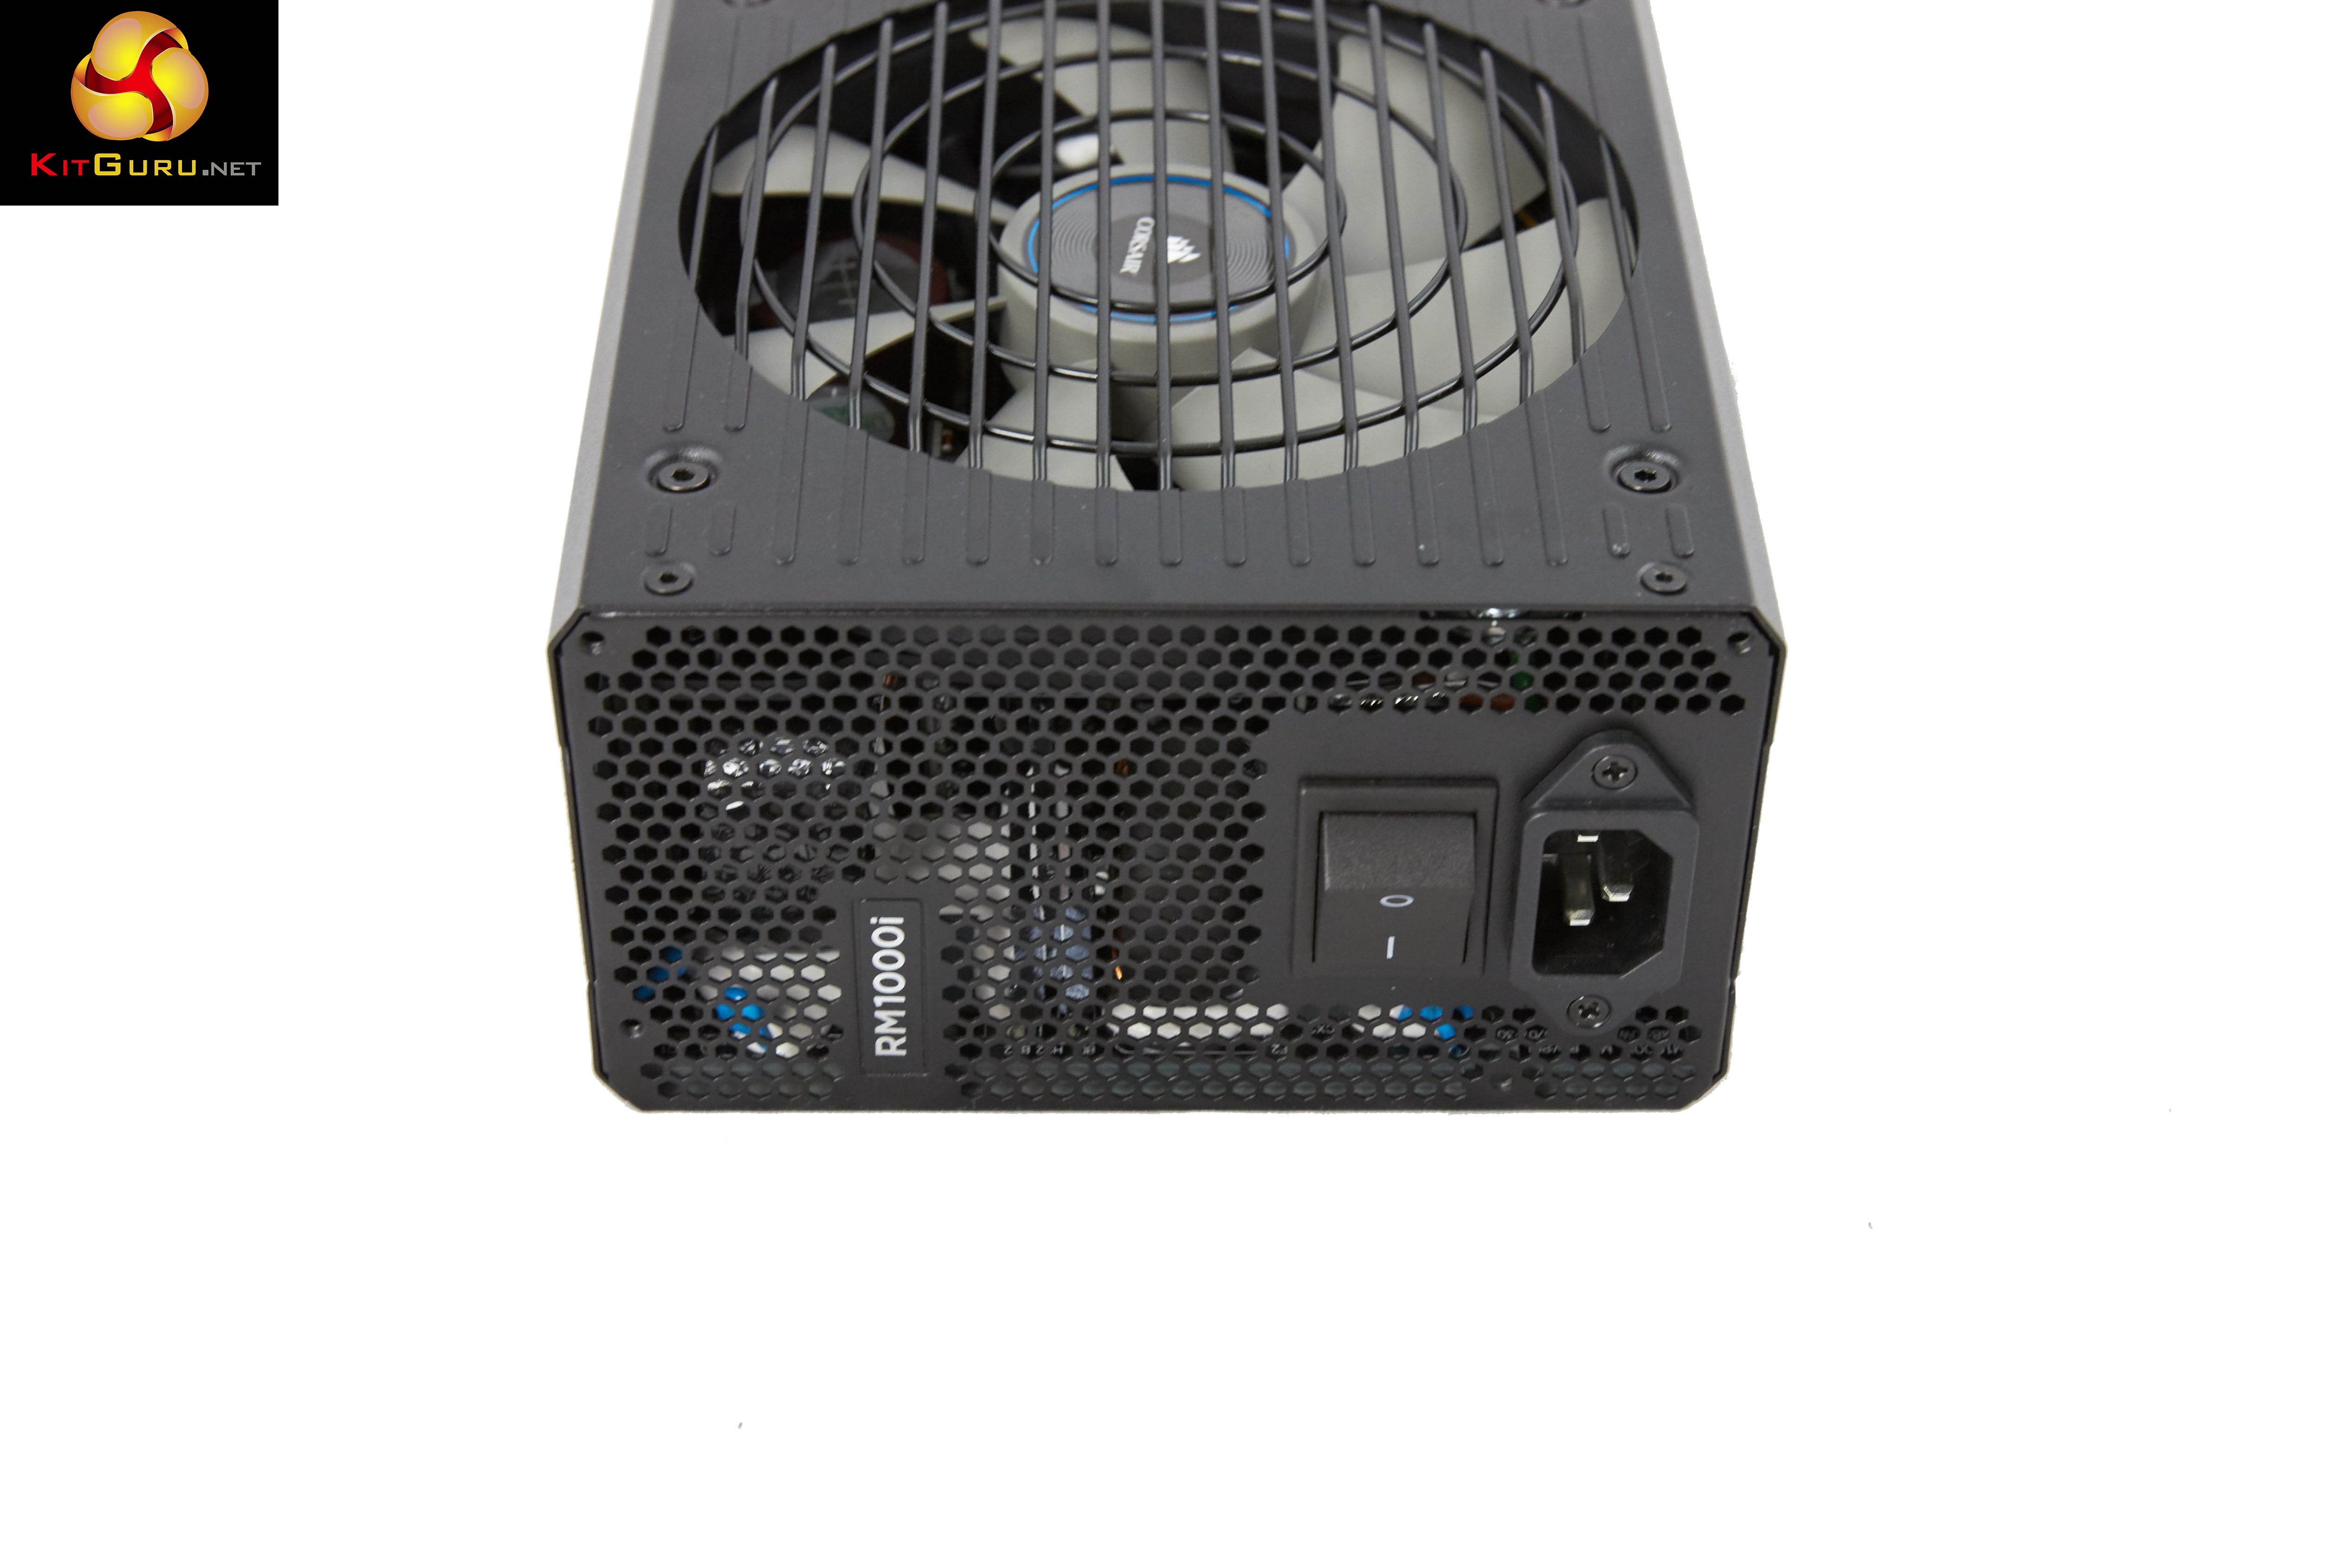
A sticker brings attention to the silent fan mode during low to moderate loads. When this is removed we can see one side of the unit is vented with a power connector and switch for operation.
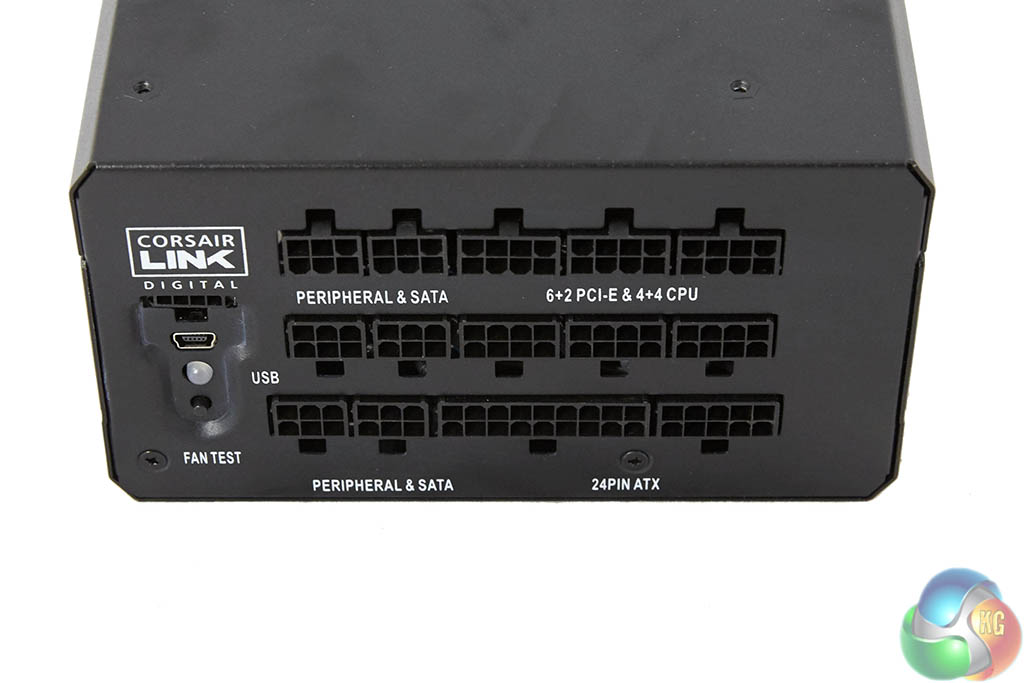
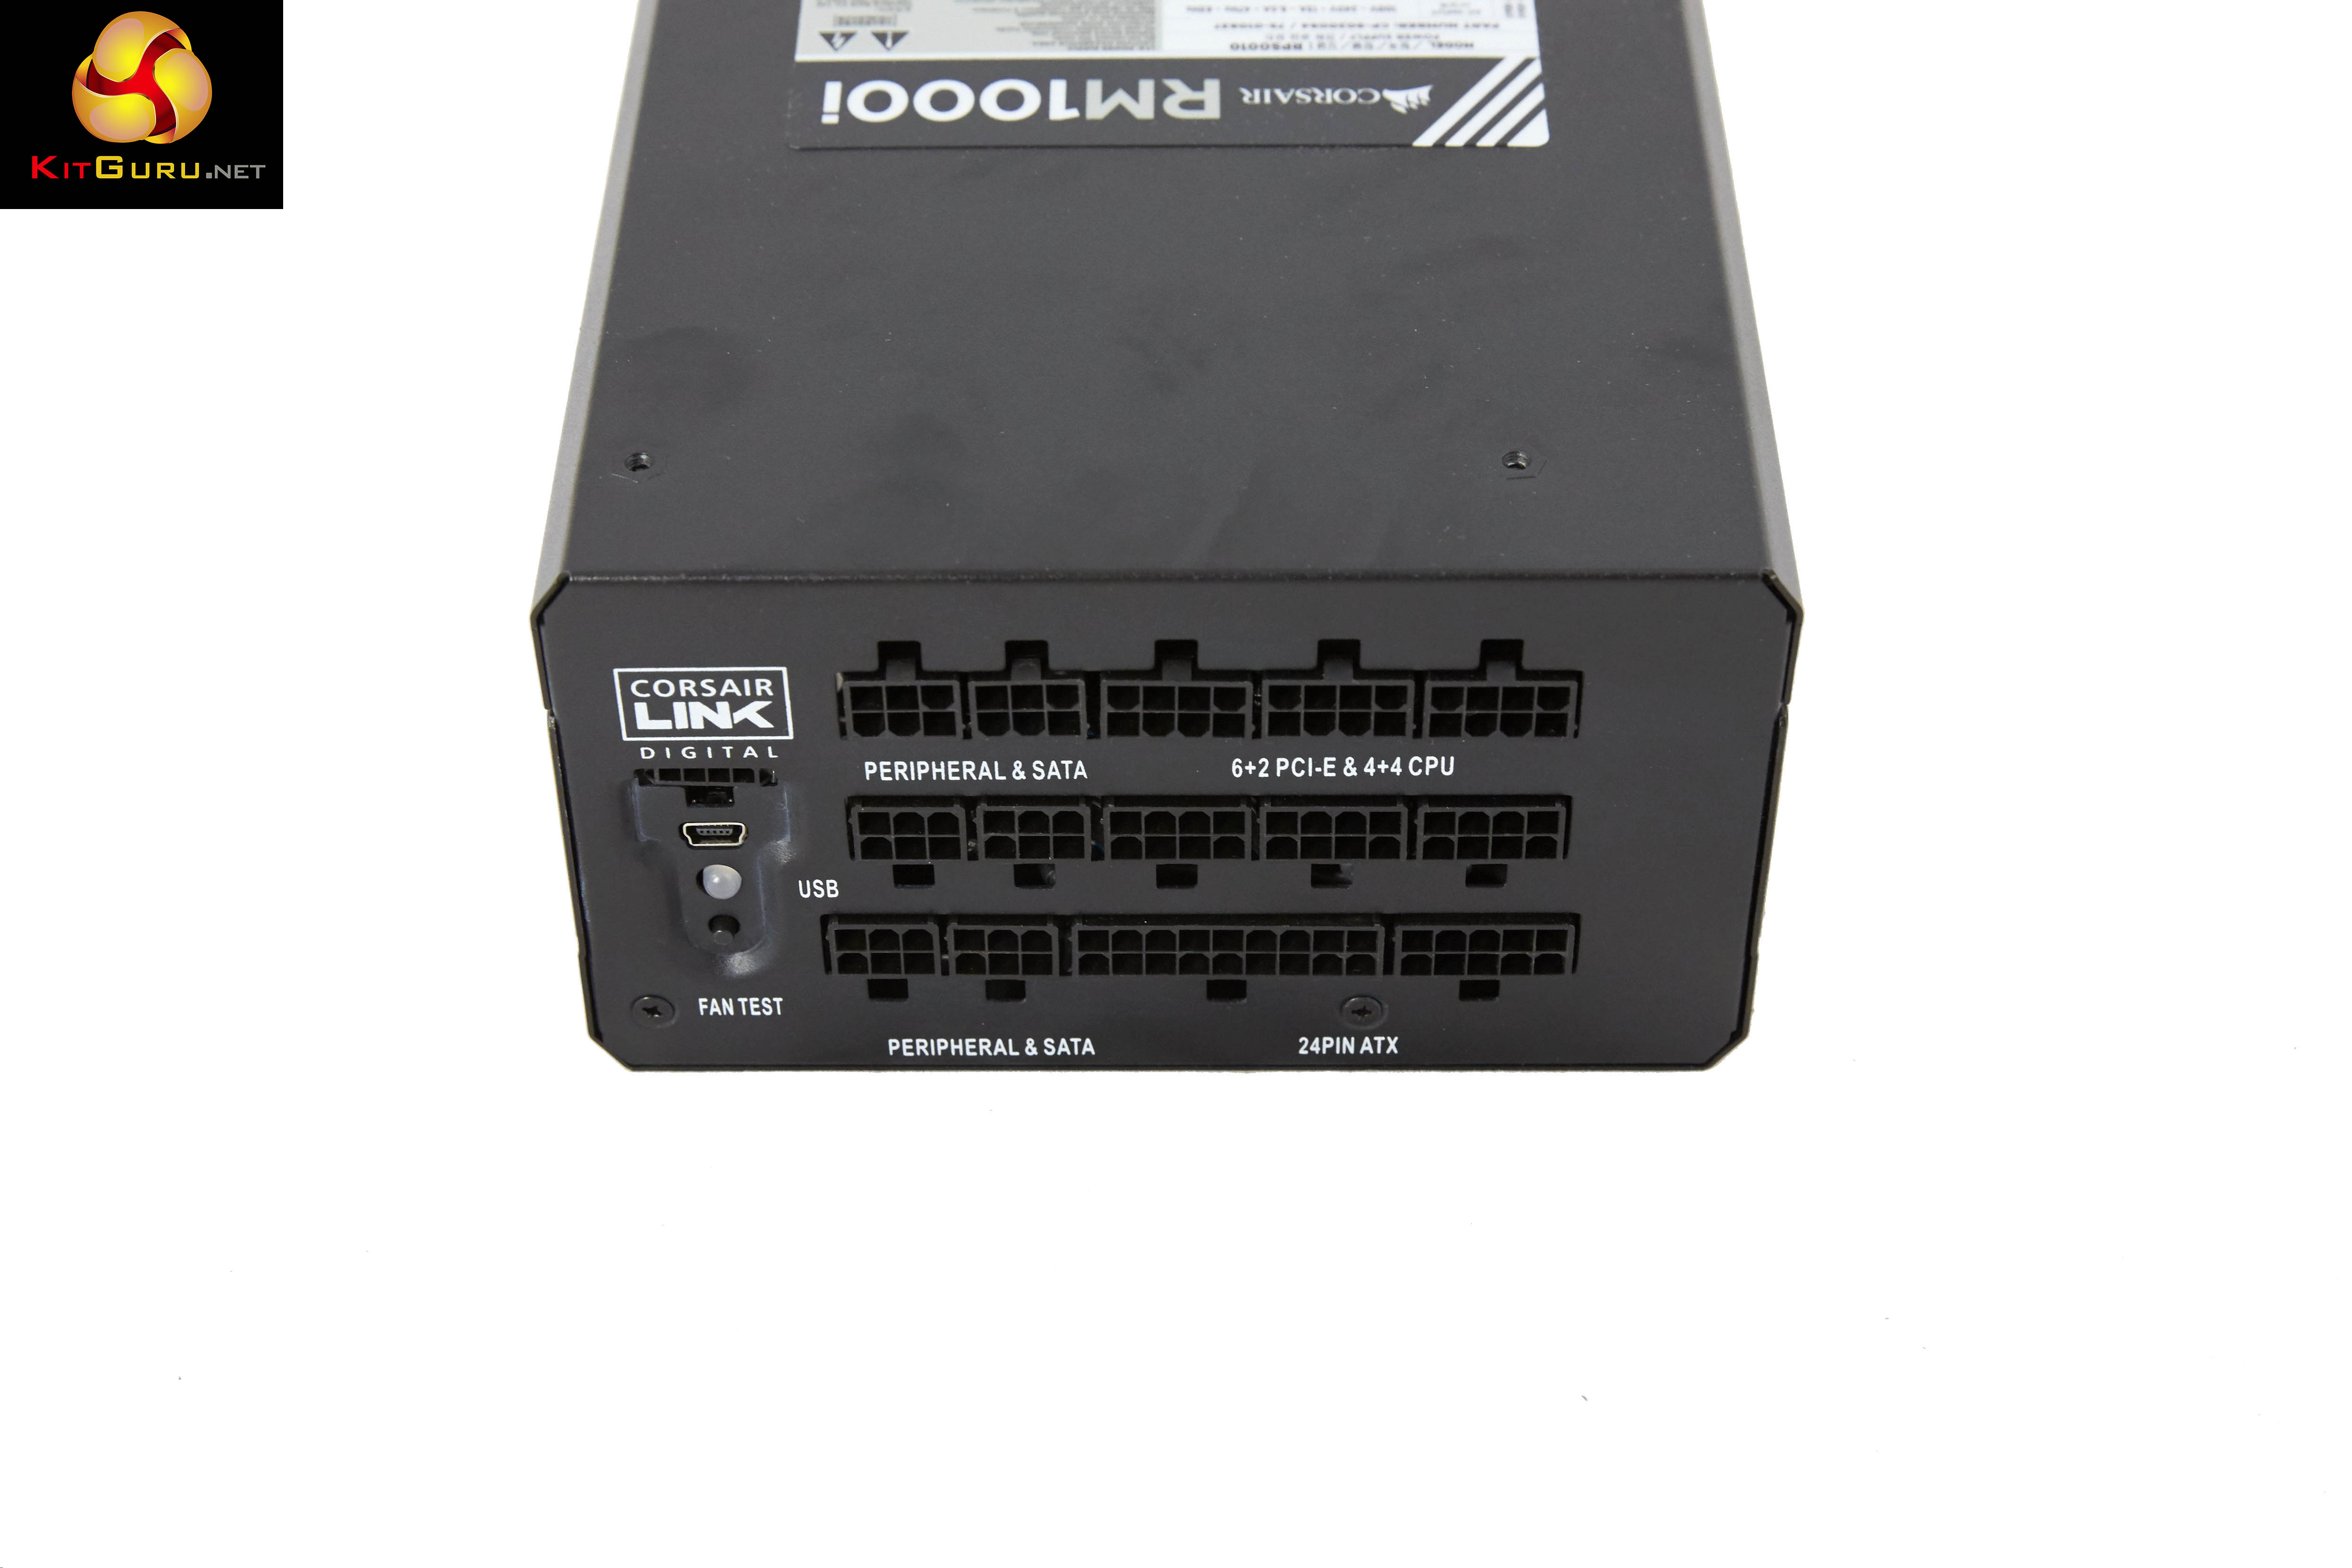
The modular bay is a three row implementation (750 watt model is two rows) – clearly labelled to make the build phase as straightforward as possible. The digital link connector is located in a separate panel at the side. As the sticker explained – the fan in this unit is often not spinning at all under general load conditions – Corsair have therefore thoughtfully included a ‘fan test’ button so the user can check the fan is actually working.
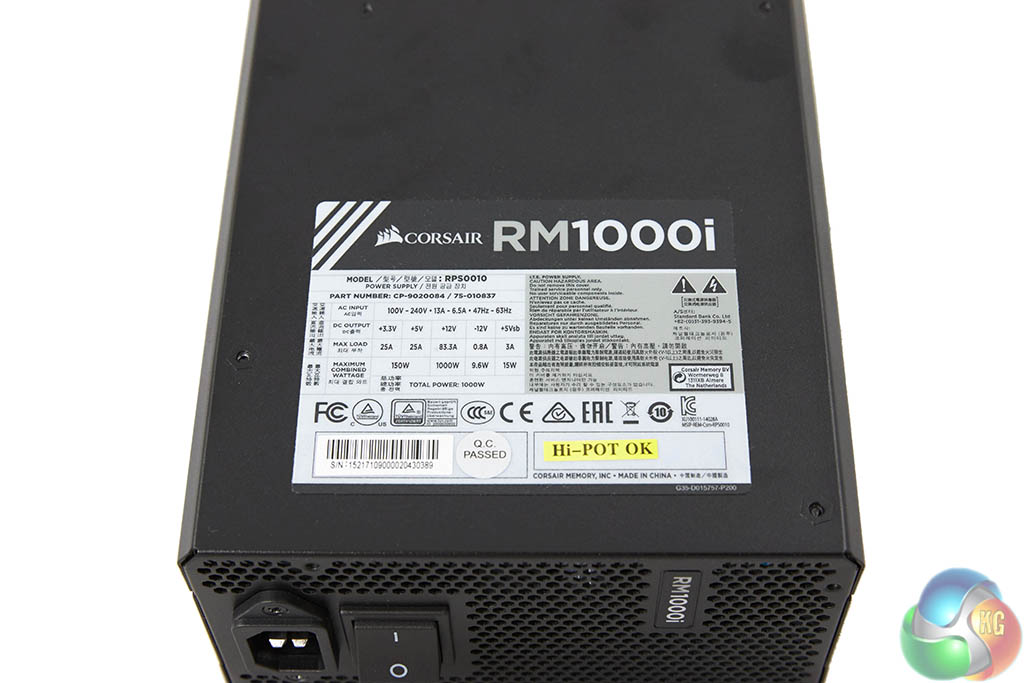
| Corsair RM1000i in Single +12V Rail Mode | |||||
|
DC Output
|
+3.3V
|
+5V
|
+12V |
-12V
|
+5Vsb
|
|
Max Output
|
25A
|
25A
|
83.3A |
0.8A
|
3A
|
| Total Power | 150W | 1000W | 9.6W | 15W | |
| 1000W | |||||
| Corsair RM1000i in Multiple +12V Rail Mode | ||||||||||||
|
DC Output
|
+3.3V
|
+5V
|
+12V1 | +12V2 | +12V3 | +12V4 | +12V5 | +12V6 | +12V7 | +12V8 |
-12V
|
+5Vsb
|
|
Max Output
|
25A
|
25A
|
40A | 40A | 40A | 40A | 40A | 40A | 40A | 40A |
0.8A
|
3A
|
| Total Power | 150W | 1000W | 9.6W | 15W | ||||||||
| 1000W | ||||||||||||
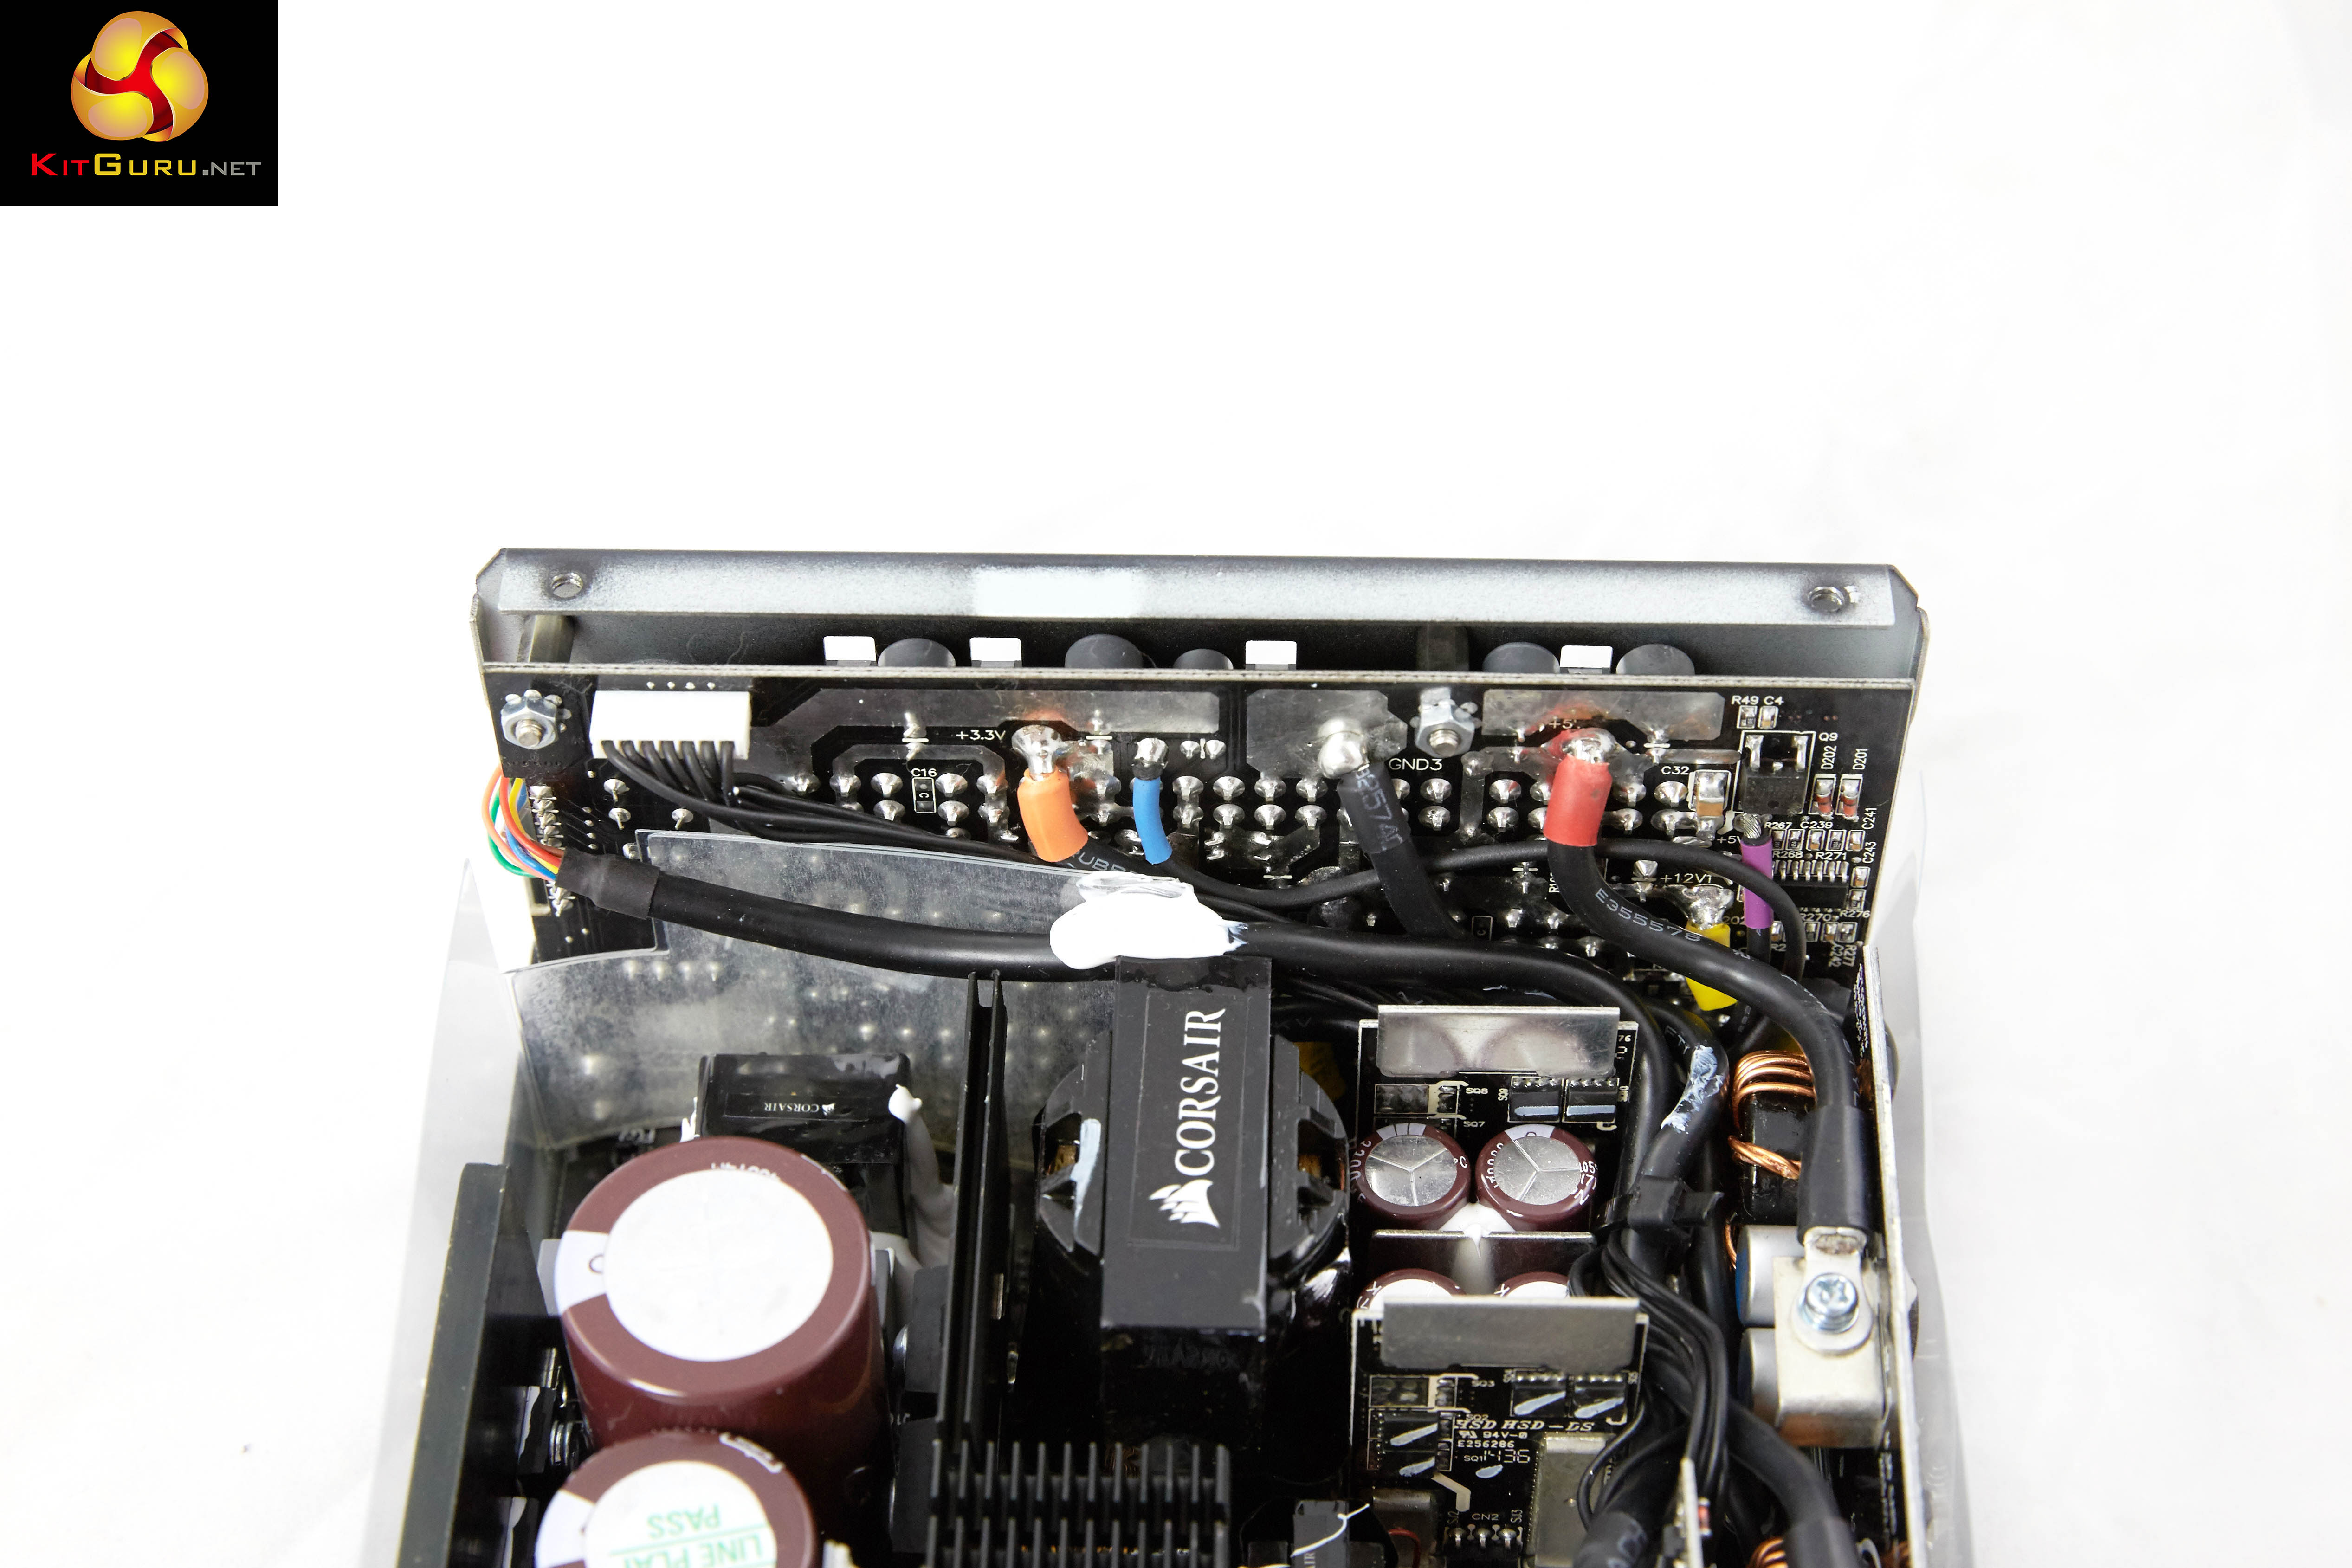
The Corsair Link software can change the RMi power supply DC output configuration from the default setting of multiple +12V rails to a single +12V rail. The RMi series can deliver all of their available power over the +12v rail.
At the default setting, the RMi has over current protection (OCP) on all of the rails. Each of the 8 pin connectors used for CPU power and PCIe power delivery has a 40A OCP over the +12V. The six pin connectors for SATA and Molex +12V leads have collectively a 40A OCP, as does the two +12V leads on the 24 pin connector.
This OCP can be disabled within the Link software. You simply toggle the multi rail switch on the right to the ‘off’ position. This will open up all the connectors to the PSU’s full +12V capability.
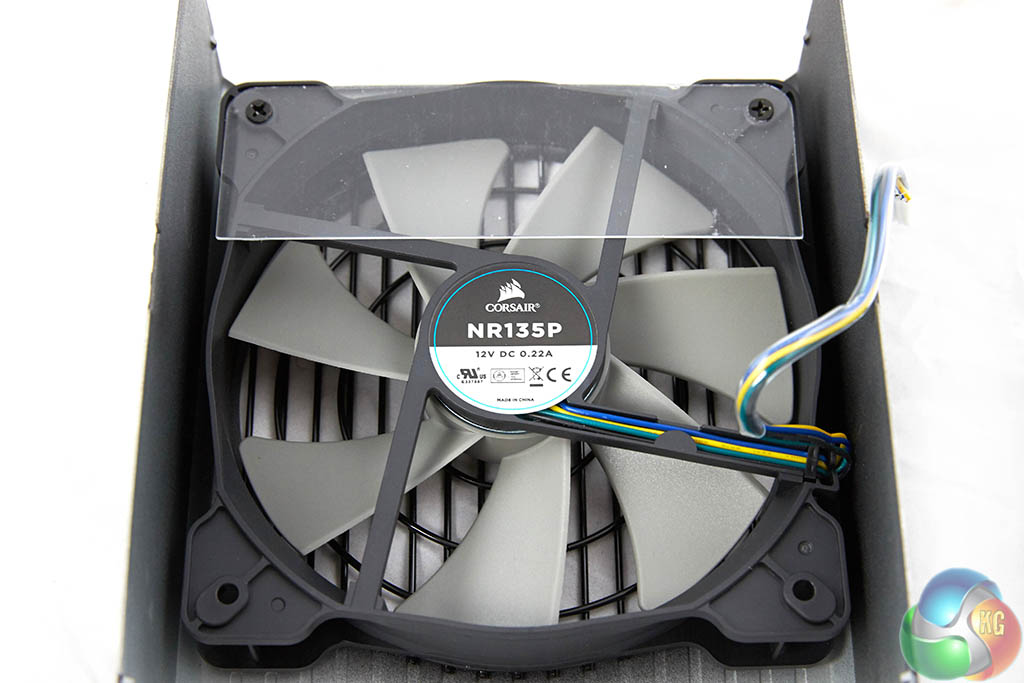
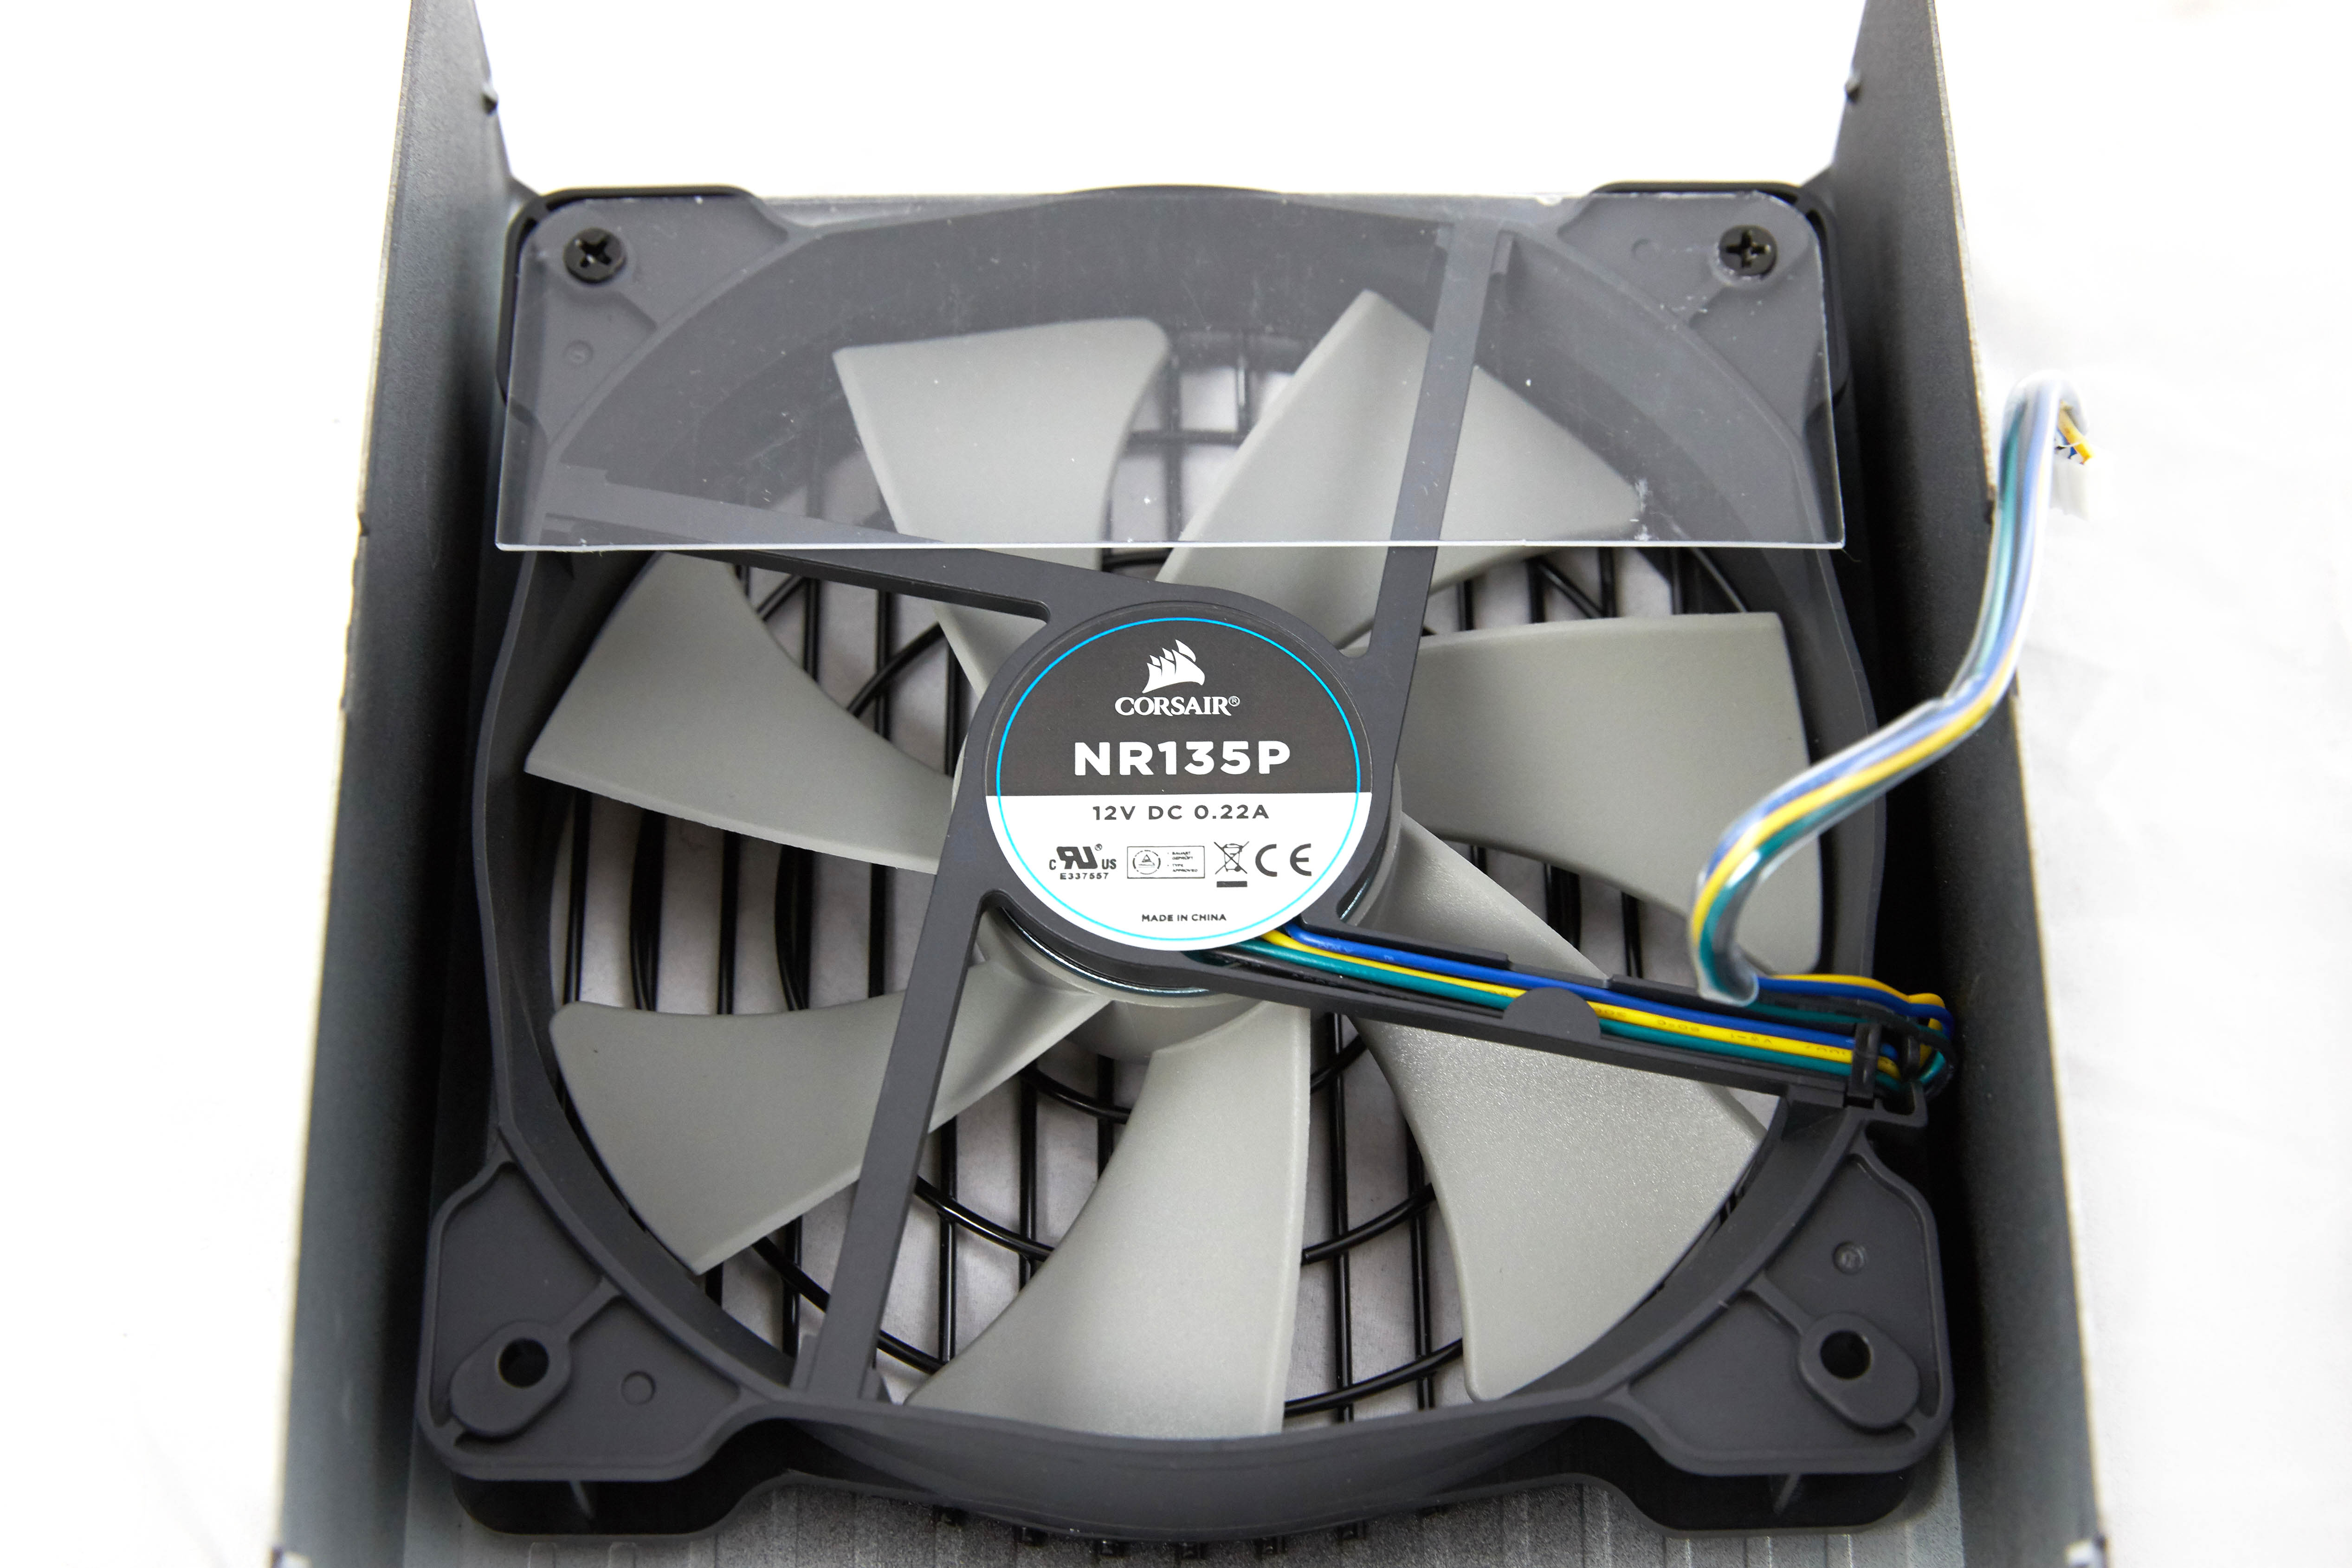
Corsair are using their NR135P fan inside the RMi Series 1000W power supply – the same fan also used in the 750 watt unit we also review today. This fan has intake blades specifically designed to move a high volume of air through the power supply components with less noise than a conventional fan design. Corsair claim the fan blades are properly balanced to help reduce resonance at higher speeds. This fan incorporates fluid dynamic bearing to help prolong life and reduce noise further than a ball bearing or sleeve bearing design.
Corsair make the point that they have invested a lot of time into ensuring these units do not exhibit any ‘coil whine’. This can be caused by poor winding of a transformer or coil. Also the conducting and insulating layers of a capacitor can vibrate excessively if the components are not wound properly. These vibrations can lead to audible noise that many people class as ‘coil whine’.
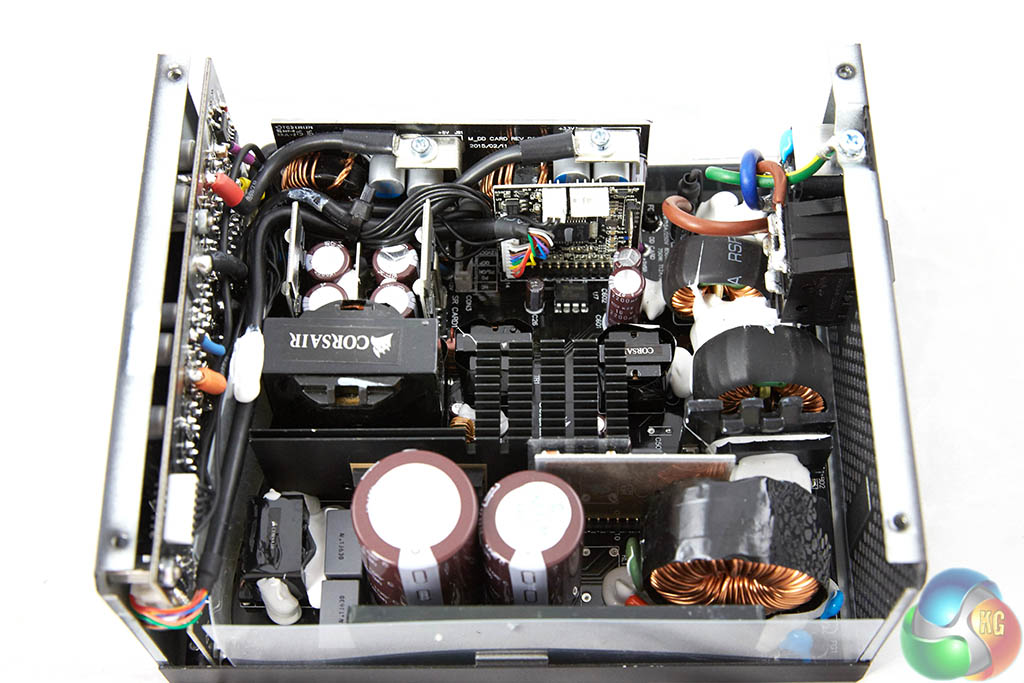
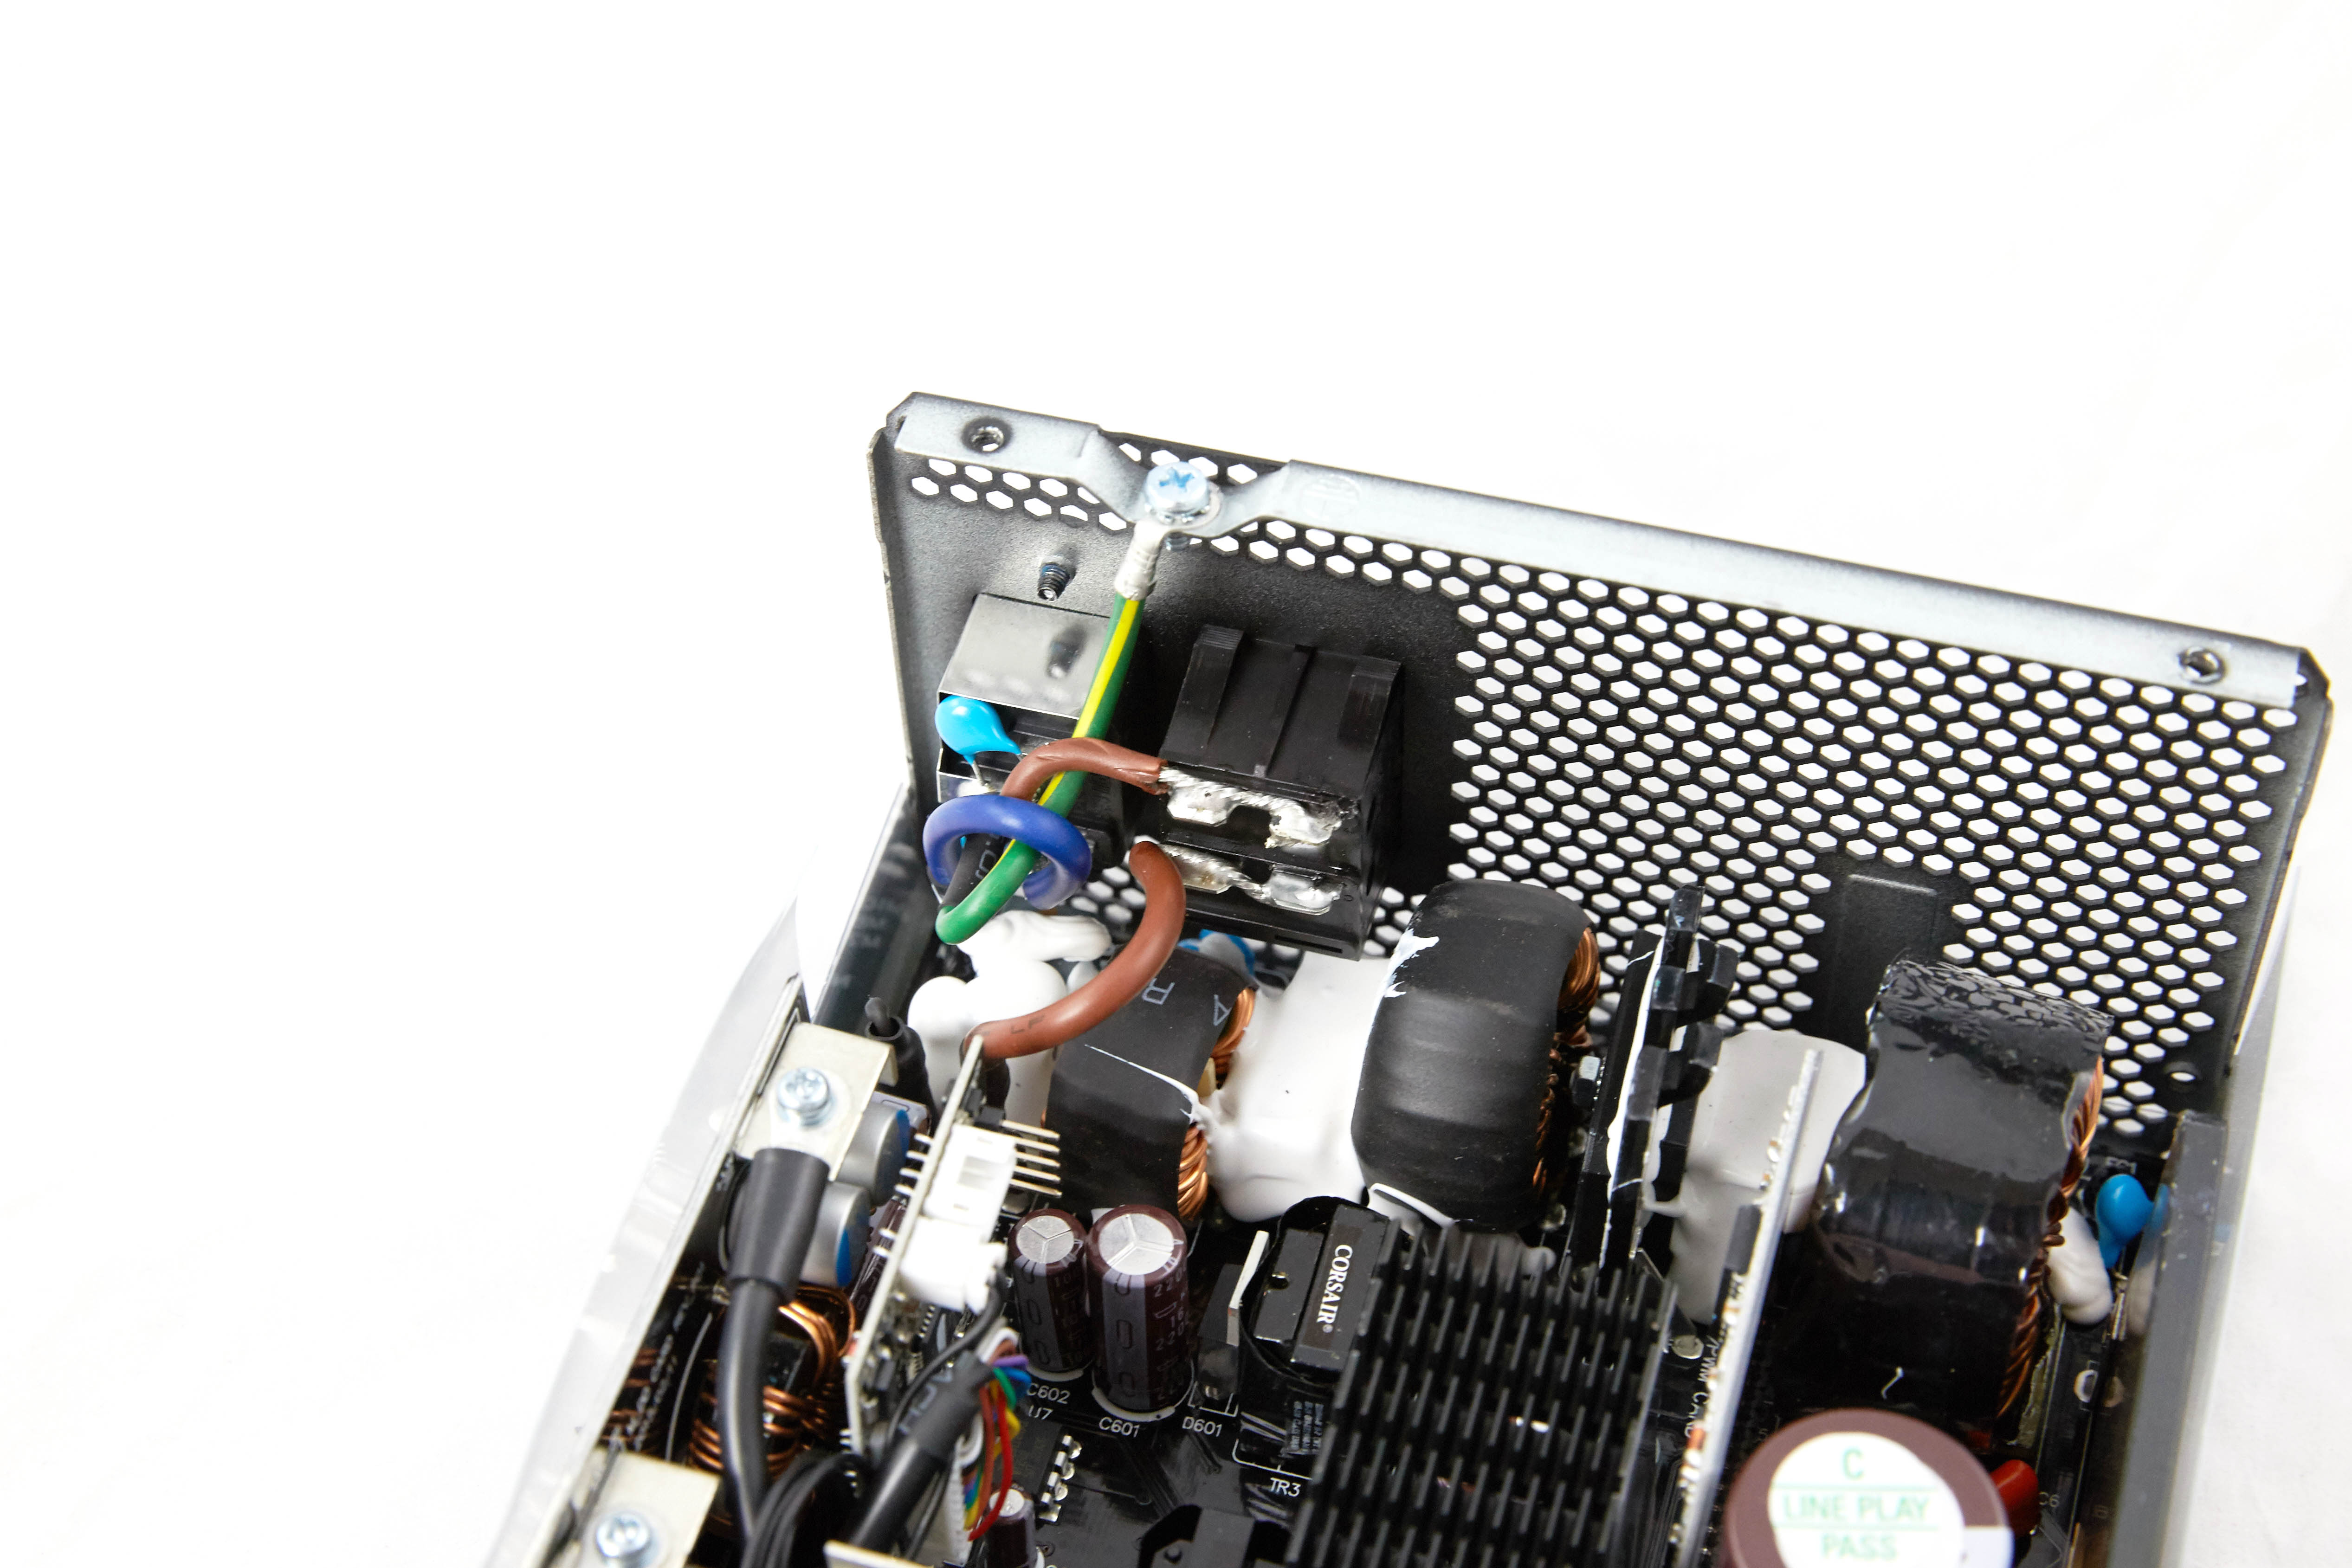
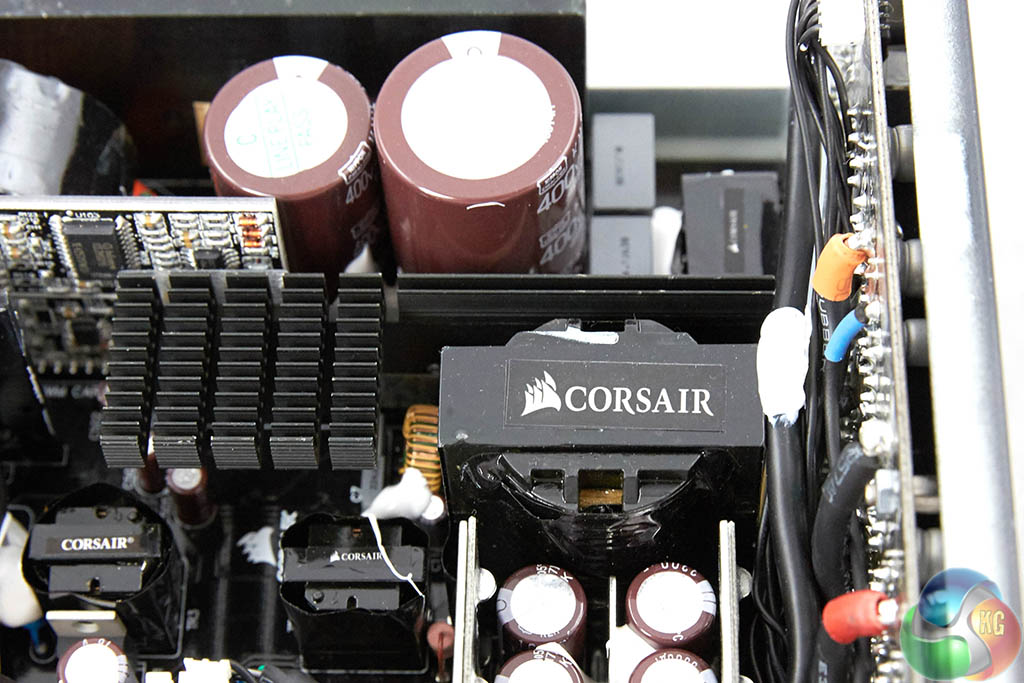
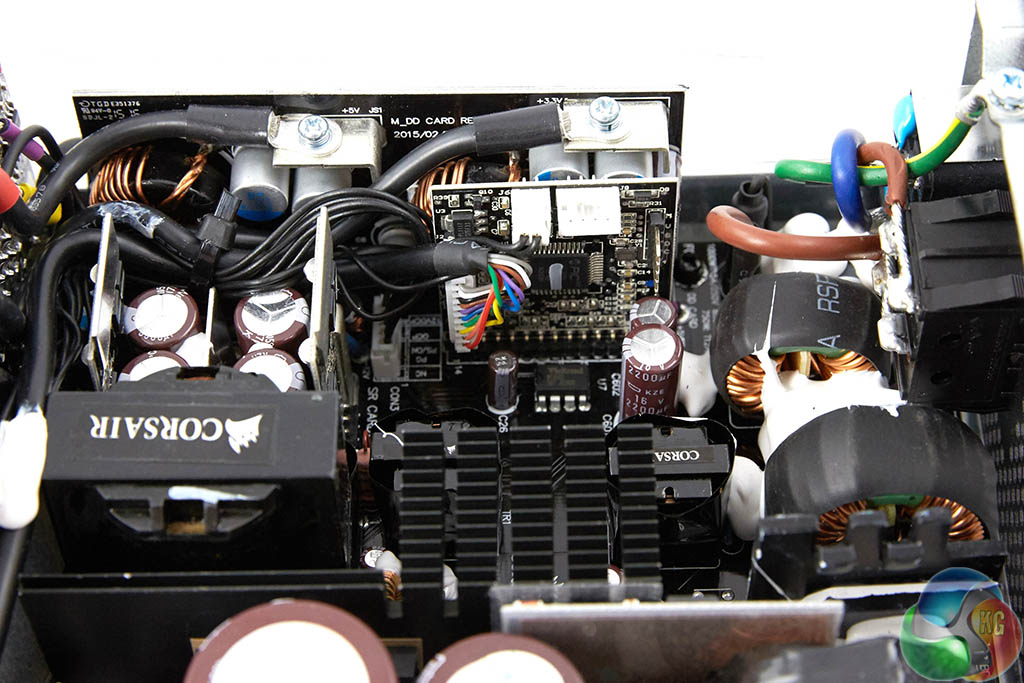
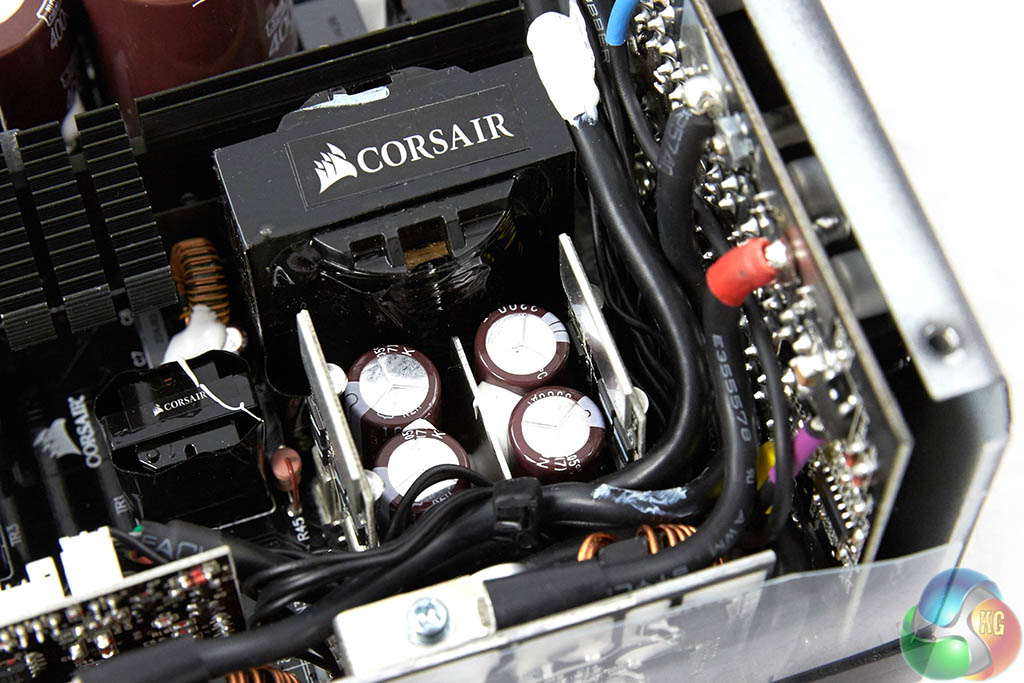
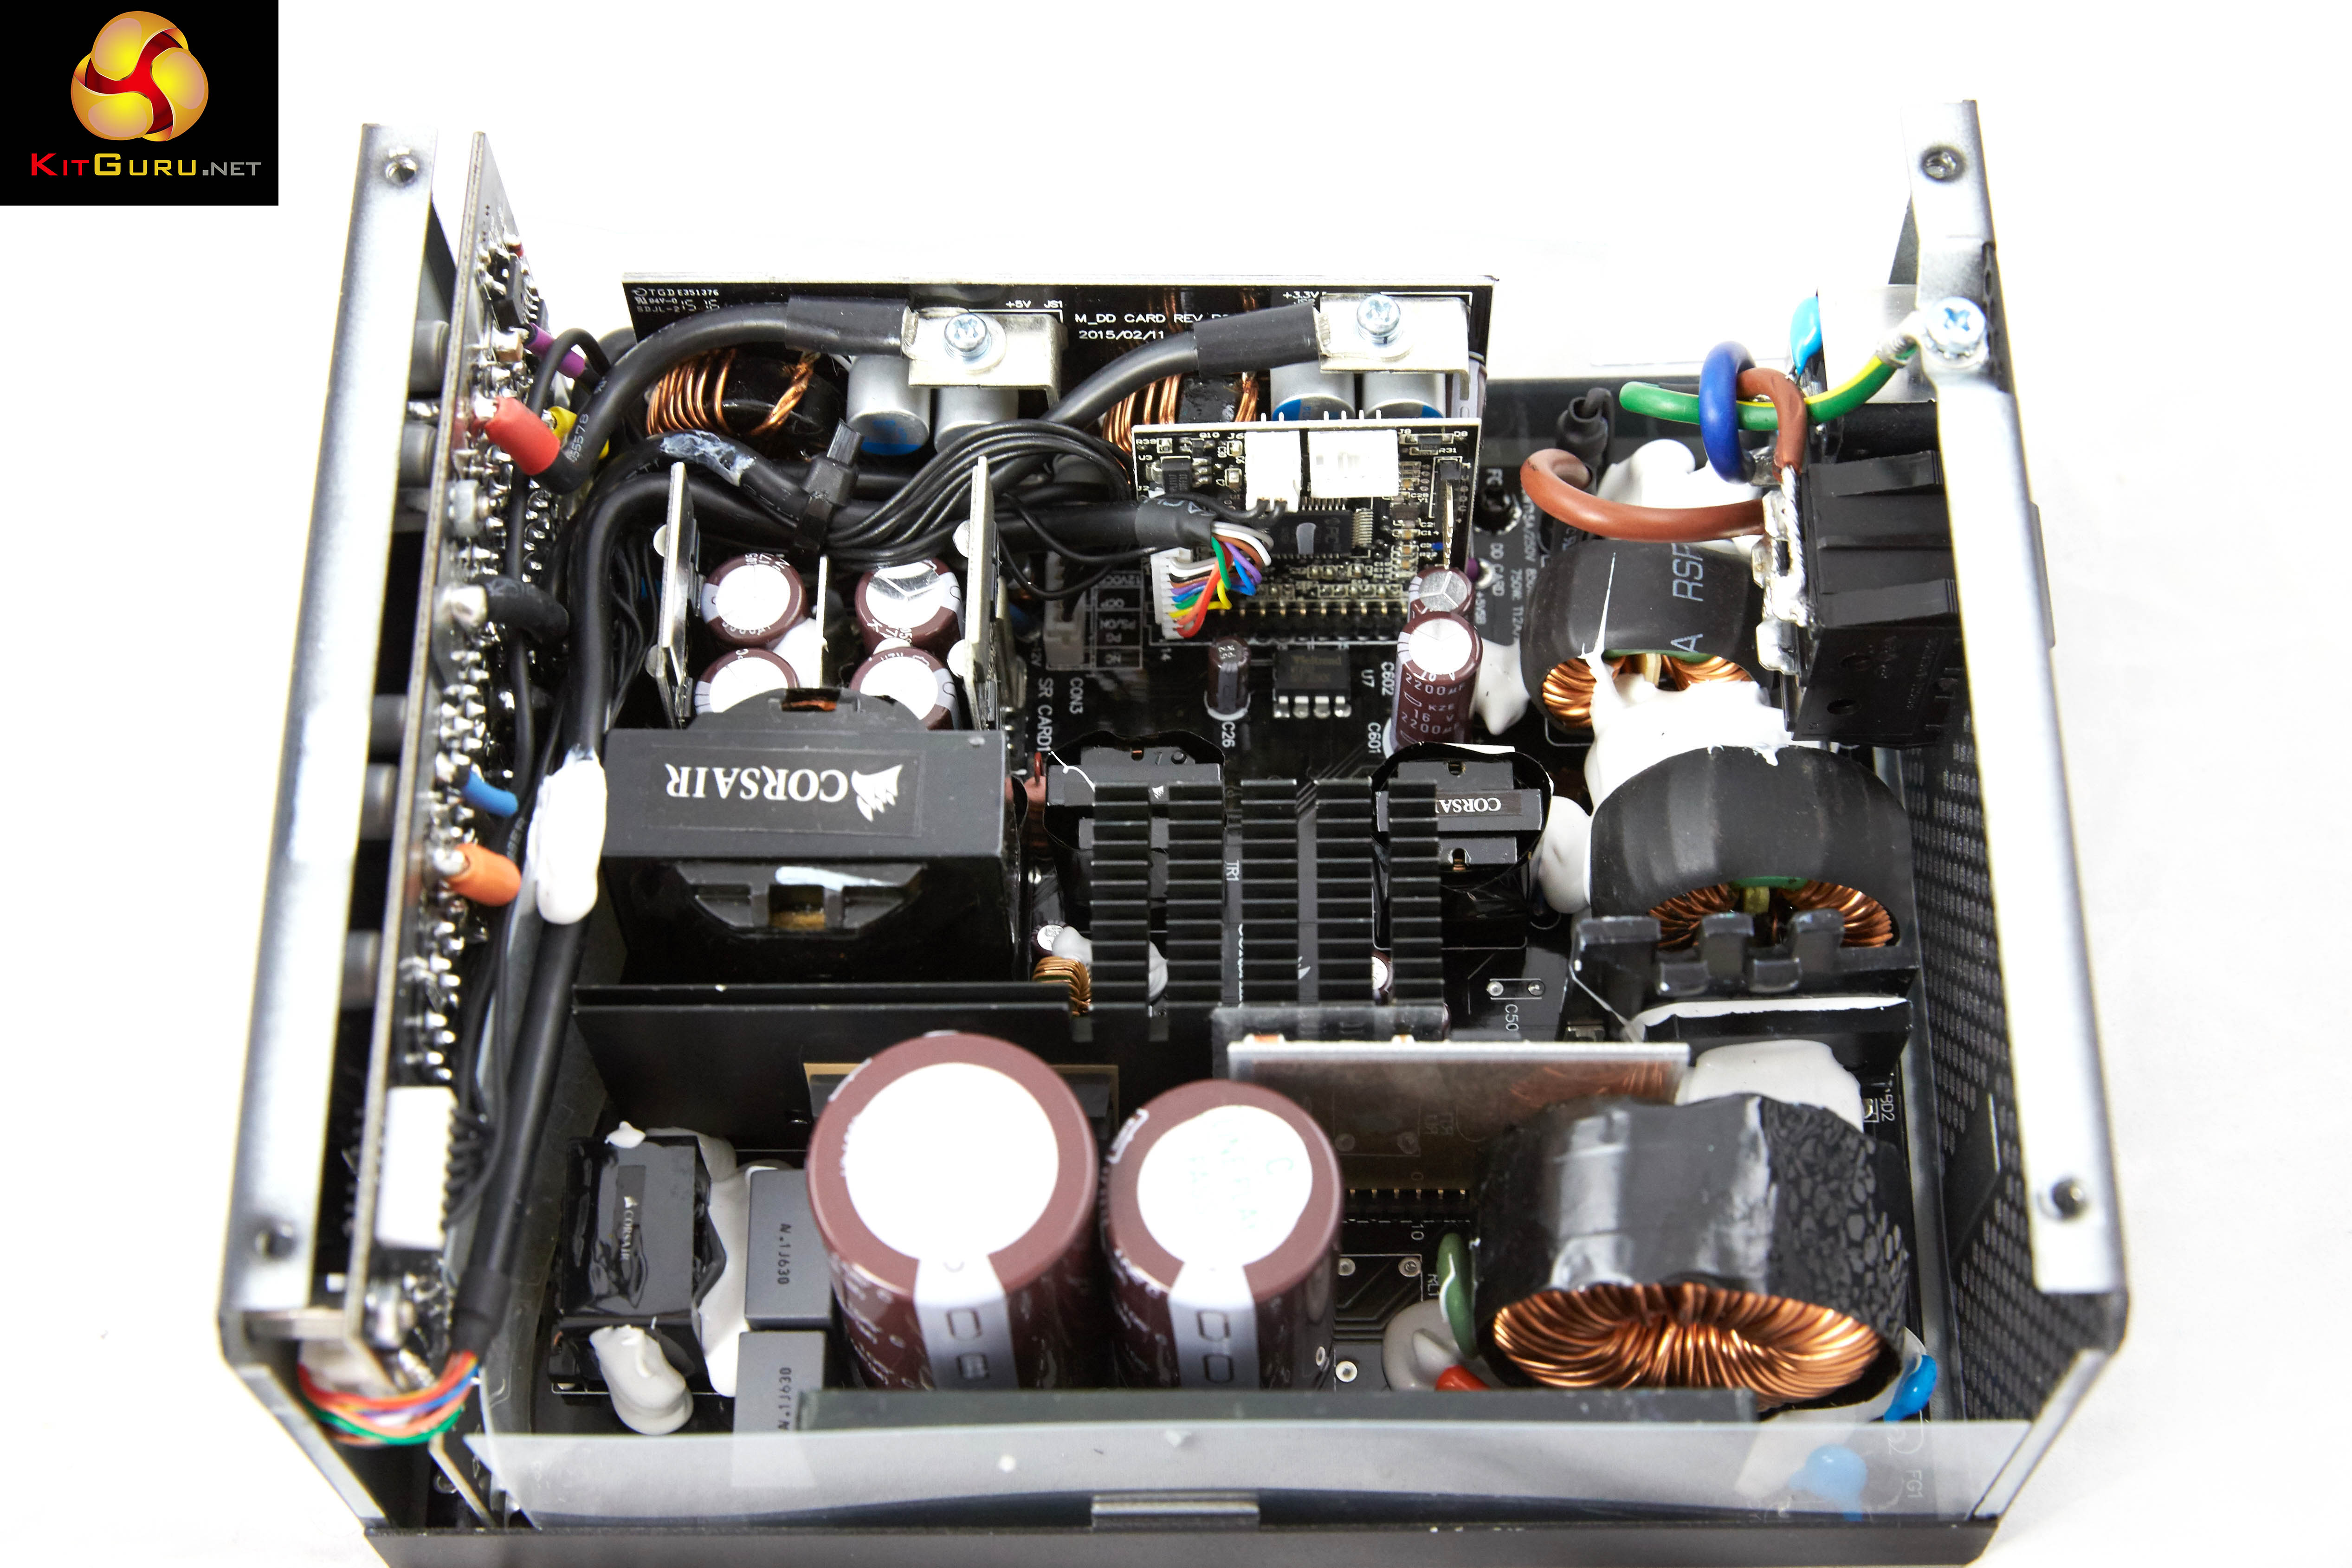
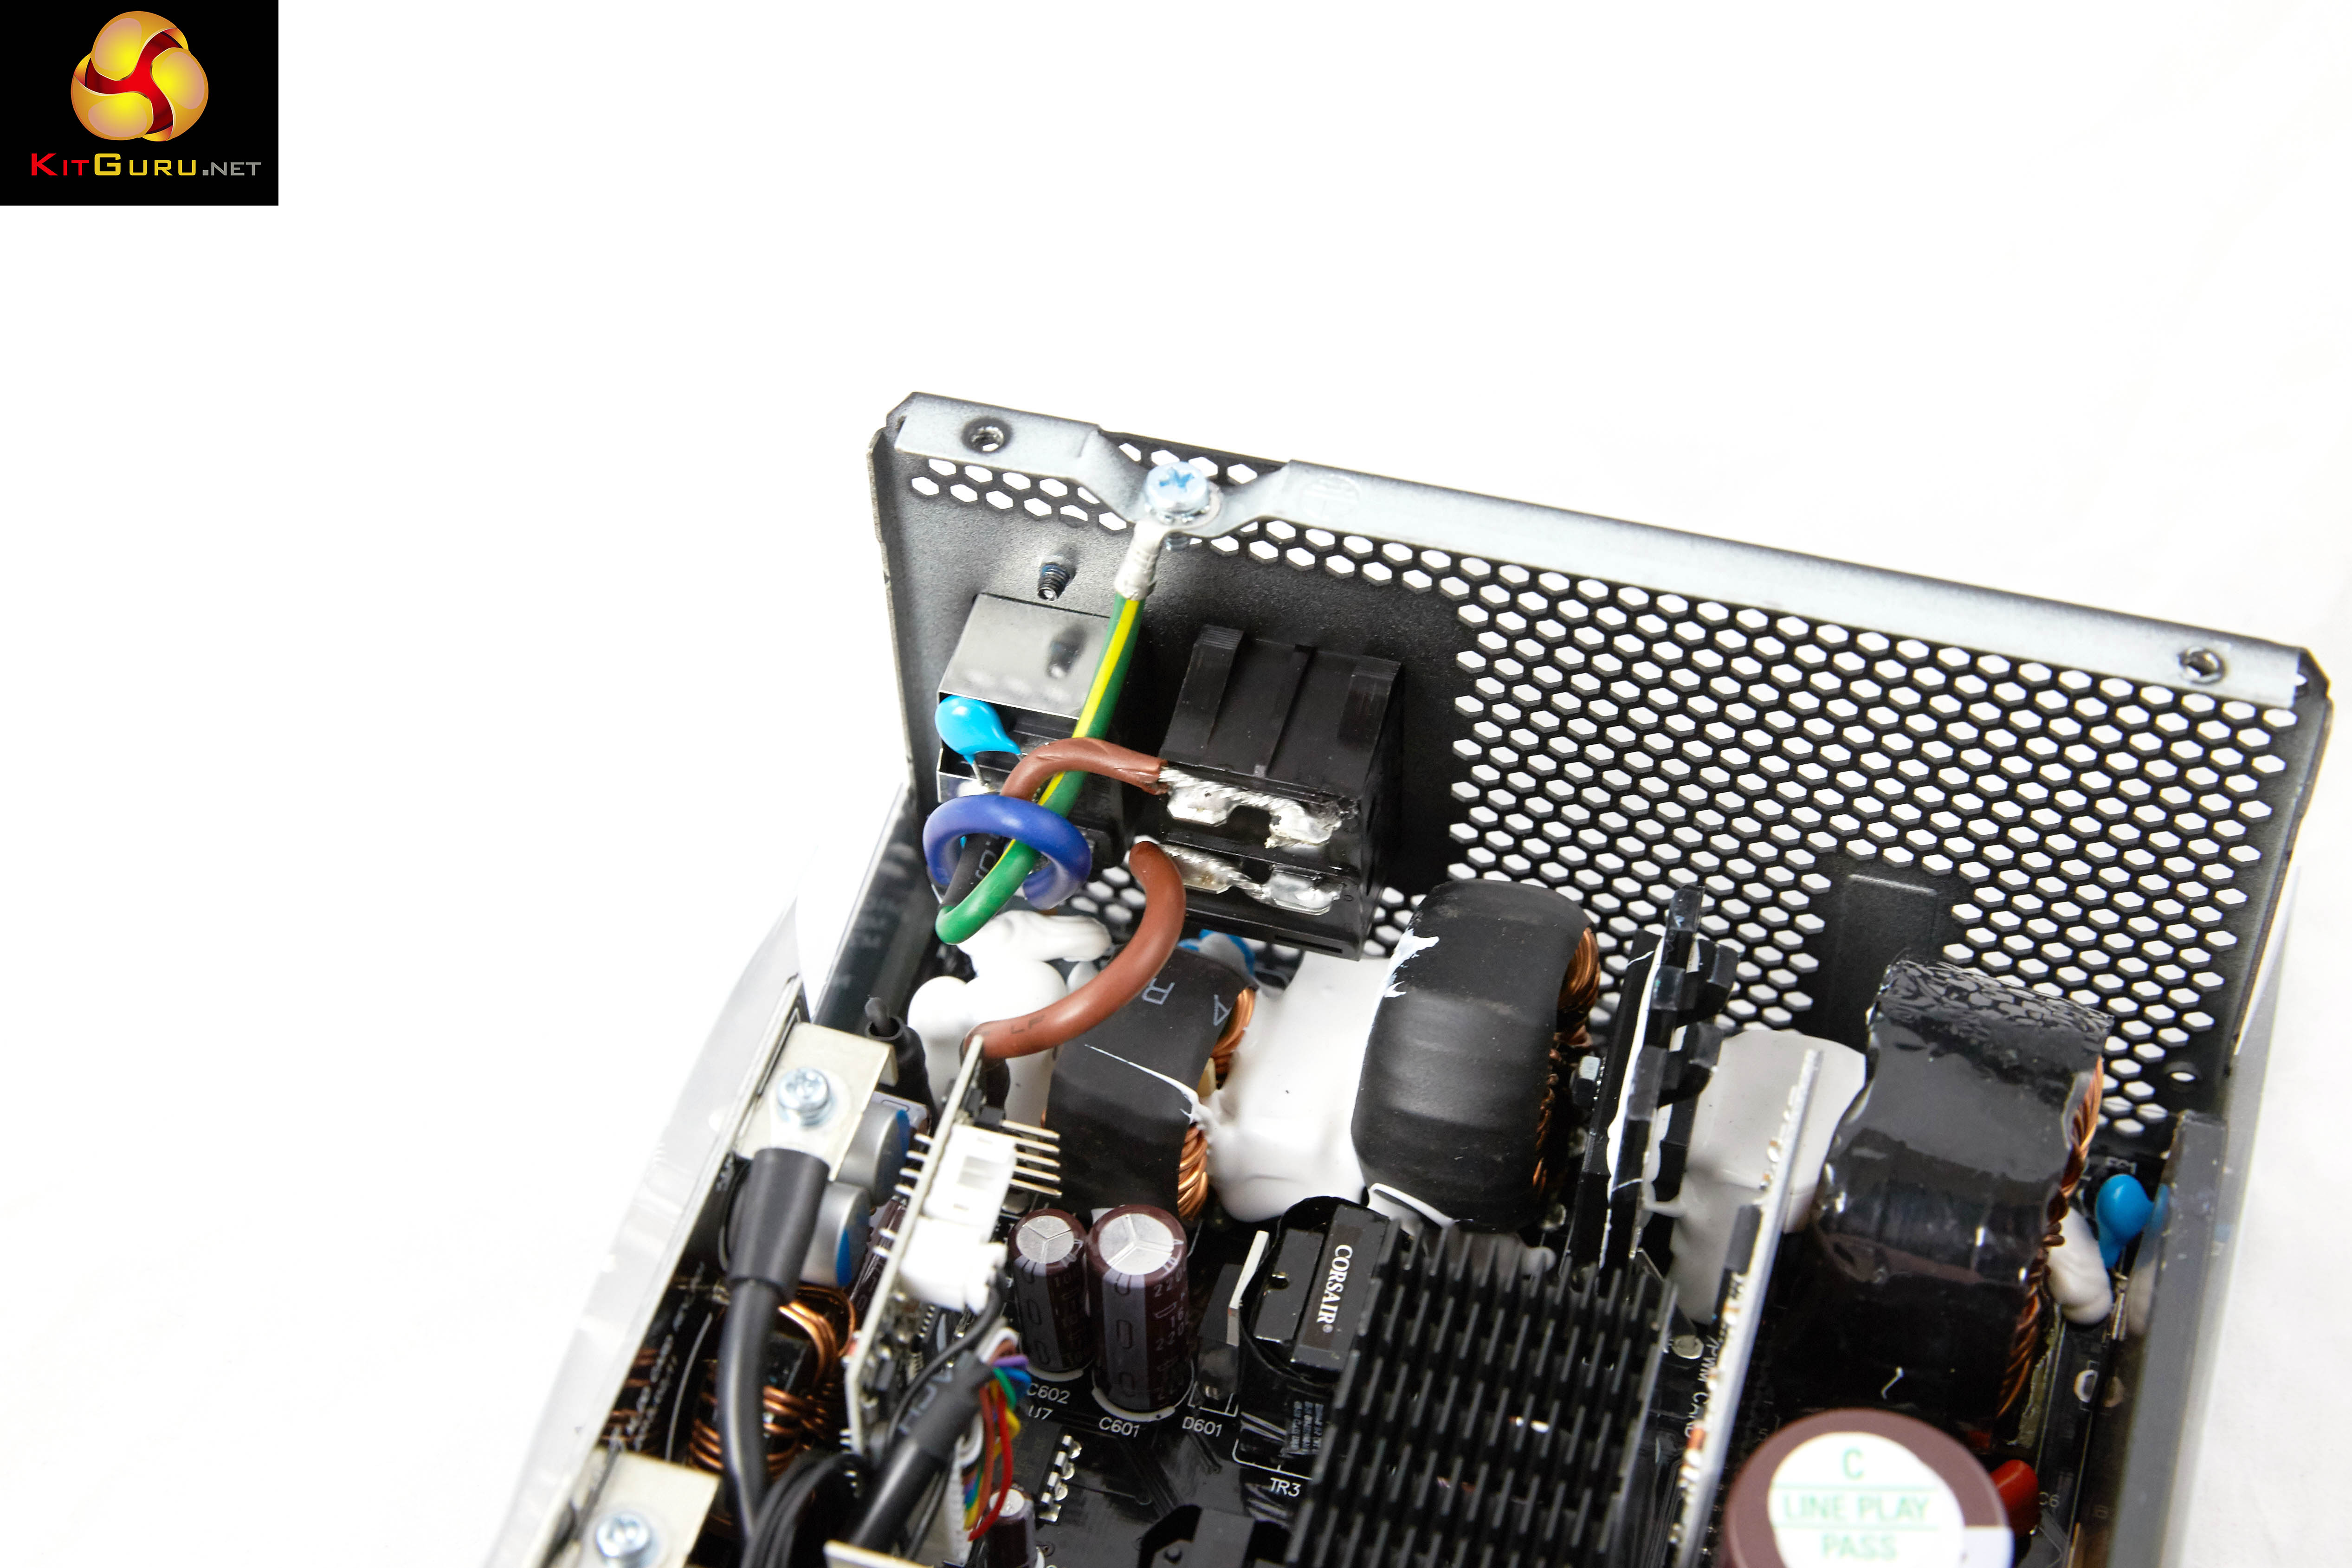
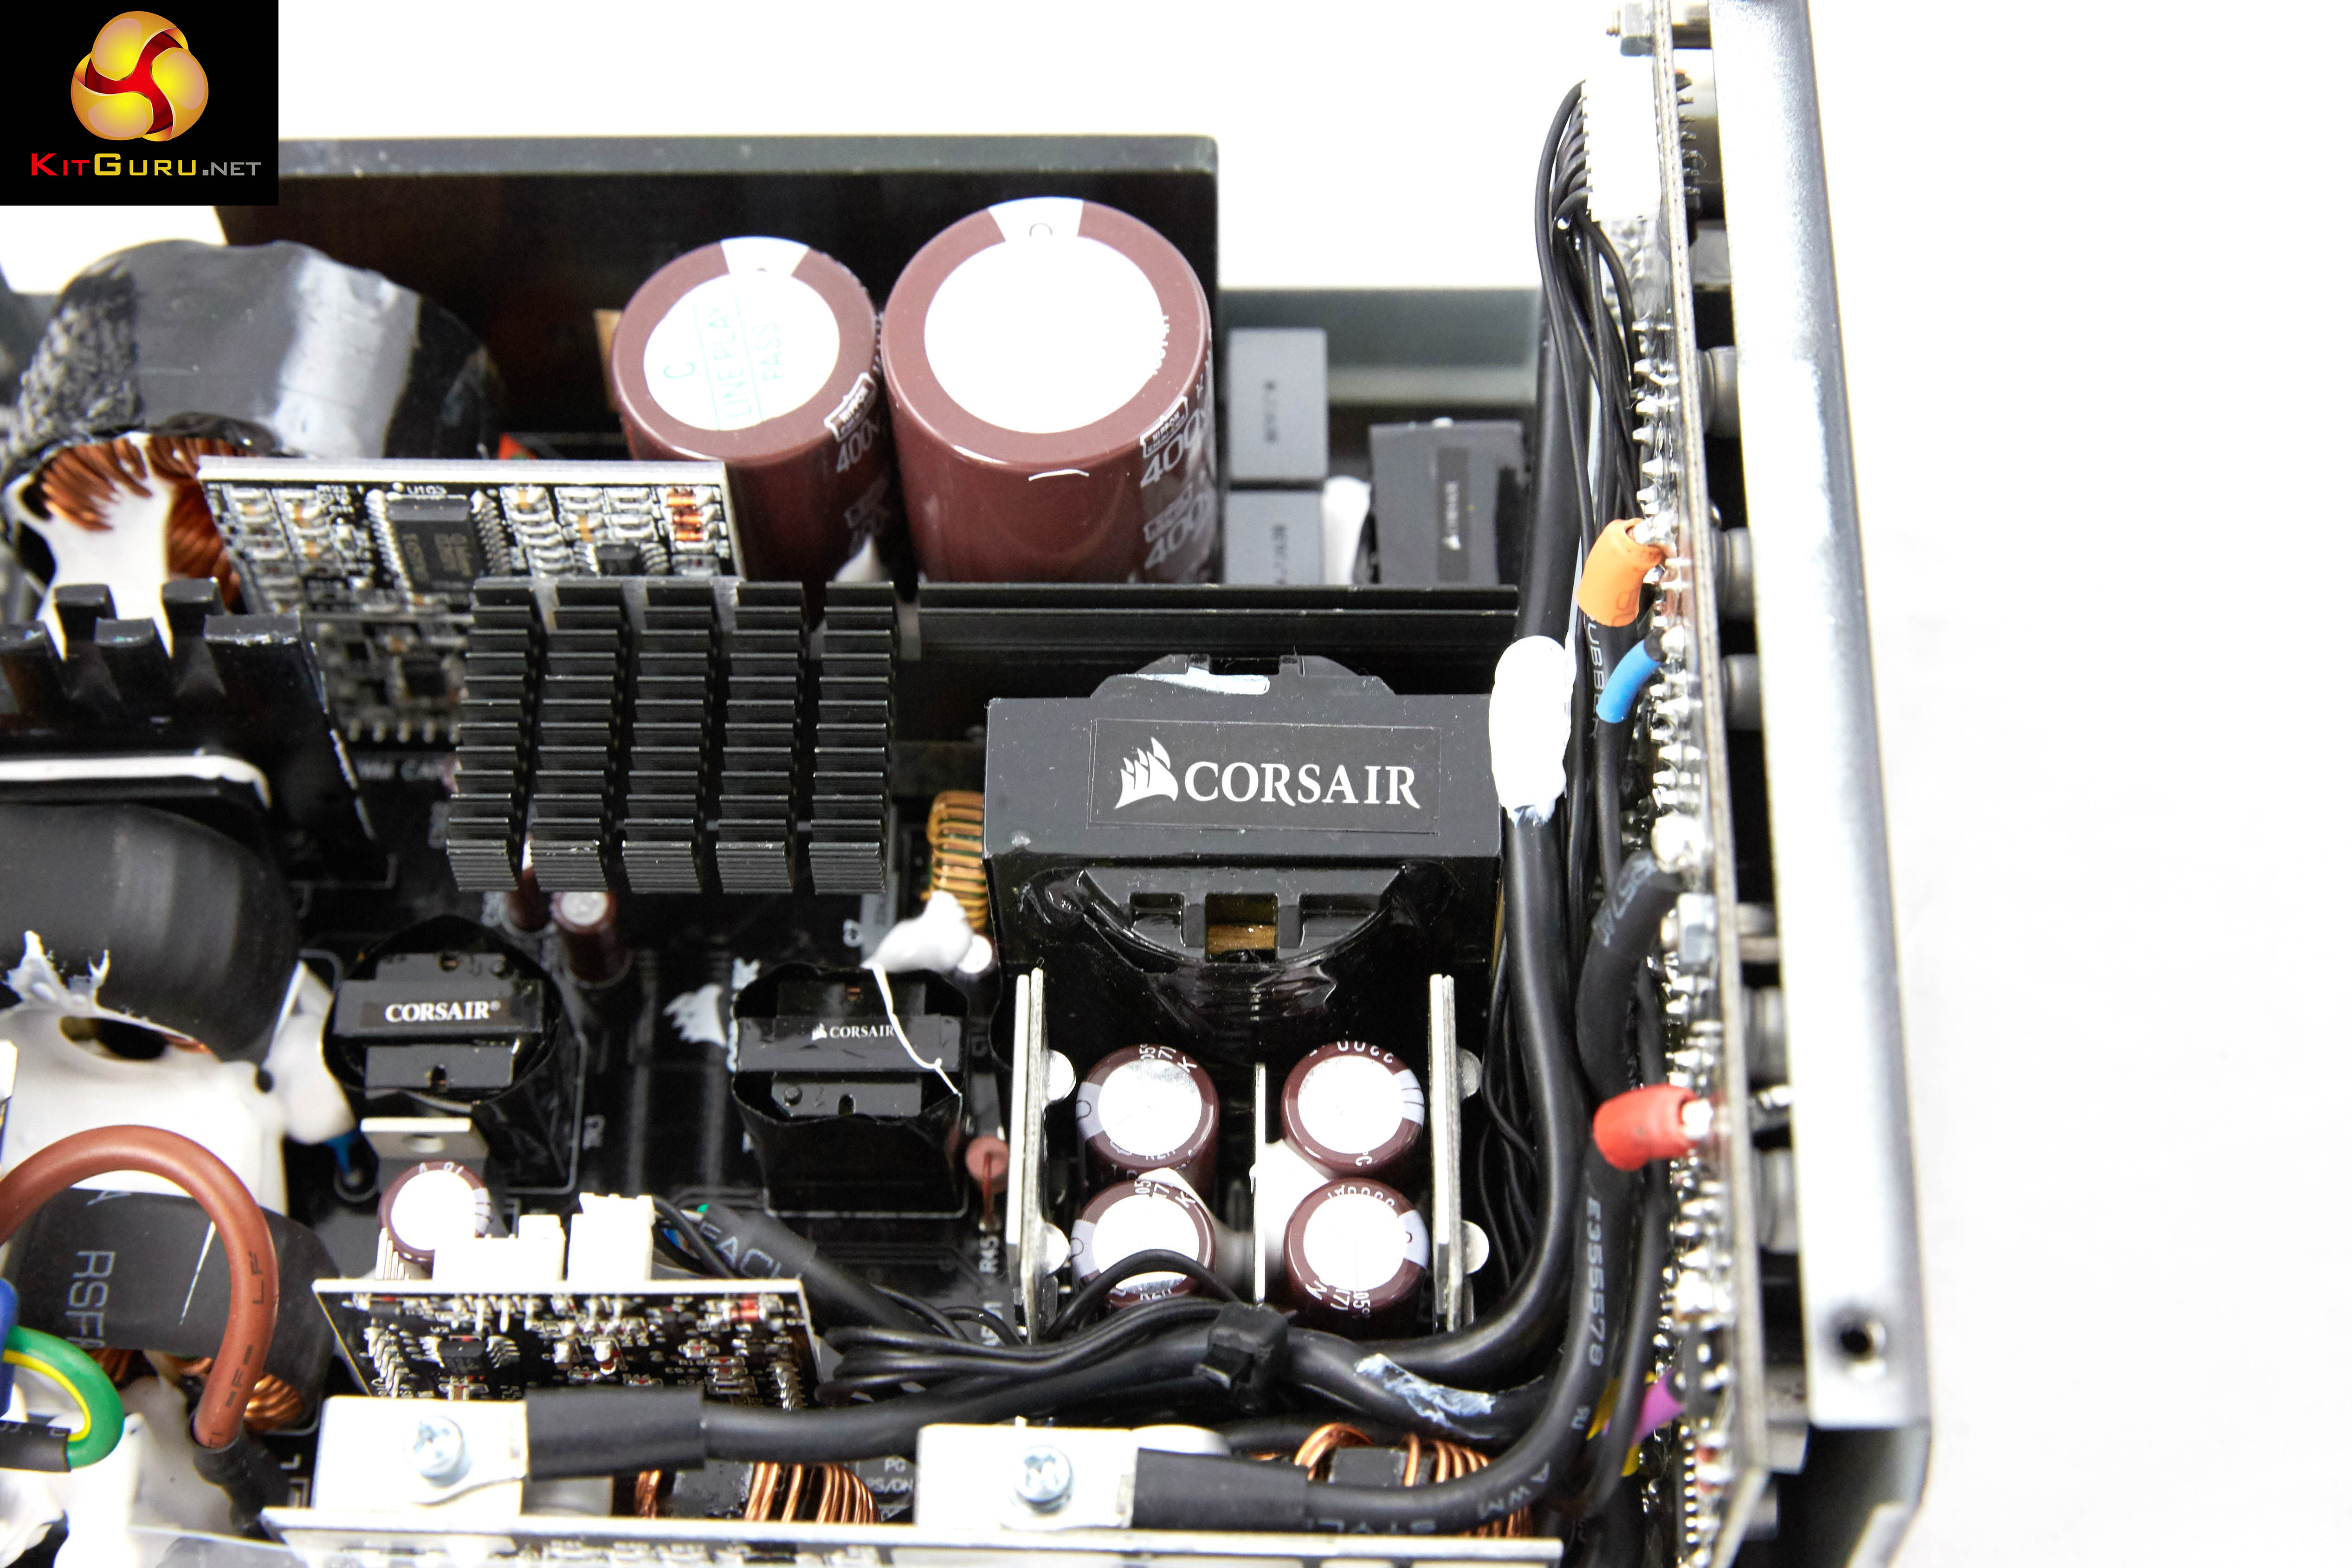
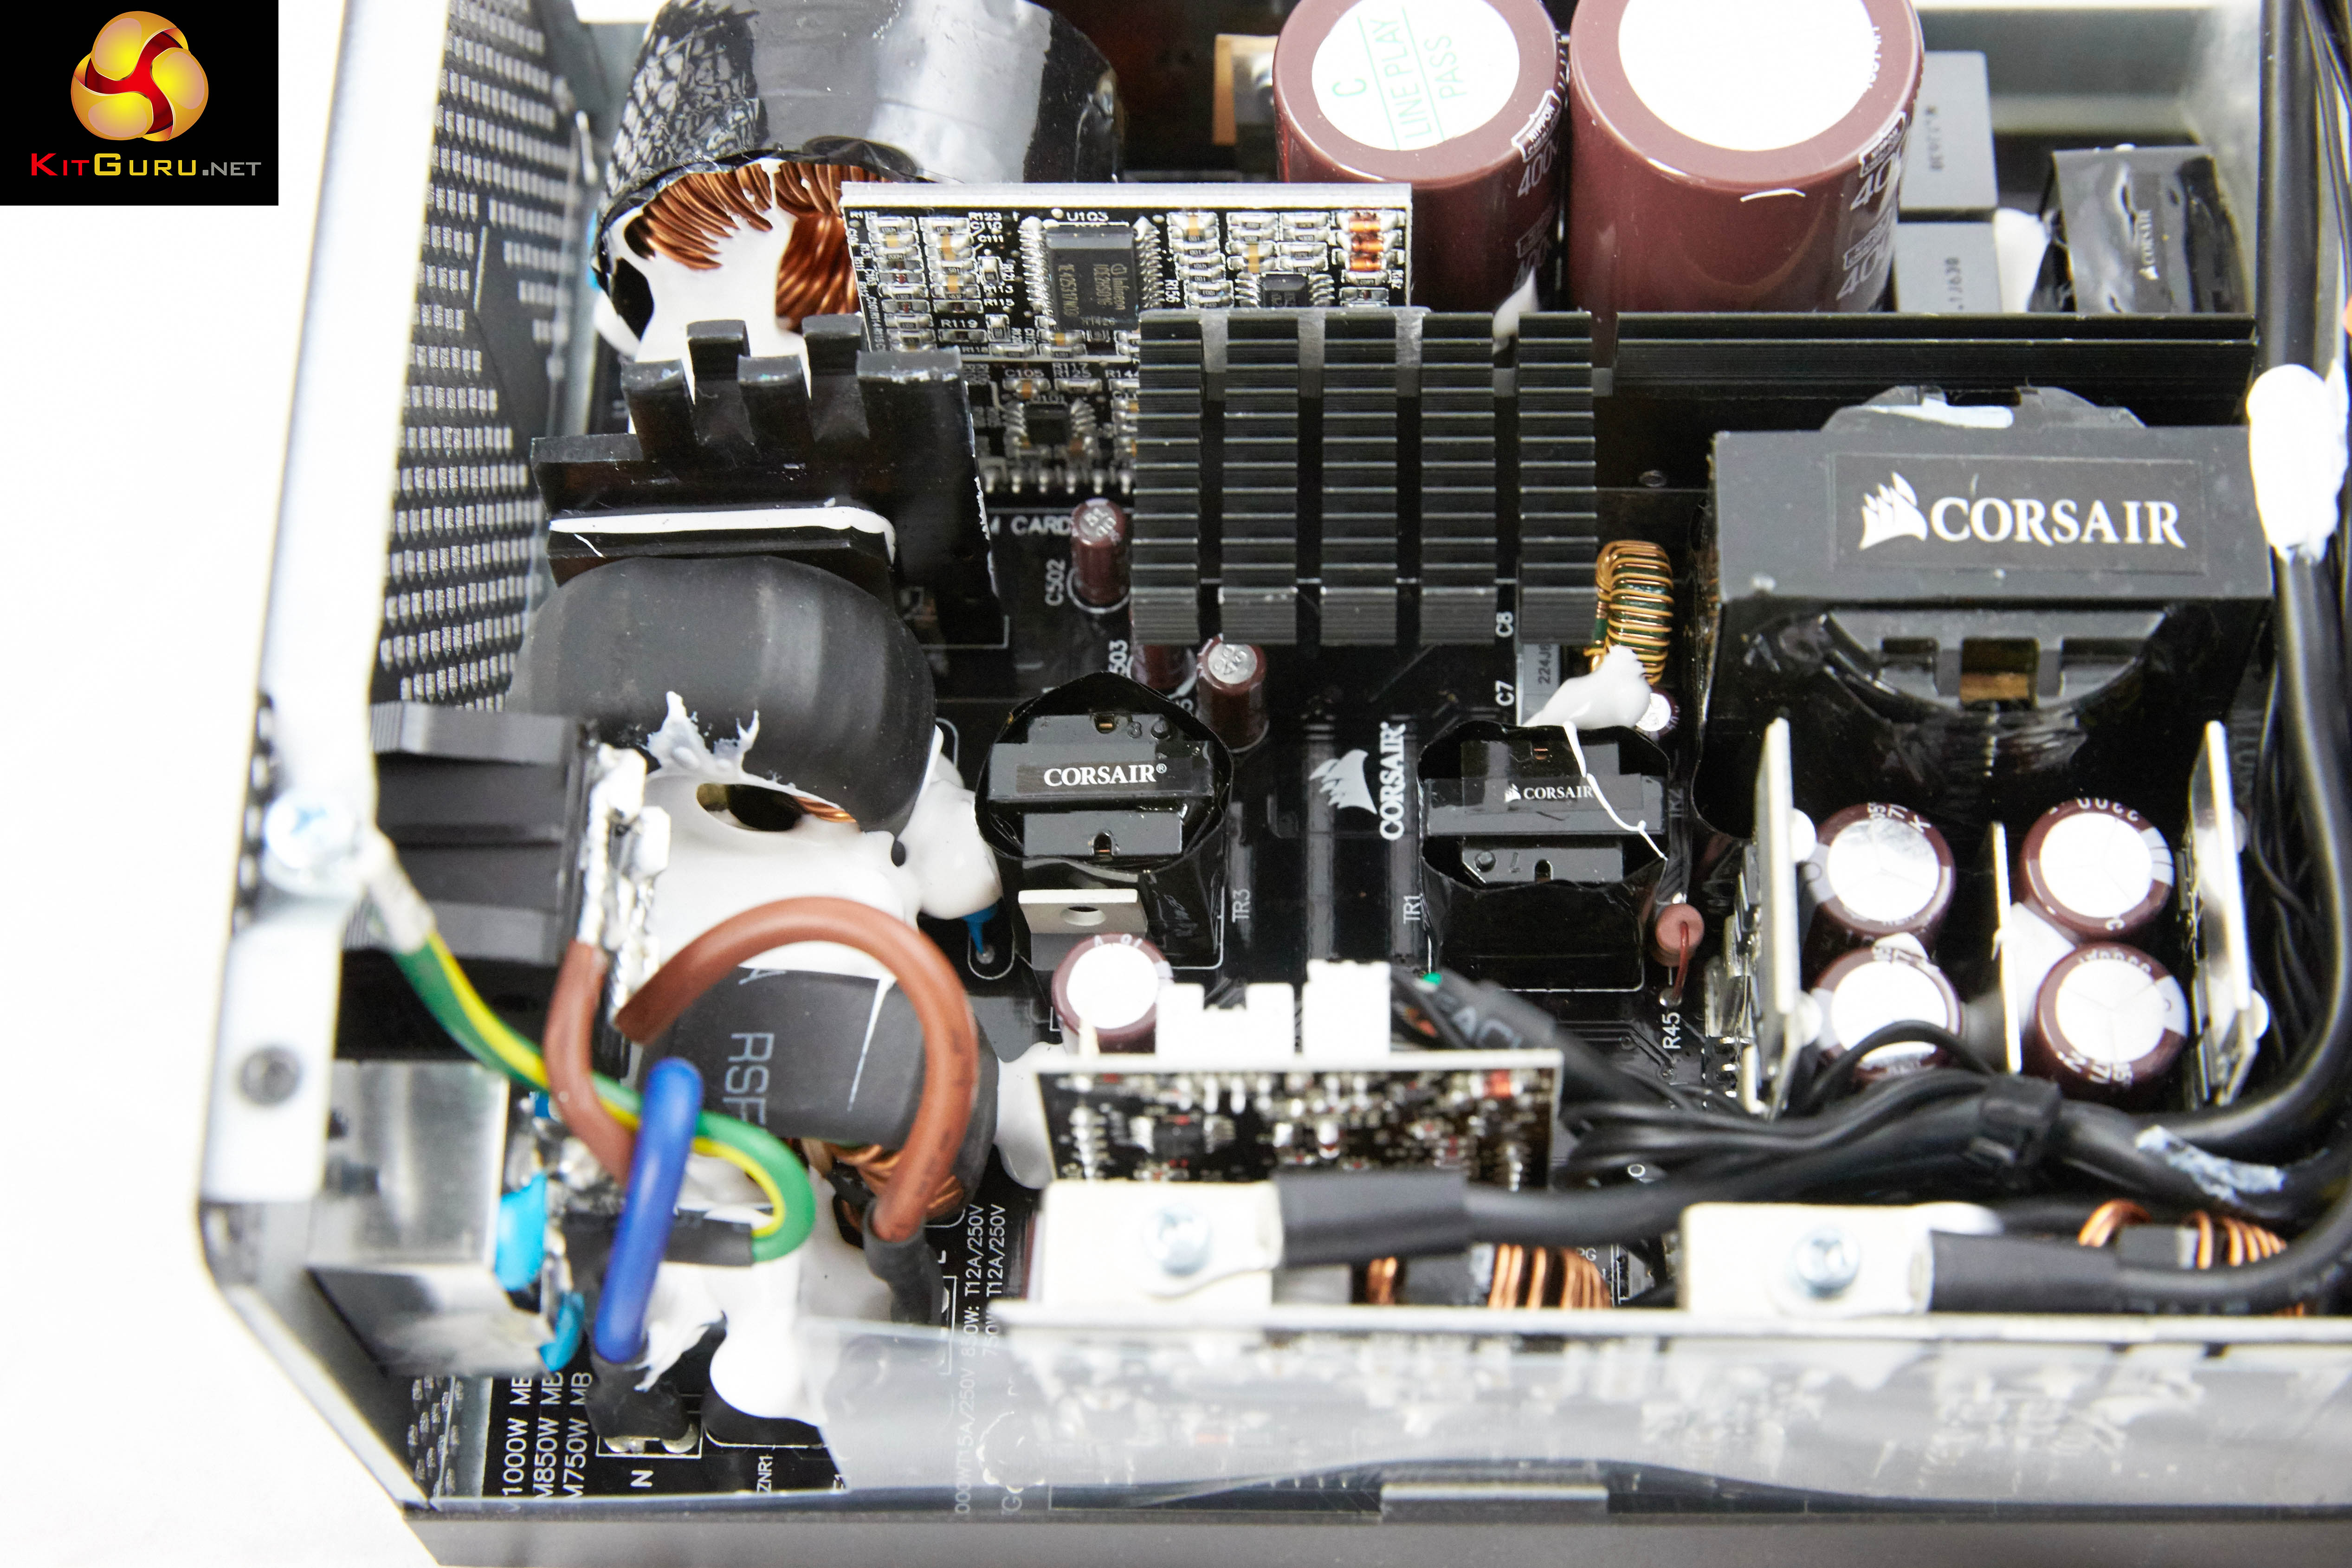
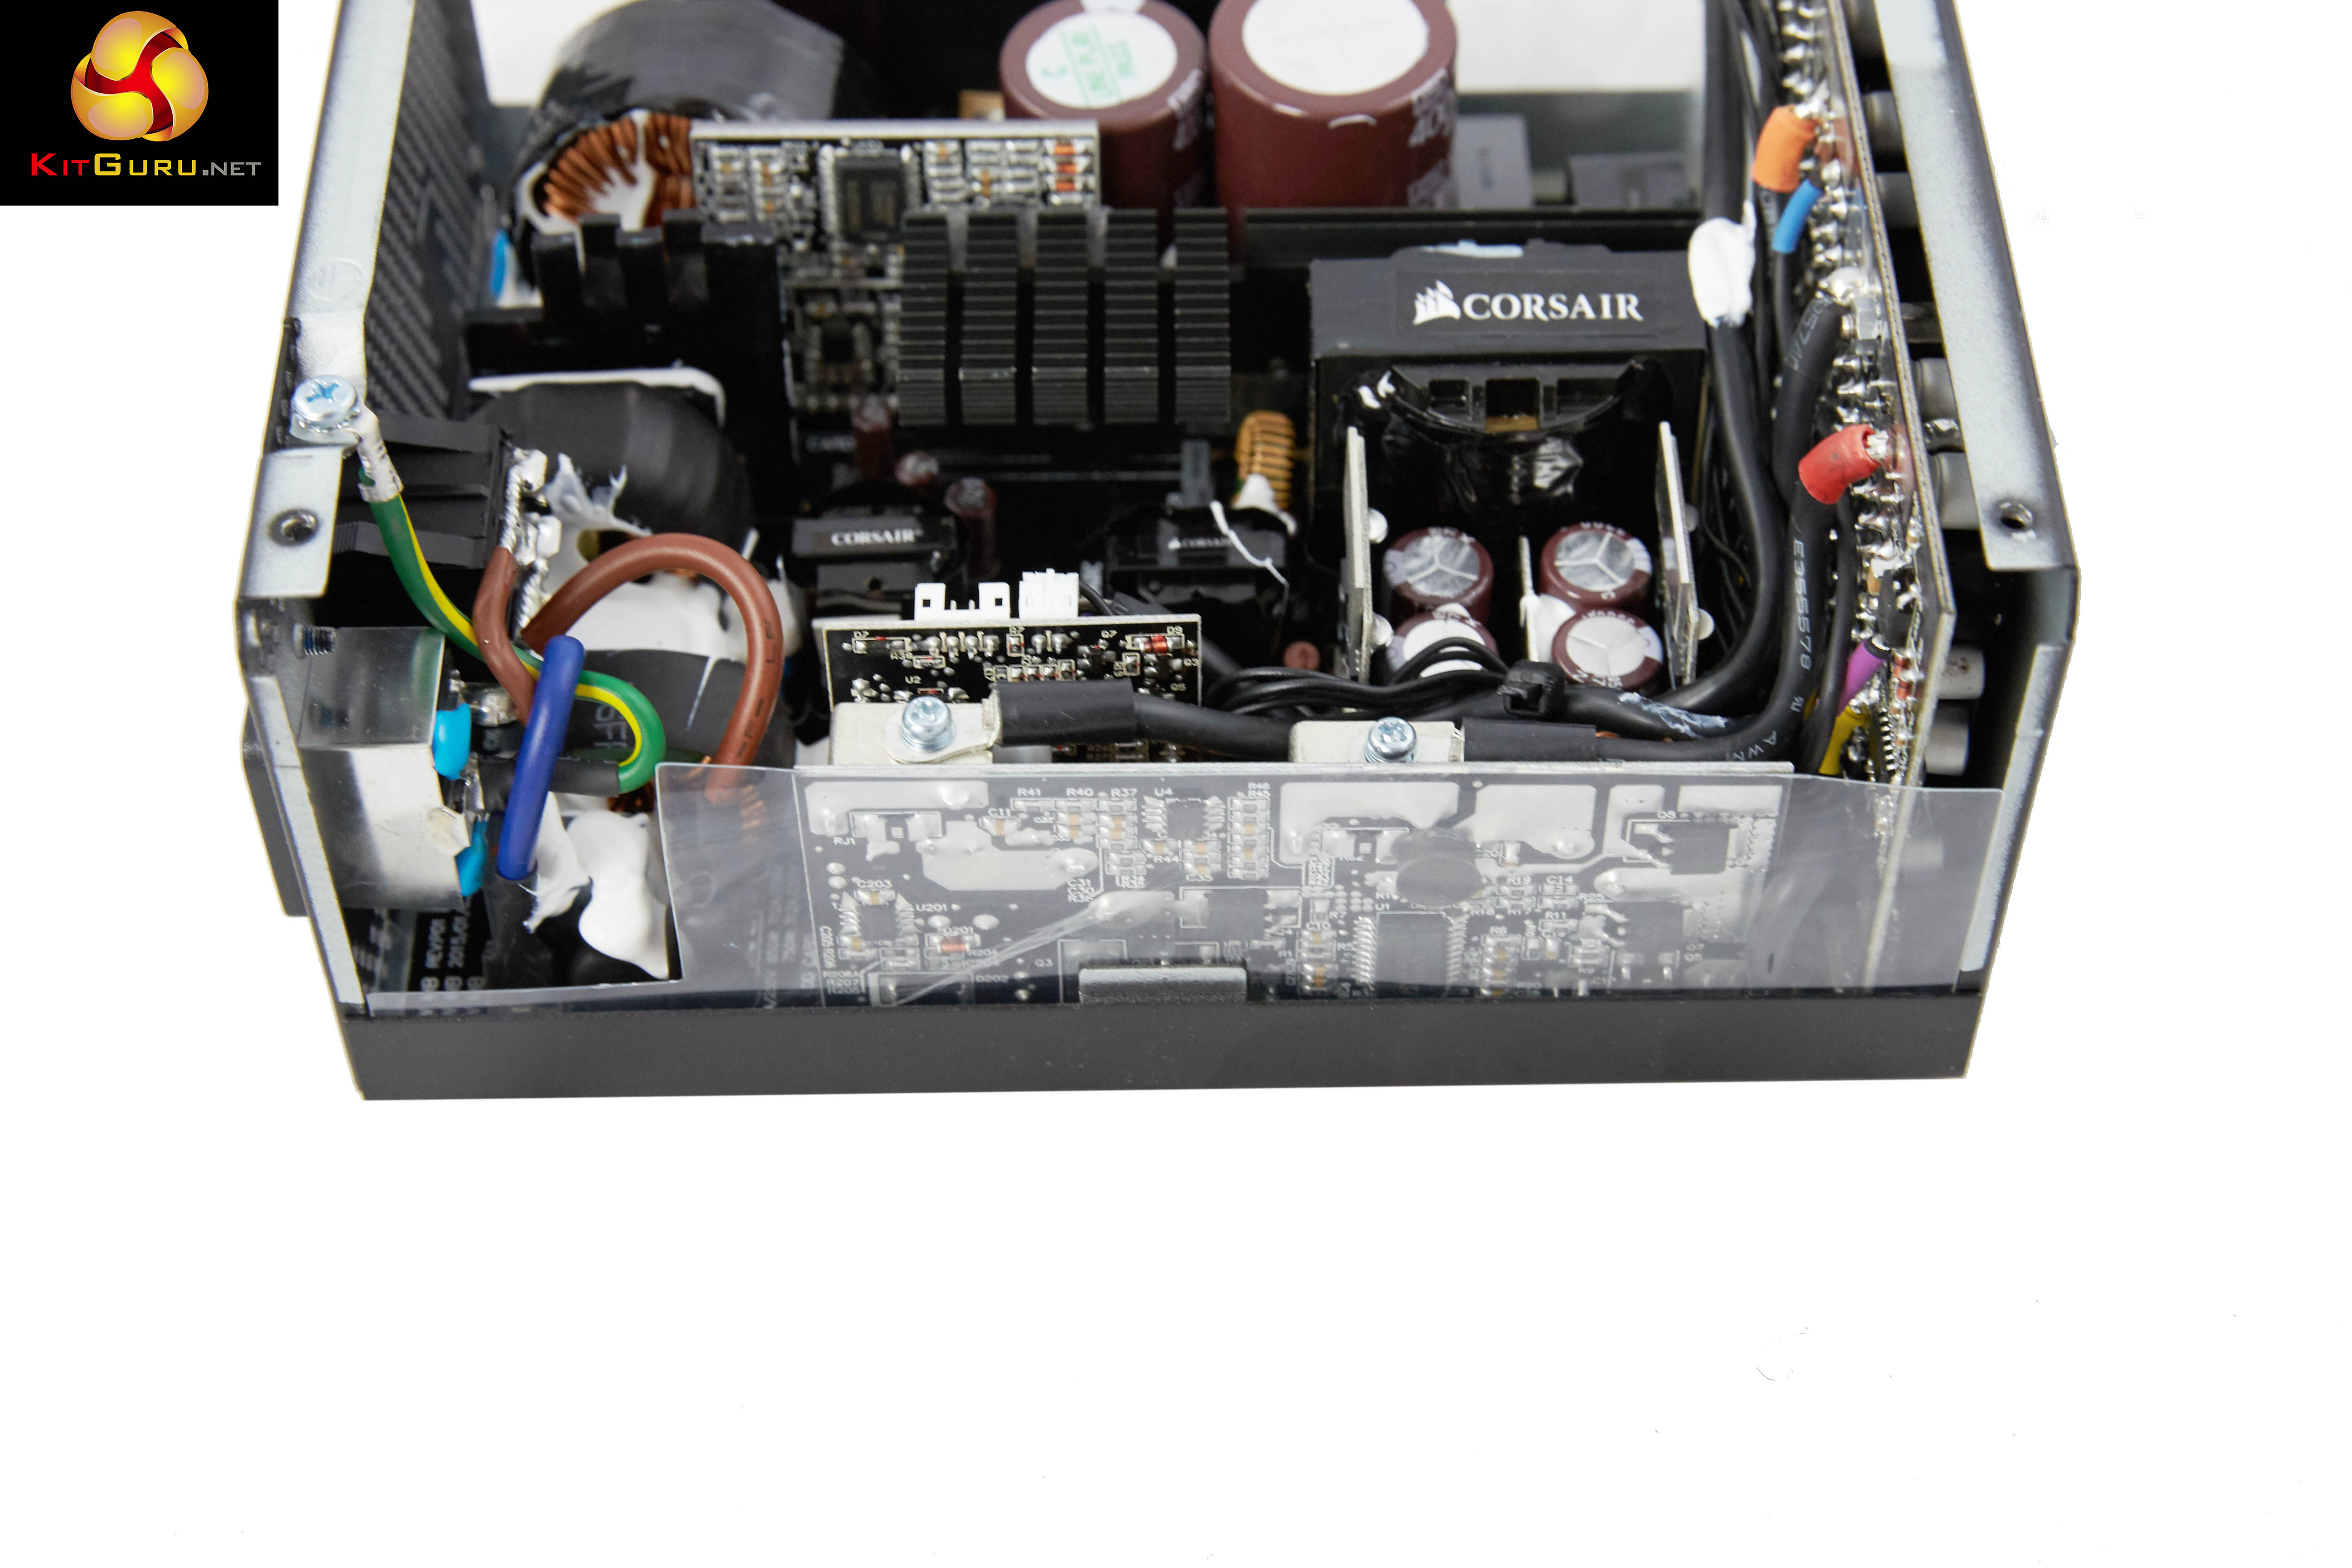
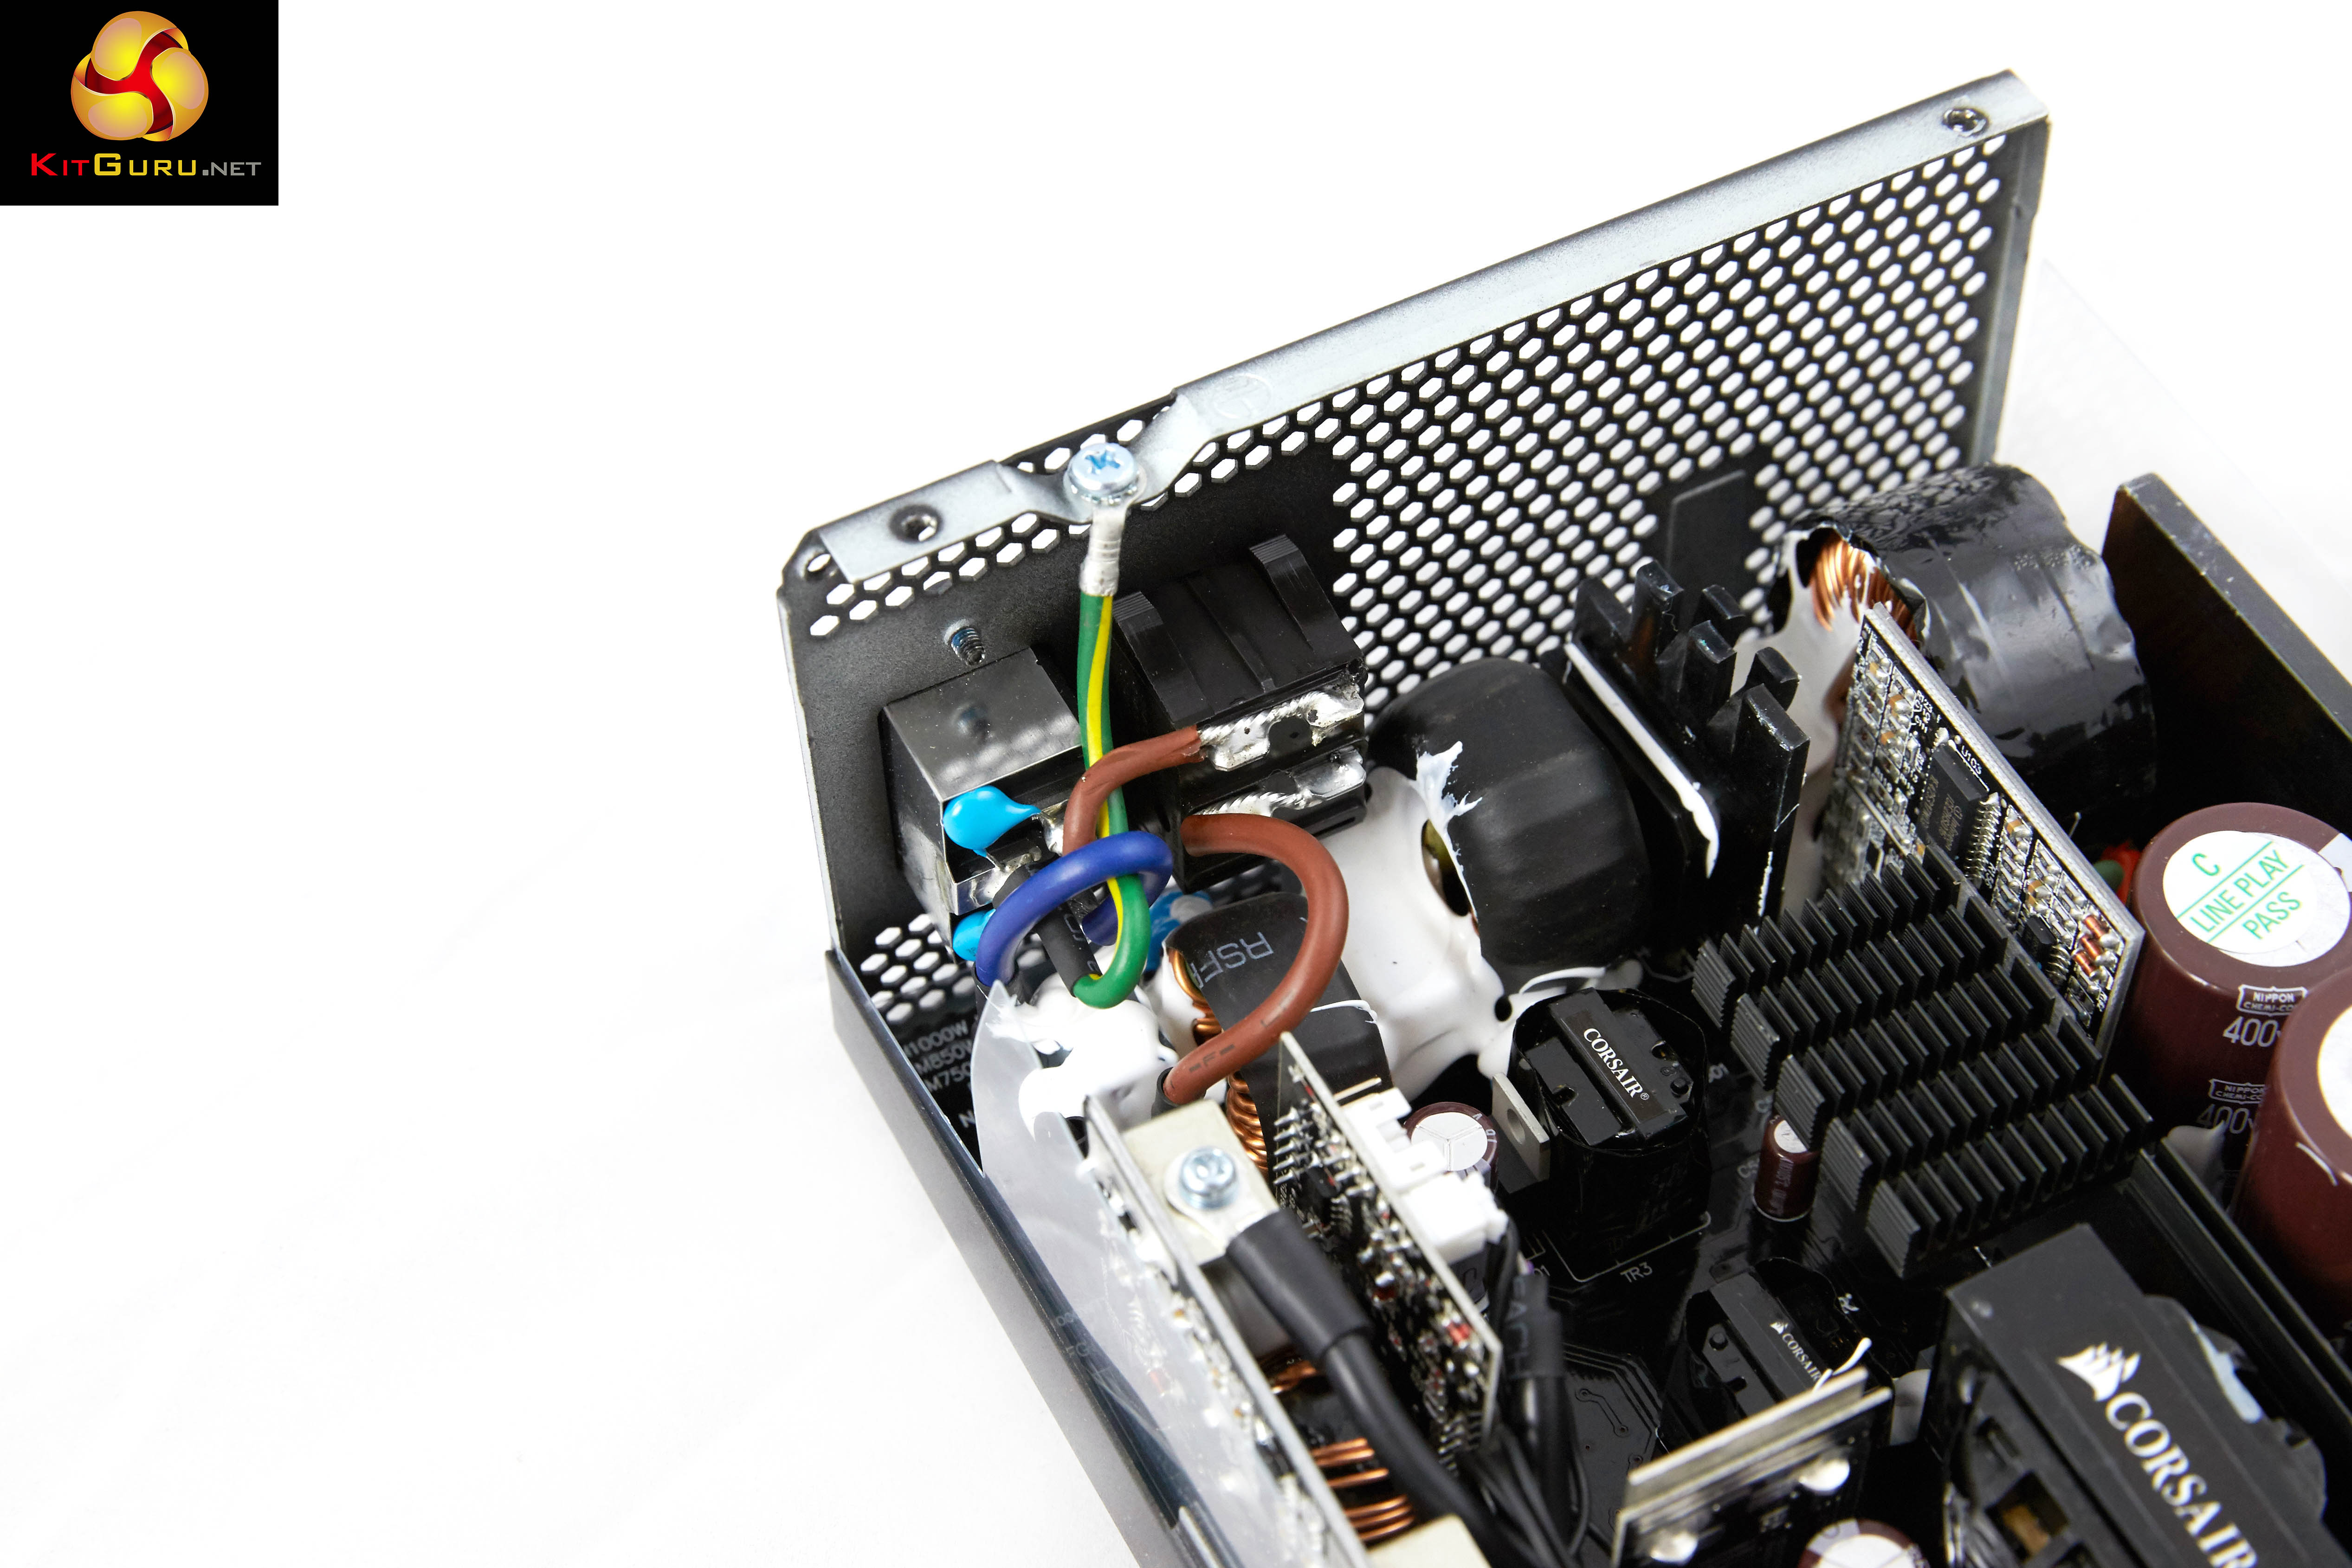
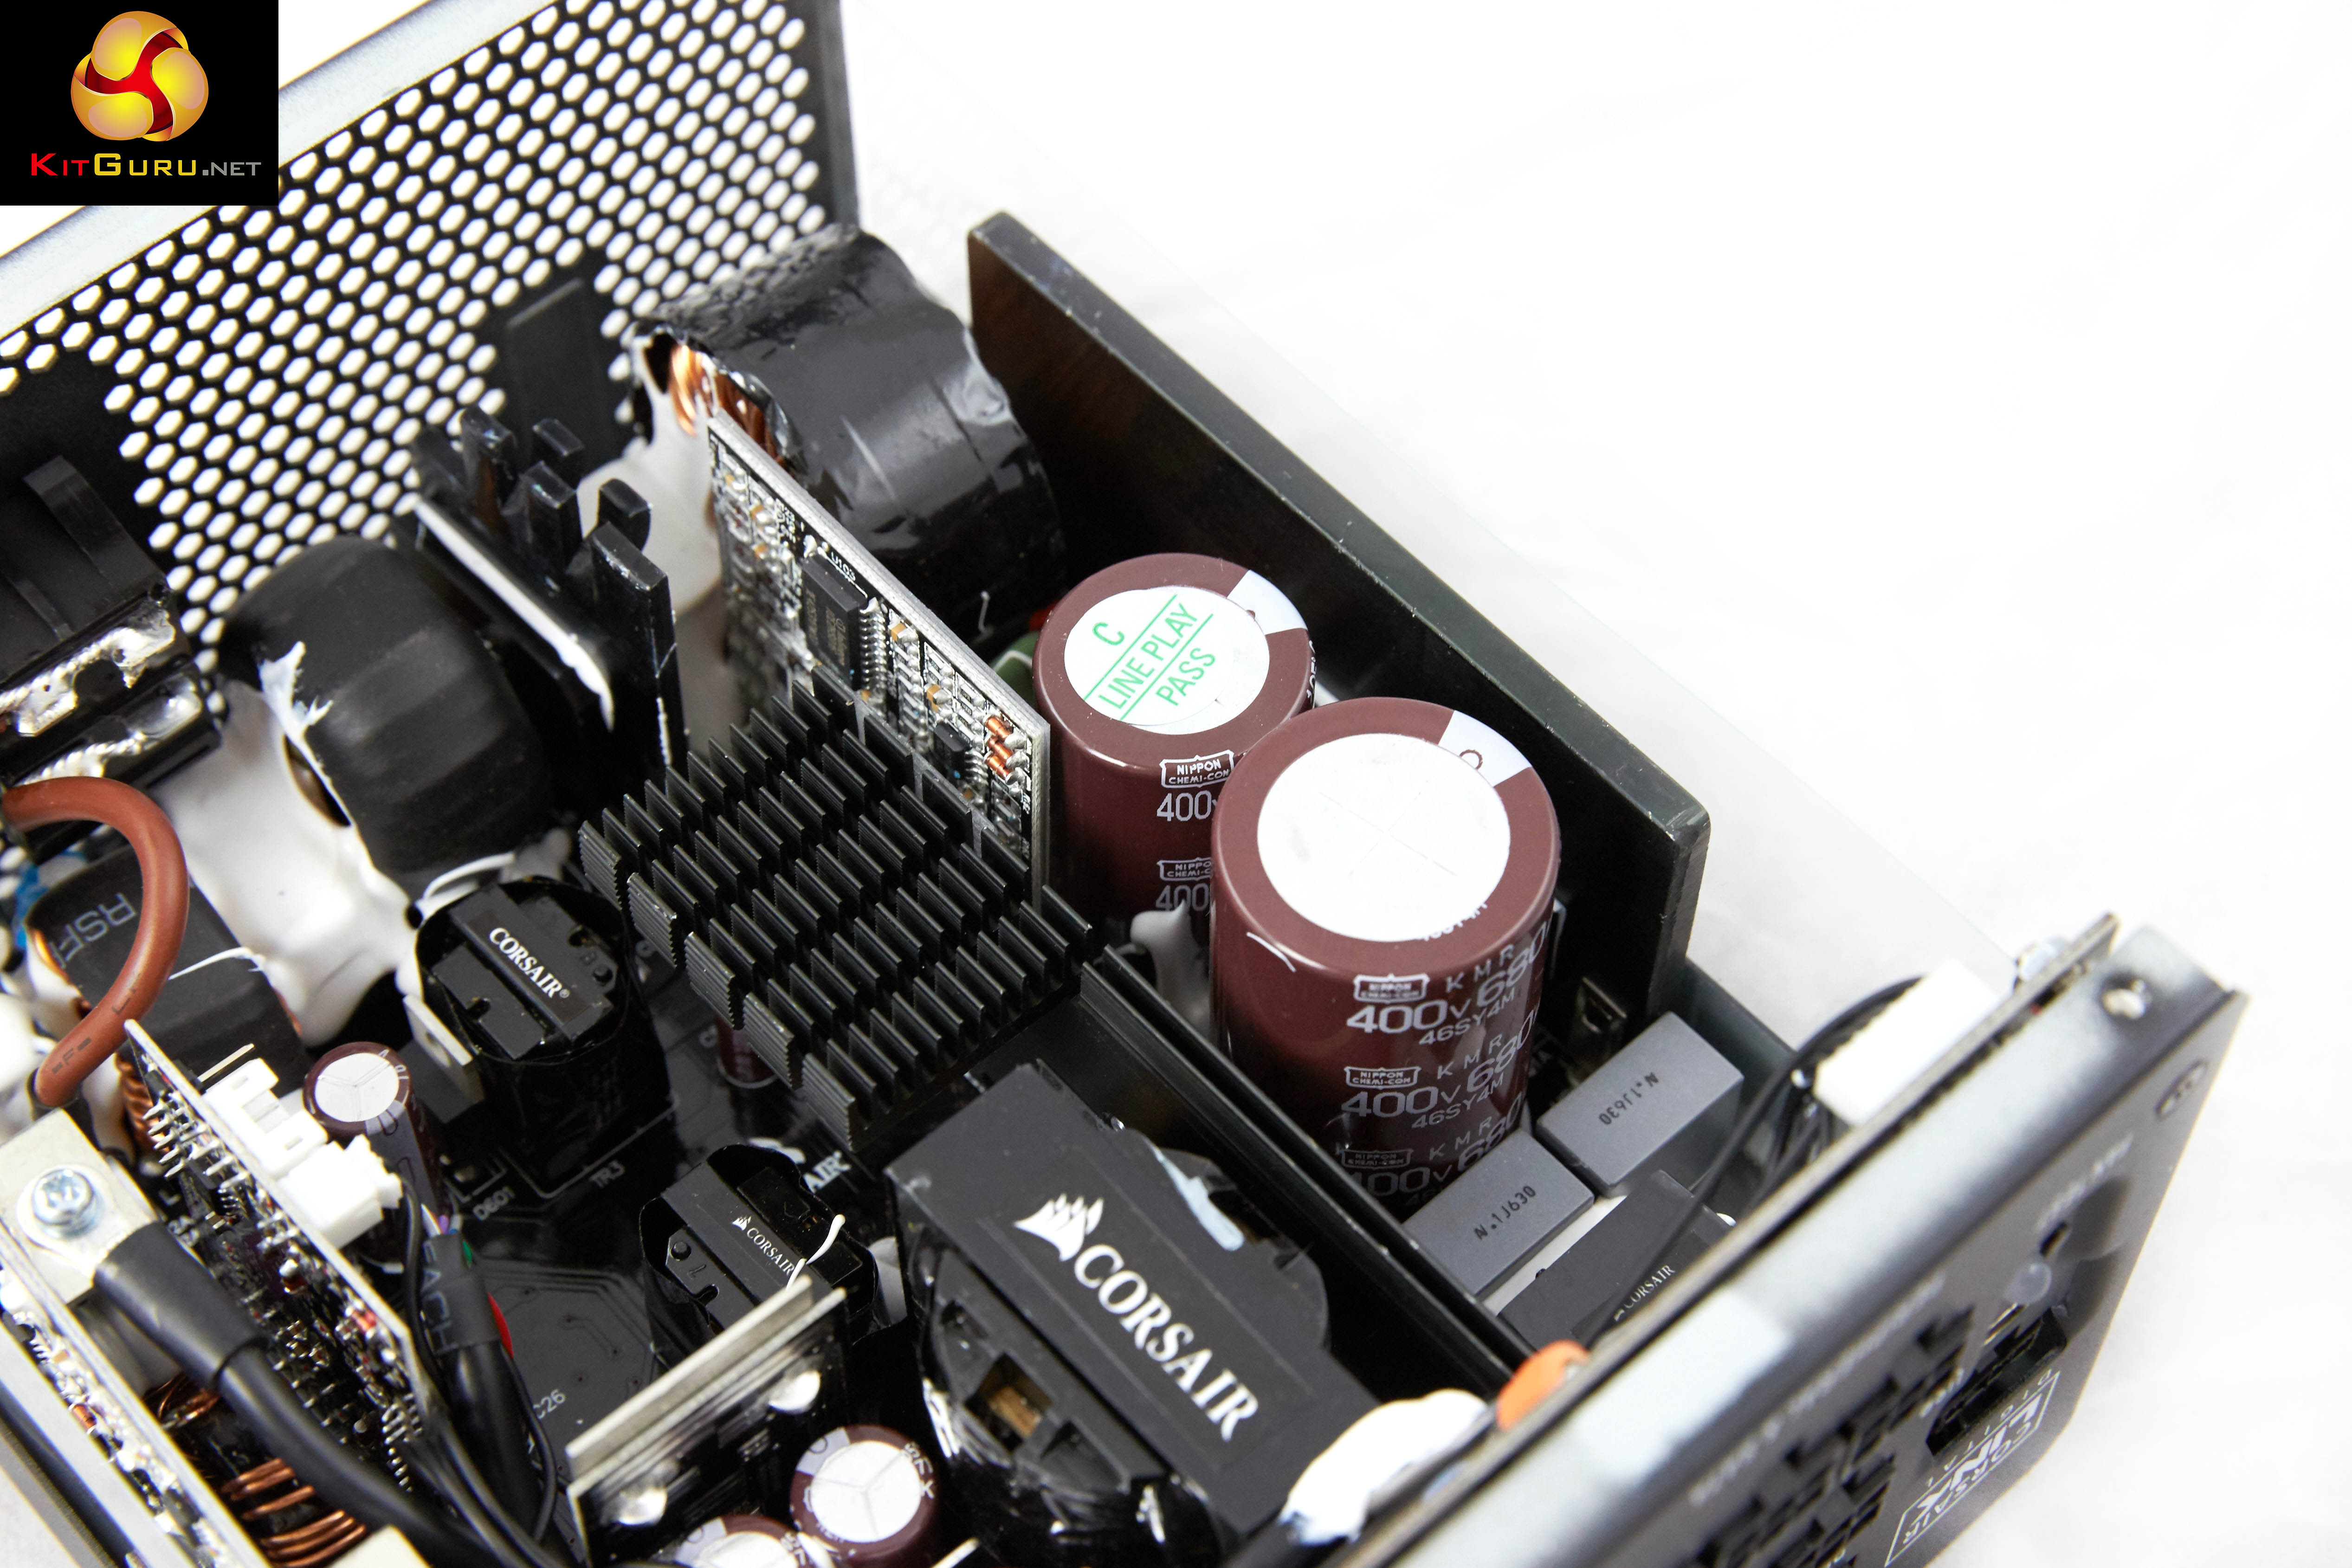
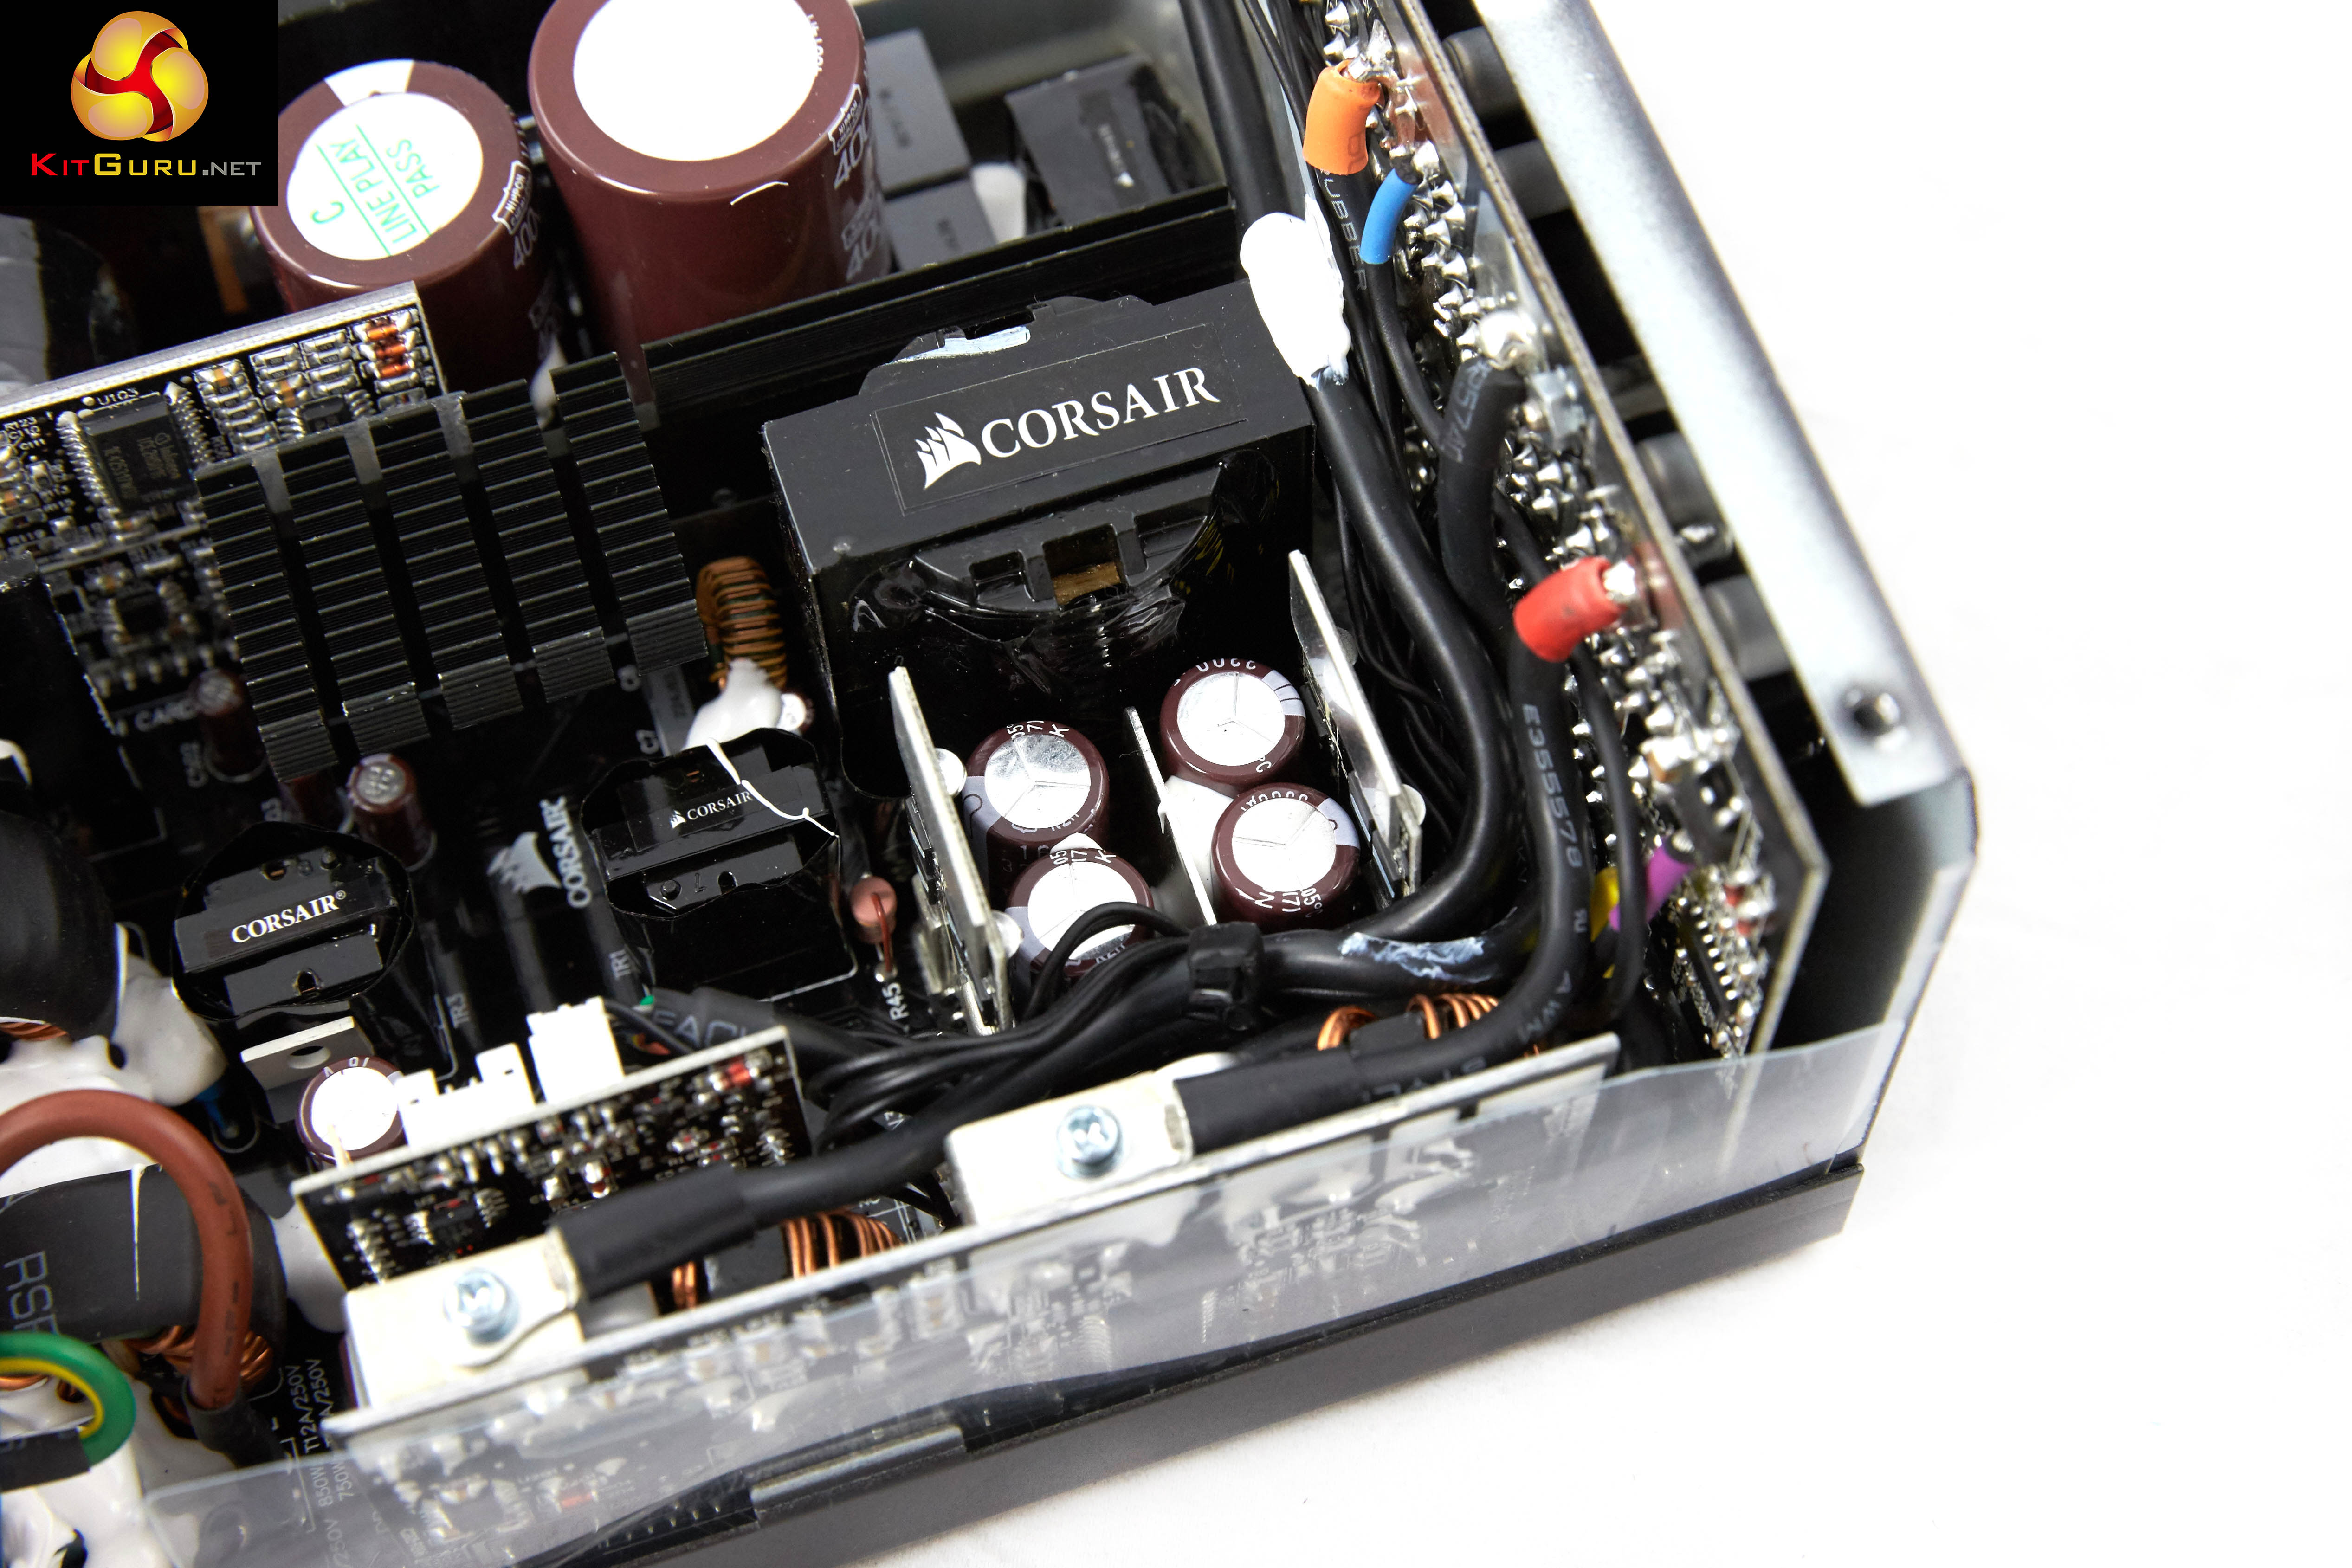
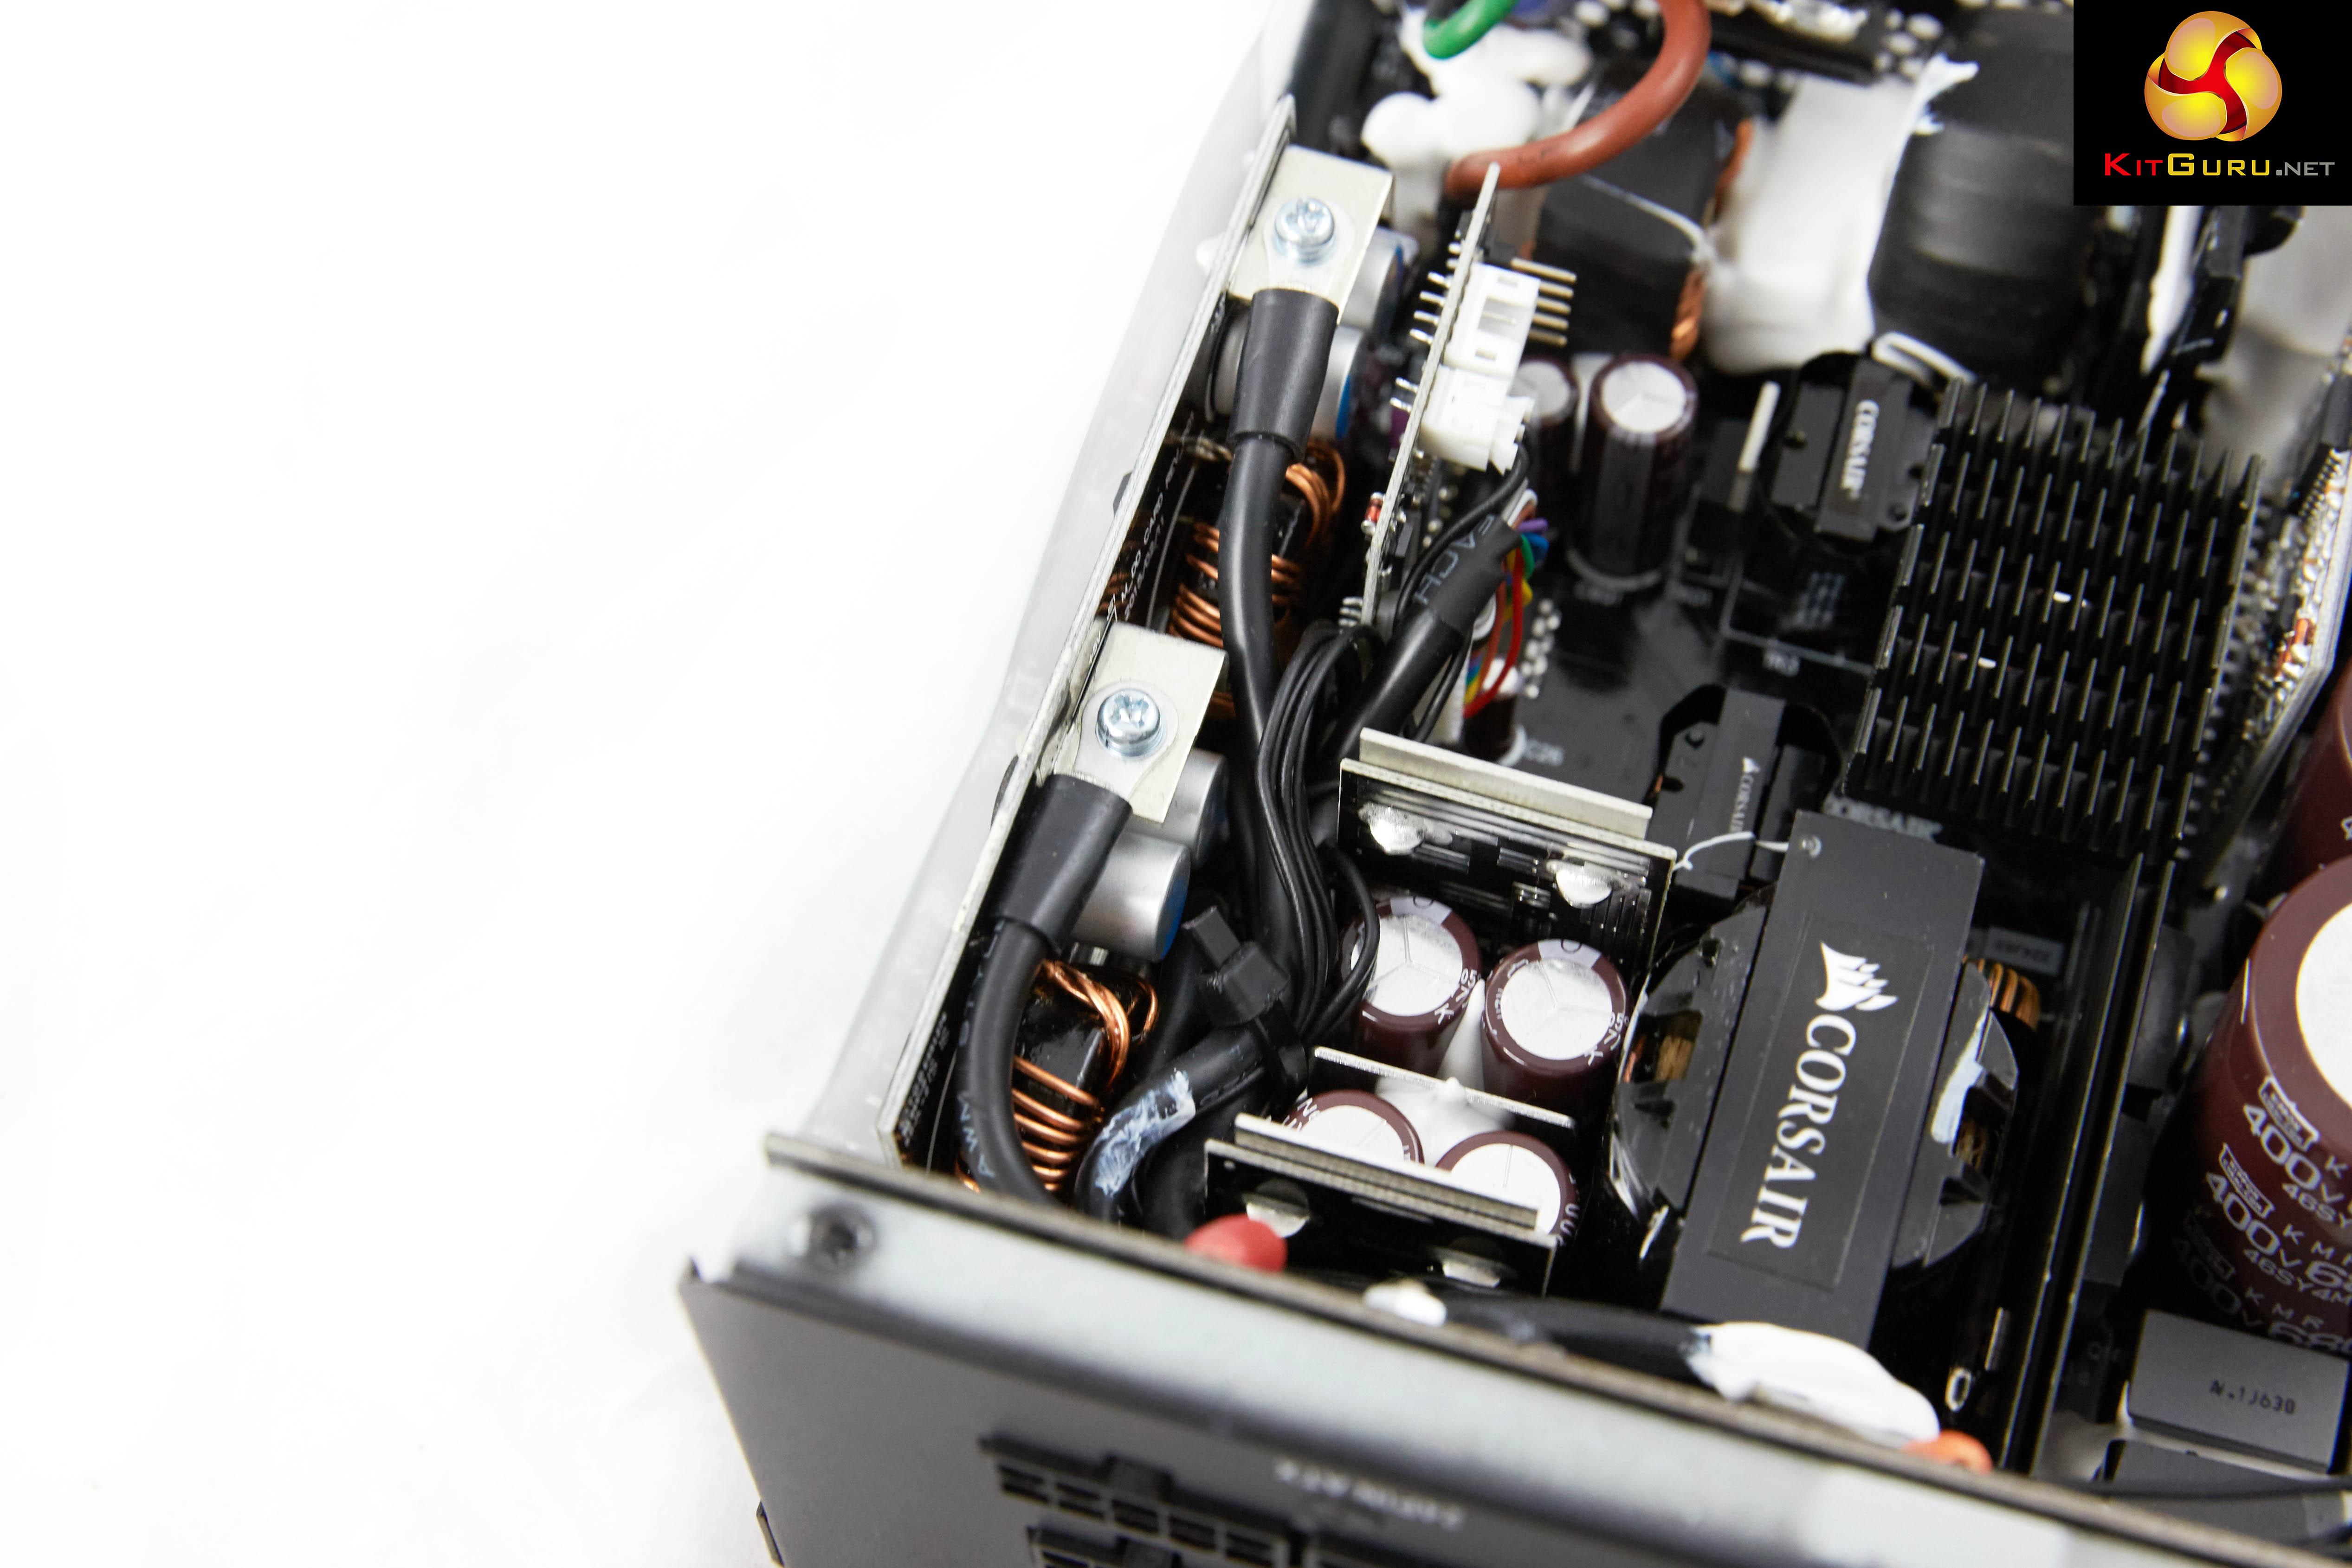
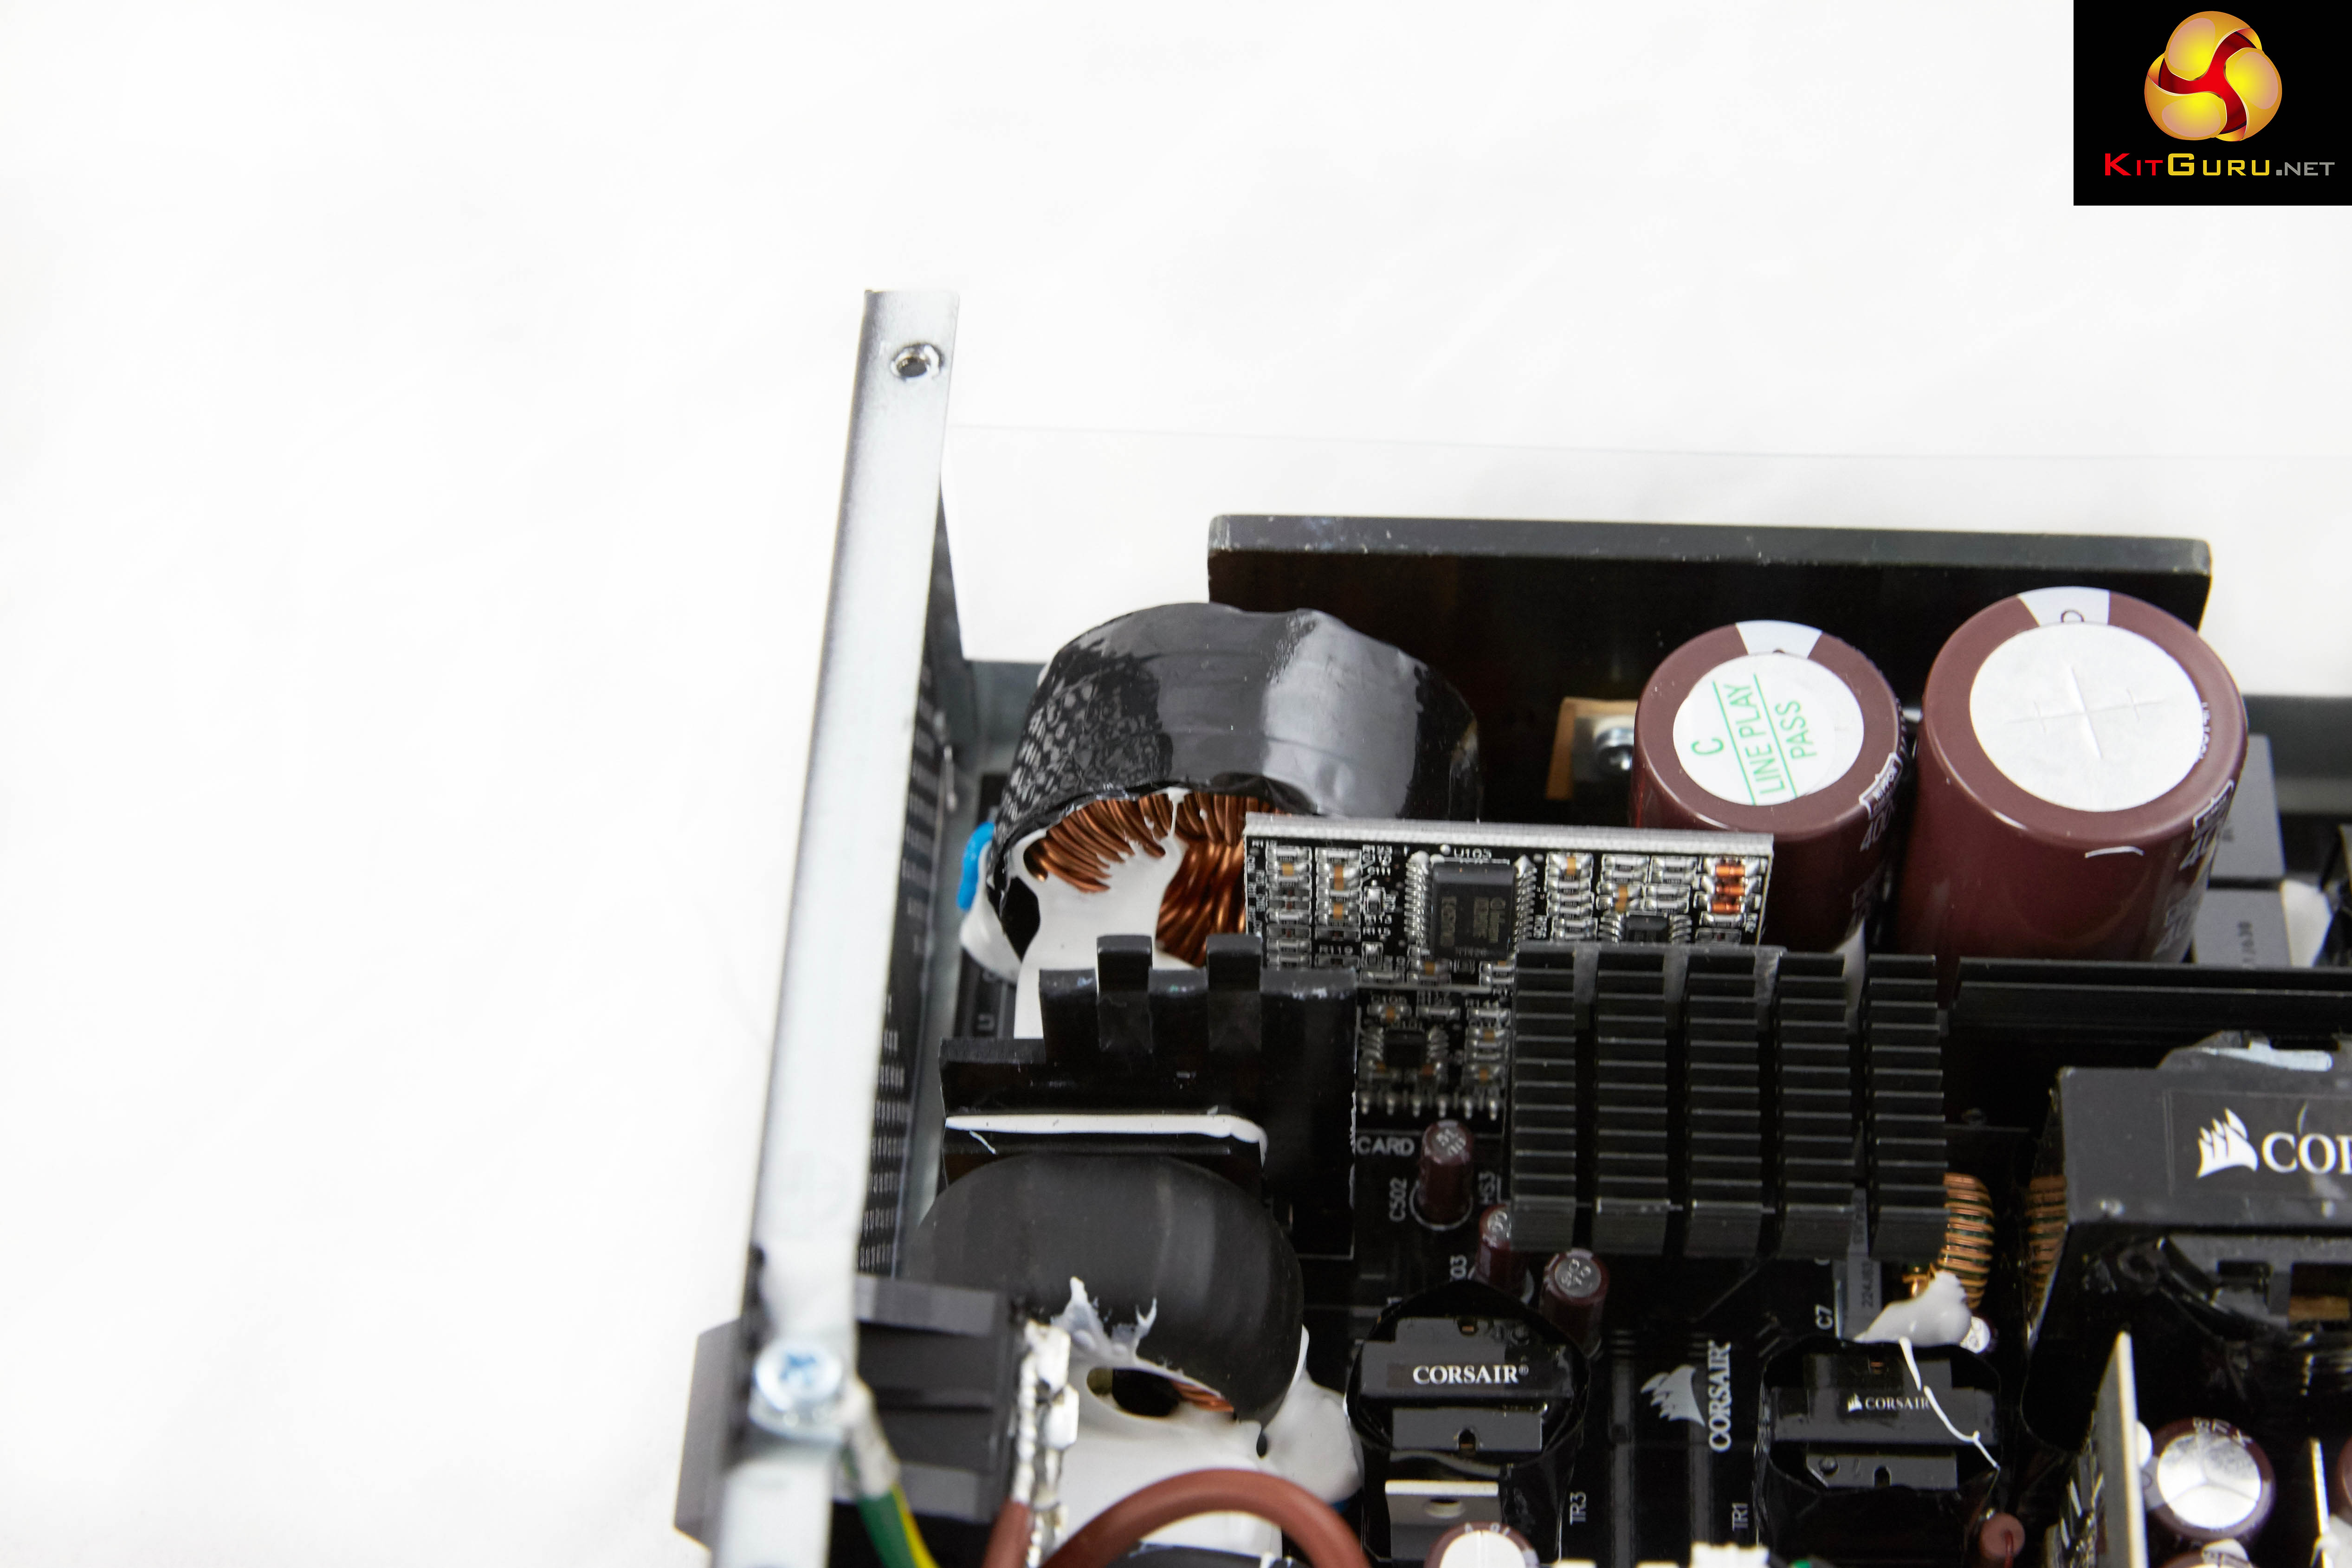
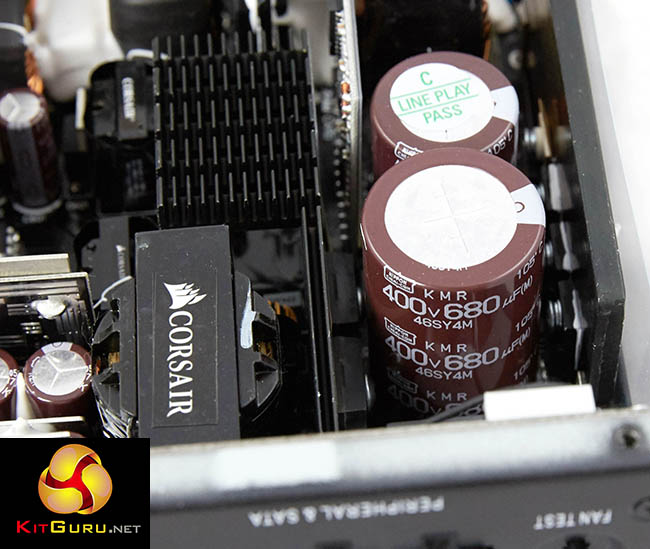
This is a CWT design and the build quality is actually very high. Soldering quality on the PCB and modular connection board is good. The 750W and 850W also have fewer PFC MOSFETs and lower power PWM MOSFETs than the 1000W unit. The 750W also has fewer +12V output rectifier diodes than the 850W and 1000W.
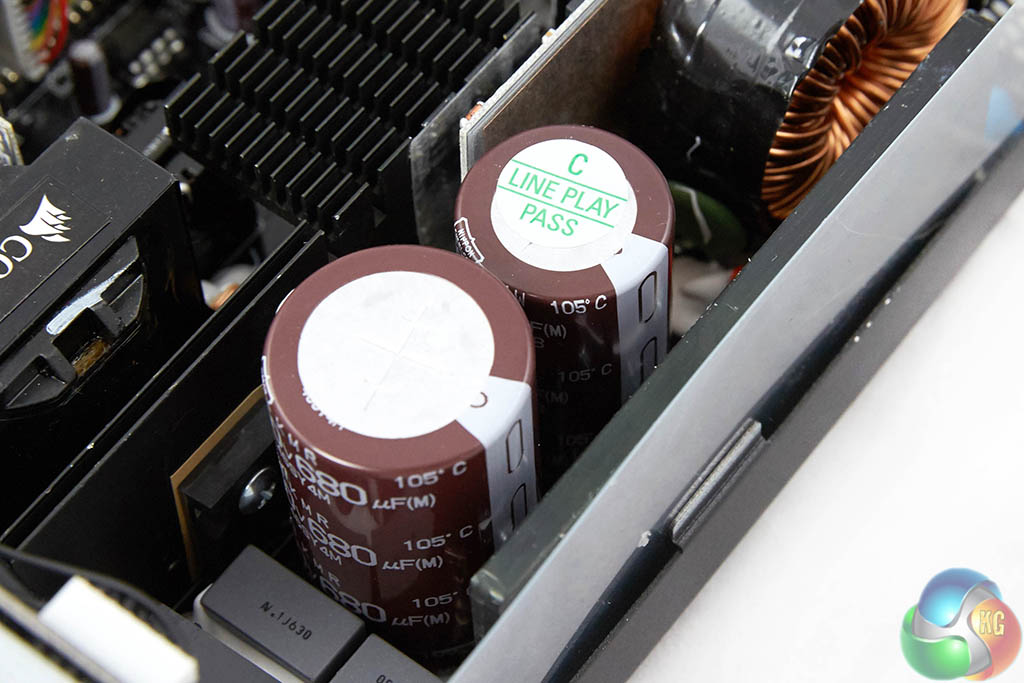
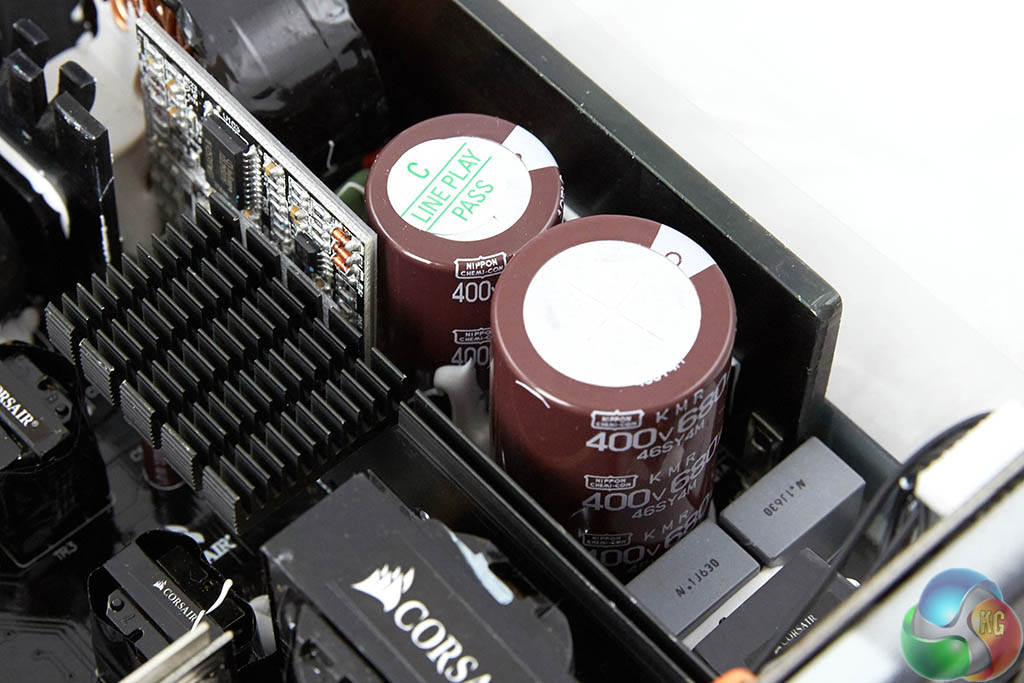
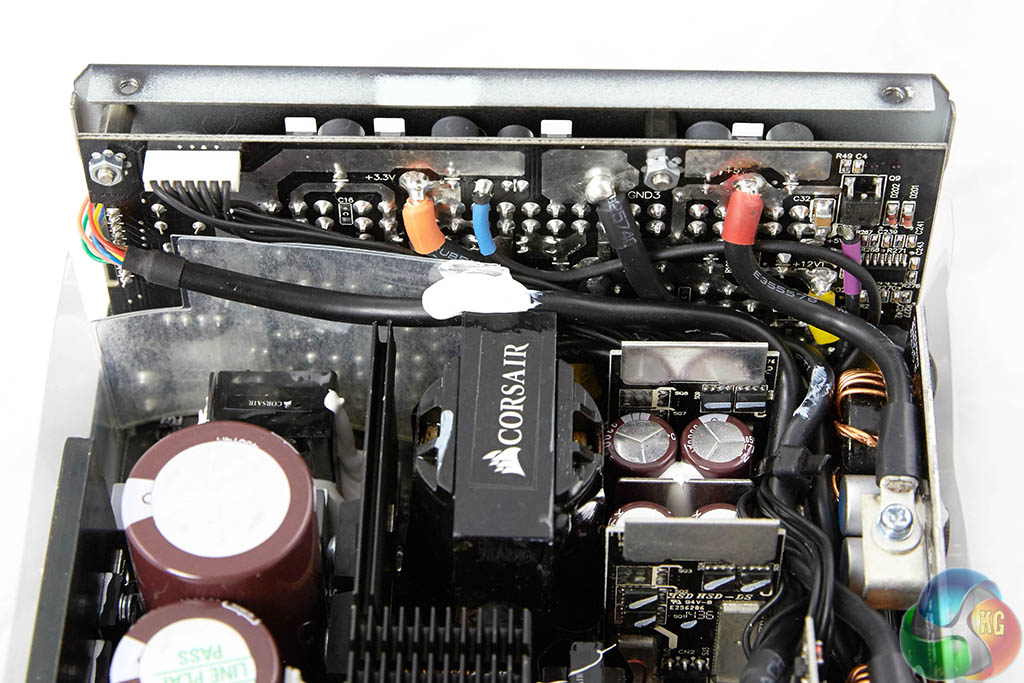
The power supply is using all Japanese capacitors in the primary and secondary stage. In the primary stage are two high grade 105C capacitors from Nippon Chemi Con – a 400V 680uF (KMR series) and 400V 470uF (KMW Series) unit. These are as good as it will get for a mainstream consumer unit.On this page we present some high resolution images of the product taken in our professional studio with a Canon 1DX camera. These will take much longer to open due to the dimensions, especially on slower connections. If you use these pictures on another site or publication, please credit Kitguru.net as the owner/source.

Additional technical assistance: Peter McFarland and Jeremy Price.
Correctly testing power supplies is a complex procedure and KitGuru have configured a test bench which can deliver up to a 2,000 watt DC load. Due to public requests we have changed our temperature settings – previously we rated with ambient temperatures at 25C, we have increased ambient temperatures by 10c (to 35c) in our environment to greater reflect warmer internal chassis conditions.
We use combinations of the following hardware:
• SunMoon SM-268
• CSI3710A Programmable DC load (+3.3V and +5V outputs)
• CSI3711A Programmable DC load (+12V1, +12V2, +12V3, and +12V4)
• Extech Power Analyzer
• Extech MultiMaster MM570 digital multimeter
• SkyTronic DSL 2 Digital Sound Level Meter (6-130dBa)
• Digital oscilloscope (20M S/s with 12 Bit ADC)
• Variable Autotransformer, 1.4 KVA
We test with the +12V in single rail mode.
|
DC Output Load Regulation
|
||||||||||
|
Combined DC Load |
+3.3V
|
+5V
|
+12V
|
+5VSB
|
-12V | |||||
|
A
|
V
|
A
|
V
|
A
|
V
|
A
|
V
|
A | V | |
|
100W
|
1.53
|
3.36
|
1.77
|
5.08
|
6.66
|
12.09
|
0.50
|
5.04
|
0.20
|
-12.04
|
|
200W
|
3.13
|
3.35
|
3.50
|
5.07
|
13.50
|
12.06
|
1.00
|
5.03
|
0.20
|
-12.04
|
| 400W |
6.42
|
3.34
|
7.04
|
5.06
|
27.50
|
12.03
|
1.50
|
5.02
|
0.30
|
-12.05
|
| 600W |
9.81
|
3.33
|
10.75
|
5.05
|
41.70
|
12.00
|
2.00
|
5.02
|
0.30
|
-12.06
|
|
800W
|
13.25
|
3.33
|
14.55
|
5.03
|
56.40
|
11.97
|
2.50
|
5.01
|
0.50
|
-12.06
|
| 1000W | 16.53 | 3.33 | 15.66 | 5.02 | 71.40 | 11.92 | 3.00 | 4.99 | 0.60 | -12.06 |
Load regulation is certainly very good.
| Corsair RMi Series 1000W |
Maximum Load |
| 1105W |
We managed to get another 105 watts from the power supply before the protection circuitry kicked in. Great results.
Next we want to try Cross Loading. This basically means loads which are not balanced. If a PC for instance needs 500W on the +12V outputs but something like 30W via the combined 3.3V and +5V outputs then the voltage regulation can fluctuate badly.
| Cross Load Testing | +3.3V | +5V | +12V | -12V | +5VSB | |||||
| A | V | A | V | A | V | A | V | A | V | |
| 885W | 2.0 | 3.33 | 2.0 | 5.08 | 72.0 | 11.89 | 0.2 | -12.04 | 0.50 | 5.02 |
| 240W | 20.0 | 3.31 | 24.0 | 5.03 | 2.0 | 12.10 | 0.2 | -12.04 | 0.50 | 5.02 |
The unit passes the cross loading test with both +3.3V and +5V rails holding steady. The +12V rail droops a little when hit with 72A, but it is not a problem.
We then used an oscilloscope to measure AC ripple and noise present on the DC outputs. We set the oscilloscope time base to check for AC ripple at both high and low ends of the spectrum. ATX12V V2.2 specification for DC output ripple and noise is defined in the ATX 12V power supply design guide.
|
ATX12V Ver 2.2 Noise/Ripple Tolerance
|
|
|
Output
|
Ripple (mV p-p)
|
|
+3.3V
|
50
|
|
+5V
|
50
|
|
+12V1
|
120
|
|
+12V2
|
120
|
|
-12V
|
120
|
|
+5VSB
|
50
|
Obviously when measuring AC noise and ripple on the DC outputs the cleaner (less recorded) means we have a better end result. We measured this AC signal amplitude to see how closely the unit complied with the ATX standard.
| AC Ripple (mV p-p) | ||||
| DC Load | +3.3V | +5V | +12V | 5VSB |
| 100W | 10 | 5 | 10 | 5 |
| 200W | 10 | 5 | 10 | 5 |
| 400W | 10 | 10 | 10 | 5 |
| 600W | 15 | 10 | 10 | 10 |
| 800W | 15 | 10 | 15 | 10 |
| 1000W | 15 | 15 | 20 | 10 |
Ripple suppression is very good. All rails hold well within the industry rated tolerance levels. +3.3V and +5V peak at 15mV. +12V peaks at 20mV at 100% load.
Edit: 6th July 2015: The +12V figure has been appended as we found that if we were using a USB oscilloscope,with the PSU’s Link interface plugged into a USB port on same system (such as a laptop) electrical noise from the laptop was introduced into the final result.
|
Efficiency (%)
|
|
|
100W
|
87.23
|
|
200W
|
88.67
|
|
300W
|
90.21
|
|
500W
|
92.13
|
|
800W
|
91.66
|
| 1000W | 90.79 |
Overall efficiency results are very strong indeed, peaking at around 92% between a 500 watt and 600 watt load. This drops to almost 91% efficiency at full load.
We take the issue of noise very seriously at KitGuru and this is why we have built a special home brew system as a reference point when we test noise levels of various components. Why do this? Well this means we can eliminate secondary noise pollution in the test room and concentrate on components we are testing. It also brings us slightly closer to industry standards, such as DIN 45635.
Today to test the Power Supply we have taken it into our acoustics room environment and have set our SkyTronic DSL 2 Digital Sound Level Meter (6-130dBa) one meter away from the unit. We have no other fans running so we can effectively measure just the noise from the unit itself.
As this can be a little confusing for people, here are various dBa ratings in with real world situations to help describe the various levels.
KitGuru noise guide
10dBA – Normal Breathing/Rustling Leaves
20-25dBA – Whisper
30dBA – High Quality Computer fan
40dBA – A Bubbling Brook, or a Refrigerator
50dBA – Normal Conversation
60dBA – Laughter
70dBA – Vacuum Cleaner or Hairdryer
80dBA – City Traffic or a Garbage Disposal
90dBA – Motorcycle or Lawnmower
100dBA – MP3 Player at maximum output
110dBA – Orchestra
120dBA – Front row rock concert/Jet Engine
130dBA – Threshold of Pain
140dBA – Military Jet takeoff/Gunshot (close range)
160dBA – Instant Perforation of eardrum
|
Noise (dBA)
|
|
|
100W
|
<28.0
|
|
200W
|
<28.0
|
|
400W
|
<28.0
|
|
600W
|
29.5
|
| 800W | 32.6 |
| 1000W | 33.3 |
A very quiet power supply thanks to high levels of efficiency and the excellent NR135P Fluid Dynamic bearing fan the company are using. Even at full load the fan is not intrusive at all. It is only really in the last 20% of power output that the fan rotates at around 1000-1100 rpm.
|
Temperature (c)
|
||
|
Intake
|
Exhaust
|
|
|
100W
|
35
|
38
|
|
200W
|
35
|
44
|
|
400W
|
37
|
47
|
|
650W
|
43
|
50
|
|
800W
|
45
|
54
|
| 1000W | 47 | 59 |
Temperatures are well controlled and the fan never works that hard – it is disabled at lower power demand completely.
|
Maximum load
|
Efficiency
|
|
1105W
|
89.68
|
Pushing the power supply above its rated limits generates an efficiency level of around 89.68%. This is not a viable ‘real world’ situation, but its interesting nonetheless.The Corsair RMi Series 1000W, like the smaller 750W model, has proven very capable in our tests today. It will appeal to the audience who want a good looking, well built supply capable of dealing with a substantial graphics card demand via the +12V rail.
Technically, we have been impressed with both units, they deliver stable power and can cope with sustained delivery at their maximum rated output level, without a problem. This unit in particular can cope with 1,100 watts before shutting off safely.
The Corsair NR135P fan deserves special mention because it doesn't cause excessive noise under any situation. When the system is idle or under modest load the fan is inactive, or spinning very slowly. Even when dealing with a 1000 watt load, the fan is barely audible. No one wants to deal with excessive fan noise anymore, so it is good to see Corsair improving their fan designs in recent years.
Ripple suppression proves to be good and well within industry tolerance levels. The results are not quite as good as flagship models from some competitors we have tested in recent months, but there are no concerns to raise. The Corsair RMi 1000W uses only high grade 105C Japanese grade Nippon Chemi Con capacitors – great to see for long term reliability.
Why would you need a 1000 watt power supply? For most people this is overkill, but it is an ideal choice for an overclocked Core i7 build featuring 2 or 3 high demand graphics cards. Those of you with two AMD R9 295X2's will be better served with a quality 1,500 watt unit as highlighted in our testing last year (see HERE). We tested this Corsair RMi 1000W power supply in a system featuring an overclocked 5960X, 32GB of 3,000mhz memory, multiple hard drives, SSD's and two Titan X graphics cards in SLi. It was rock solid throughout some intensive stress tests.
The fully modular design will appeal to system builders using windowed case panels. It is good to note that the quality of cabling is excellent and there is full support for up to four graphics cards.
![]()
You can buy the Corsair RMi Series 1000 watt power supply from Overclockers for £144.95 inc vat.
Discuss on our Facebook page, over HERE.
Pros:
- high build quality.
- fully modular.
- low noise.
- technically very capable.
- 105c Japanese capacitors throughout.
Cons:
- Faces stiff competition from brands such as Seasonic.
Kitguru says: The Corsair RMi Series 1000 watt power supply is built to the same high standards as the RMi 750W model, but it can deliver around 1,100 watts – targeting the audience who need more juice from the +12V rail(s).

I guess this should be enough to power up 4 way 980s?
ideally you might want to aim for 1250W. 1000W should handle it, but you are likely going to be running at 80% load all the time. A quality 1250 Watt PSU will be more in the sweet zone for efficiency and reduced sustained demand on the caps.
@disqus_L3DqeZAL3n:disqus ◬✈◭✈◮✔ Use Your Free Time….➨✈✔✈➨✔ Just Make A Huge profit Only doing Simplly work Of Google Tasks….. LAST thursday I bought a gorgeous BMW since getting a check for $9693 this-past/month and just over 10k this past month . it’s definitly the best-job I’ve ever had . I started this eight months/ago and right away began to earn minimum $83 per-hr . —>
☄☄☄☞ https://www.GenuineOnlineJobsOpportunity.com
I have this for my new pc. 5820k asrock extreme4 980 ti 32gb ram at 2166 or 2400 default plug and tting W/o xmp profi , but ram rated 3000. Without any oc, i run hdmi cable on a samsung tv. I placed all the contors in the part with the cooler, motherboard connector pce and cpu pins. I get coil whine when i game. Most sounds are made by he psu. What shall i do? Everything runs good and cold and the psu cooler doesnt turn on at all. I hear more coil whine than coolers. I curently built it on a cartoon box, i wait for the case to come tomorrow.
I do not have internet home, i just installed windows and gta5 and it works great. I have an 960 4gb oc edition, when change the 980 ti with it the 960 doesnt have coil whine as with the 980 ti, at least not as notifiable. Shall i use 2 cables or 1 for the power hungry kfa2 hof 980 ti 2×8 pin? Where shall place the type4 on the back of the psu or it doesn’t matter?