

The Streacom DB4 arrived double-boxed for extra peace-of-mind. As our sample is a review unit, we did not get the usual accessories (such as quick-start guide, cable ties etc) but the system is pre-built.
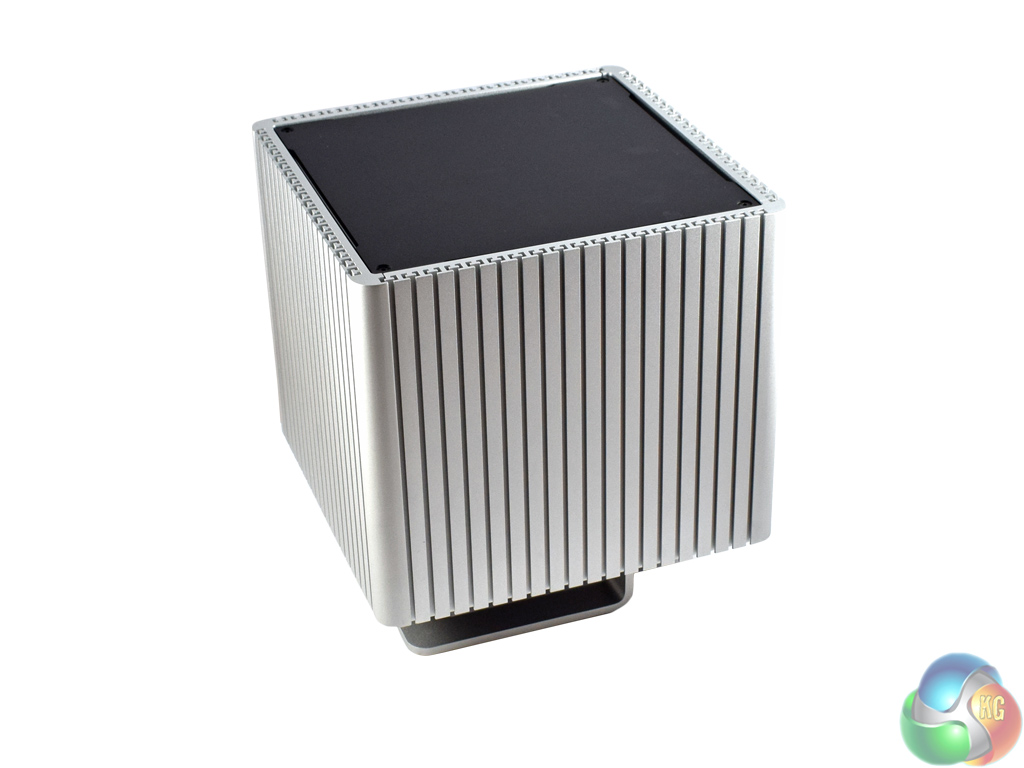
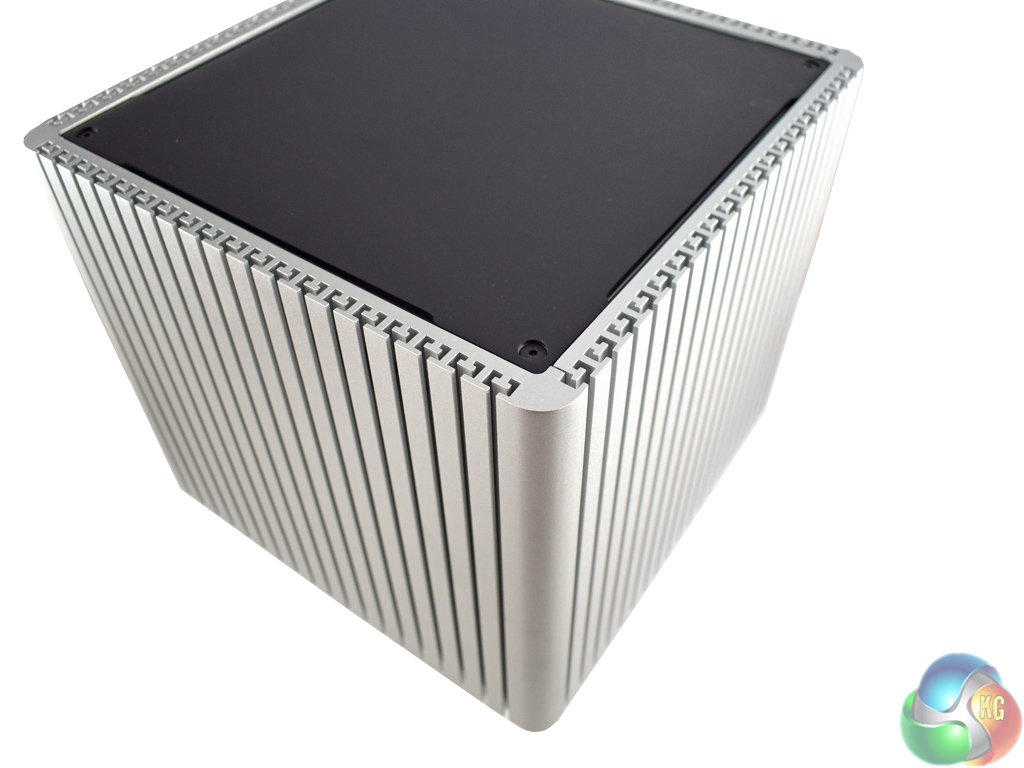
The chassis itself is made from sturdy, 13mm-thick aluminium side panels. This is specifically done to ensure the best possible cooling performance, since – as we shall see in a moment – a whole side panel acts a huge heatsink to dissipate heat.
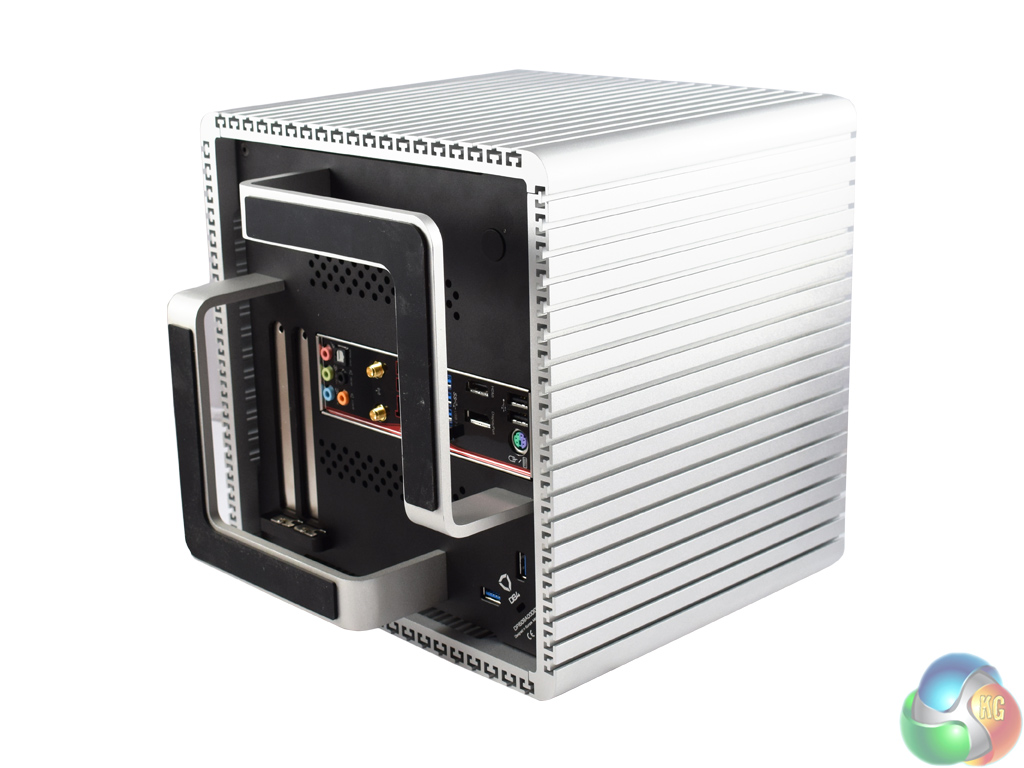
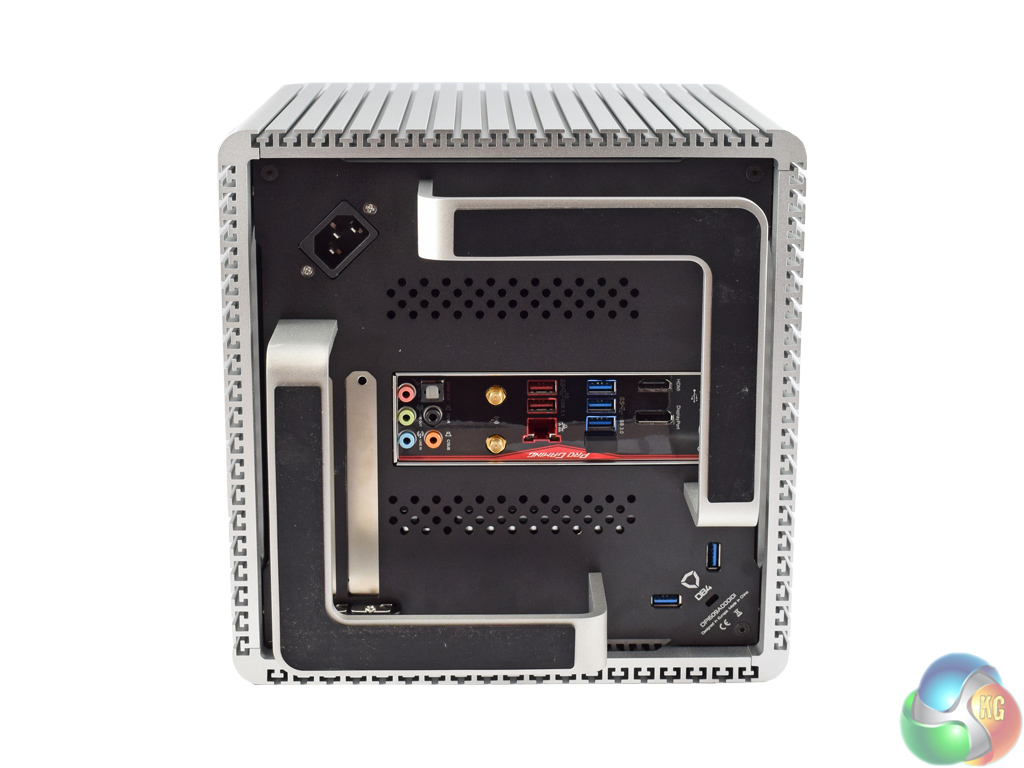
While the chassis is very compact – a cube-style Mini-ITX design, measuring 260 x 260 x 270mm (W x D x H) – it rests on two L-shaped feet at the bottom. These feet raise the case itself about an inch-and-a-half off the ground, supposedly allowing access to the motherboard I/O and ‘front' USB 3.0 ports, both of which are positioned on the underside panel of the case.
However, perhaps the biggest problem with the DB4 is that the feet make accessing these ports no easier. Realistically, unless you are capable of a) plugging in USB ports without looking, and b) being able to do so in a very confined space, you will need to lift the DB4 up to gain access to the I/O. This is very inconvenient – nobody wants to have to lift up their case, weighing 7.5kg without components installed, every time they want to plug and unplug a USB drive, for instance. No matter how cool and funky a case may be, being practically unable to access all of the I/O ports is a huge problem. It makes the purchase of a USB hub almost a necessity.
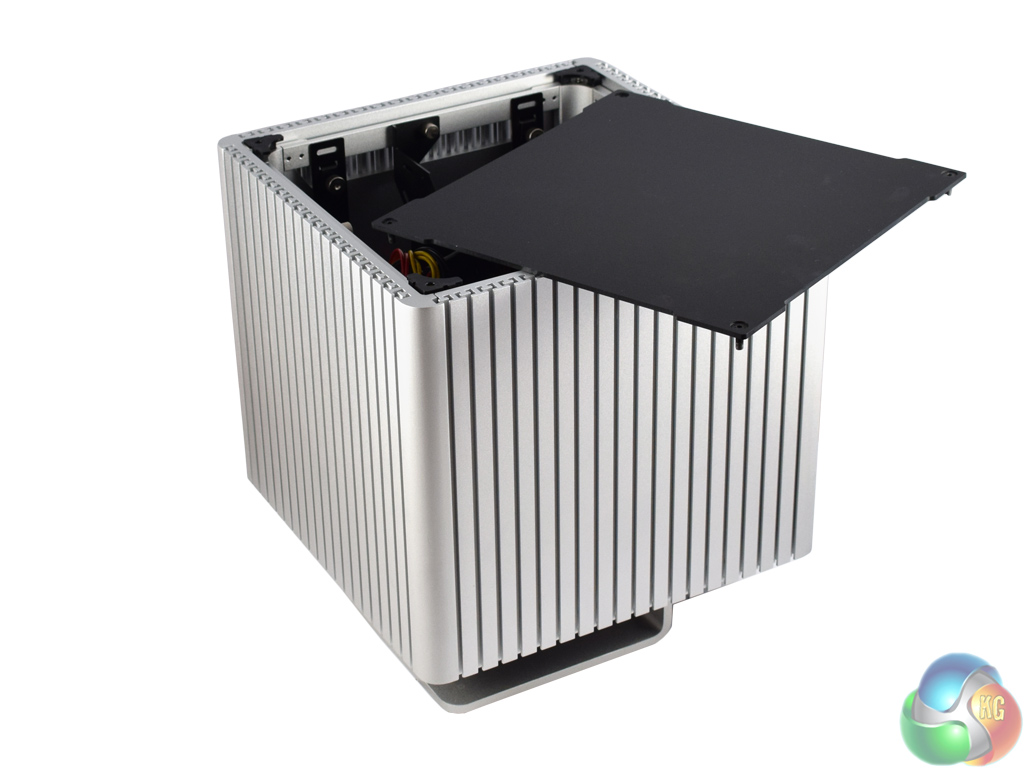
Moving on, the first step to gaining access to the innards of the chassis is to remove the top panel. This is held in place with 4 hex-screws, so you will have to use an Allen key to remove them. Fortunately, one comes included if you buy the DB4.
Then, the first side panel can be removed. Side panels need to be lifted up and then pulled away, as they use ‘posts' to lock into place to the main frame of the case.

From there, you can repeat the process for the 3 remaining side panels.
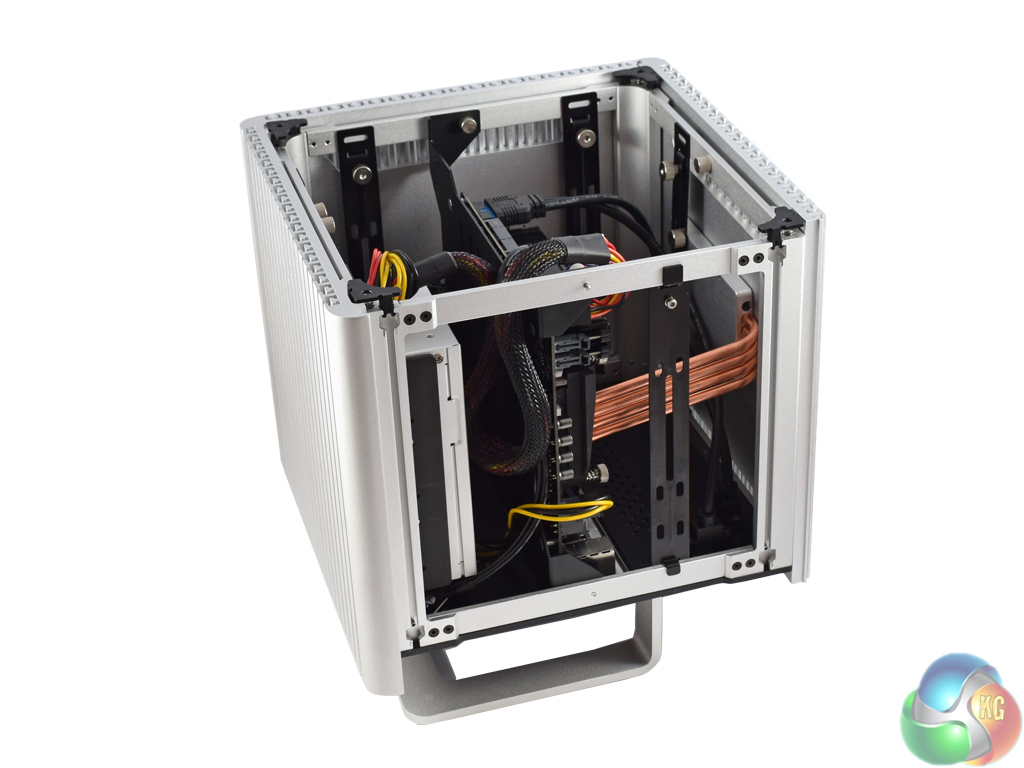
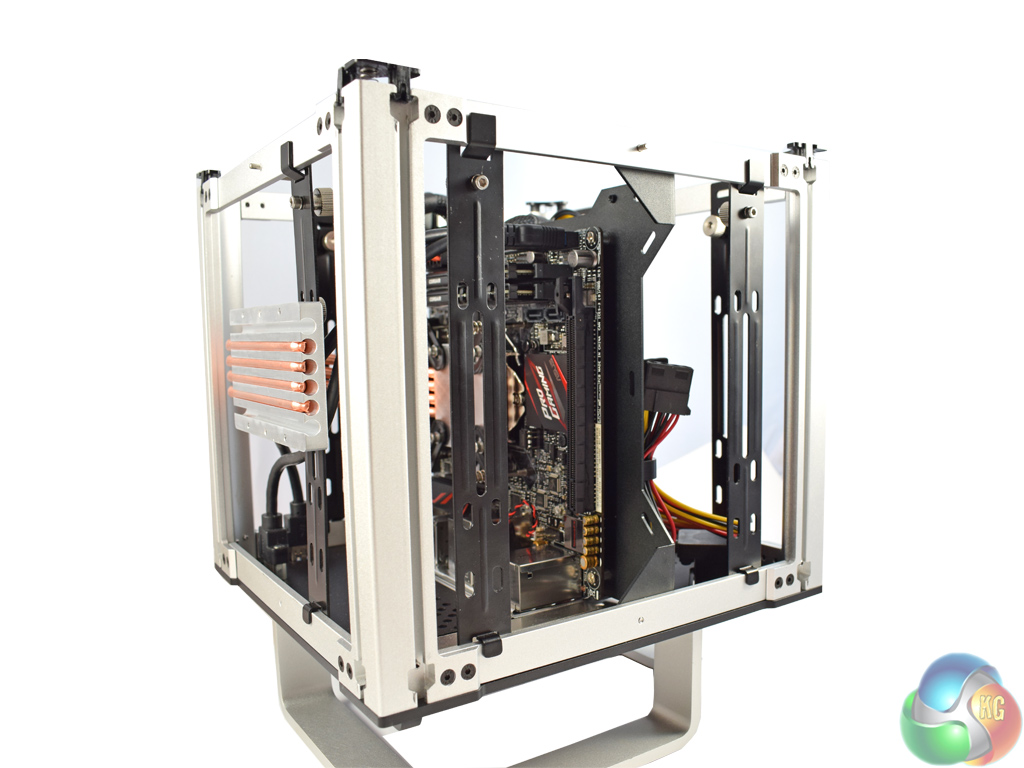
What's left is the skeleton frame of the DB4, and having a look inside shows us how the cooling system works. A copper block is installed to the CPU, with four heatpipes leading away to a rectangular ‘heat sink mount', as Streacom call it. This makes contact with a side panel, allowing the heat to dissipate.
While the model with four heatpipes (the one in for review today) has a TDP of 65W, it is possible to upgrade the cooling potential by adding in the ST-LH6, which utilises a second side panel for enhanced cooling. This solution increases the TDP to 105W.
It is also worth pointing out that in our pre-built configuration, there is no graphics card. As the DB4 uses a Mini-ITX motherboard, it is possible to use a single x16 expansion card, though these must be no more than 200mm in length and 116mm in height.
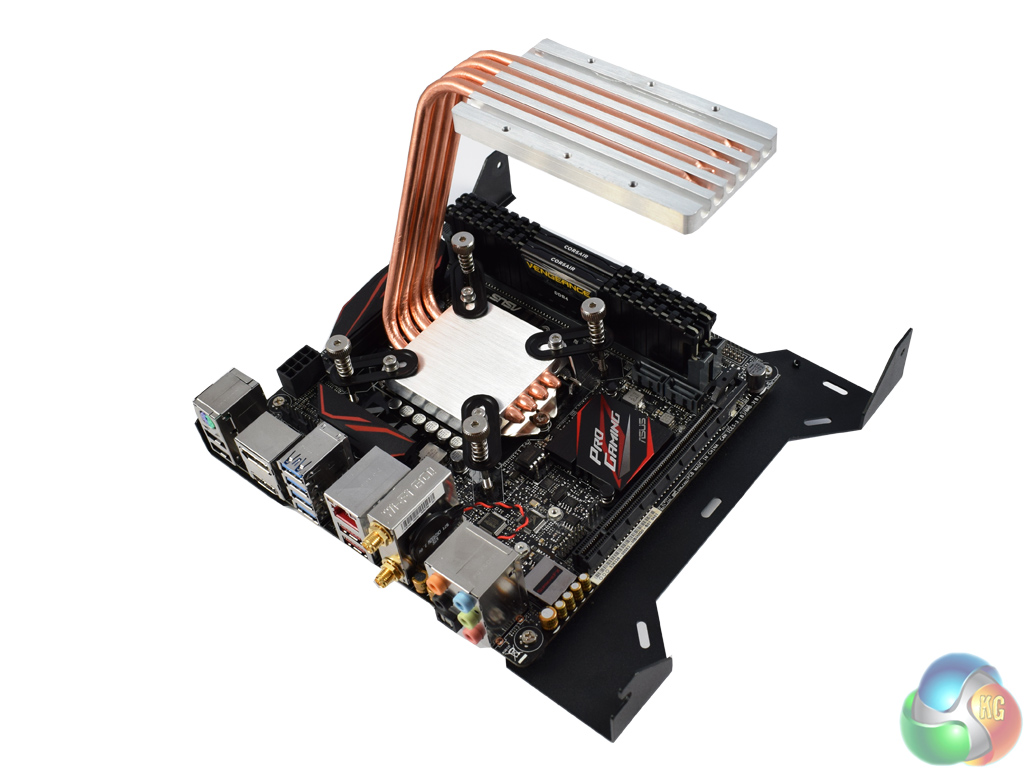
Finally, the DB4 has one last party trick – the motherboard tray is fully removable. This allows easy installation of the CPU cooler, as well as RAM and an M.2 SSD, for example, before the motherboard is installed in the small chassis.
It is like an post-Steve apple product, looks nice but is impractical in many ways.
Impractical in what way? How many other cases offers 100% fanfree installation? And i bét they used the thermal pad instead of regular grease and a 91 TDP cpu when the case cpu cooler have a 65 TPD recomend. This can take care of a i7 no problem and FANFREE with the additional cpu mount, no other case can that.
What this have to do with the case bring practical? I am taking about where the ports are located. It is impractical to use on a workflow like that.
True but how often do you need to change? A USB hub and it’s fixed otherwise its pretty compact, stylish looking and you don’t have to worry about the cables inside since there are no airflow to take in consideration.
sure but it could be so much prettier if they where at least 2 usb incorporated in the design (I for example always need to plug and unplug external storage or my phone, but 2 are enough) and save you the extra step of a hub (which will also be more ugly cables on your desk.
This is why I say is like an apple product, where they remove practical ports just for the sake of minimalism.
But Steve Jobs had it right back then “Design is not just what it looks like and feels like. Design is how it works.” and design lately tend to forget that form follow function.