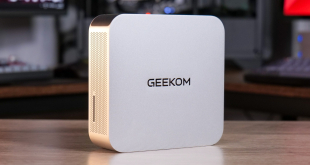
There are some similarities between the ASUS ROG Strix H370-F Gaming and its Z370 equivalent, but it is clear to see the design is substantially different in places. In general heatsinks are smaller and the plastic shroud is bigger and boxier. That said, in the context of H370 rivals, this ASUS motherboard is colour neutral and sensibly designed to blend into most builds.
The printed grey text across the motherboard's PCB is somewhat peculiar, though, including phrases like “Game On”, “ROG Strix”, “Republic of Gamers” and “Join the Republic of Gamers”. ROG motherboards of past have usually been more subtle and refined than this so hopefully this doesn't become a new trend.

In keeping with current market trends, ASUS has matched those neutral colours (blacks, greys and silvers) with user-customisable RGB lighting for a splash of colour. There is just a single on-board RGB lighting zone integrated into the rear I/O shroud which is fully customisable in the ASUS AURA software. A 12v G R B header for LED strips is also available for additional customisation.
The on-board LED is bright and easily configurable but for a motherboard of this price point perhaps more than one LED zone would have been desirable. MSI's H370 Gaming Pro Carbon is the notable rival in that regard.

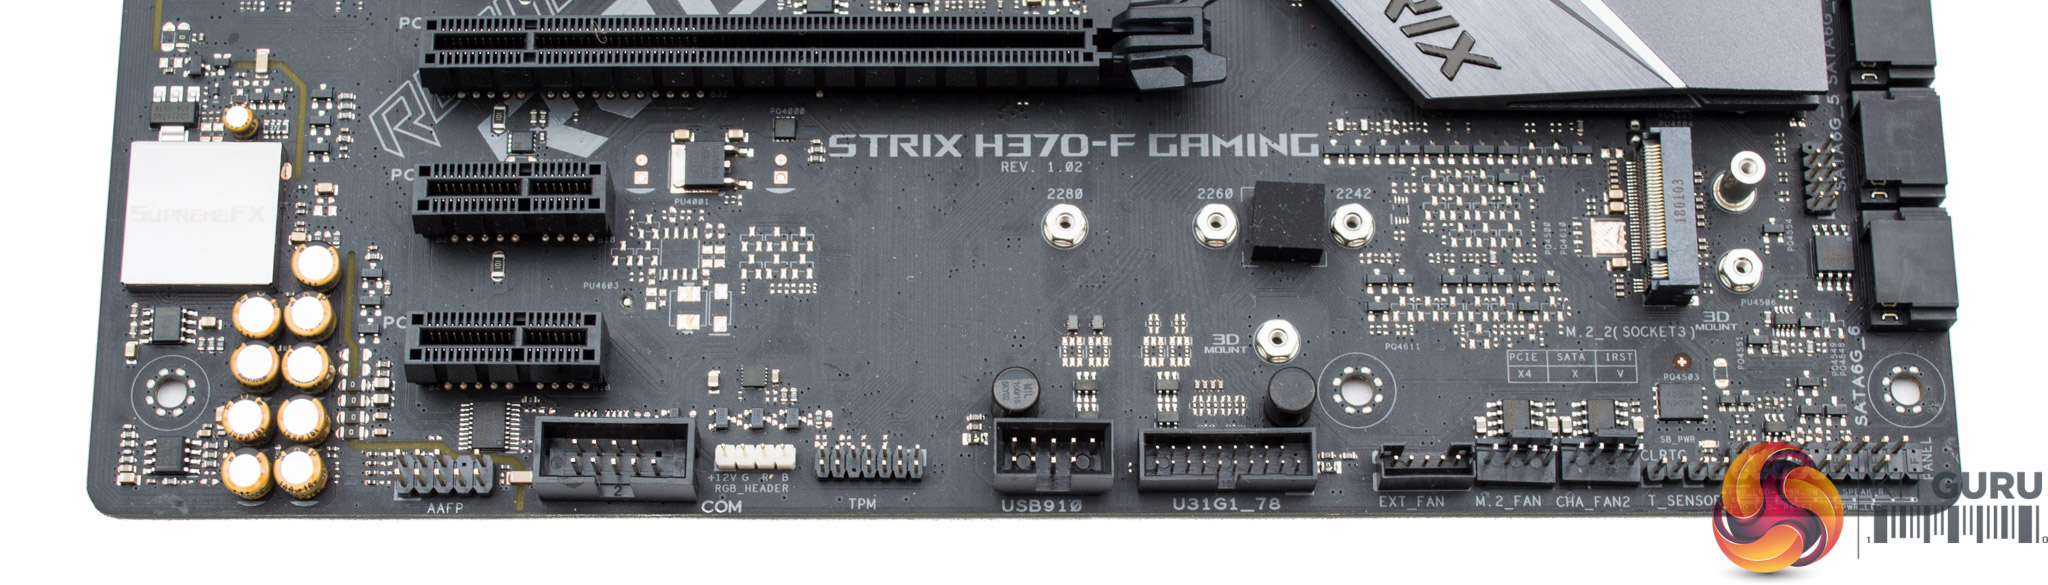
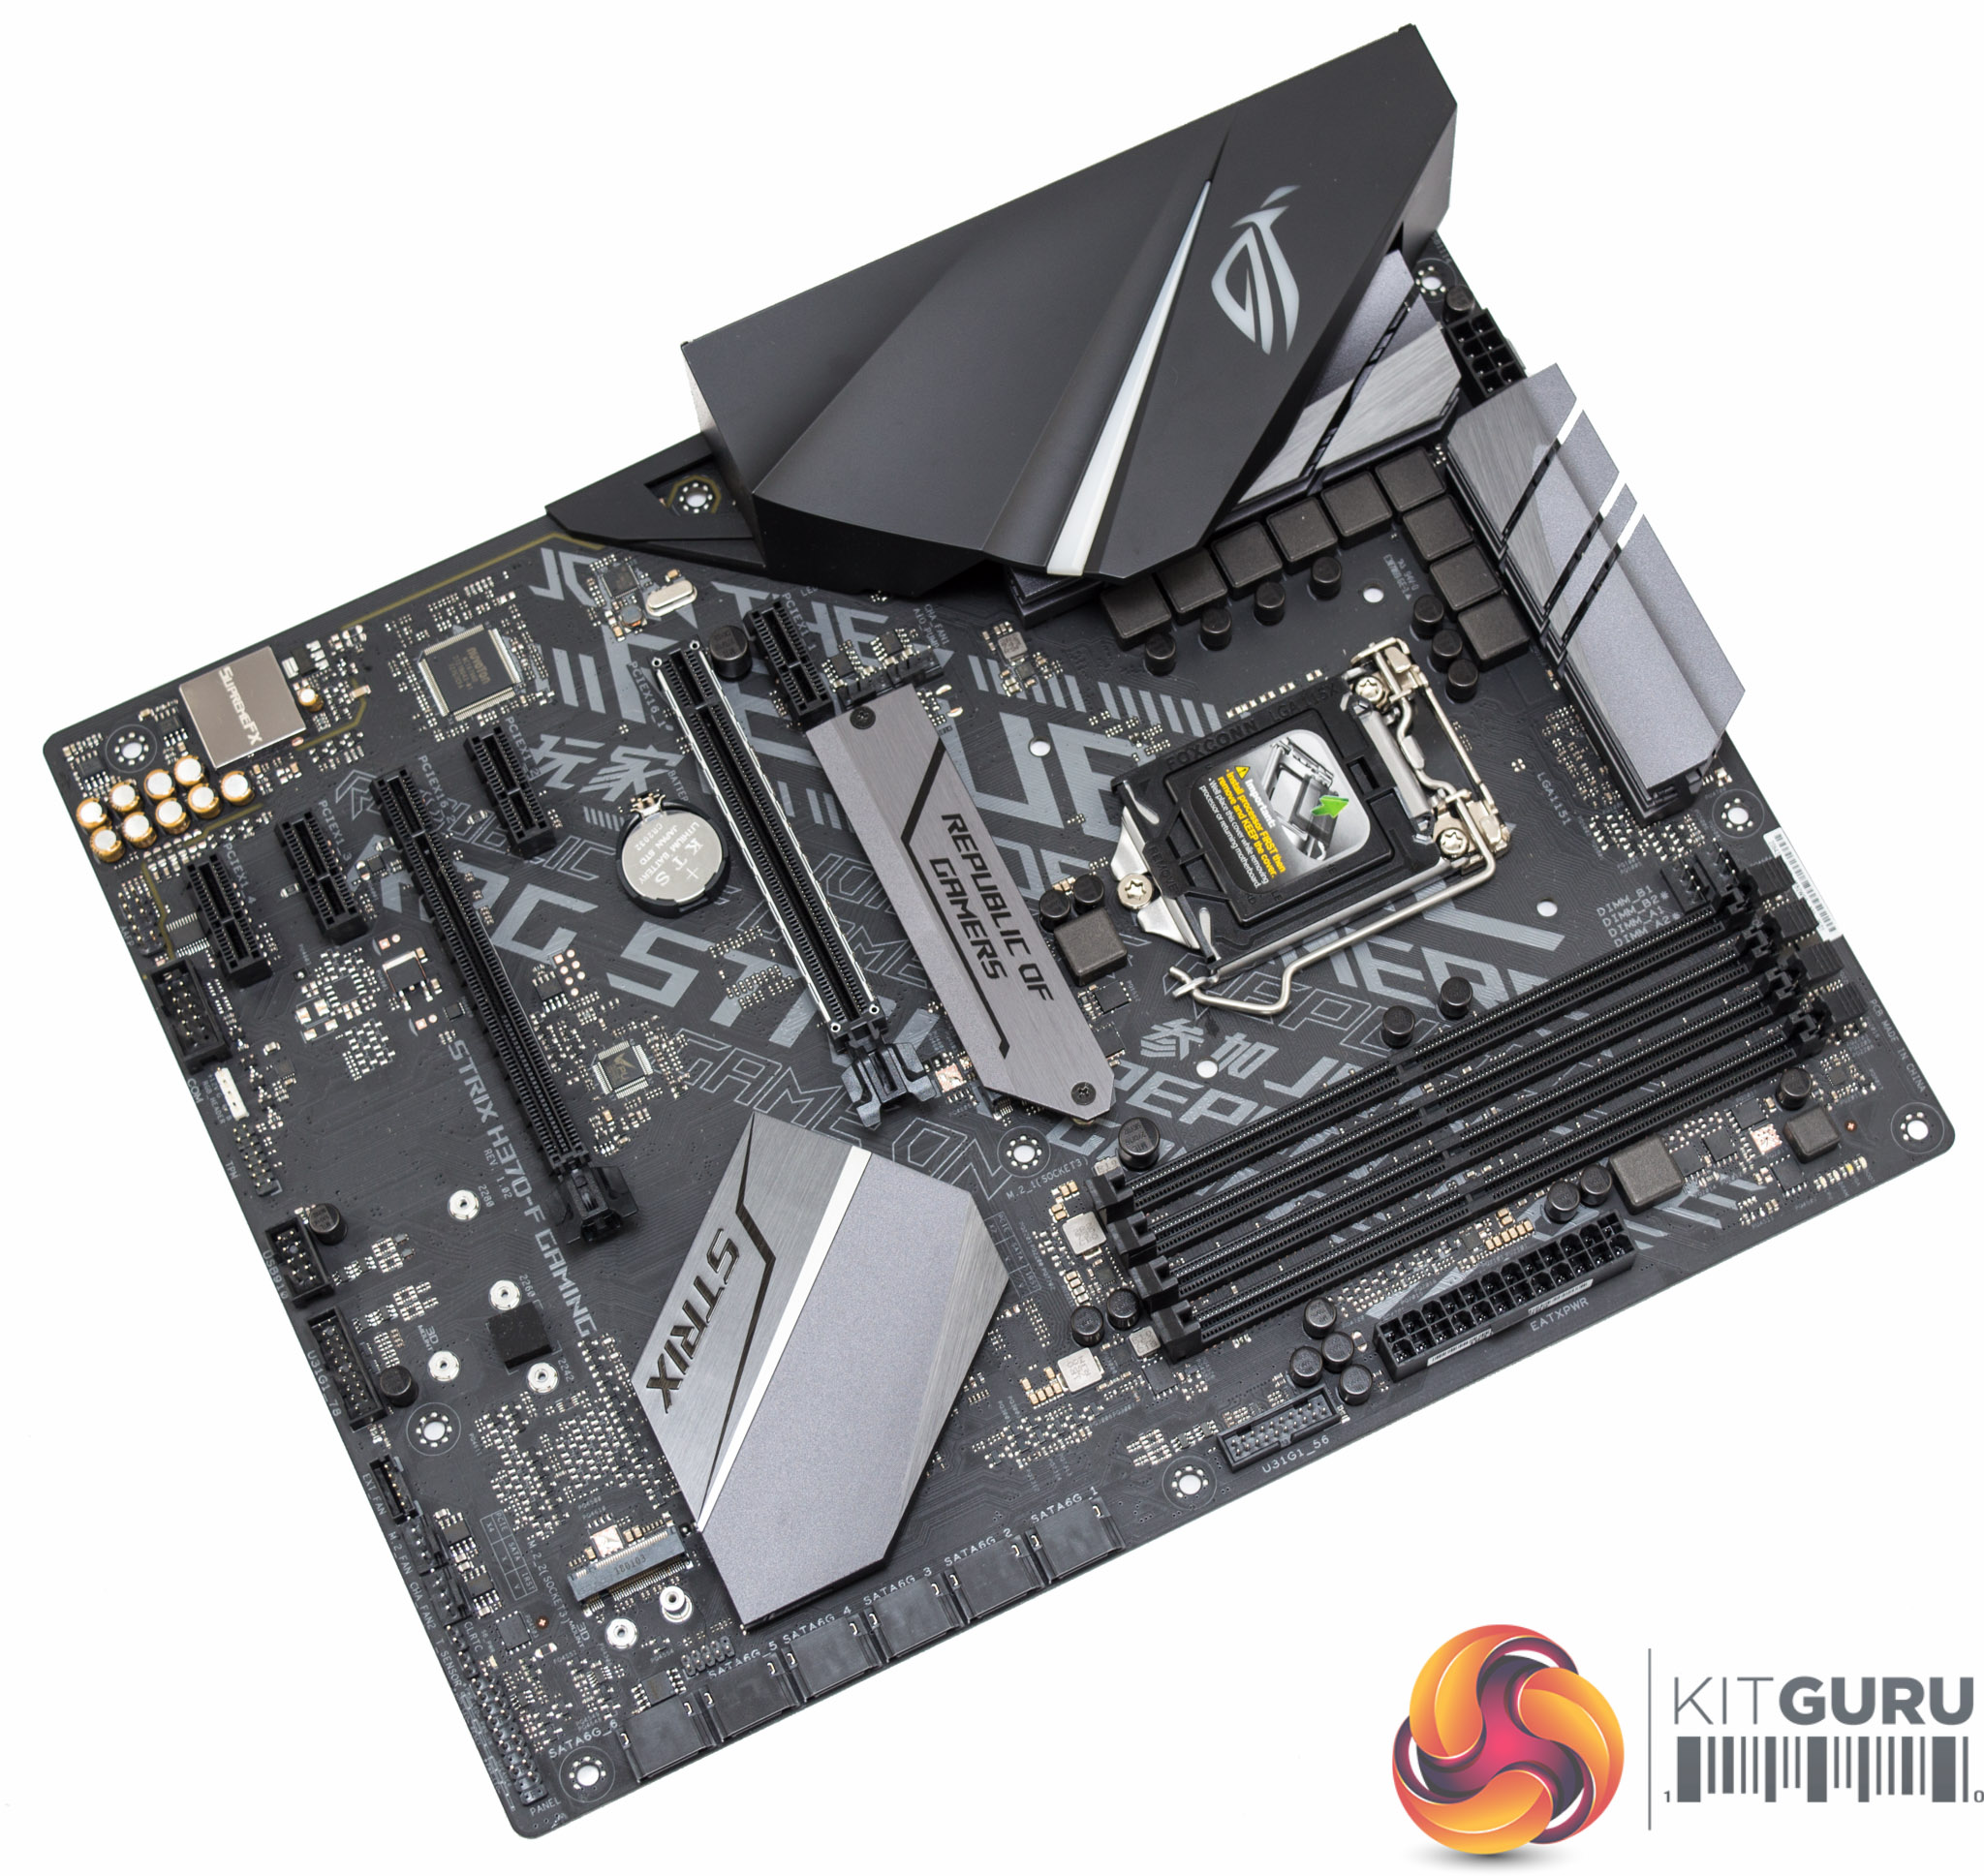
There are six SATA ports lined up individually rather than stacked two high, which is rather unusual but potentially easier to build with.
Near the motherboard 24-pin is the first USB 3.0 header and four diagnostic LEDs for Boot, VGA, DRAM and CPU to compensate for the lack of a code-reader. That said, when overclocking is not supported the chances of needing any form of diagnostic code reader or LED system is fairly low unless there are hardware compatibility issues during building, or a complete hardware failure later on.
Along the bottom edge of the board we find the RGB header and the second USB 3.0 header. Two fan headers are positioned next to the second M.2 slot (M2_2) which operates at PCIe 3.0 4X, but this slot is not cooled by default. There are, however, 3D mounting holes around the second M.2 slot which allows for a fan bracket and optional fan (fan header marked M.2_FAN) to be fitted. ASUS provides the 3D templates for that fan bracket here.
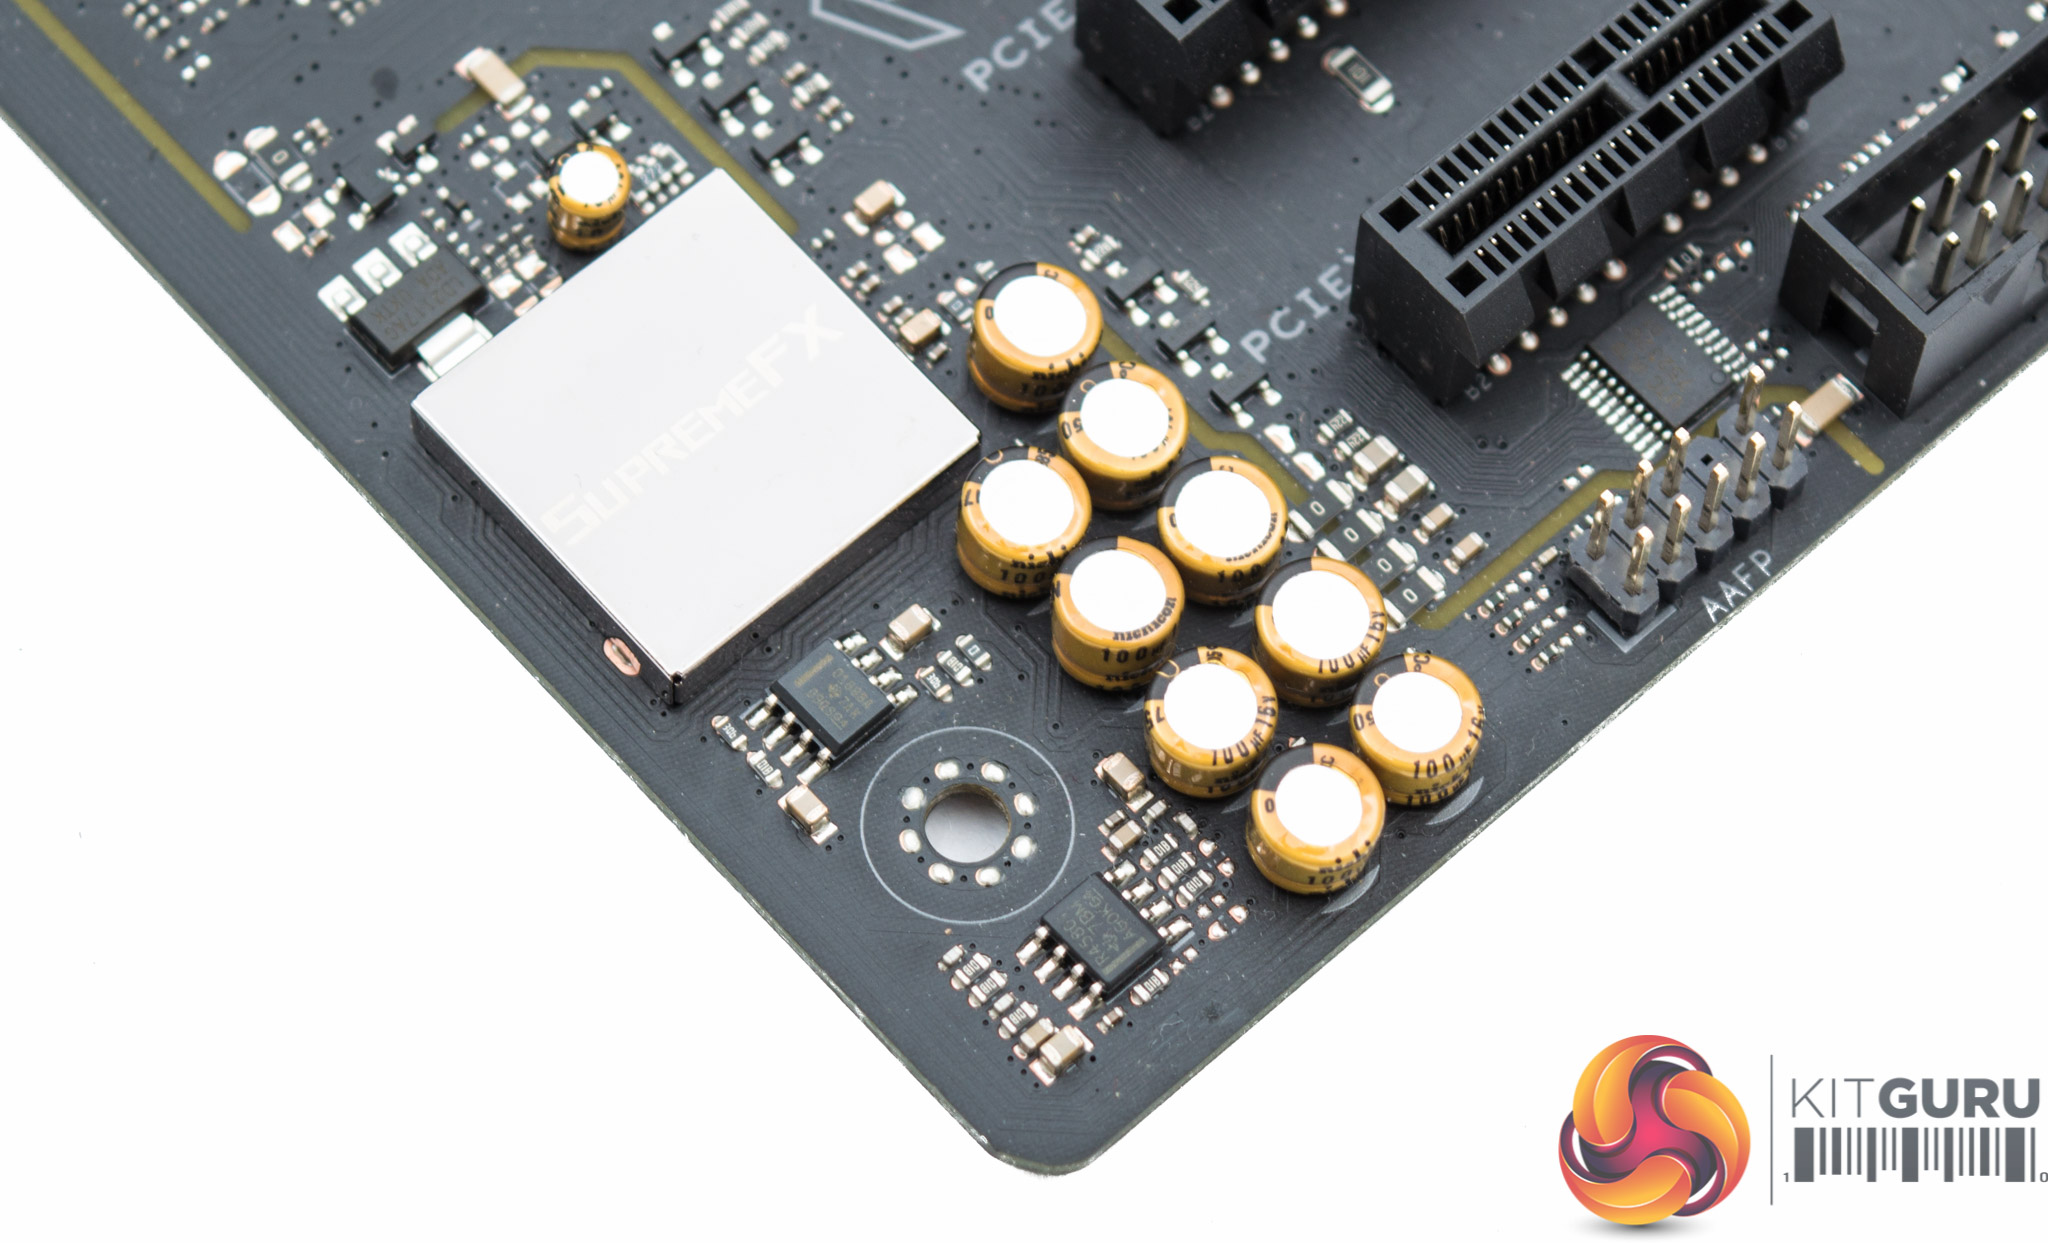
The audio area uses an isolated PCB and deploys Nichicon gold-series audio capacitors, a shielded Realtek ALC1220 codec (packaged as ROG Supreme FX S1220A) and dual headphone amplifiers (Texas Instruments RC4580 and OPA1688).
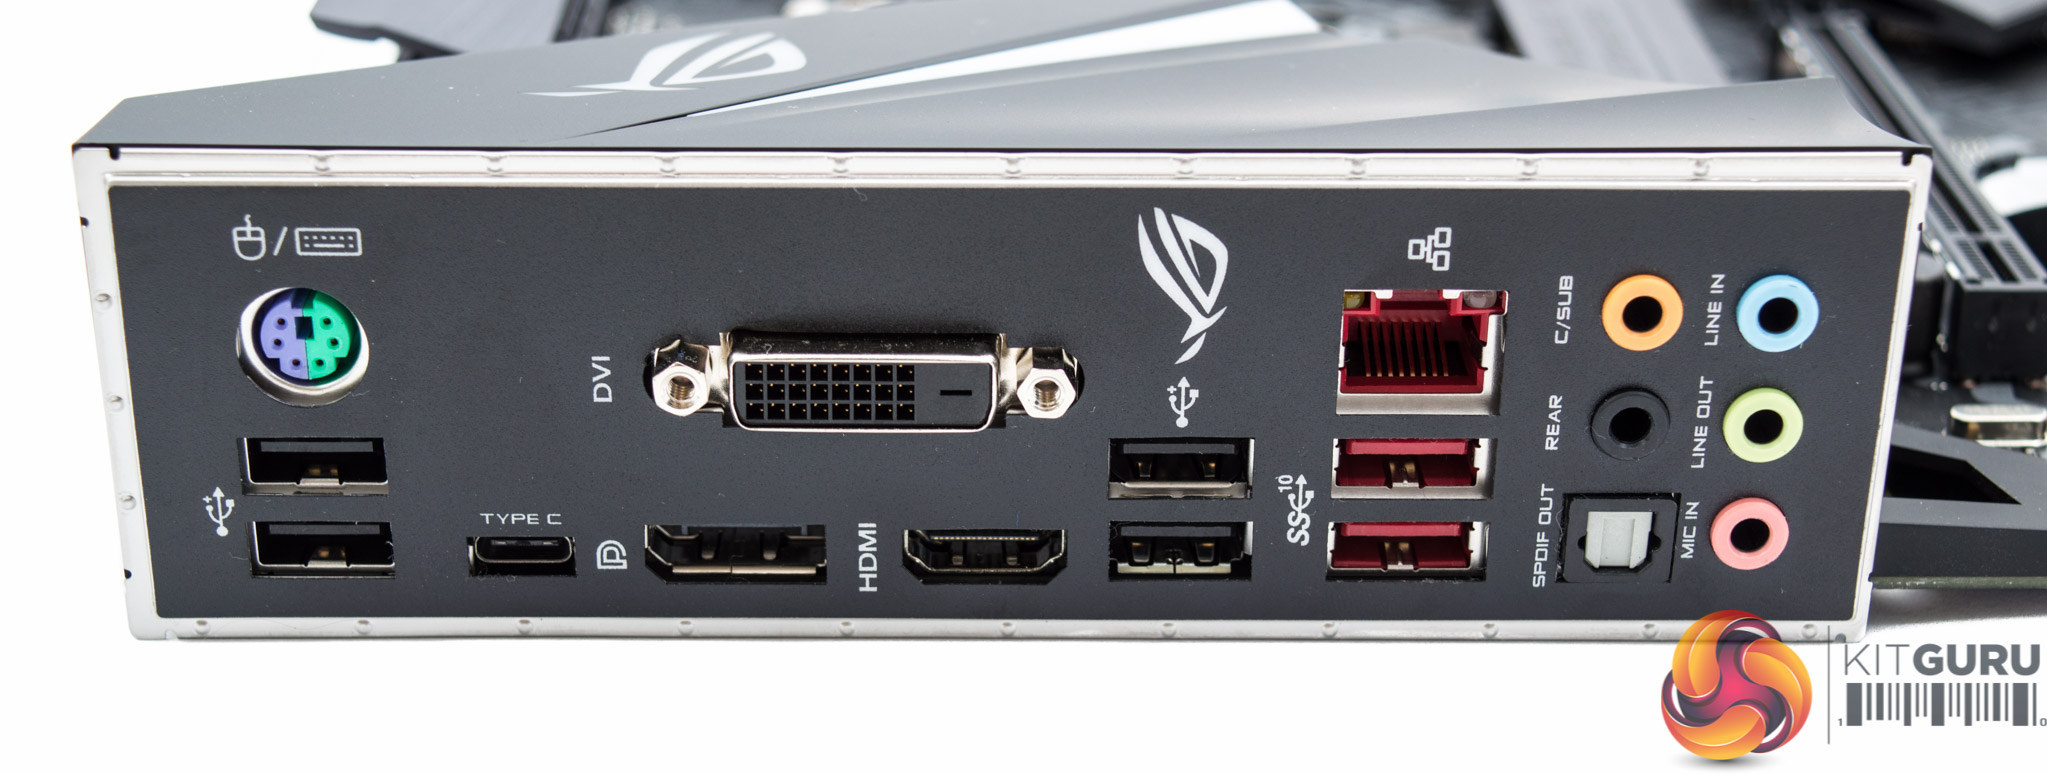
The rear I/O has a sleek-looking pre-mounted I/O shield along with decent display and USB connectivity. Full connectivity is as follows:
- 1 x PS/2
- keyboard/mouse combo port(s)
- 1 x DVI-D1 x DisplayPort
- 1 x HDMI
- 1 x LAN (RJ45) port(s)
- 1 x USB 3.1 USB Type-C
- 2 x USB 3.1 Type-A
- 4 x USB 2.0
- 1x Optical S/PDIF out
- 5 x Audio jack(s)
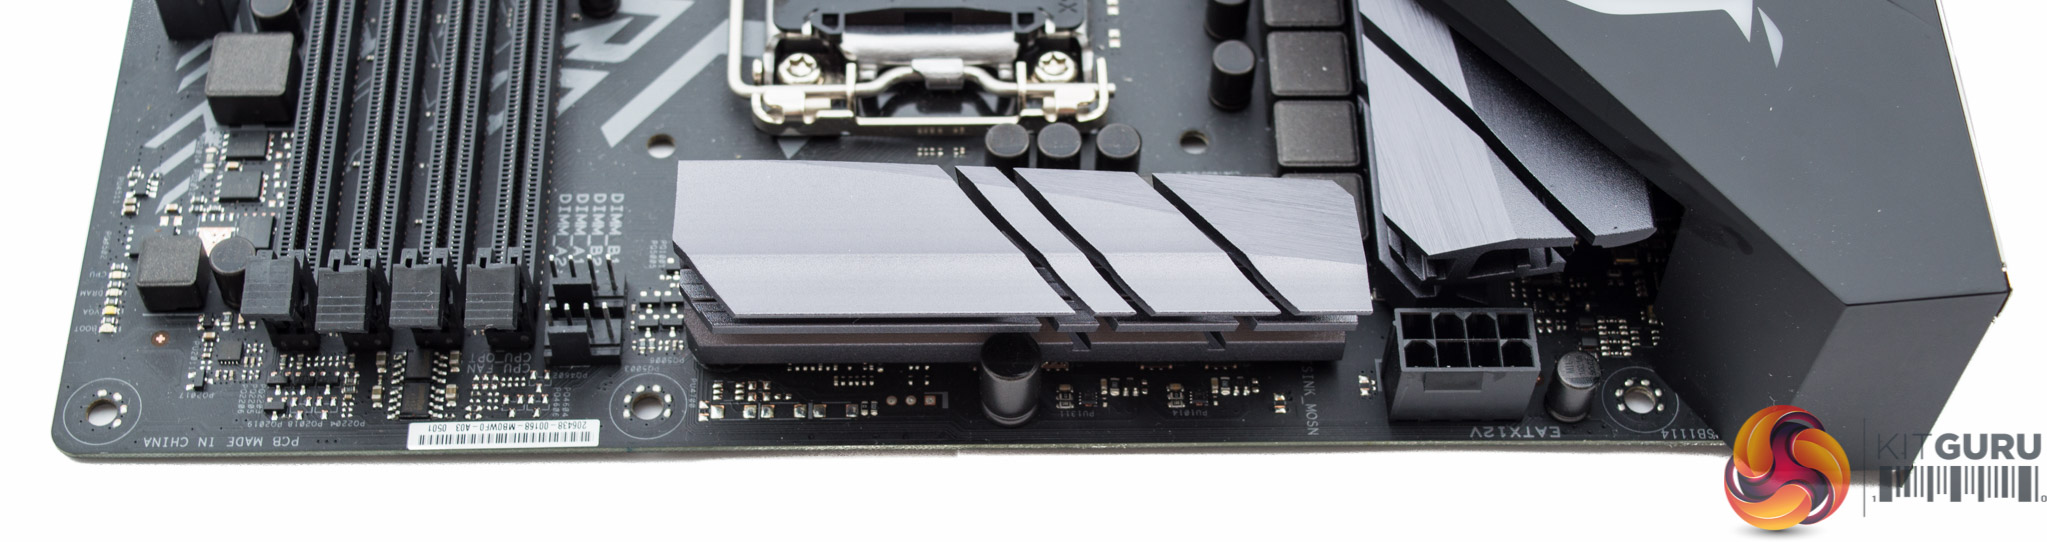
Along the top of the motherboard are two fan headers for the CPU cooler, a couple of VRM heatsinks and a single 8-pin EPS connection.
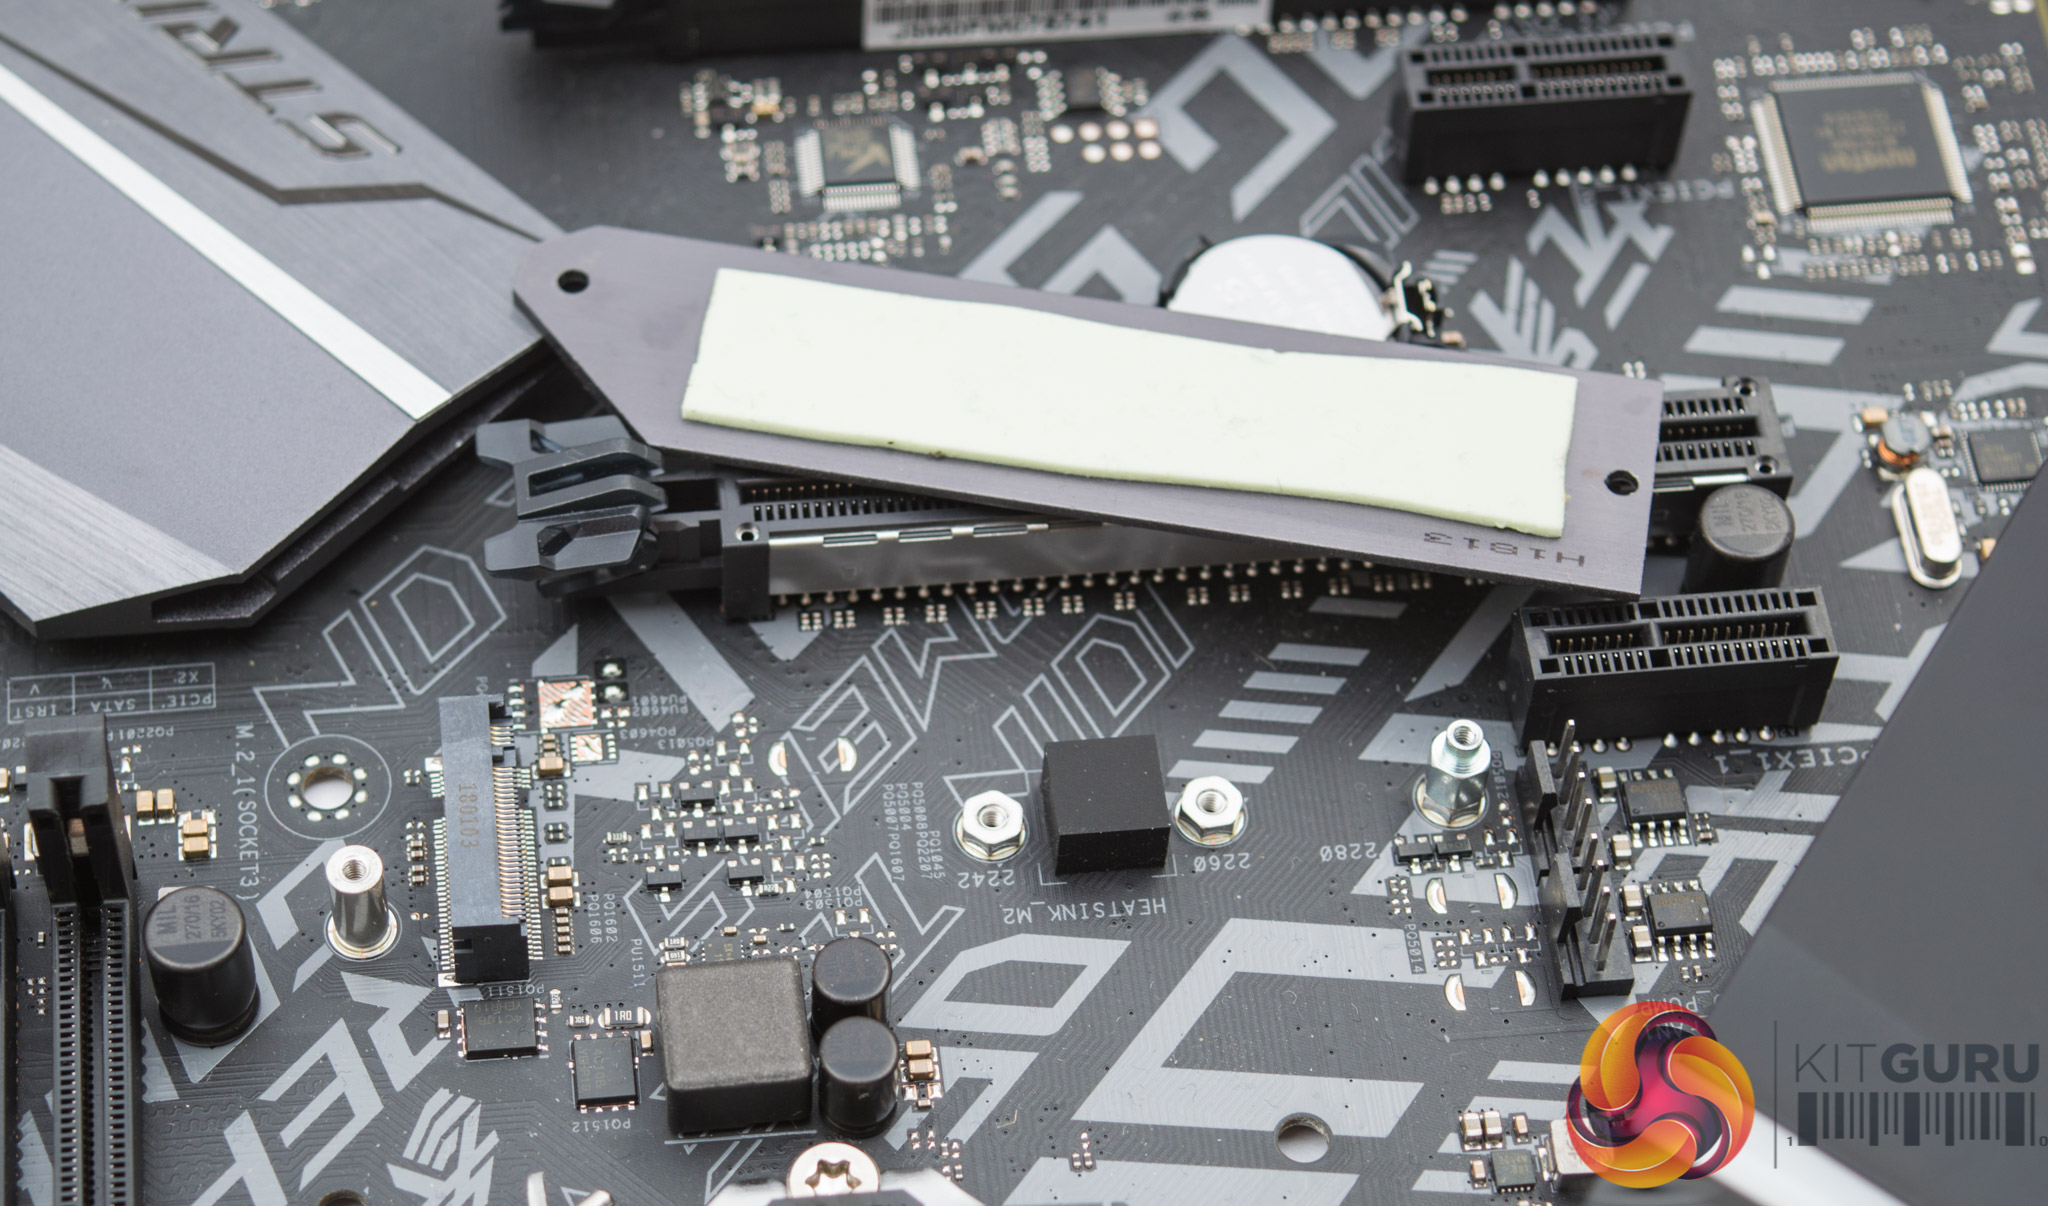
In the middle of the board is the cooled M.2 slot (M2_1) which is cooled by a custom heatsink. There is a fairly significant design oversight here which is that this cooled slot can only run at PCIe 3.0 2X, limiting the speed of most performance M.2 drives, while the full speed M.2 slot (M2_2) is not cooled.
The temperature results for the cooled slot will be incomparable to rival motherboards since the M2 drive is not working at full speed. Given most users will likely own just one M.2 drive, would they sacrifice performance in favour of lower operating temperatures? It does seem unlikely.
Two more fan headers are found mid-board next to the M.2 heatsink meaning four fan headers are within easy reach of the CPU socket.
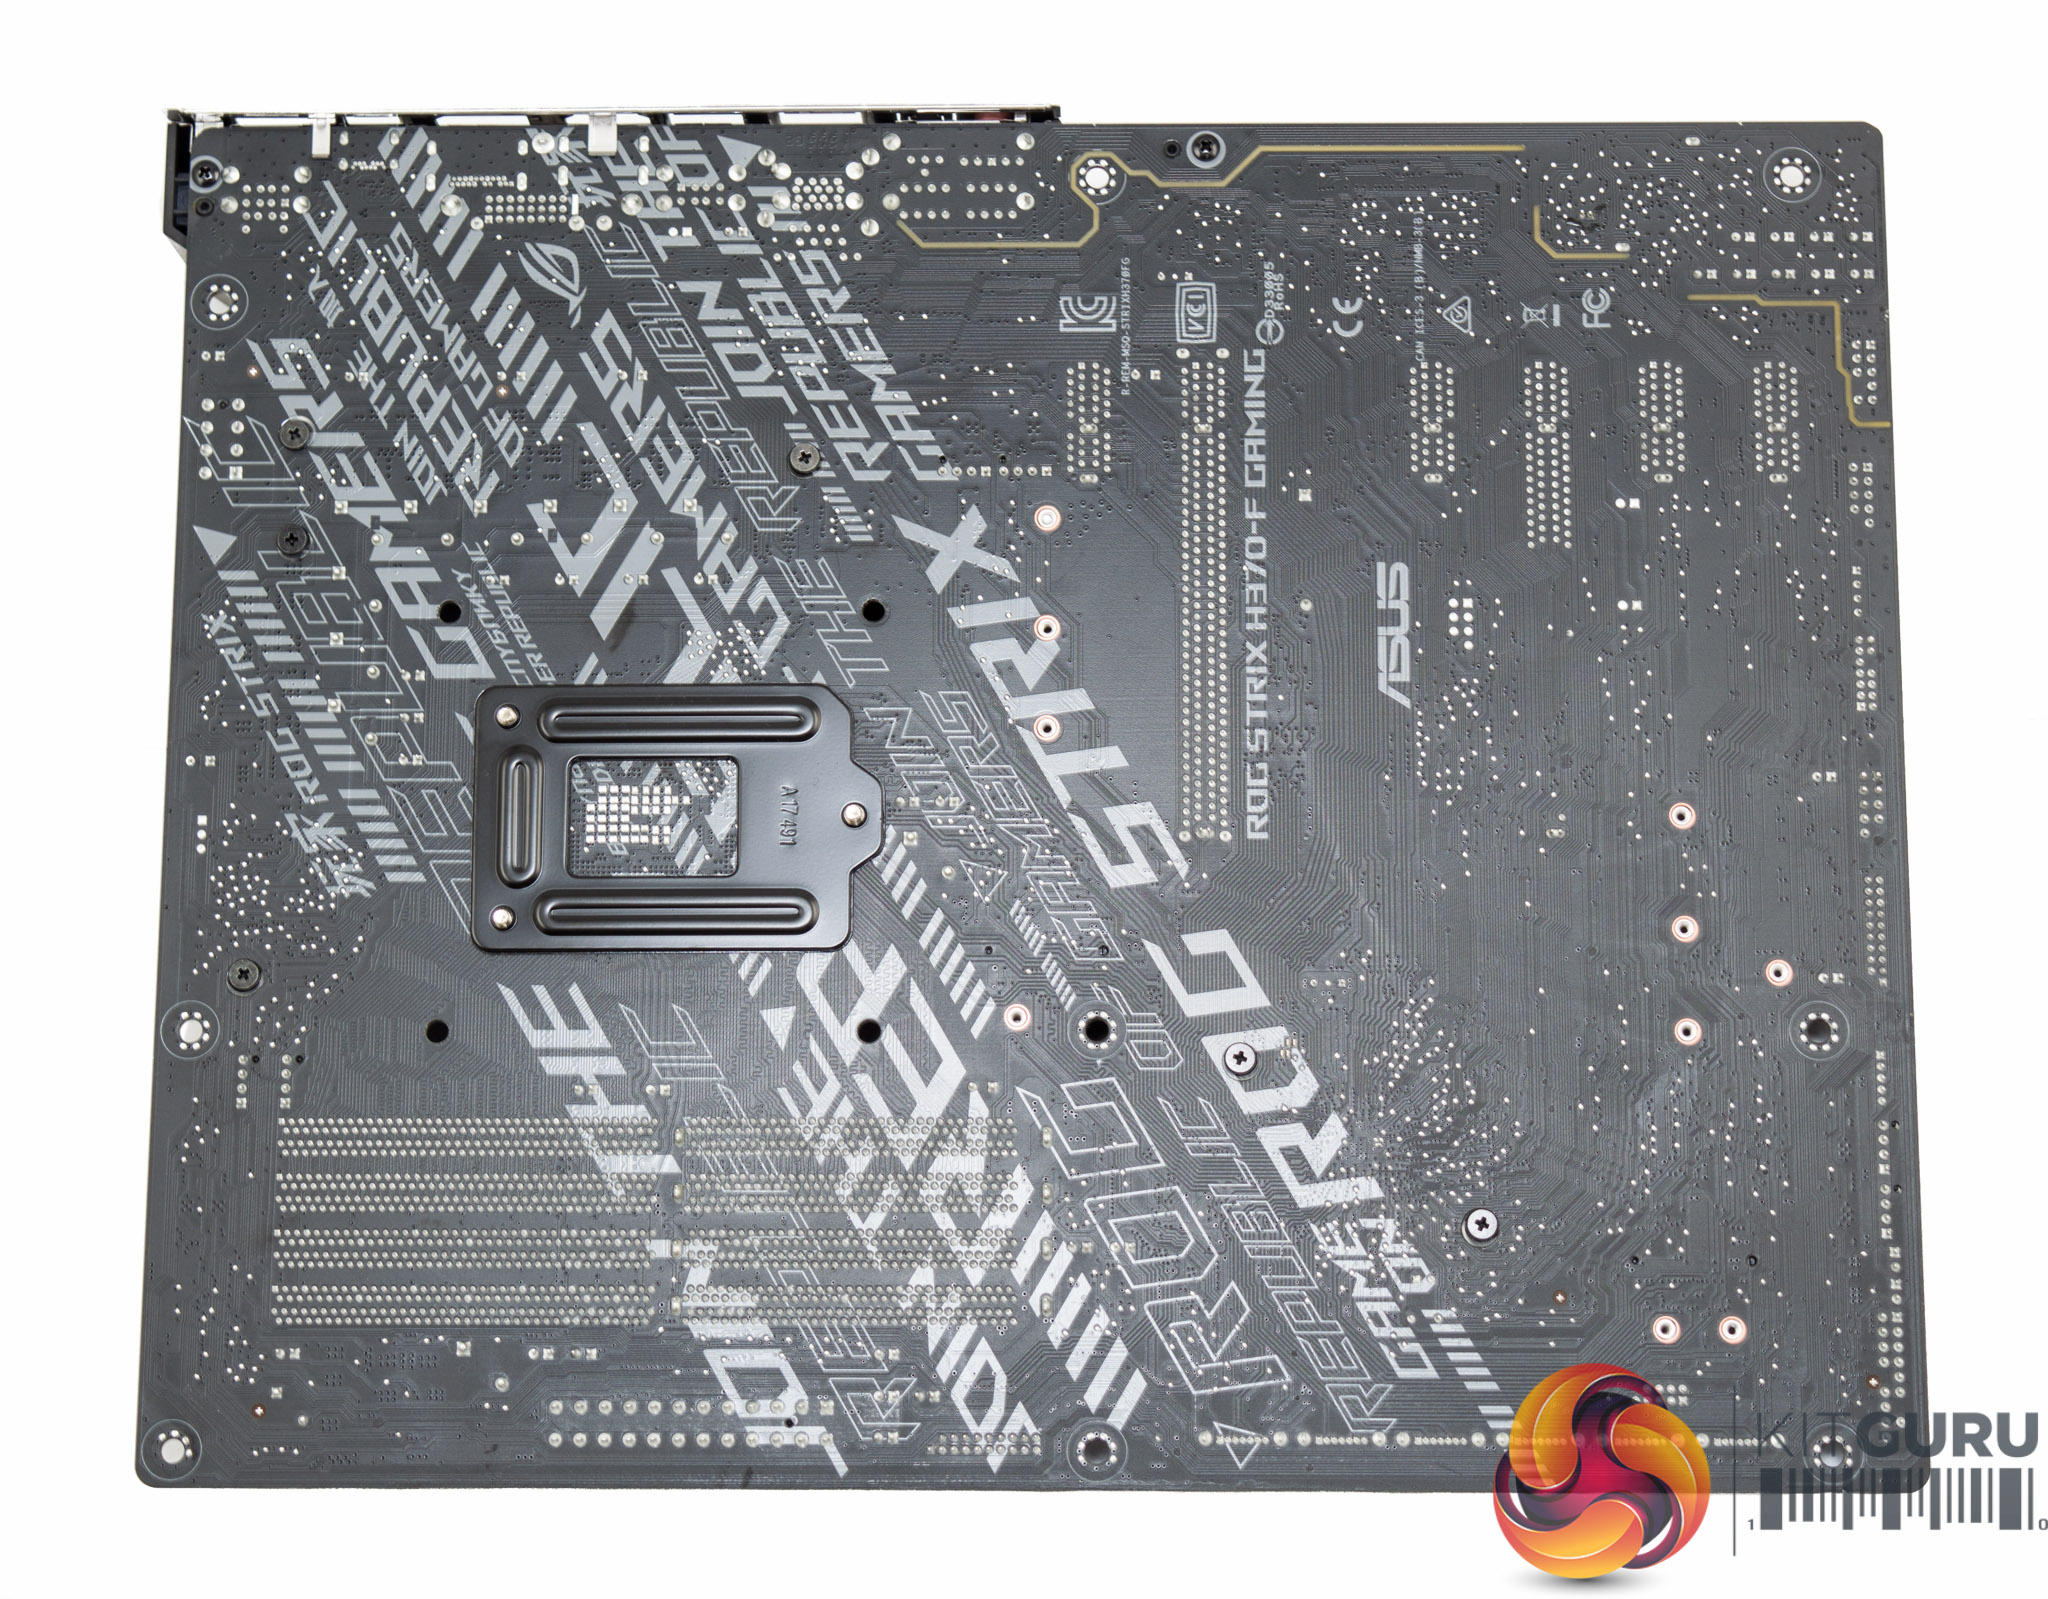
The rear of the motherboard is completely free of soldered components, given the lower density of H370 motherboards compared to Z370. Underneath, the ASUS approach of printing decals and phrases on the PCB can be seen even clearer. It won't be to everyone's taste and comes off as trying too hard to be “cool” and “down with the gamers”, thankfully it is less obvious on the top than the bottom and generally difficult to see in low light.
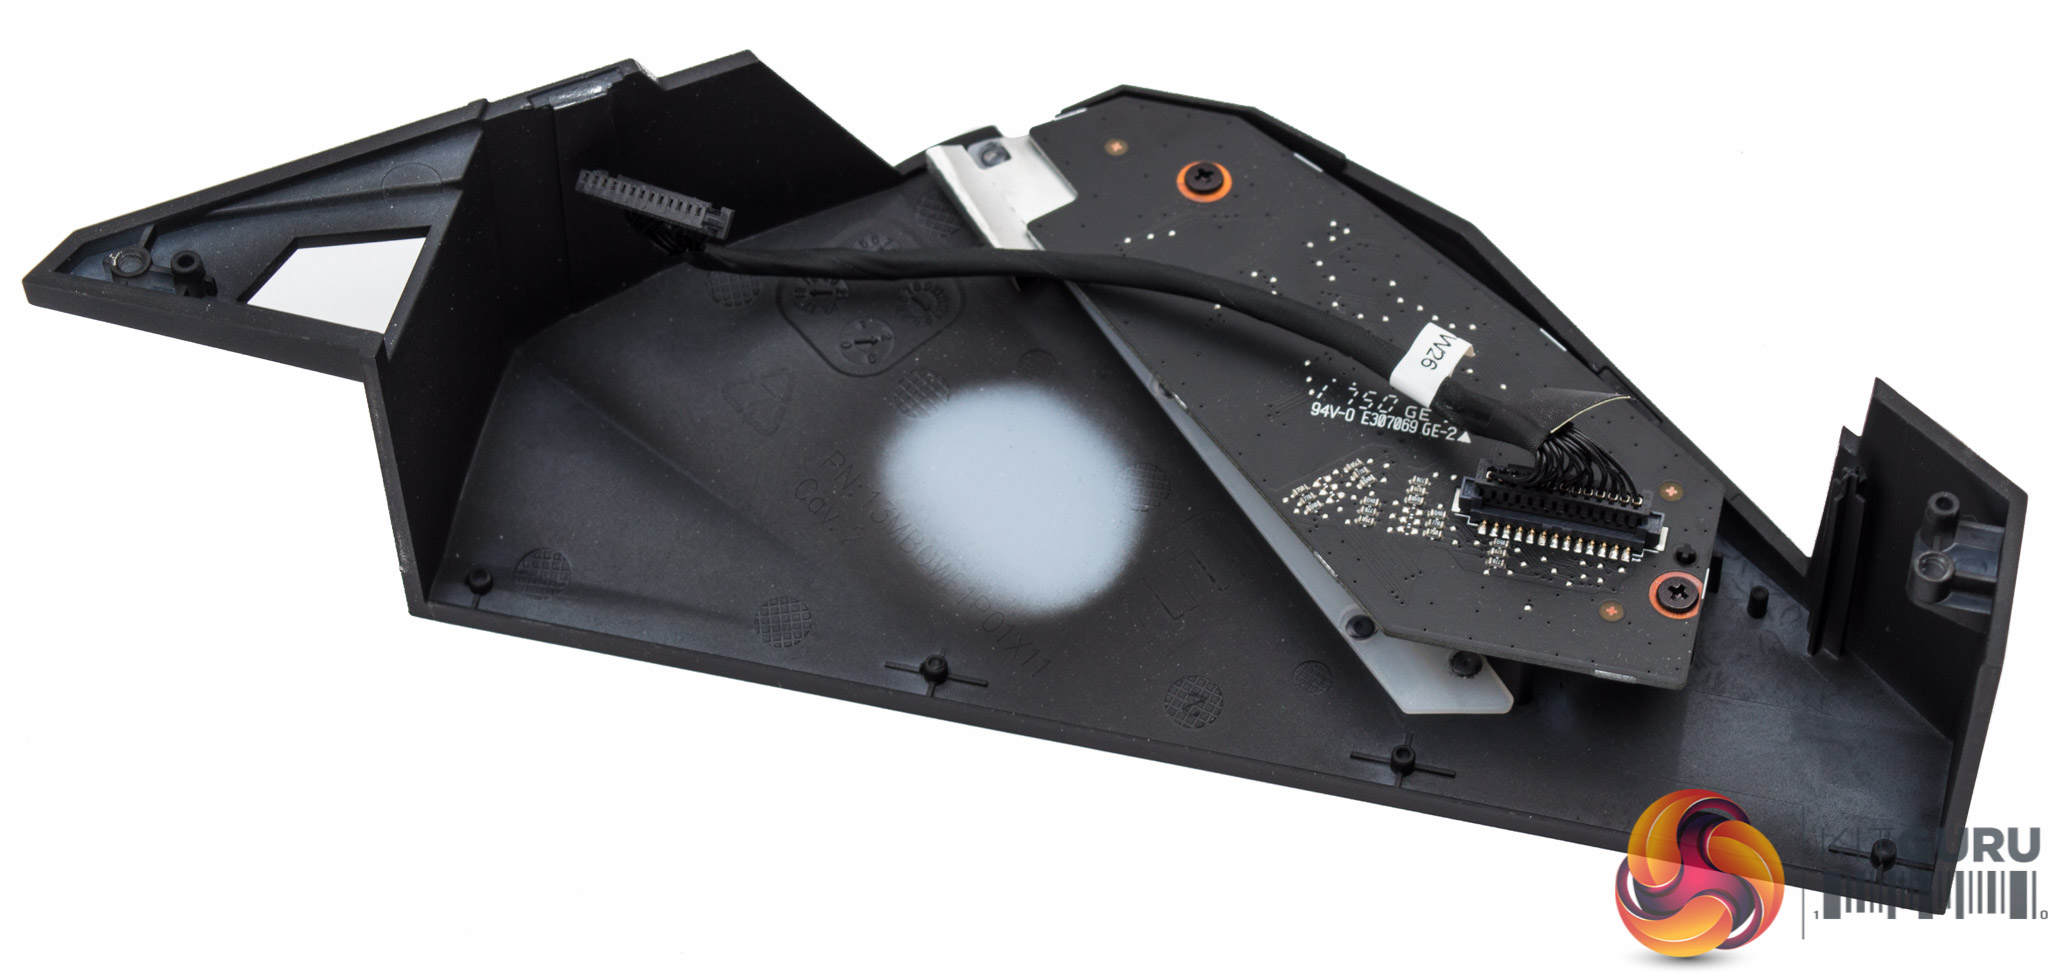
The rear shroud is easily removable with a few screws, it has within it a separate PCB that hosts the LED lighting and this plugs into a dedicated connection on the motherboard.
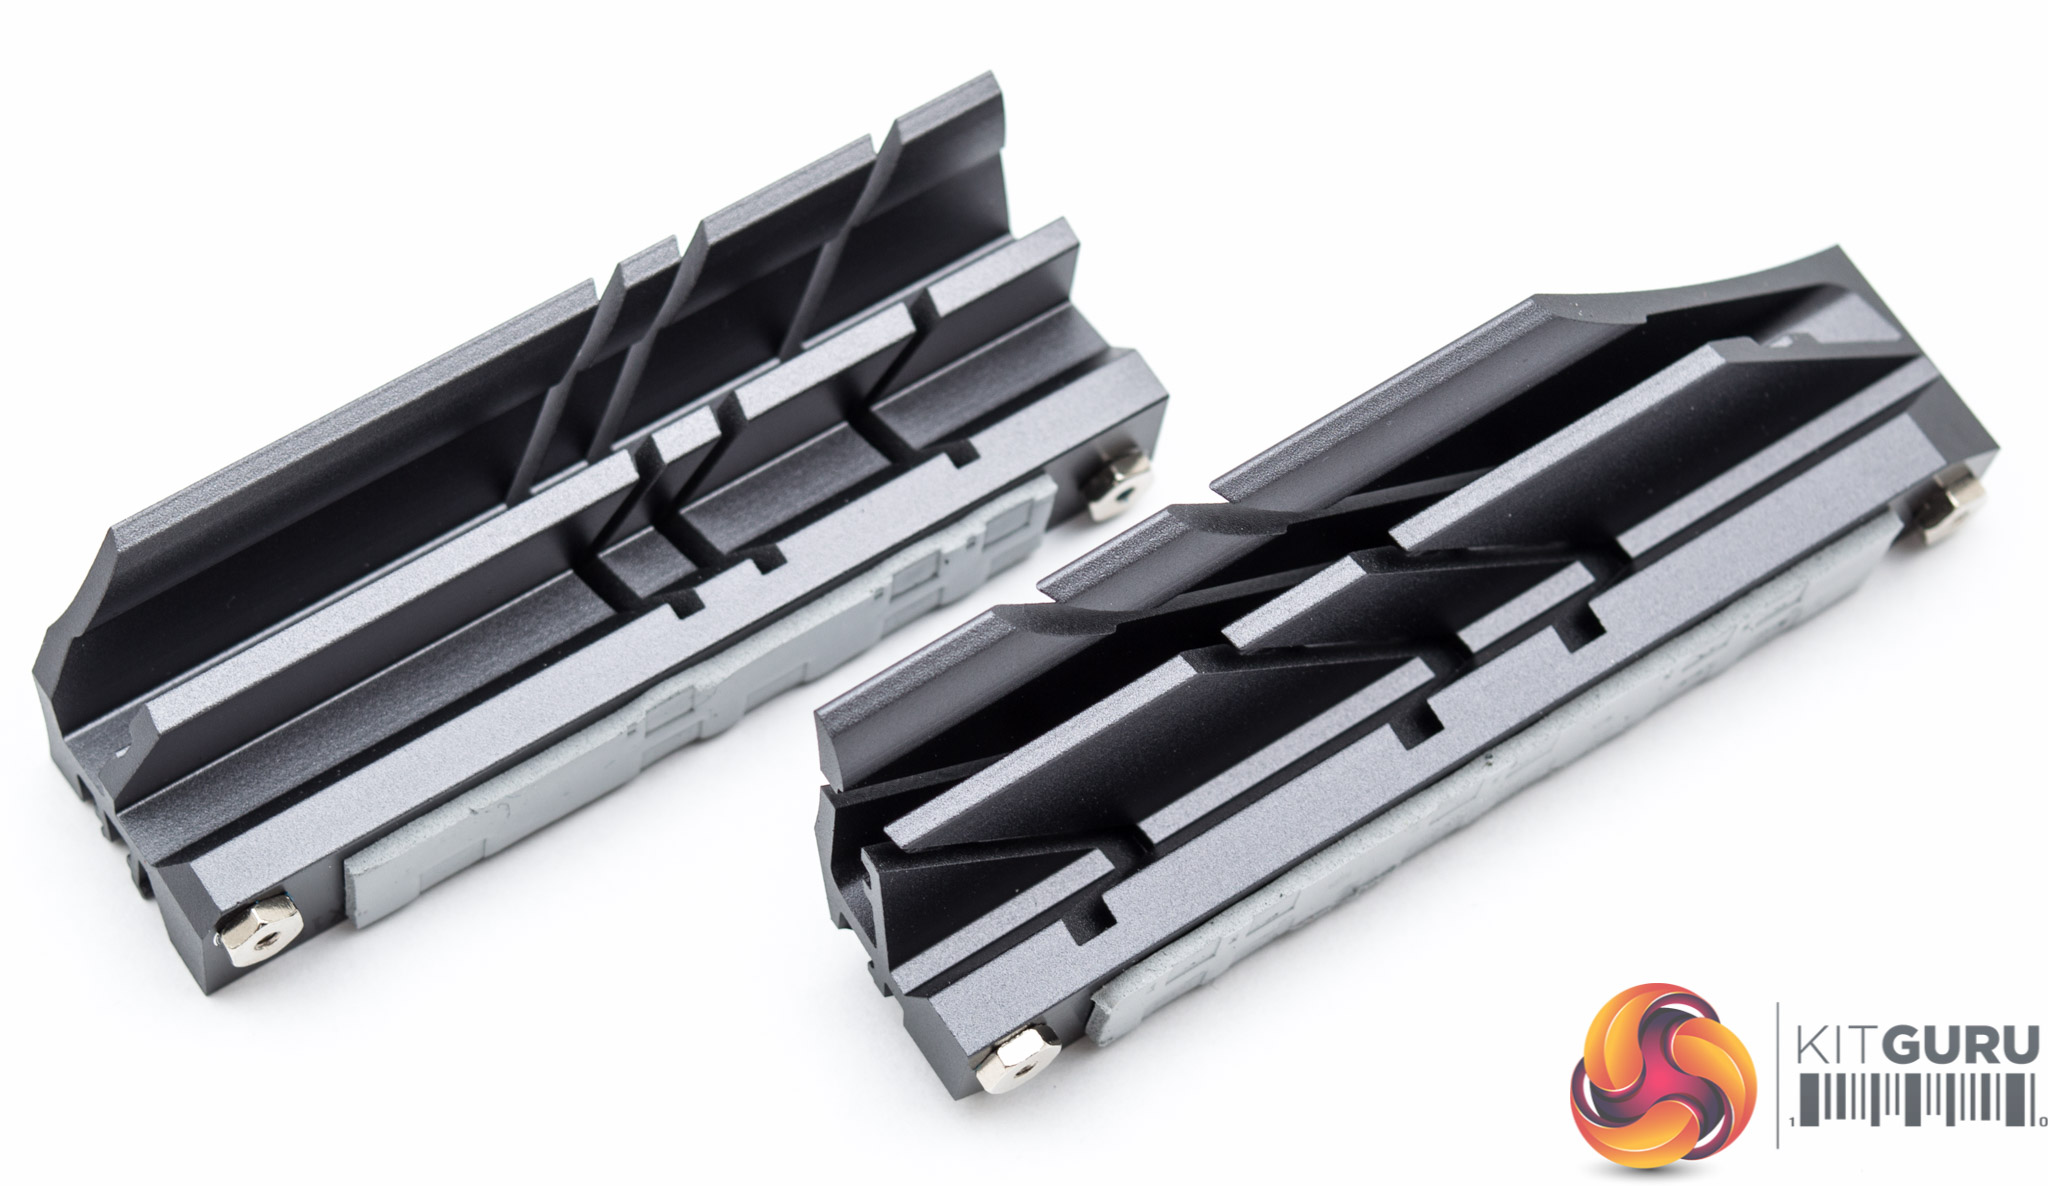
There are two aluminium CPU heatsinks with thermal pads that should do a more-than-adequate job of taming the VRM given no overclocking is possible.
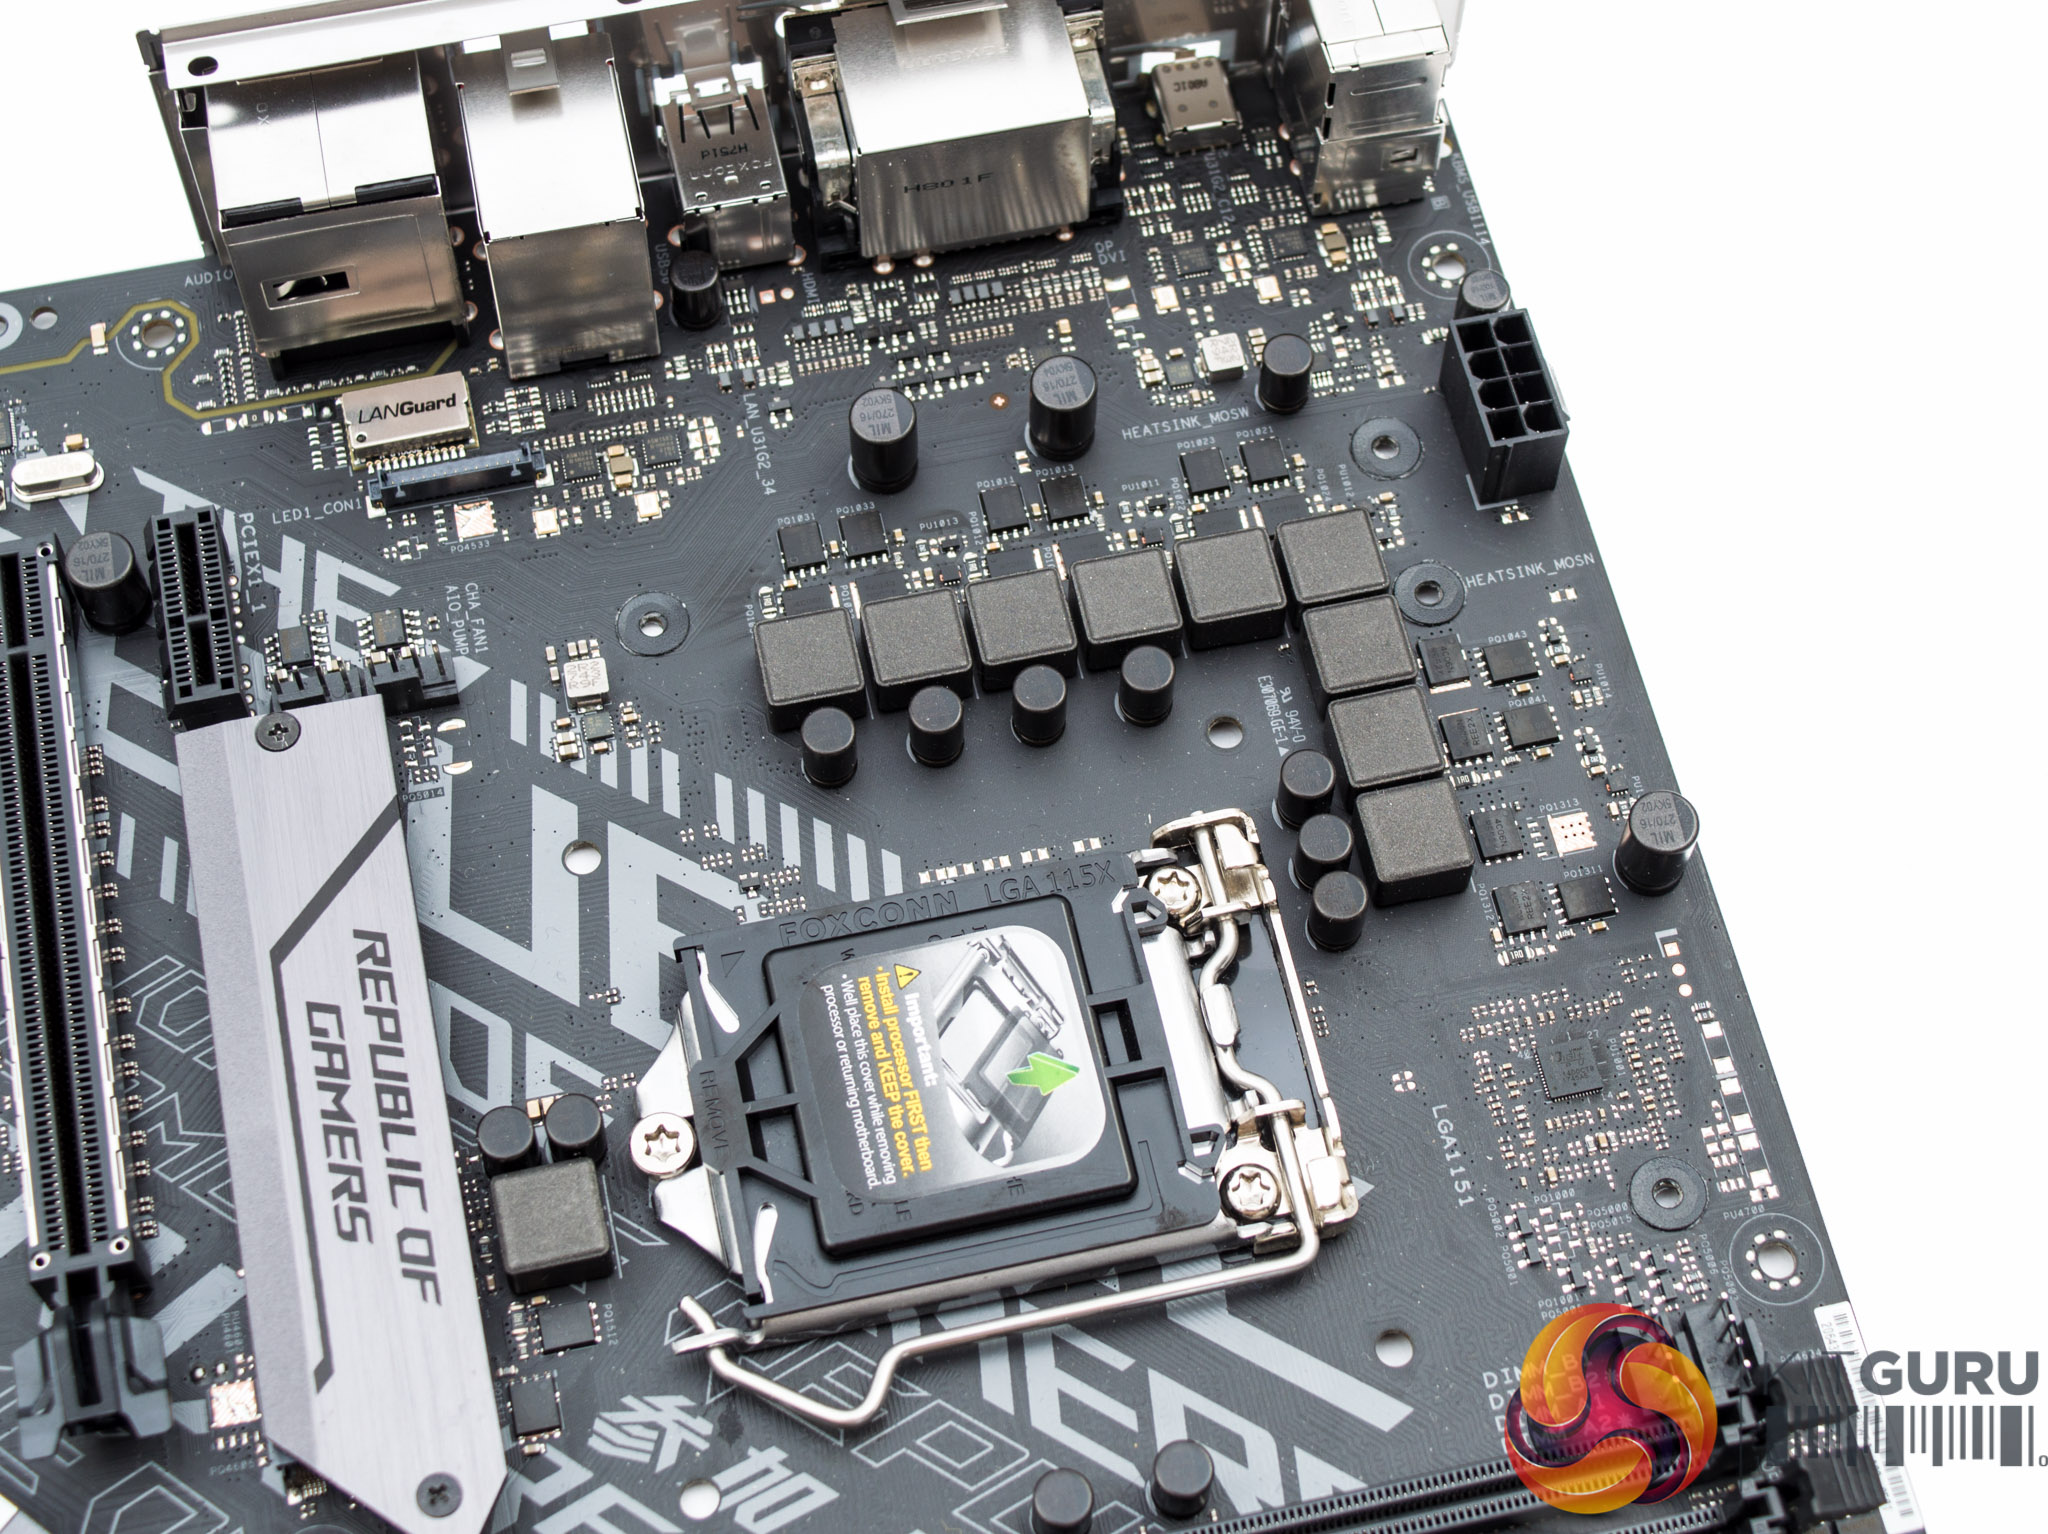
After removing the plastic shield and CPU VRM heatsinks we get a closer look at the internals.
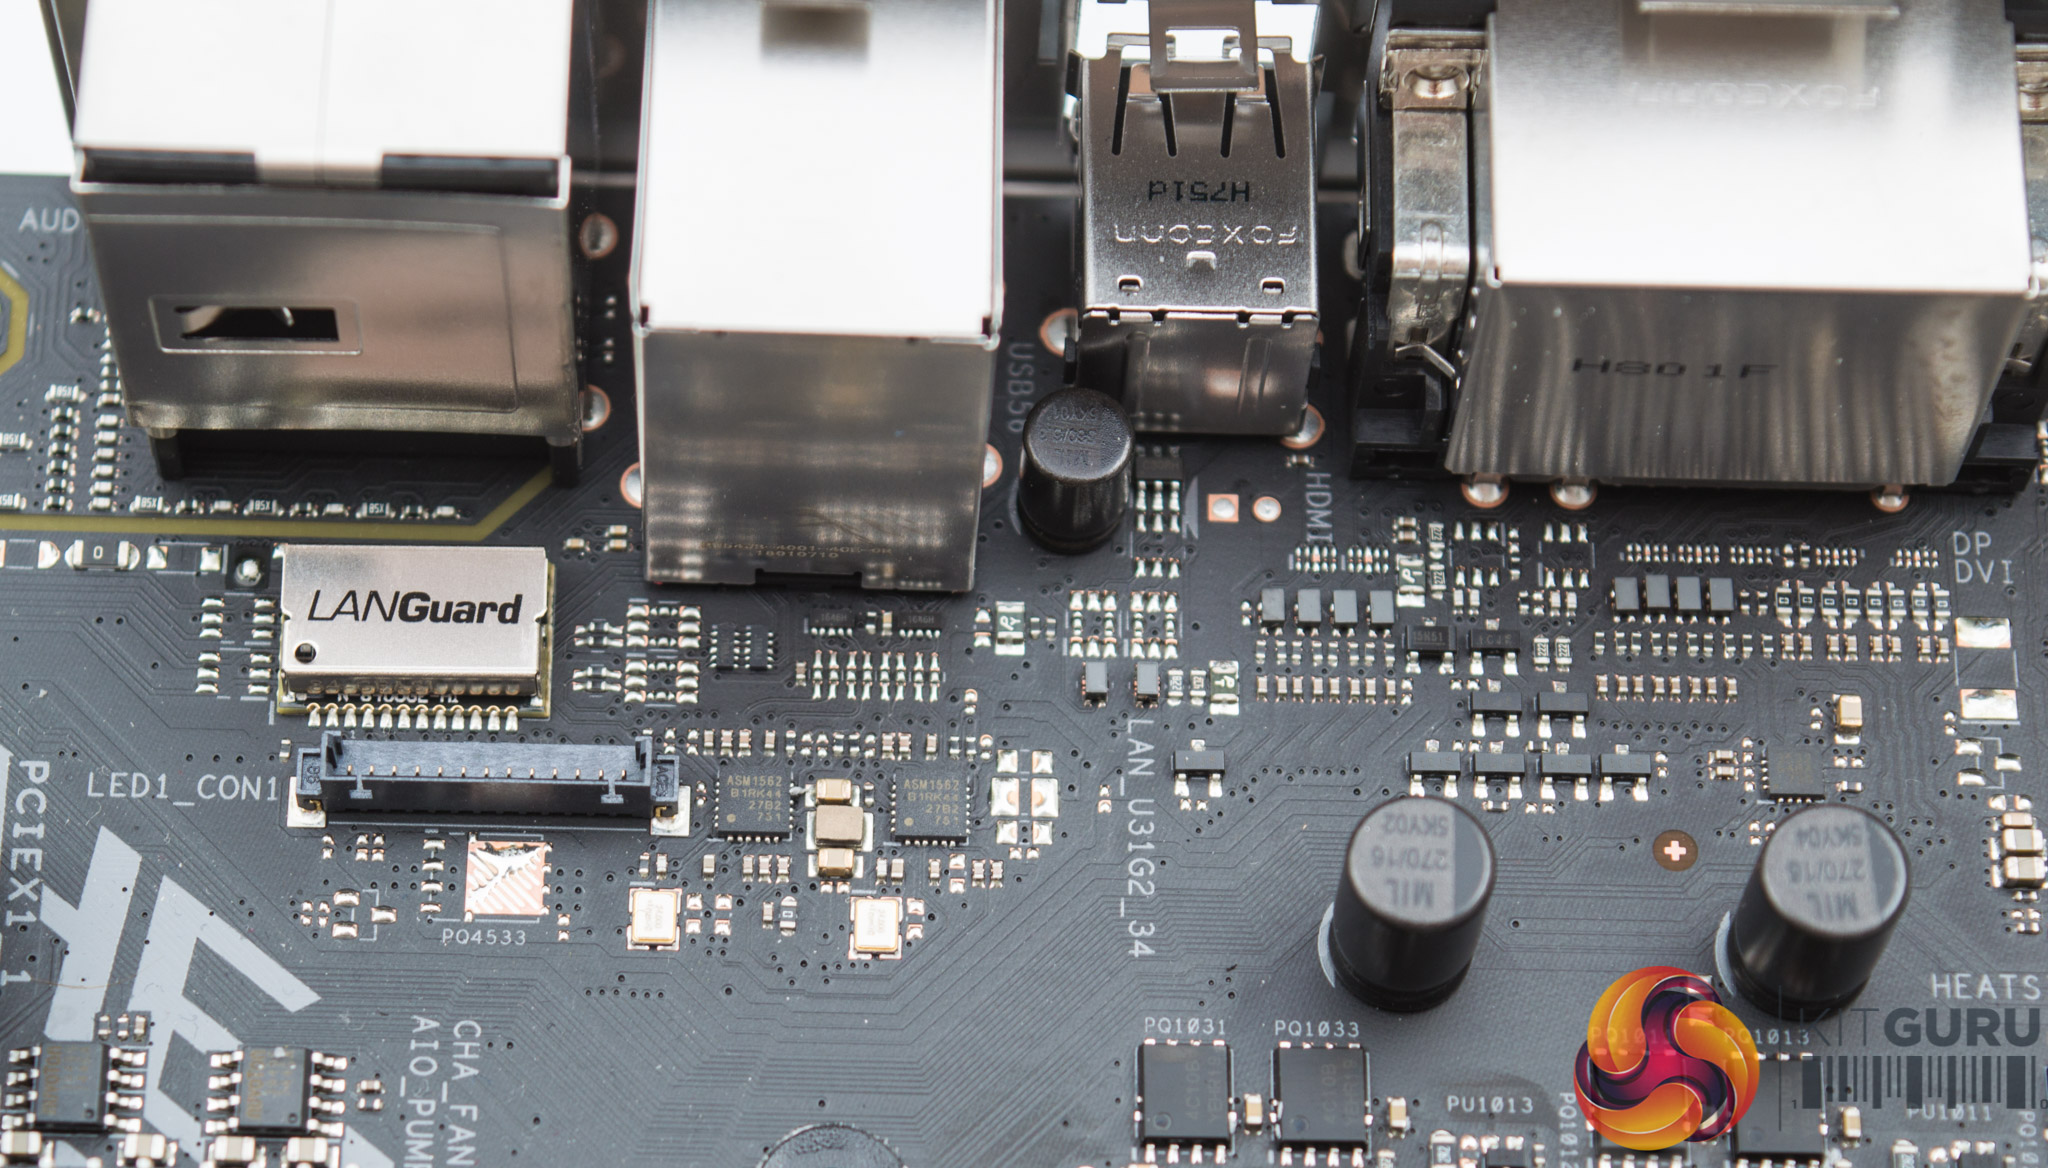
Near the rear I/O shield is the LANGuard module, the custom RGB LED connection and four ASM1562 ICs for the rear USB 3.1 ports.
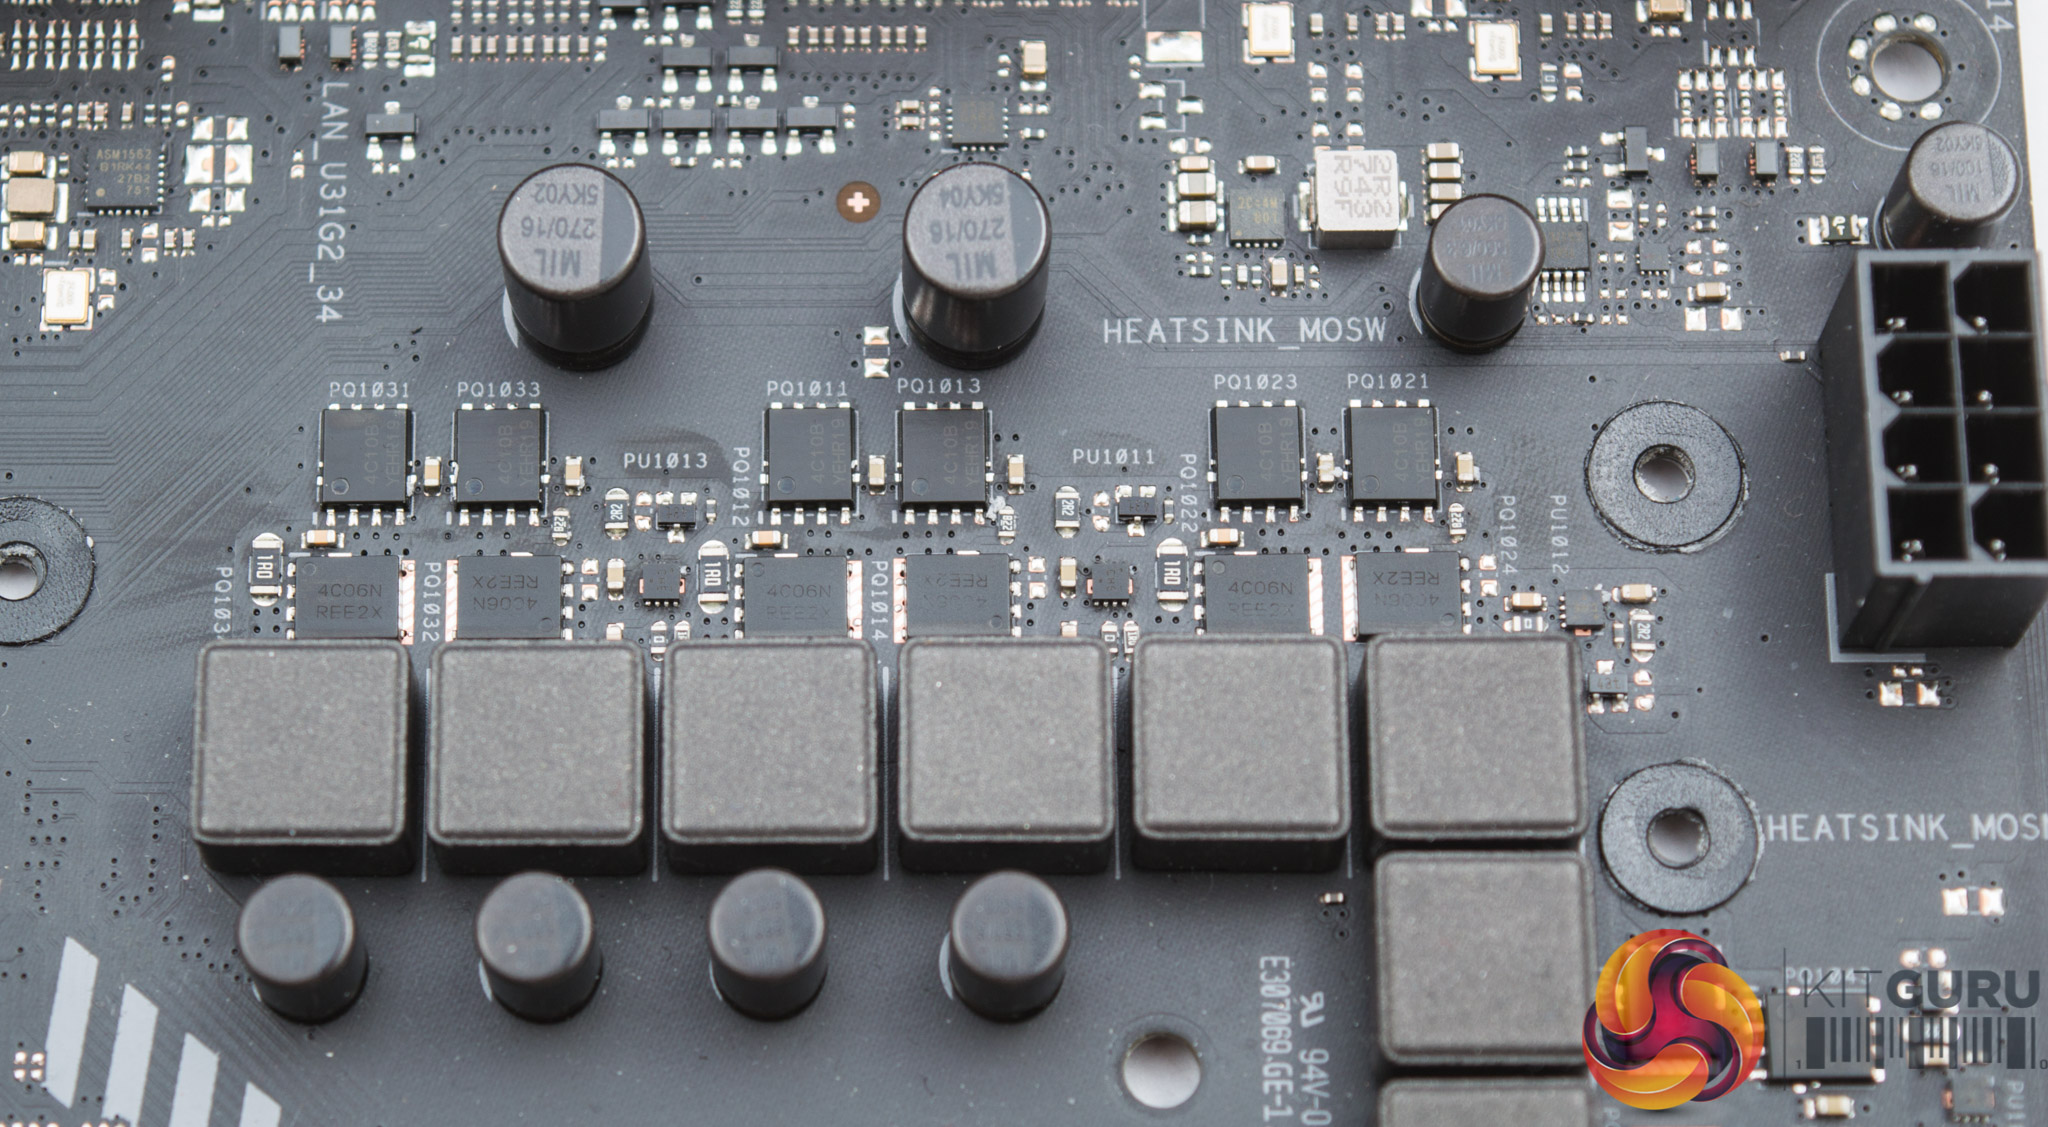
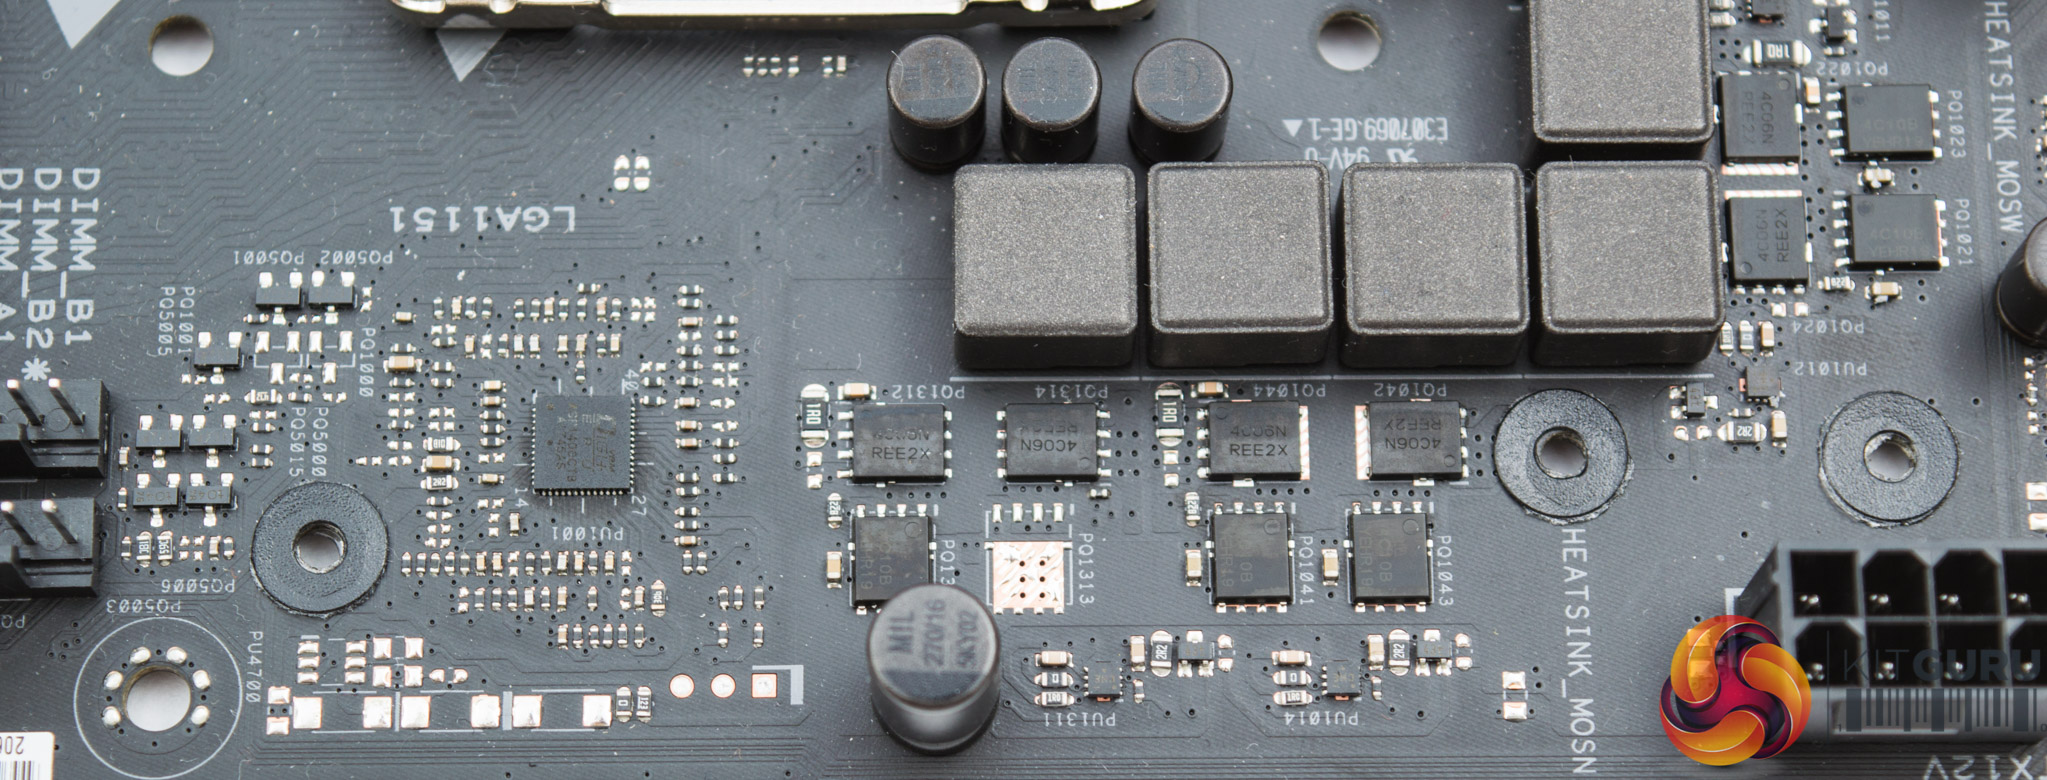
The CPU VRM uses an ASUS packaged PWM controller marked ASP1400CTB A1745AS which is likely based off an International Rectifier solution like IR35203 or IR35201. There are 9 ferrite-core chokes in the main CPU VRM array and 10 ON Semiconductor “4C06N” MOSFETs and 9 “4C10B” MOSFETs for the main CPU array.
The exact configuration isn't immediately clear since the PWM controller is custom-packaged but it looks like a 9 phase design for the CPU comprising of 4 phases doubled to eight (for the VCore), plus a 9th phase for the iGPU (true 4+1, virtual 8+1). There are five smaller chips around and in between the CPU MOSFETs that are likely to be doublers. Then there are a number of other minor rails around the socket for things like VCCIO and VCCSA.
ASUS marketing materials imply the system runs an 8+2 phase VRM solution, with two phases for the iGPU and 8 phases for the CPU VCore, both doubled from a true 4+1 phase configuration. However, it isn't immediately clear how the iGPU gets two phases from only one ferrite-core choke/inductor and three MOSFETs when all other phases use 1 choke and 2 MOSFETs per phase.
The memory VRM is handled by a single phase running the APW8723A controller and a myriad ON Semiconductor MOSFETs.