

In our initial review of the Razer Phone (HERE), we mentioned there was room for improvement when it came to the camera's software. Razer listened, and last month the company rolled out a big update to improve shutter speed, add the ability to easily switch between lenses and improve overall performance. With that in mind, we thought it high-time we revisited the phone to give its camera and software a proper analysis.
I've been using the Razer Phone for nearly three months now, ever since the global launch event in London. In my original review, I praised the primary lens but thought the software to be very poor. Three months on, can the Razer Phone's camera be considered a success? To find out, we analyse low-light performance, HDR mode, primary vs secondary lenses and even include comparisons with the Huawei Mate 10 Pro.
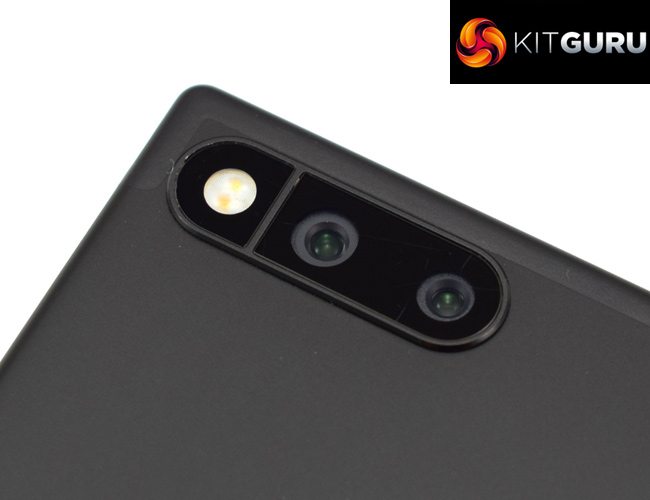
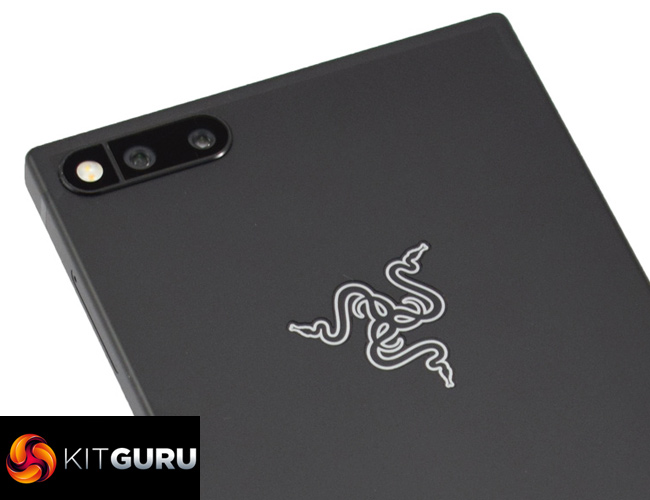
Camera specification
- 12MP AF f1.75 Wide
- 12MP AF f2.6 Zoom
- Dual PDAF
- Dual tone, dual LED flash
Primary vs secondary lens
One of my biggest criticisms of the Razer Phone camera came from its software – specifically, there was no way to manually choose which lens you wanted to use. In the original software, there was a ‘smooth zoom' feature, which automatically switched between the wide-angle f/1.75 primary lens to the telephoto f/2.6 lens as you zoomed in on-screen.
That sounds handy, but in reality it just meant I never knew which lens I was using at any given moment. It also meant I didn't know whether I was using digital zoom or not, something which degrades image quality.
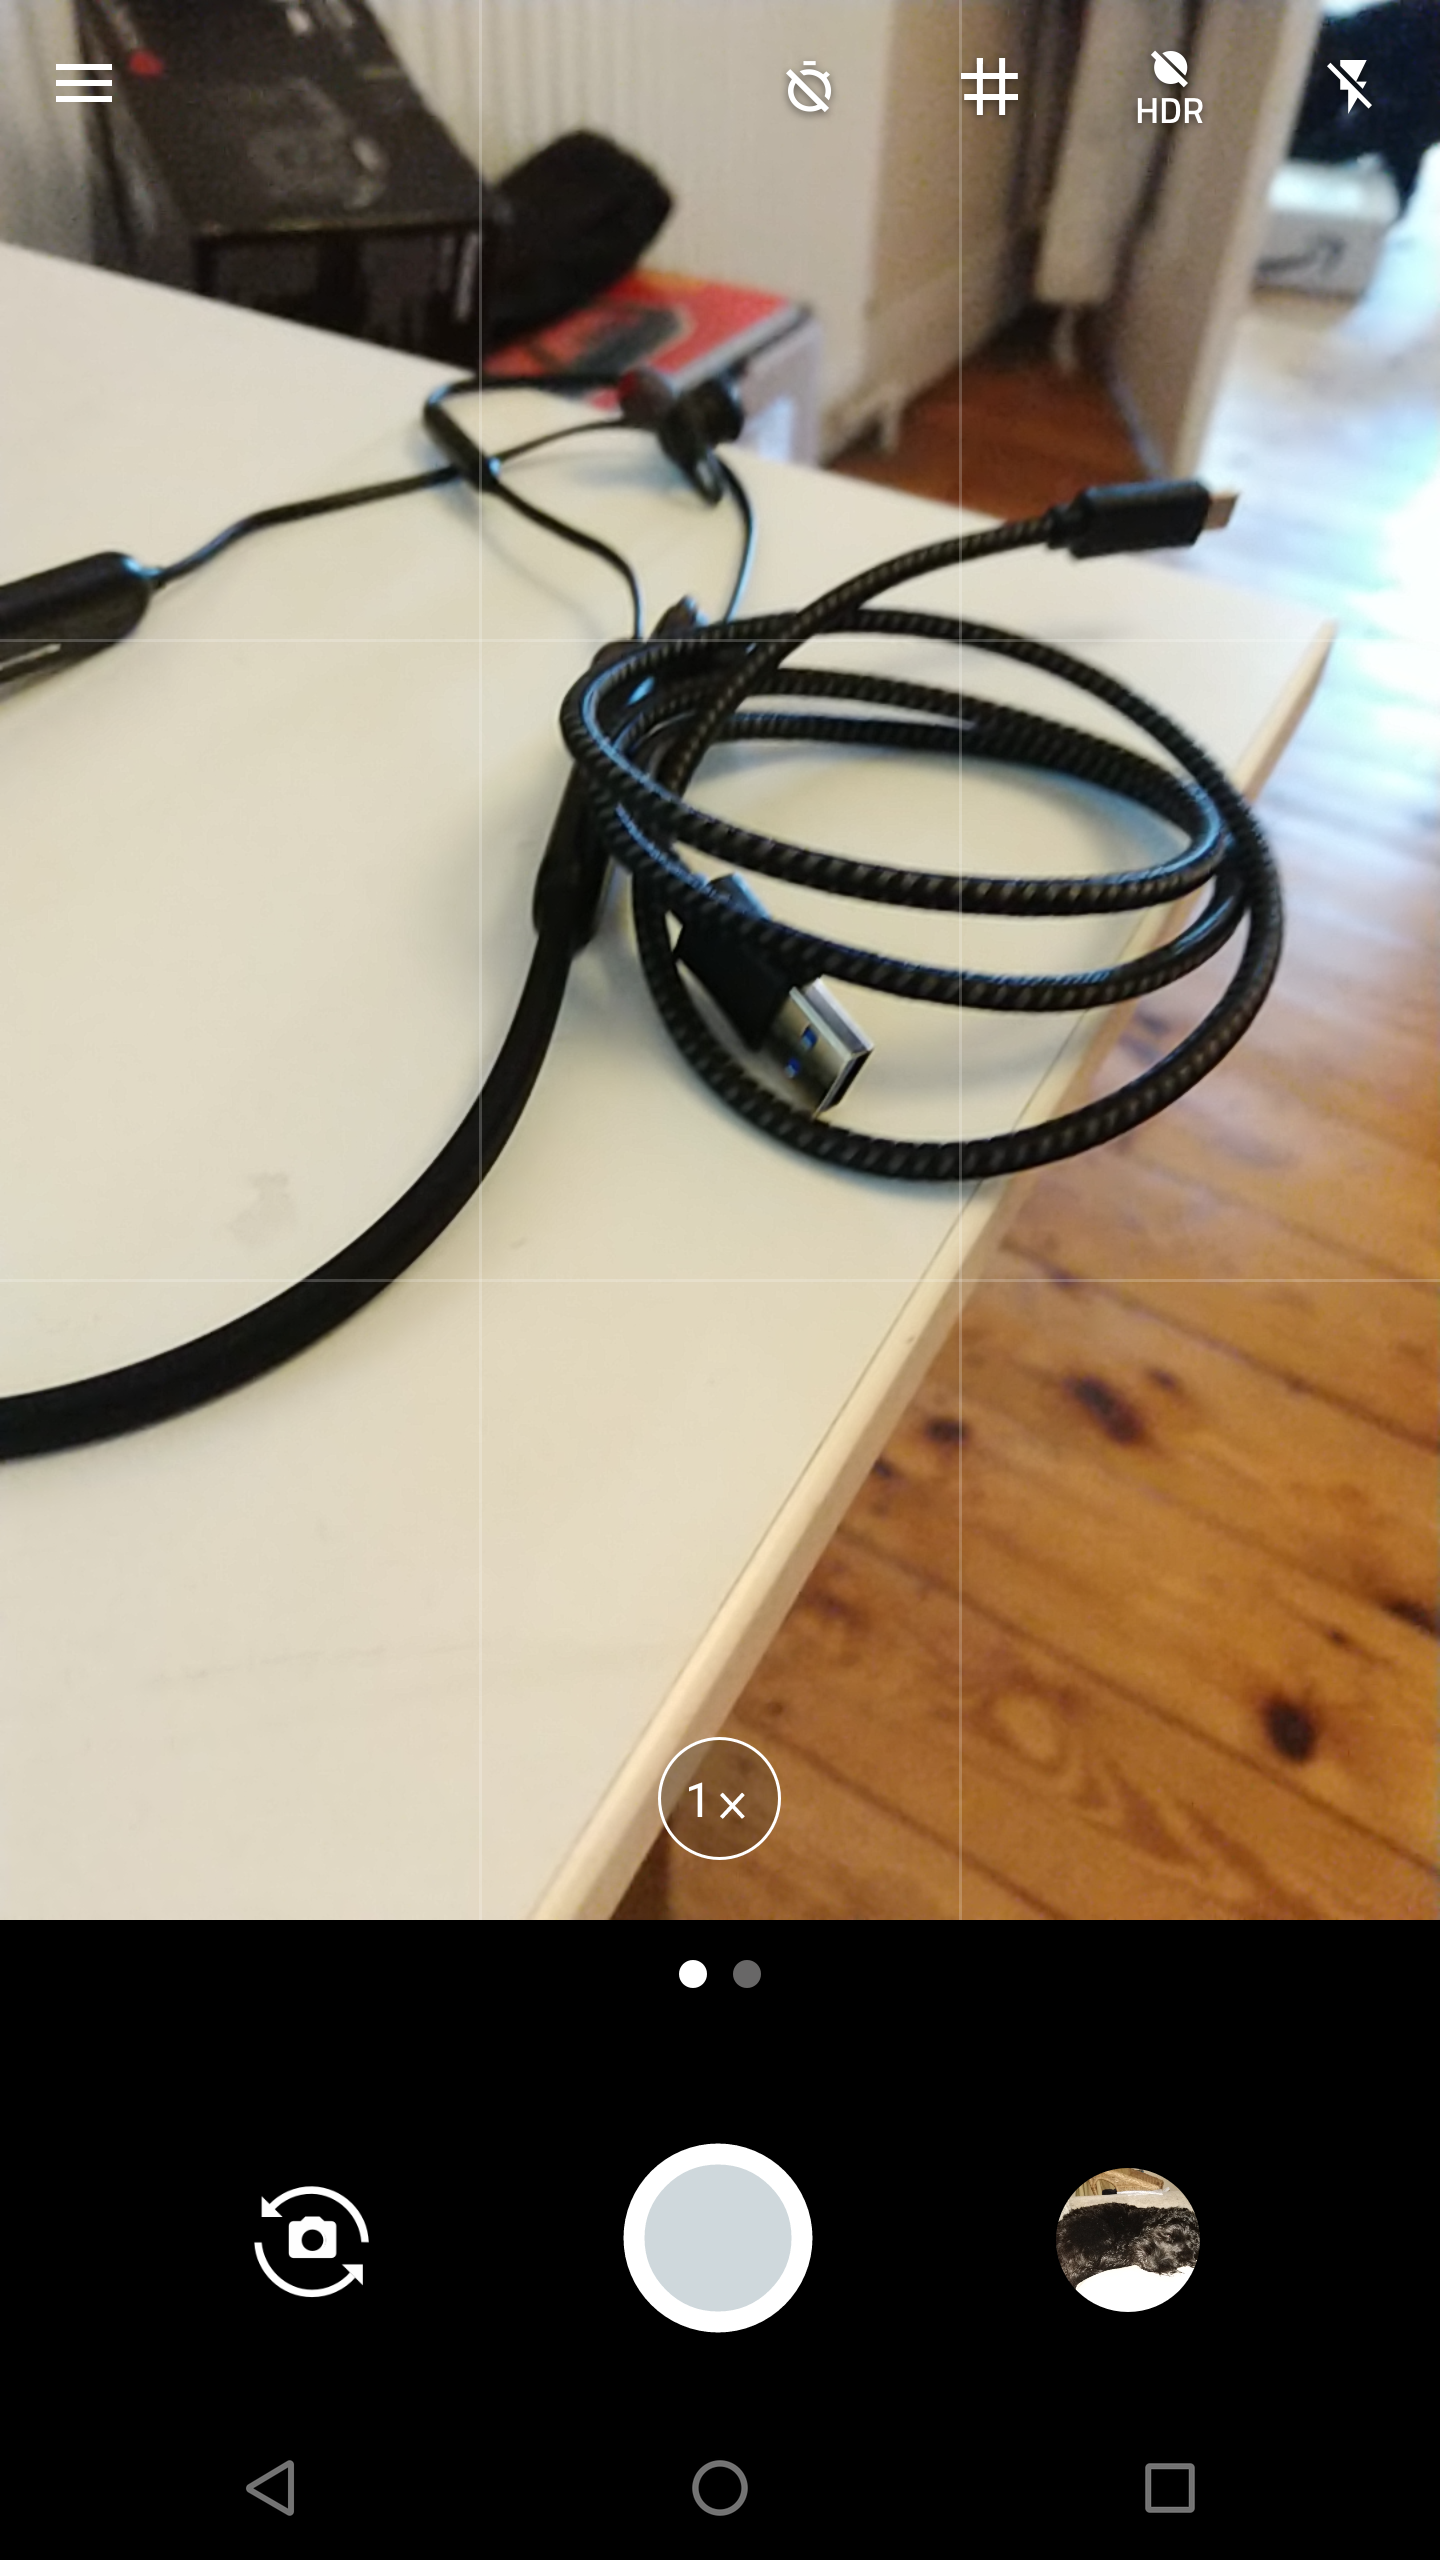
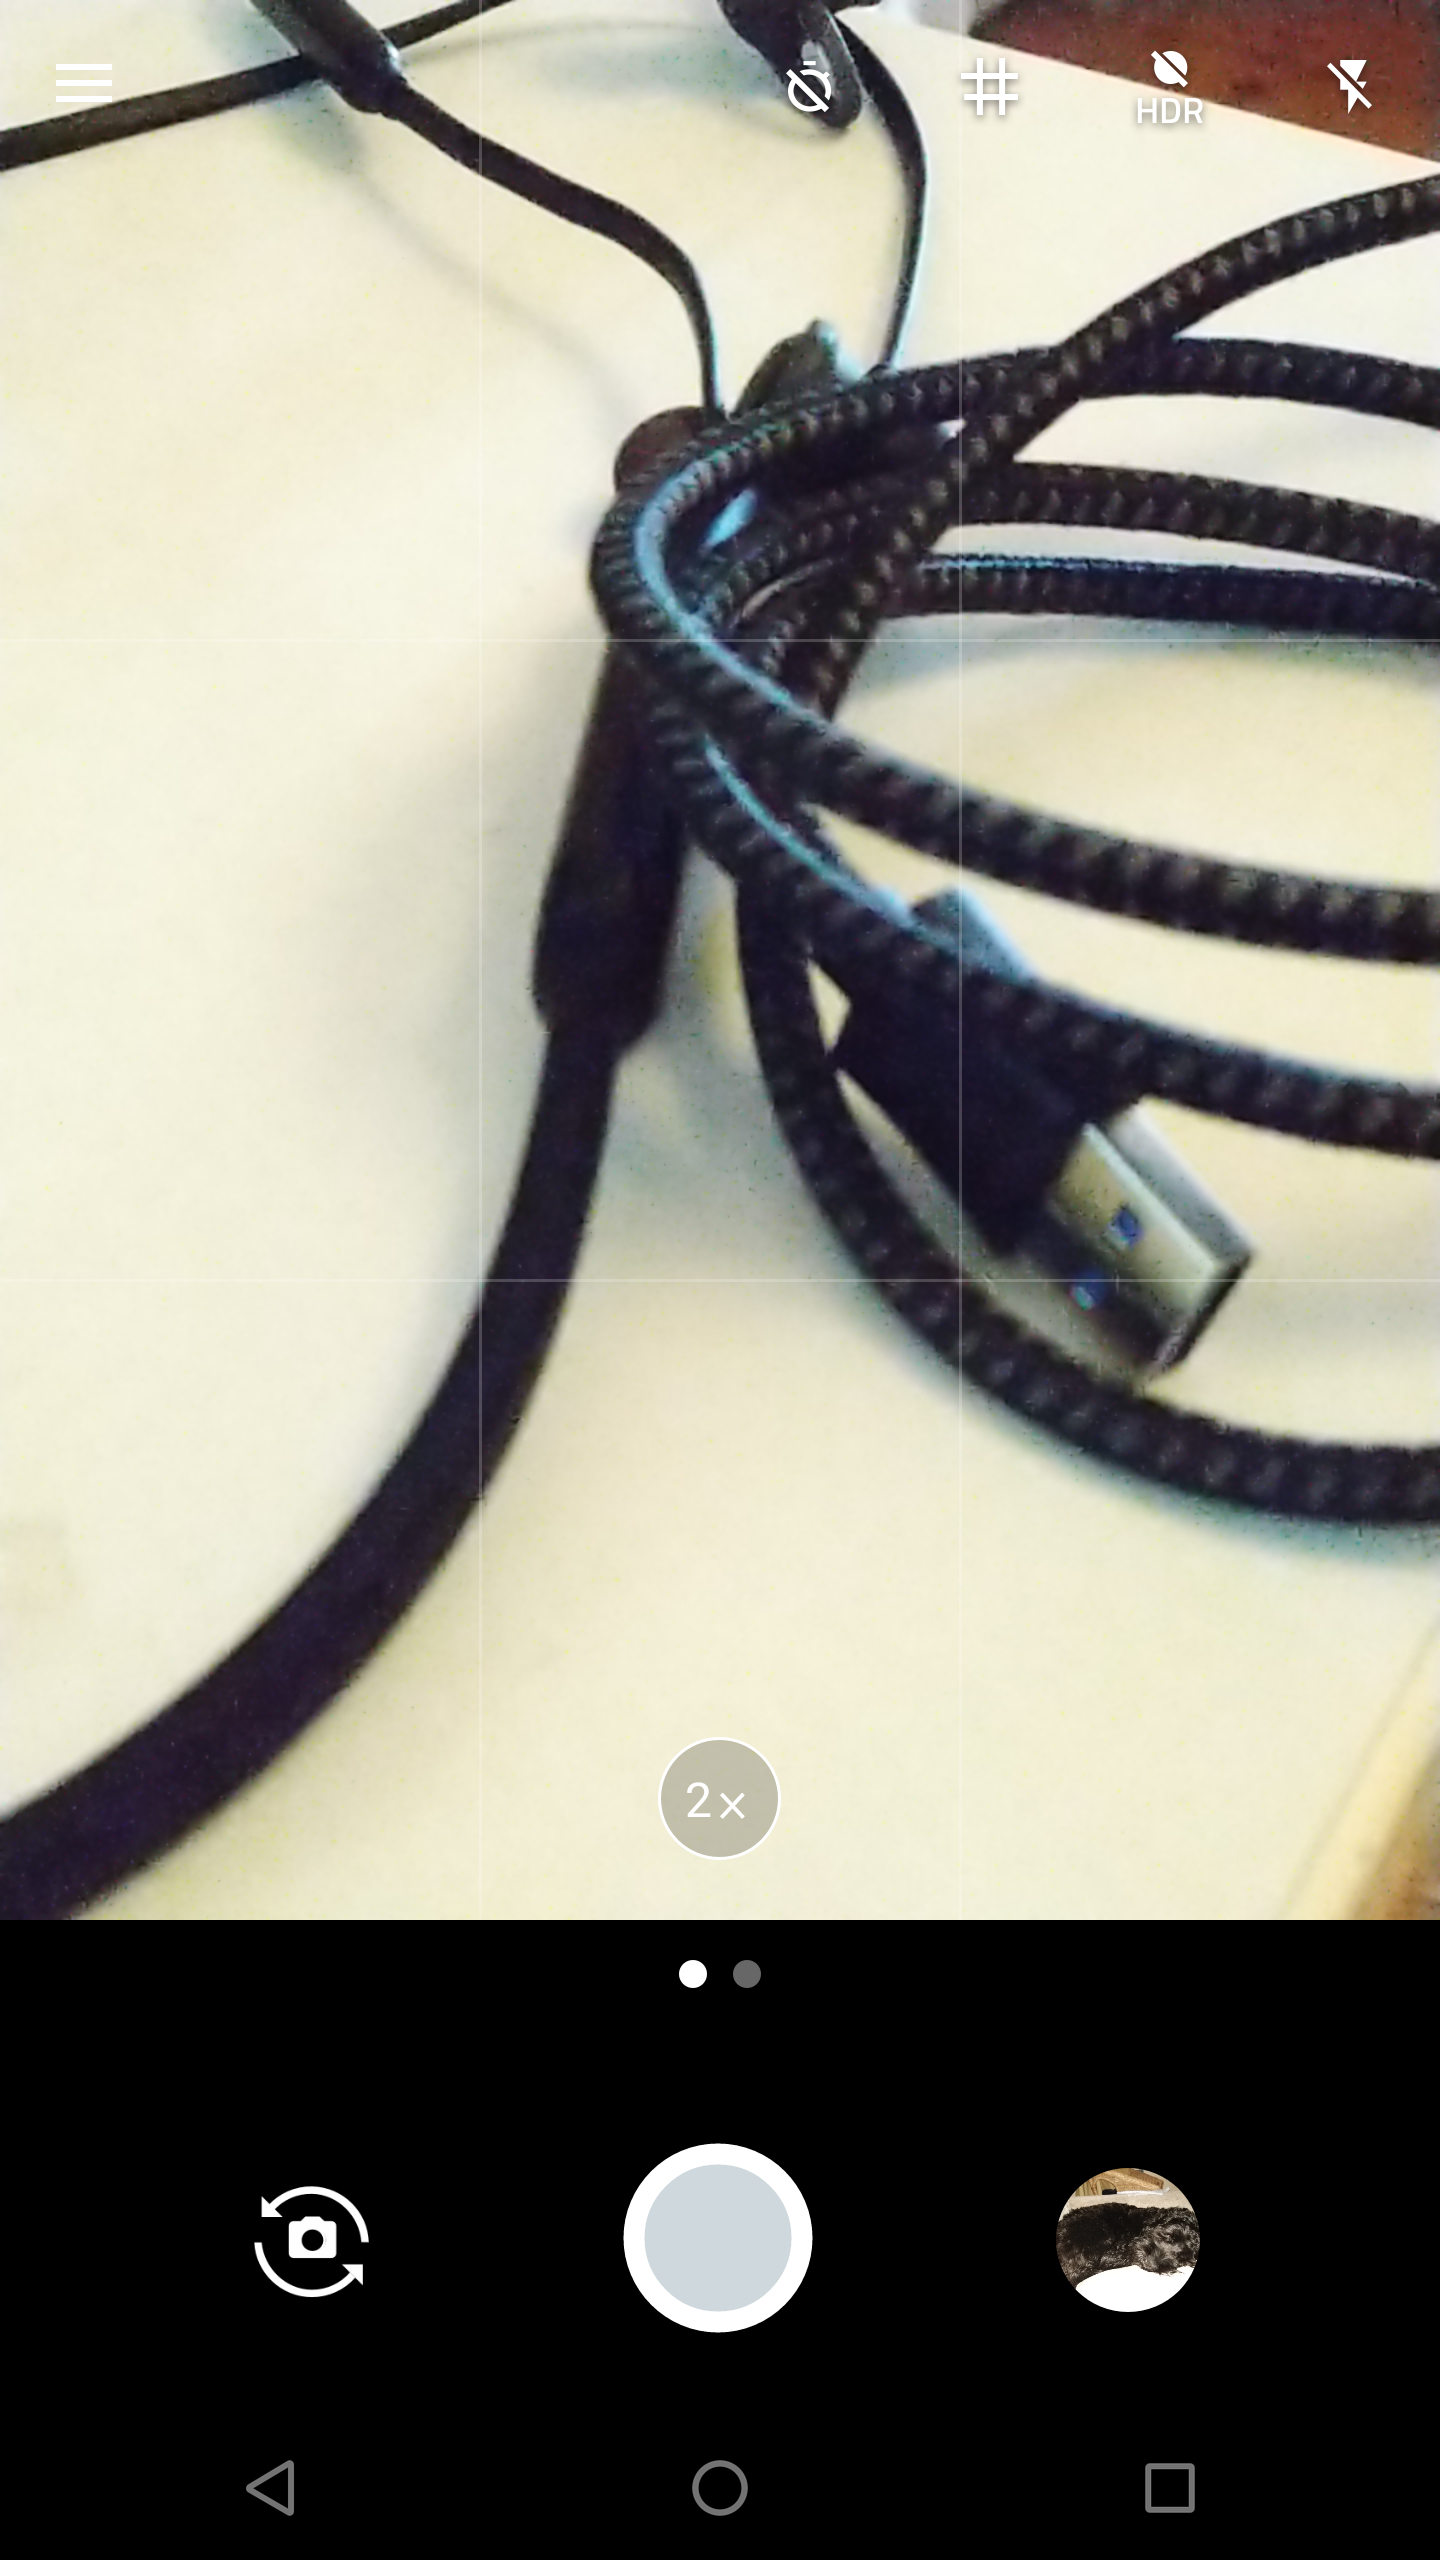
Fortunately, Razer fixed this via its update, adding in a simple ‘1x' or ‘2x' button which switches between the two lenses. This makes it infinitely easier to accurately assess the capabilities of each individual lens.
For reference, the primary lens is 12MP f/1.75 wide-angle, while the secondary is a 12MP f/2.6 zoom lens.
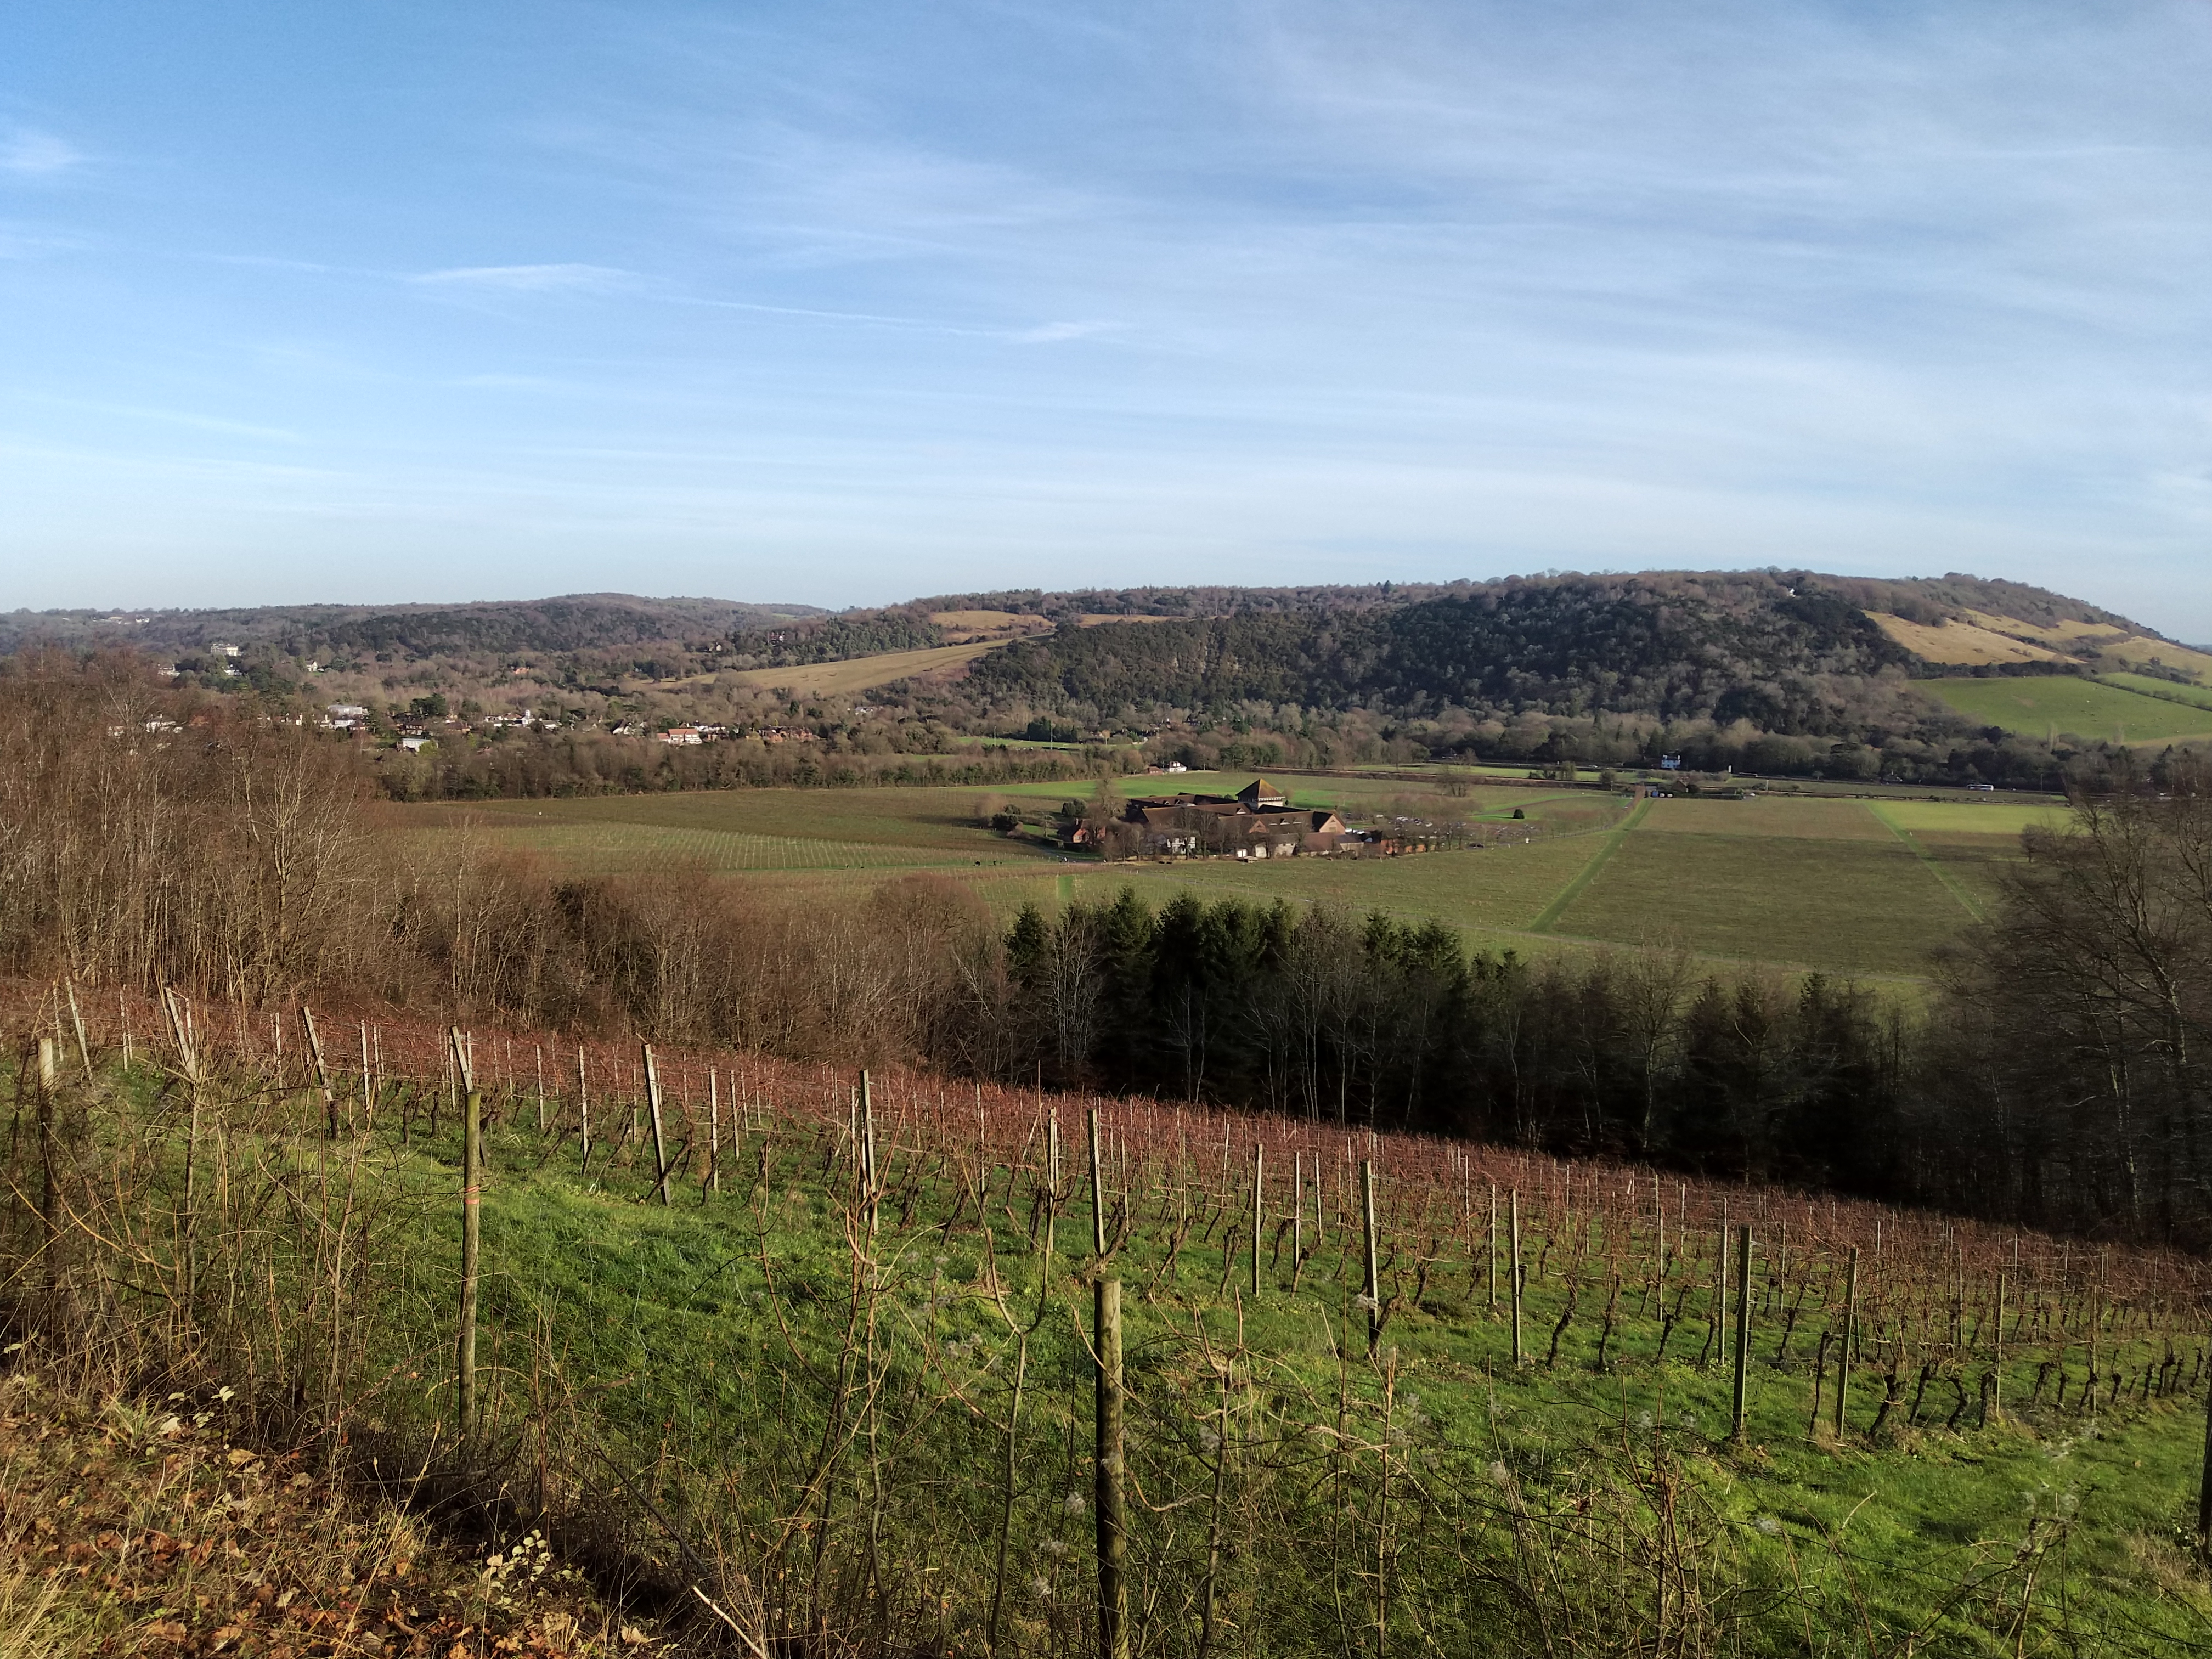
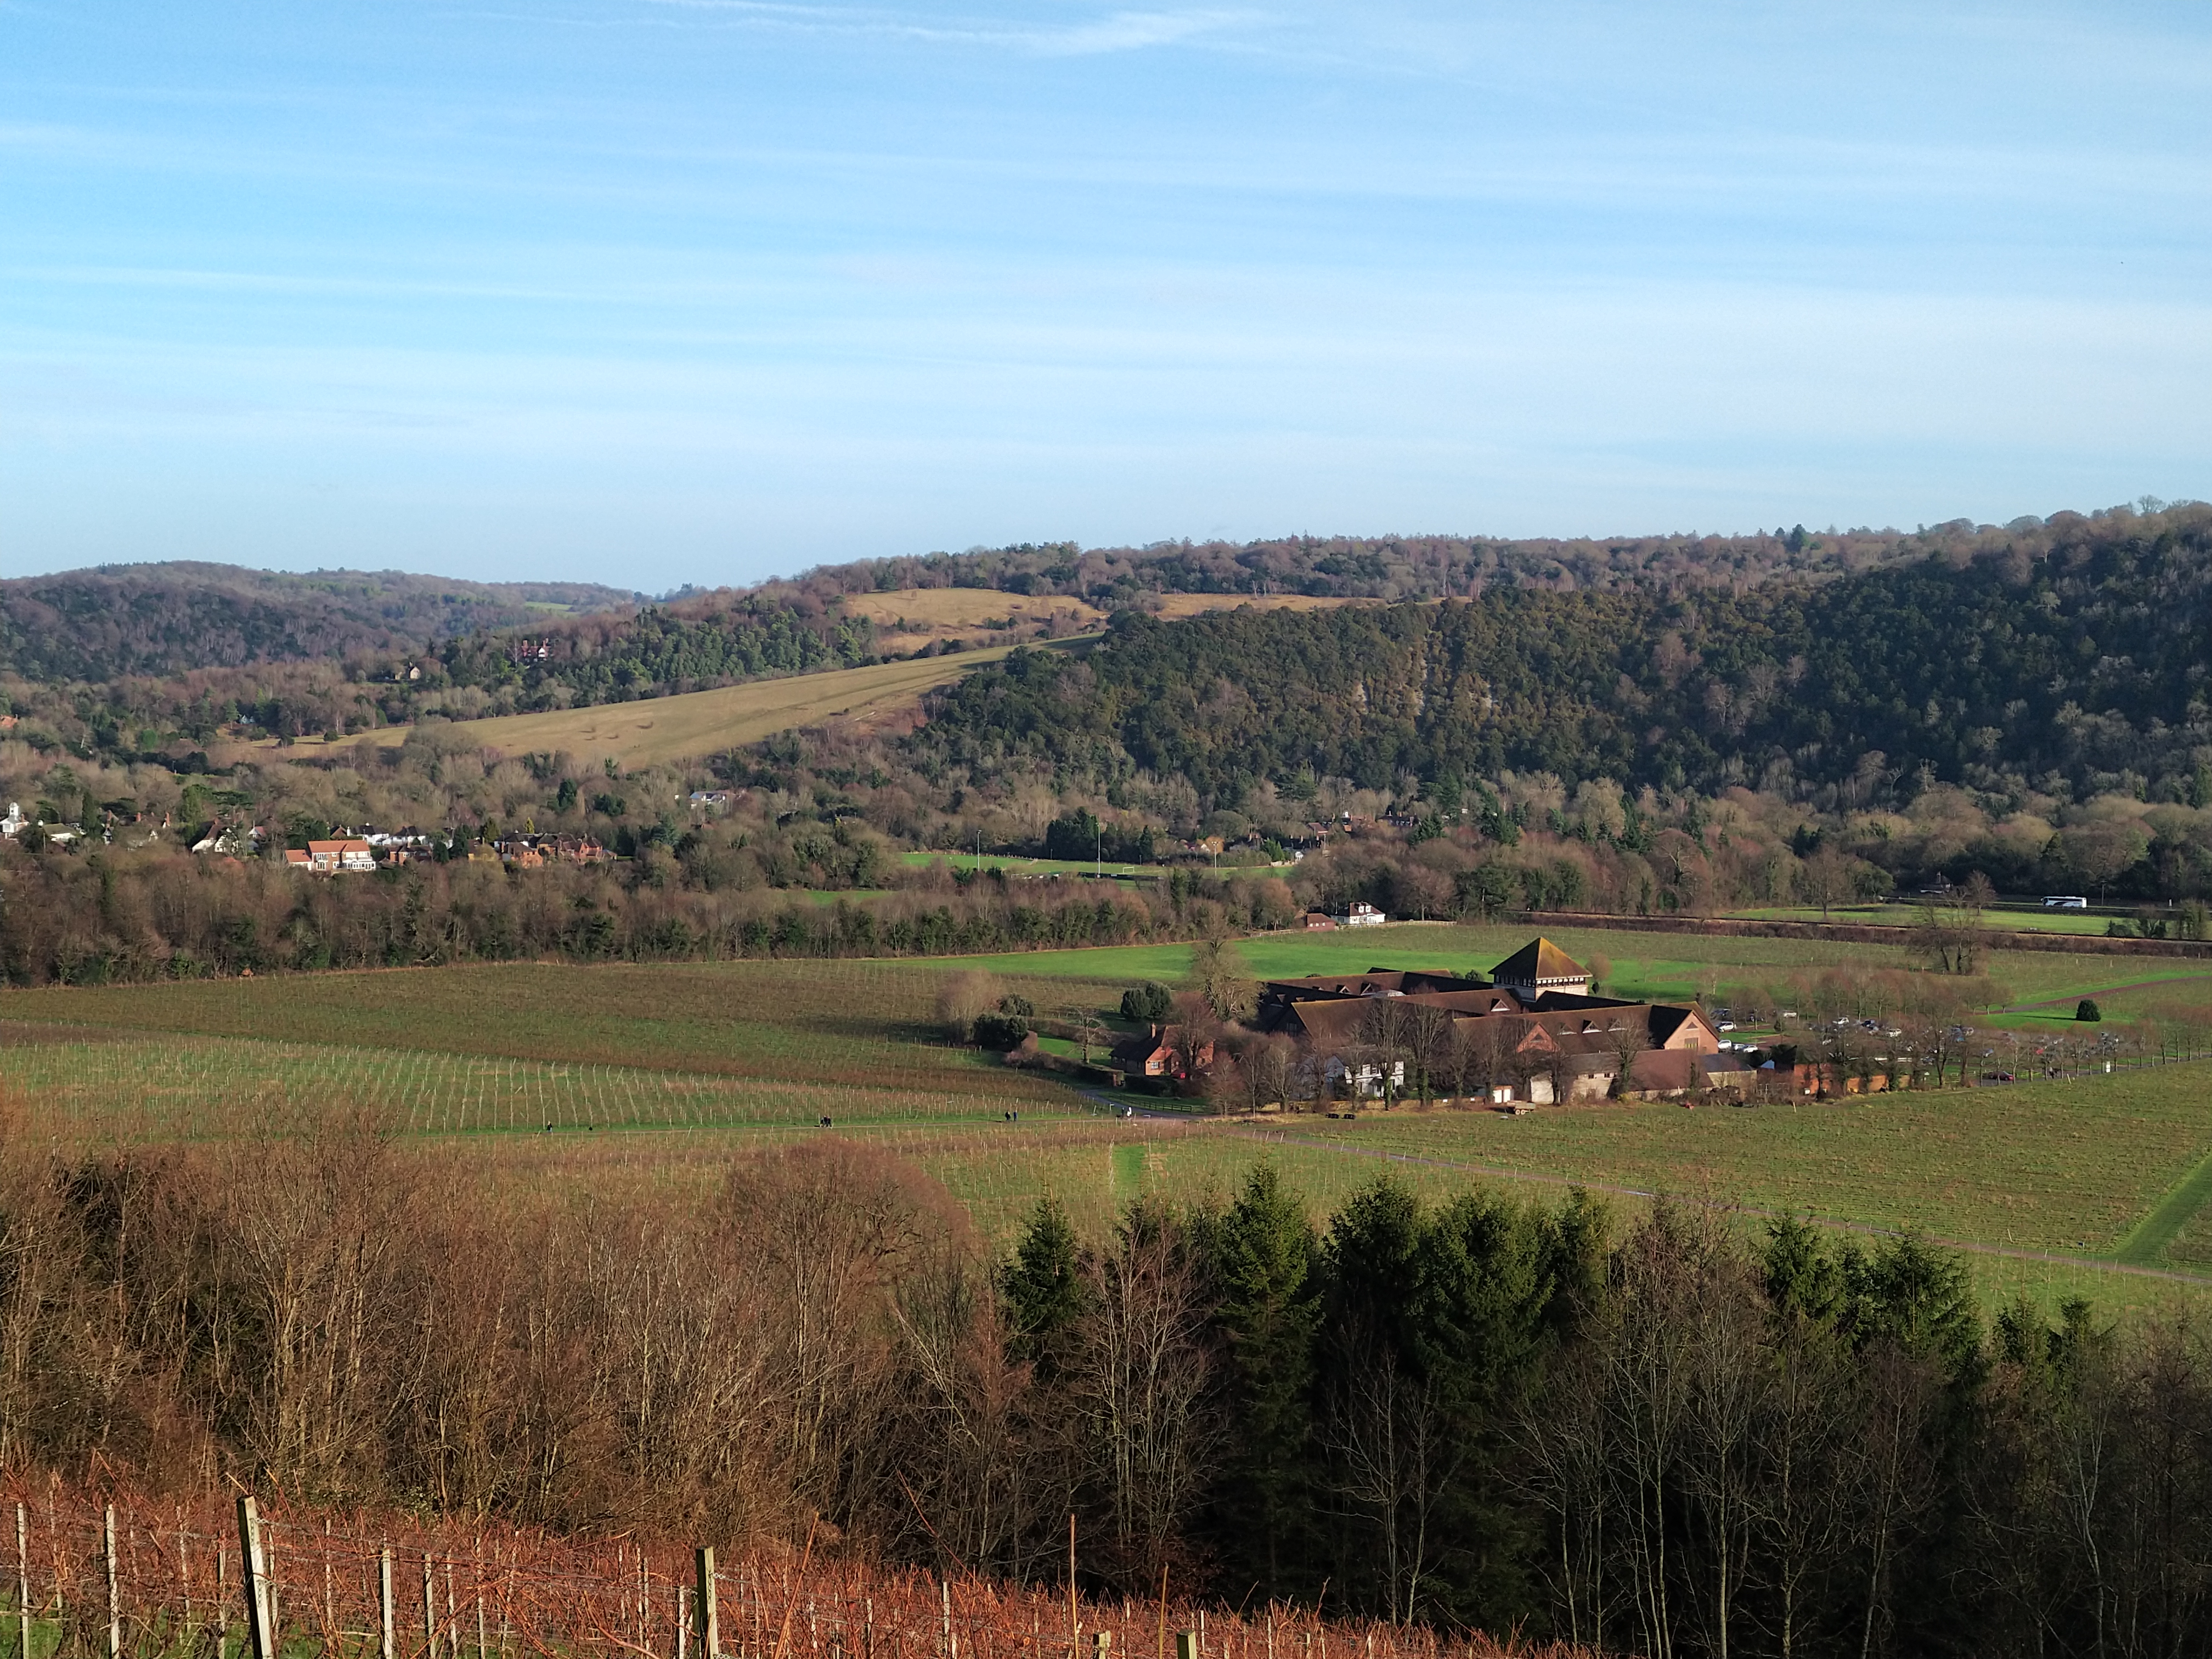
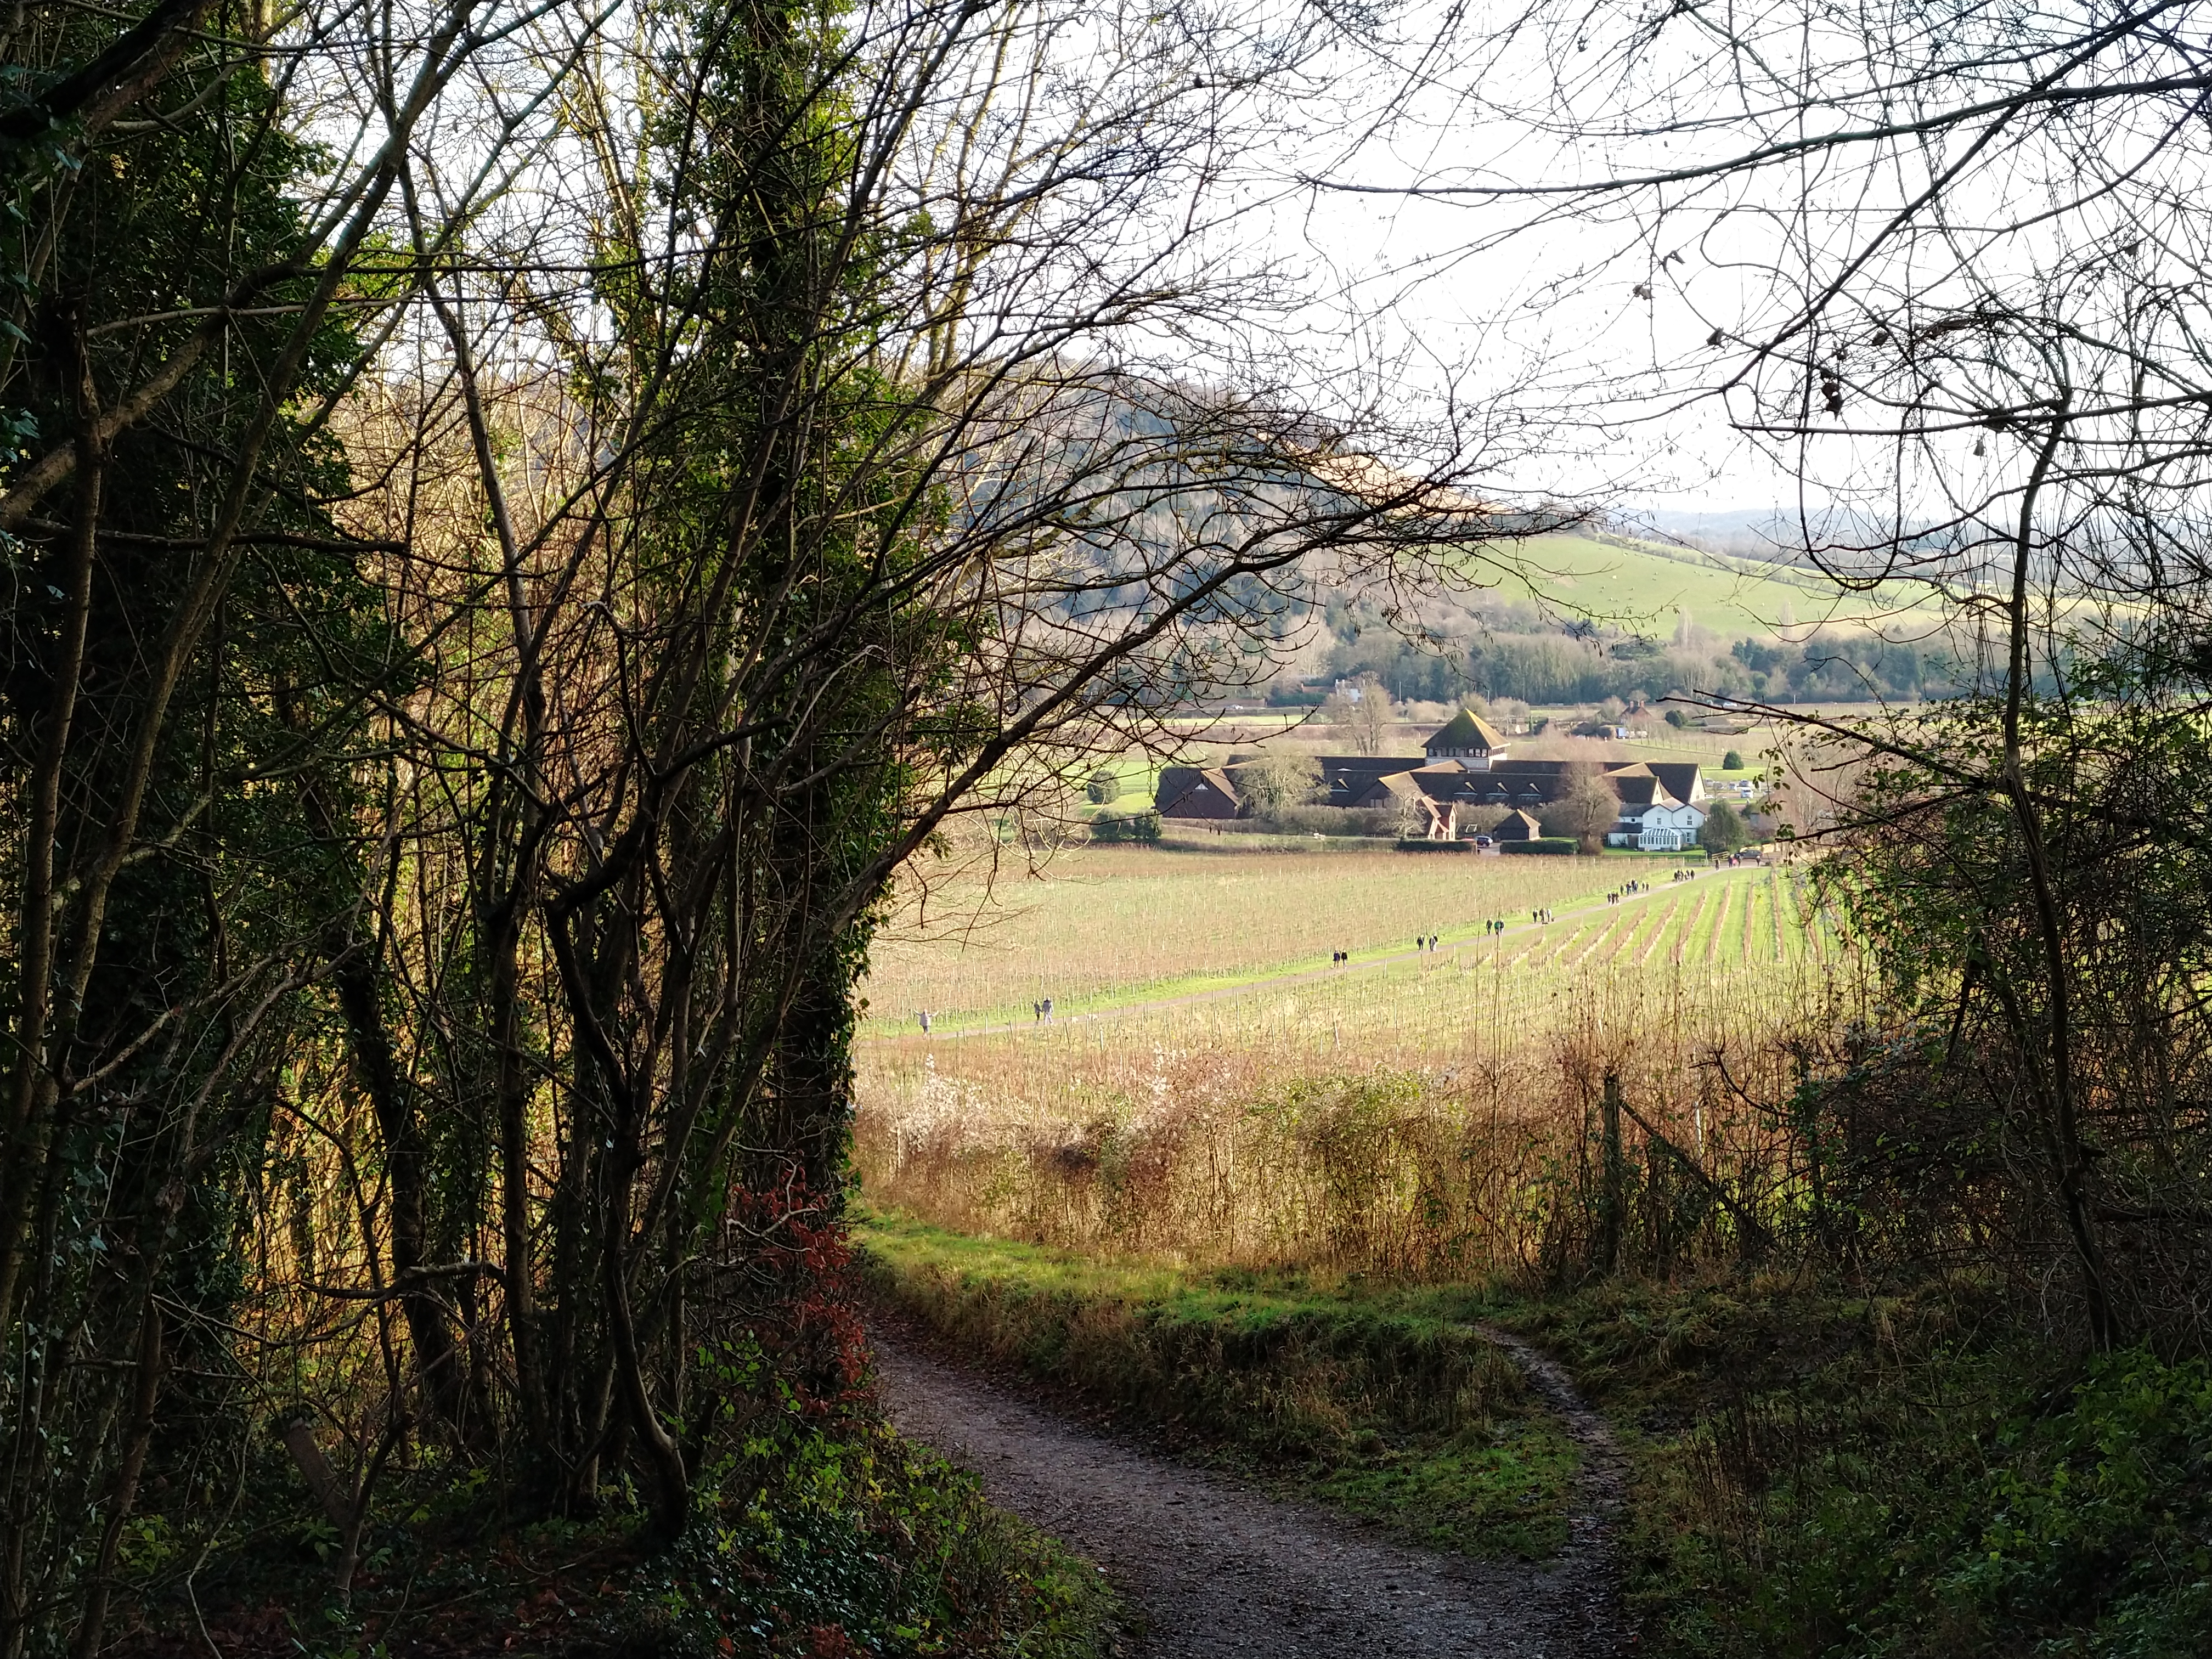
Primary lens, left, compared with secondary lens, right
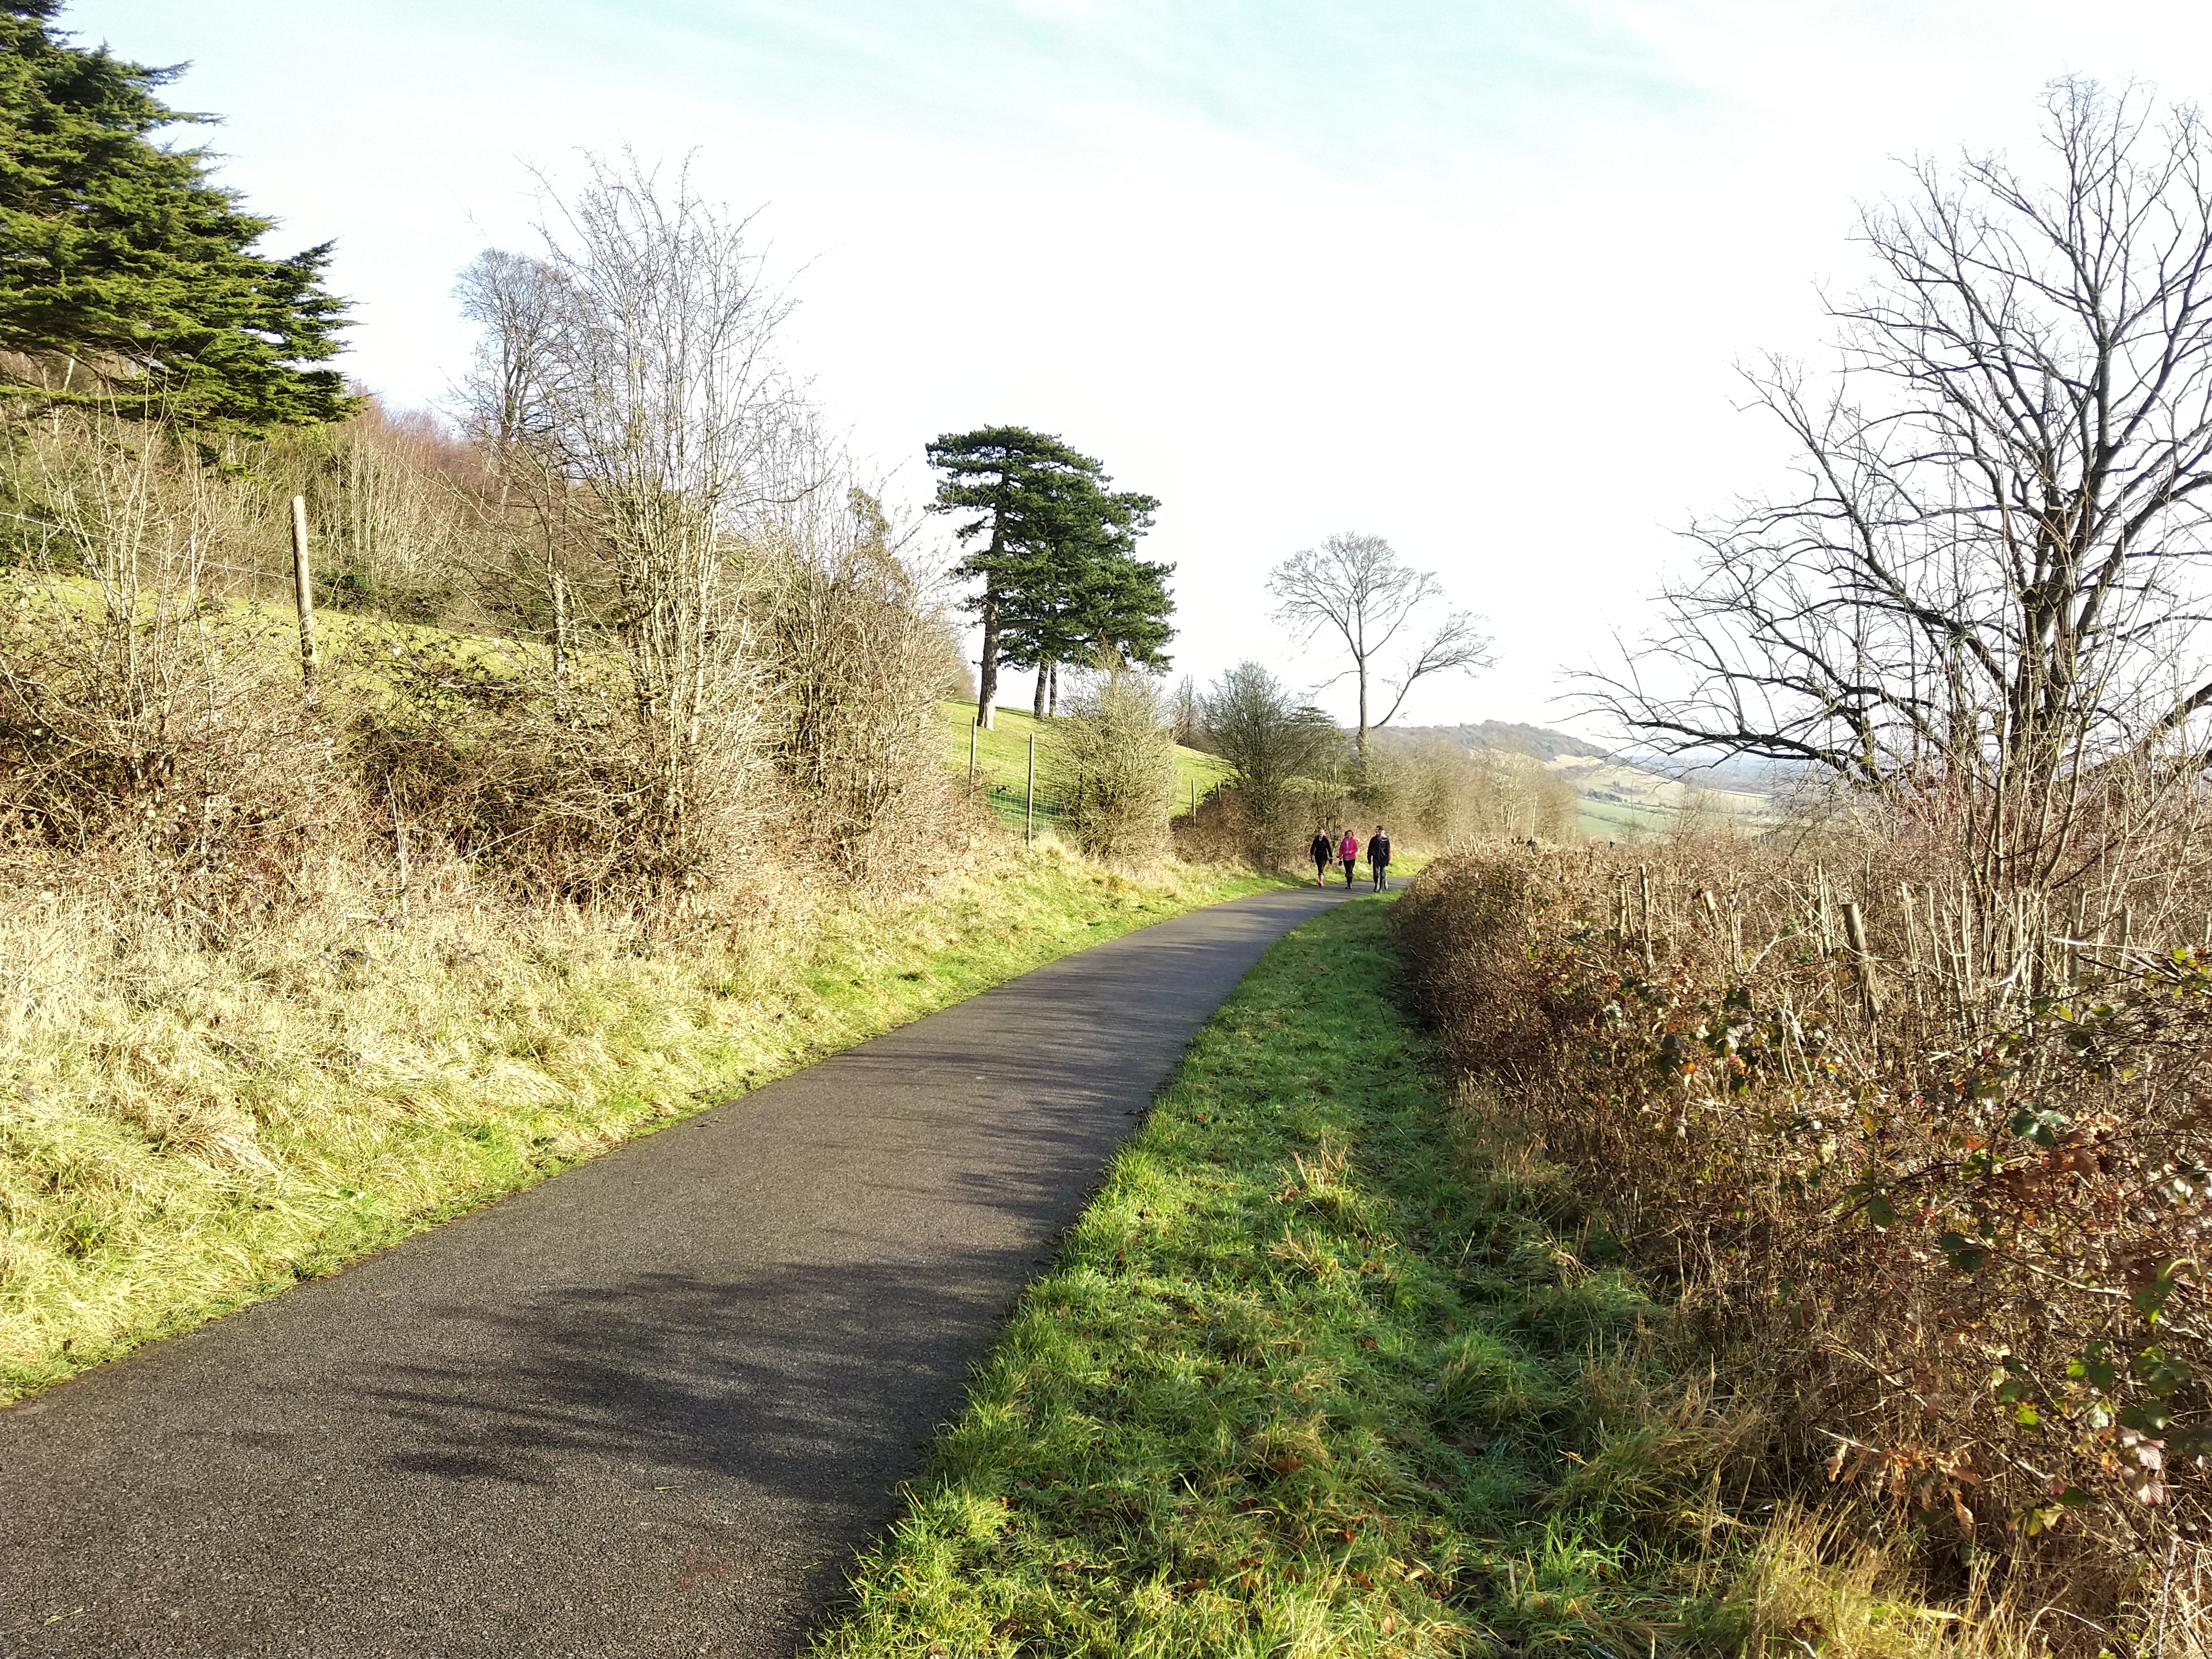
Starting with our first comparison, this shot gives a very good demonstration of the difference in scale between the two lenses. The primary lens, on the left, is significantly wider with the hillside in the distance being much more visible. The posts in the foreground are also much more apparent.
The benefit to the zoom lens is that it can ‘punch in' on subjects in a way the primary lens cannot. You can see the building in the middle of the image (Denbies Wine Estate in Surrey, for those interested) is much more pronounced and we can easily spot the different sections of the building.
In terms of actual quality, the first thing that stands out to me is the subtly different colour cast to each of the lenses. In the images above, you can see the sky in the primary lens' image is much warmer and more natural looking, though the grass in the image produced by the secondary lens looks a more punchy to my eye.
The secondary lens is also noticeably softer, with significant loss of detail to the trees in the background, while even the central building is not overly sharp. When comparing the secondary lens with a digitally zoomed version of the primary lens' image, it is still significantly sharper, though.


Primary lens, left, compared with secondary lens, right
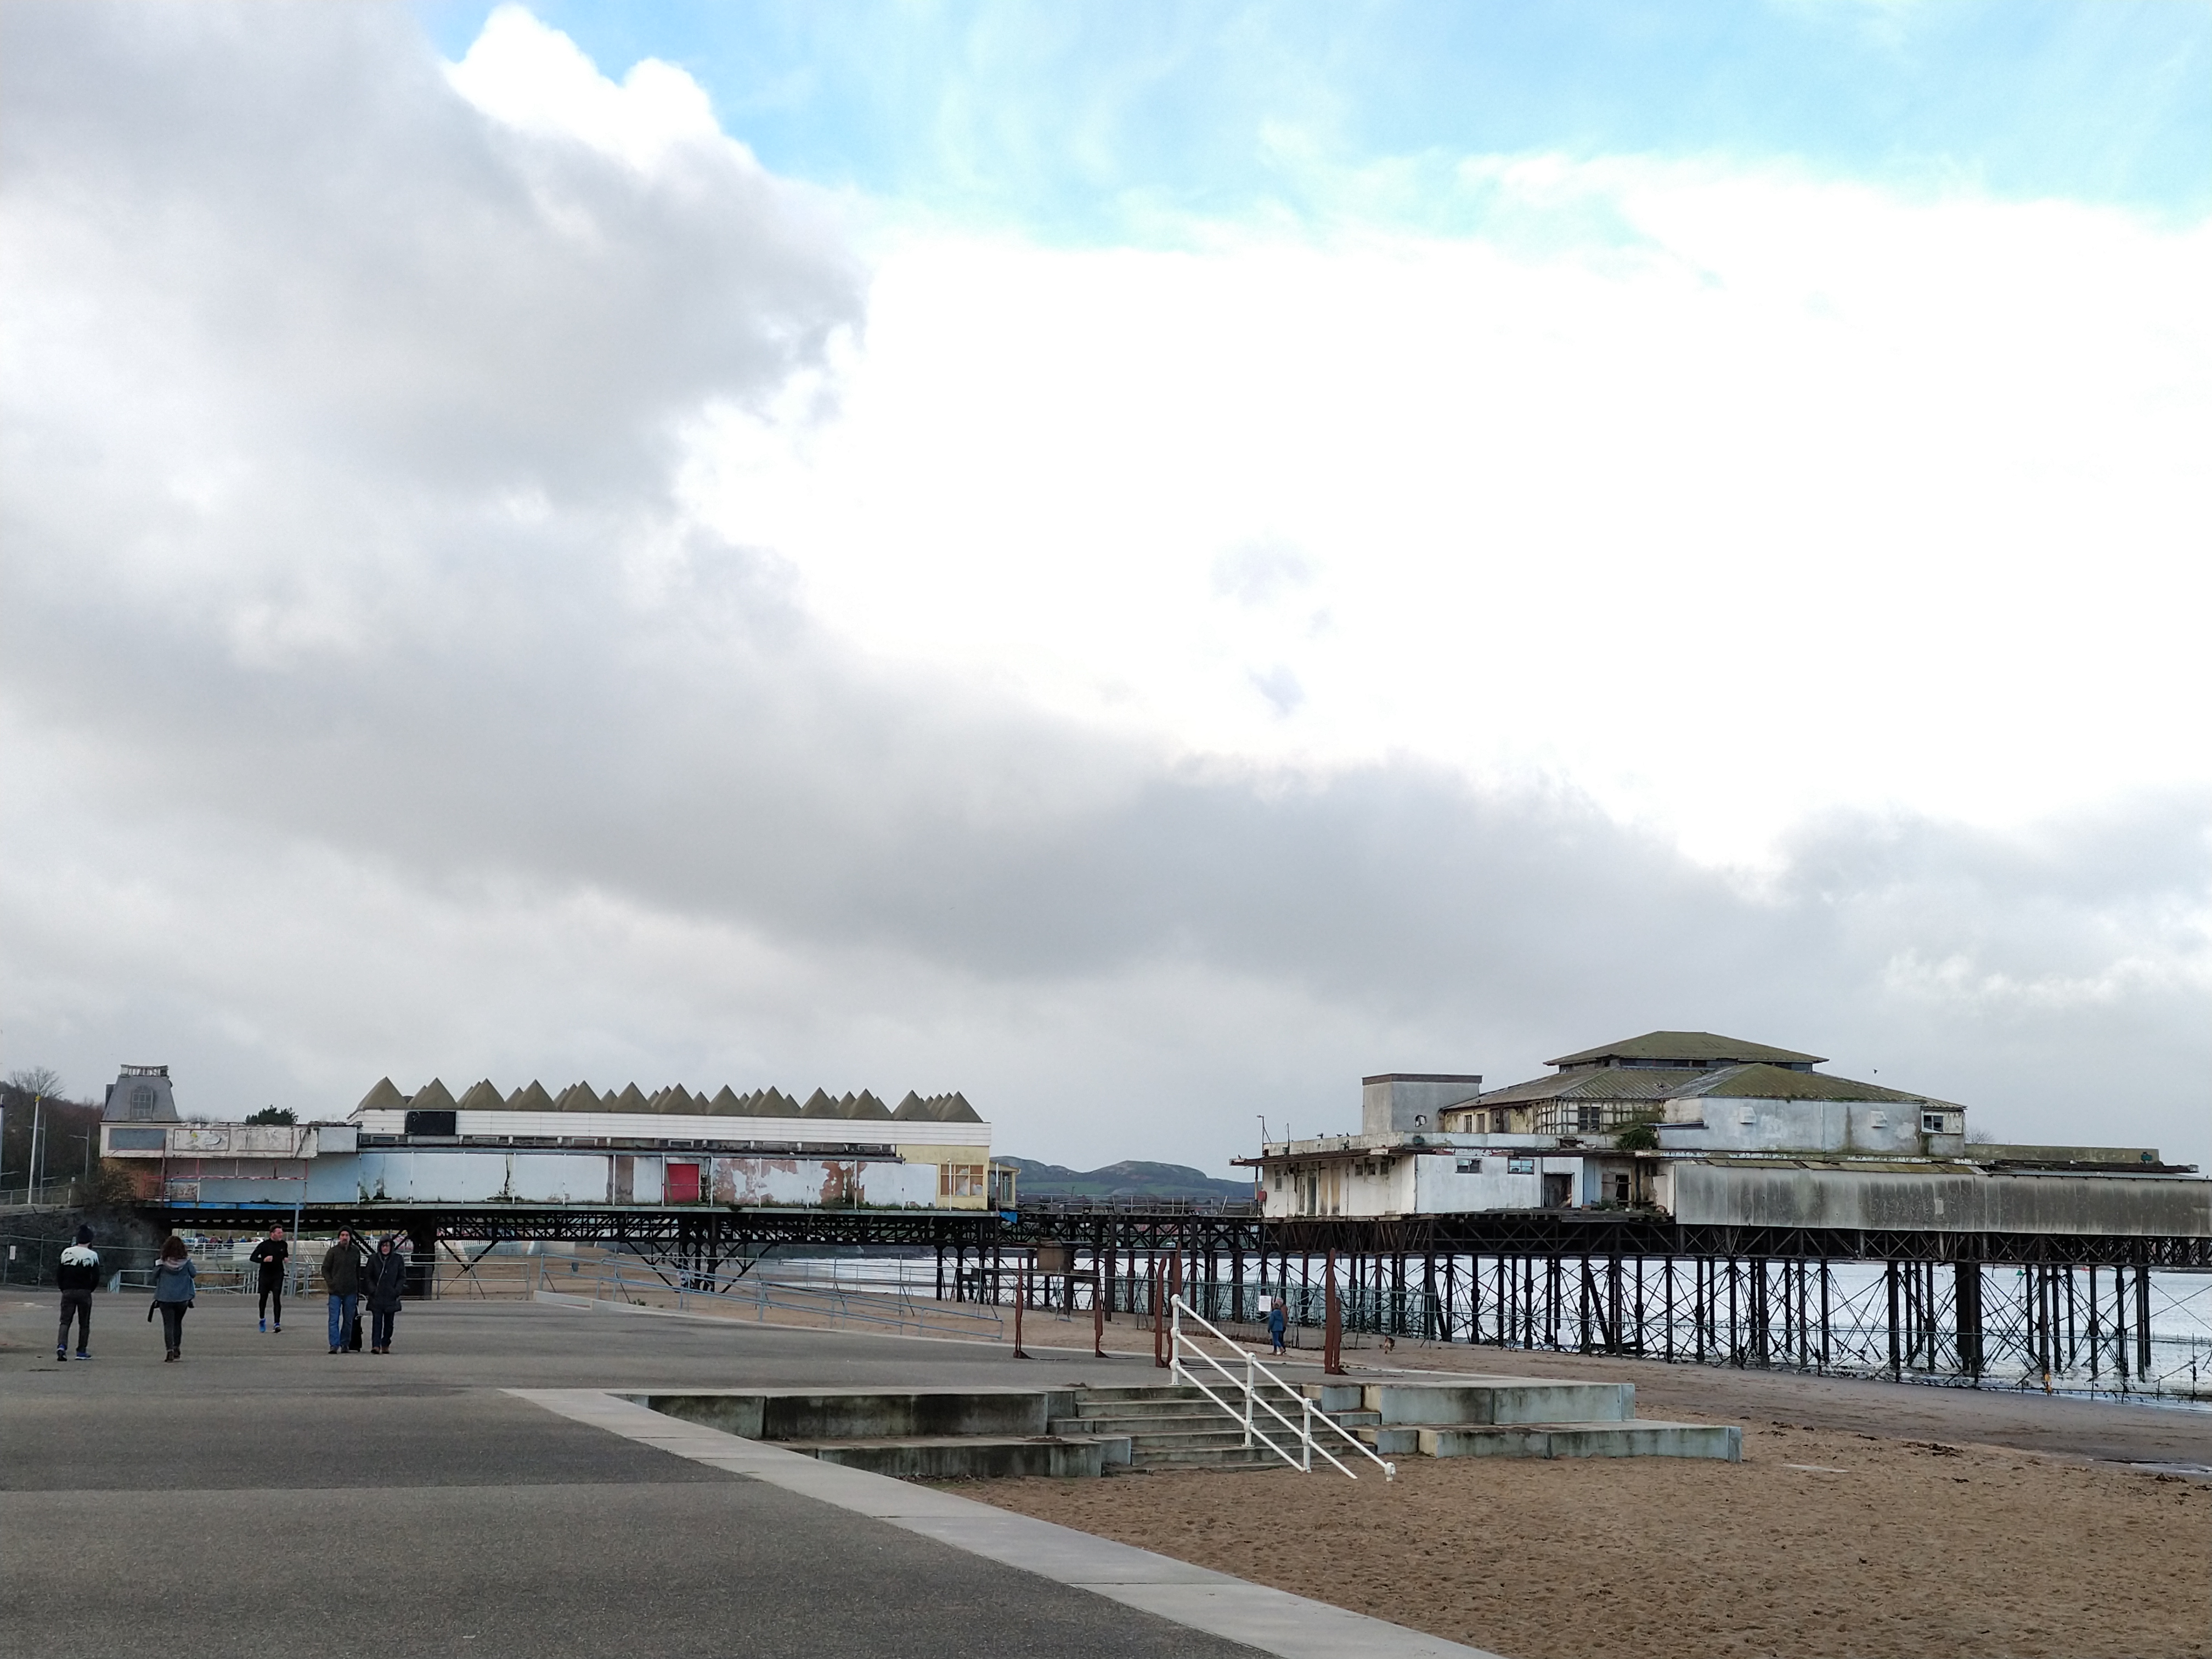
Moving on, the next two examples encapsulate the negatives associated with the Razer Phone camera. The primary lens, again positioned on the left, produced an image that is overall quite soft – there is a major lack of detail in the showed sections, while the over-exposed buildings on the far right-hand side of the image demonstrate significant burn-in. Overall, the image is not terrible but it could be improved.
However, the secondary lens has not done itself any favours here, with terrible auto-exposure which is unfortunately a common problem with the Razer Phone. You can see the clouds in the background are completely washed-out and that has caused parts of the pylon cabling to disappear completely. The palm trees are quite soft, too, rendering the overall image unusable.
Primary lens, left, compared with secondary lens, right
The last direct comparison between wide-angle and zoom lens, this one was taken in my office at home. Using only natural light, for reference the room was easily bright enough to read a book in.
That being said, starting with the image from the secondary lens this time (on the right), you can see the photo exhibits significant amounts of noise. Despite the room being fairly well lit, the f/2.6 aperture means the lens just can't get enough light, so the ISO was raised to 6300 to compensate. It is not good quality.
The primary lens does fare much better as its wider aperture can let in far more light, so the camera only had to raise the ISO to 730 to get a decent image. There is still some noise, but it is much cleaner than the secondary lens' image.As mentioned on the previous page, auto-exposure is a problem for the Razer Phone. Accordingly, we wanted to see how HDR can affect the camera's results. For reference, all the images on the right-hand side are the HDR versions.
HDR analysis

HDR off, left, compared with HDR on, right
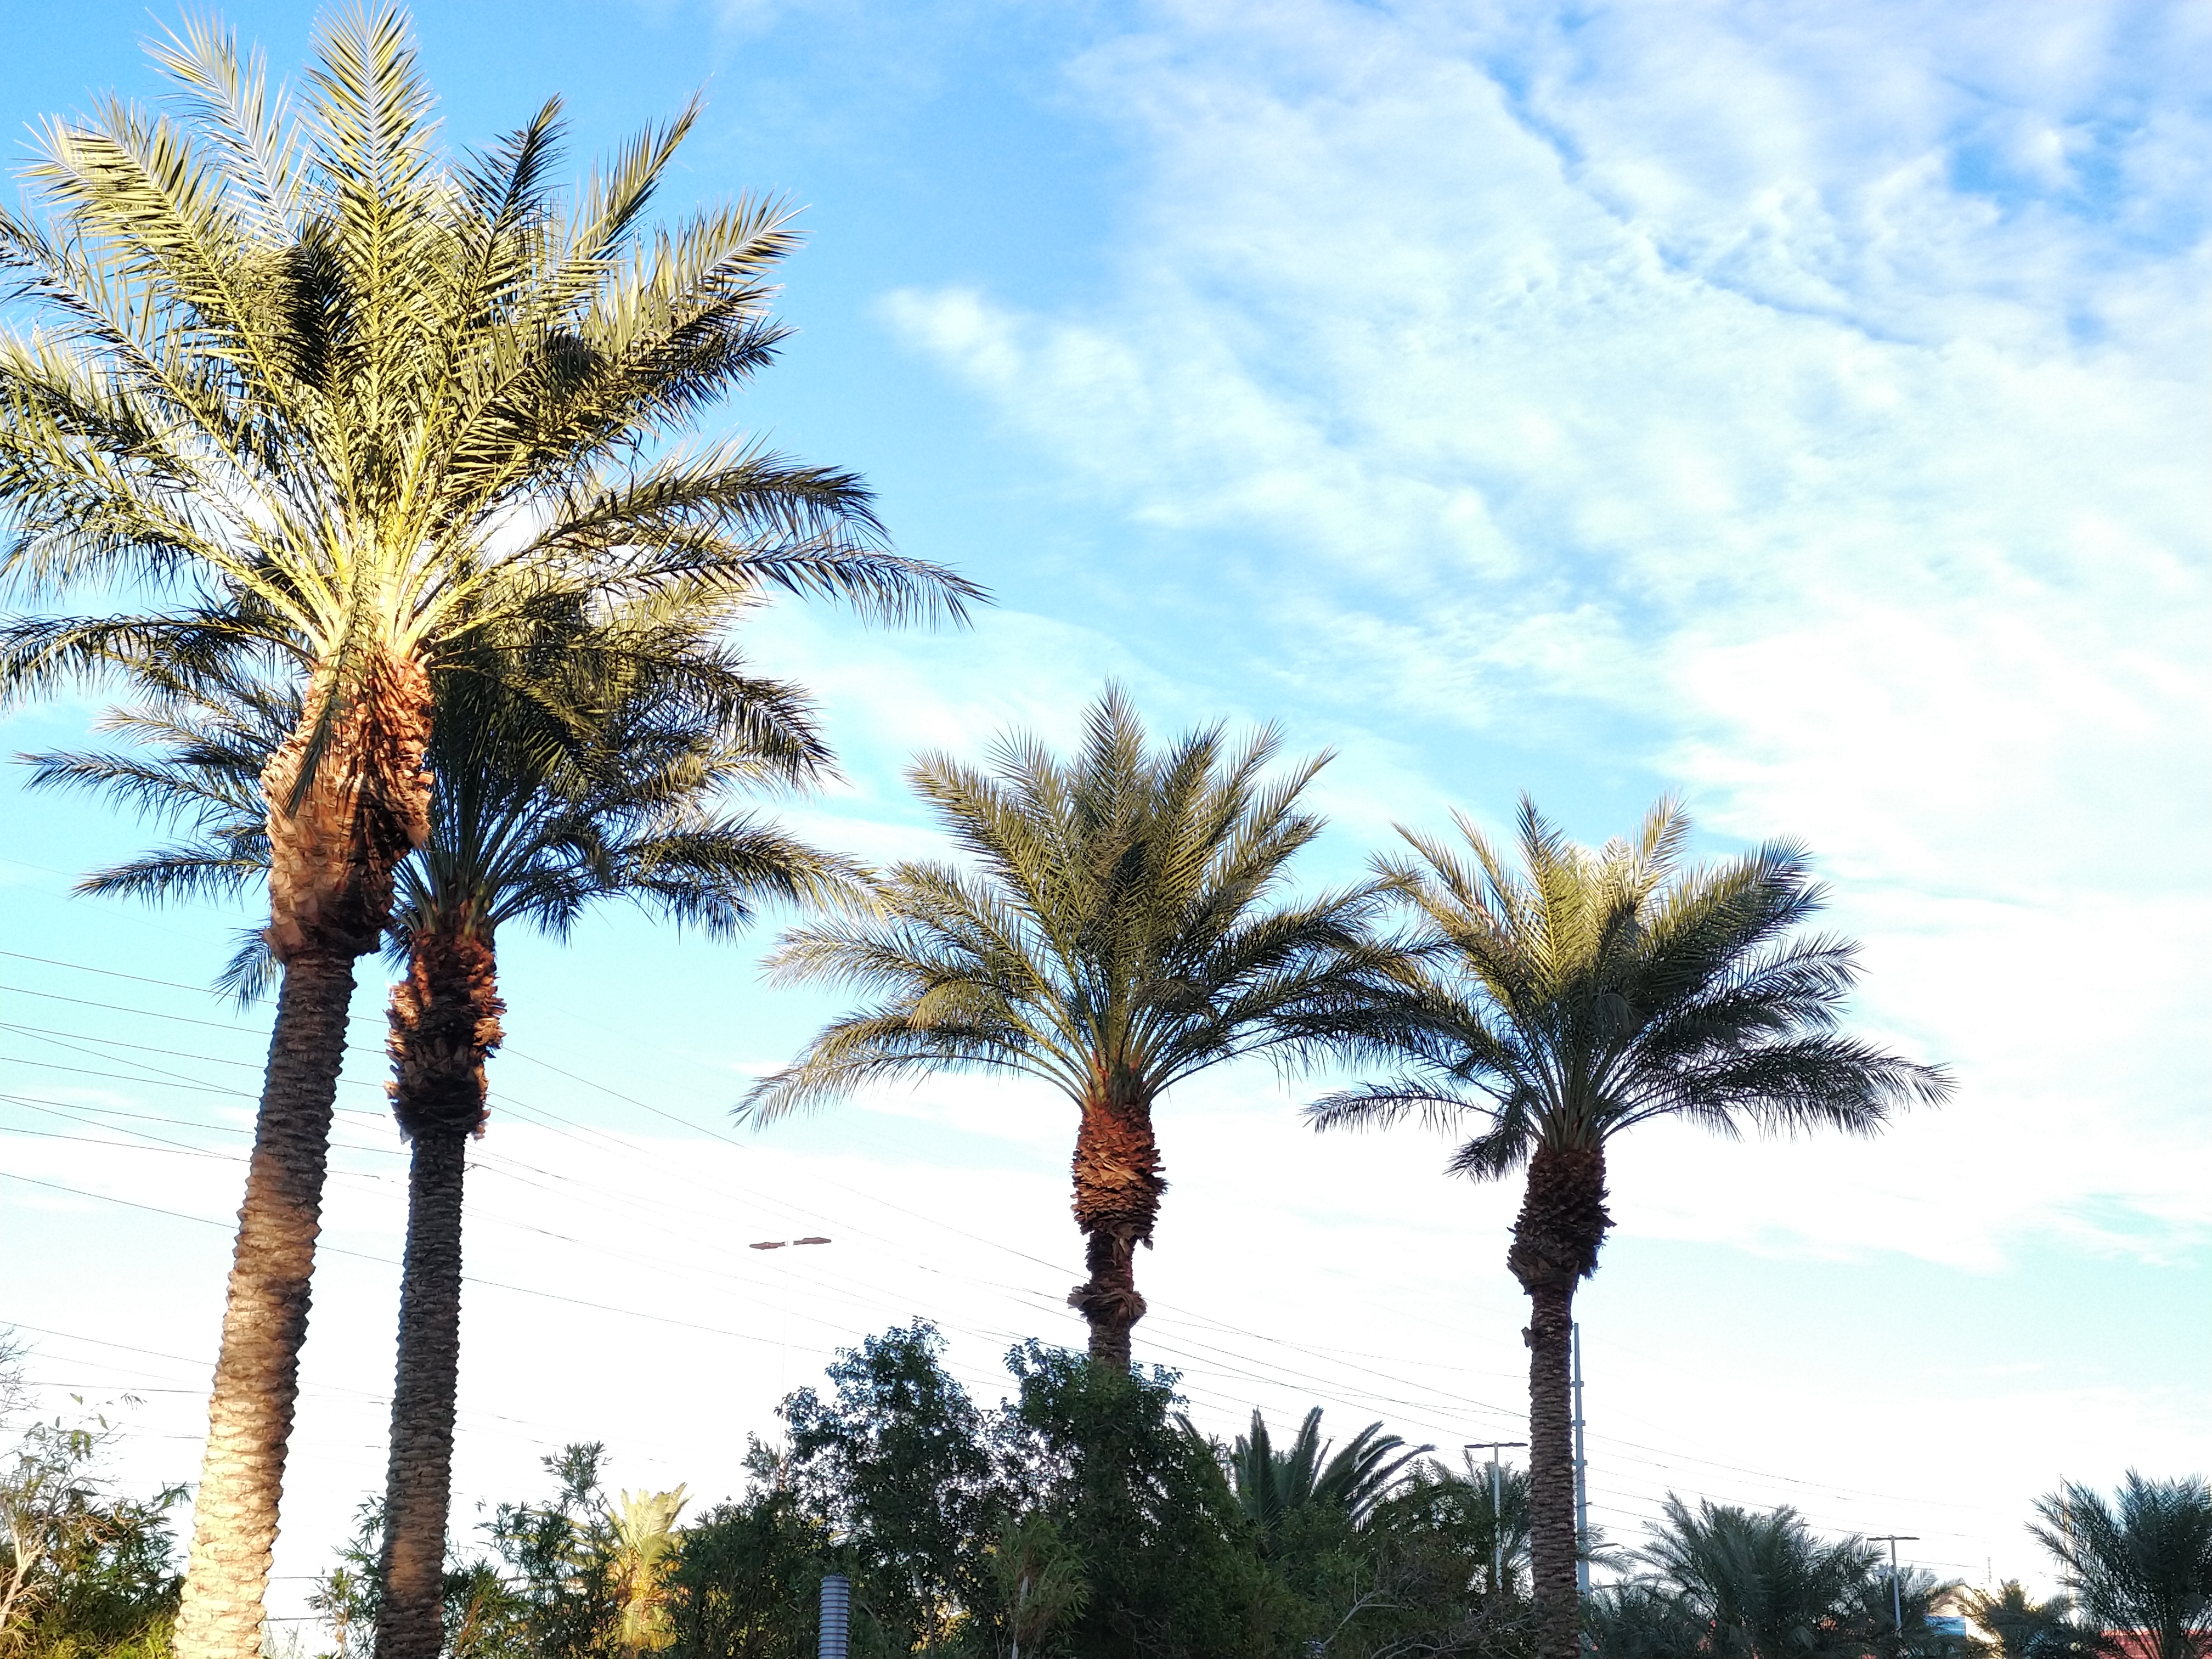
Back to our beloved Las Vegas palm trees, what better test of HDR than the over-exposed image on the left?
As you can see, HDR actually does a decent job at salvaging the image. The white clouds can now be distinguished from the blue sky, while the pylon's wires are now fully formed (as they should be). The palm trees themselves also look quite natural, if a bit dark, but that is an easy fix in post-processing.
It's still not a perfect image, though – the overall scene is just a bit dull, although I suppose it still much better than the original non-HDR shot.
HDR off, left, compared with HDR on, right
The next two images follow the same trend. The non-HDR image, on the left, is quite over-exposed with the sky being almost completely white.
Enabling HDR brings back more colour to the sky, although it is almost grey in the image above. The rest of the scene, however, really gets flattened by the HDR – the grass looks very dull, while you almost can't tell that half of the evergreen is in shade and half is in the sun.
HDR certainly improves the image, but it does look a bit lifeless. Personally I wouldn't want to use the image without a bit of tweaking in Lightroom.
HDR off, left, compared with HDR on, right
Ending on a high, this is perhaps the best example of an HDR image that I have taken over the last three months. The original photo again shows some over-exposed sky, while the branches in the foreground don't look too natural either.
HDR brings back some colour to the sky, but not all – however, the vibrant colours in the foreground are retained, whereas in the other two examples above the colours were completely flattened. On the whole, the HDR image retains a nice ‘pop' to it while balancing out the exposure in a way that is pleasing on the eye.
It is just unfortunate that this example is ultimately quite a rarity – most HDR images end up being quite dull-looking. They are still more usable than their non-HDR versions, but you are unlikely to want to use the images straight from the camera without any tweaking.We touched on it on the first page, but here we present a variety of images taken in low-light situations – anything from dimly-lit rooms to being outdoors at night.
Low-light performance – primary lens


Starting with the primary lens, we would expect the best low-light images to come from this lens due to its f/1.75 aperture. In short, that is exactly what we get. However, overall quality is still somewhat hit-and-miss when light levels are reduced.
Starting with the image on the top left, this is perhaps the best low-light photo I have taken with the Razer Phone. The overall scene is well-exposed and there is a good amount of detail – you can clearly make out the facial features of the gentleman in the foreground which is quite impressive. An ISO of 180 also helps keep noise to a minimum, and overall I would be happy to use this image.
Moving to the image on the top-right, it is typical of the Razer Phone to serve up a very good image one moment, and then gives you something like this. The primary lens really struggles with this night scene, and a significant amount of noise is introduced despite the ISO not exceeding 1400. The noticeable motion blur is a result of the shutter speed going as slow as 1/14 sec, and this also results in a fair amount of lost detail – particularly evident when looking at the ‘Wynn' logo emblazoned on the top of the hotel. Overall, a very poor image.
Moving inside the El Cortez casino (the bottom left image), things pick up again here. Relying on the fairly dingy casino floor lighting, the ISO hit 733 with a shutter speed of 1/25 sec. The end result is not bad, but not perfect – the car in the foreground is mostly sharp and you can clearly read the ‘El Cortez' sign in the top-left corner of the photo. However, the slot machines in the background are badly blurred, while their screens are also washed-out. Overall, not terrible but not that good either.
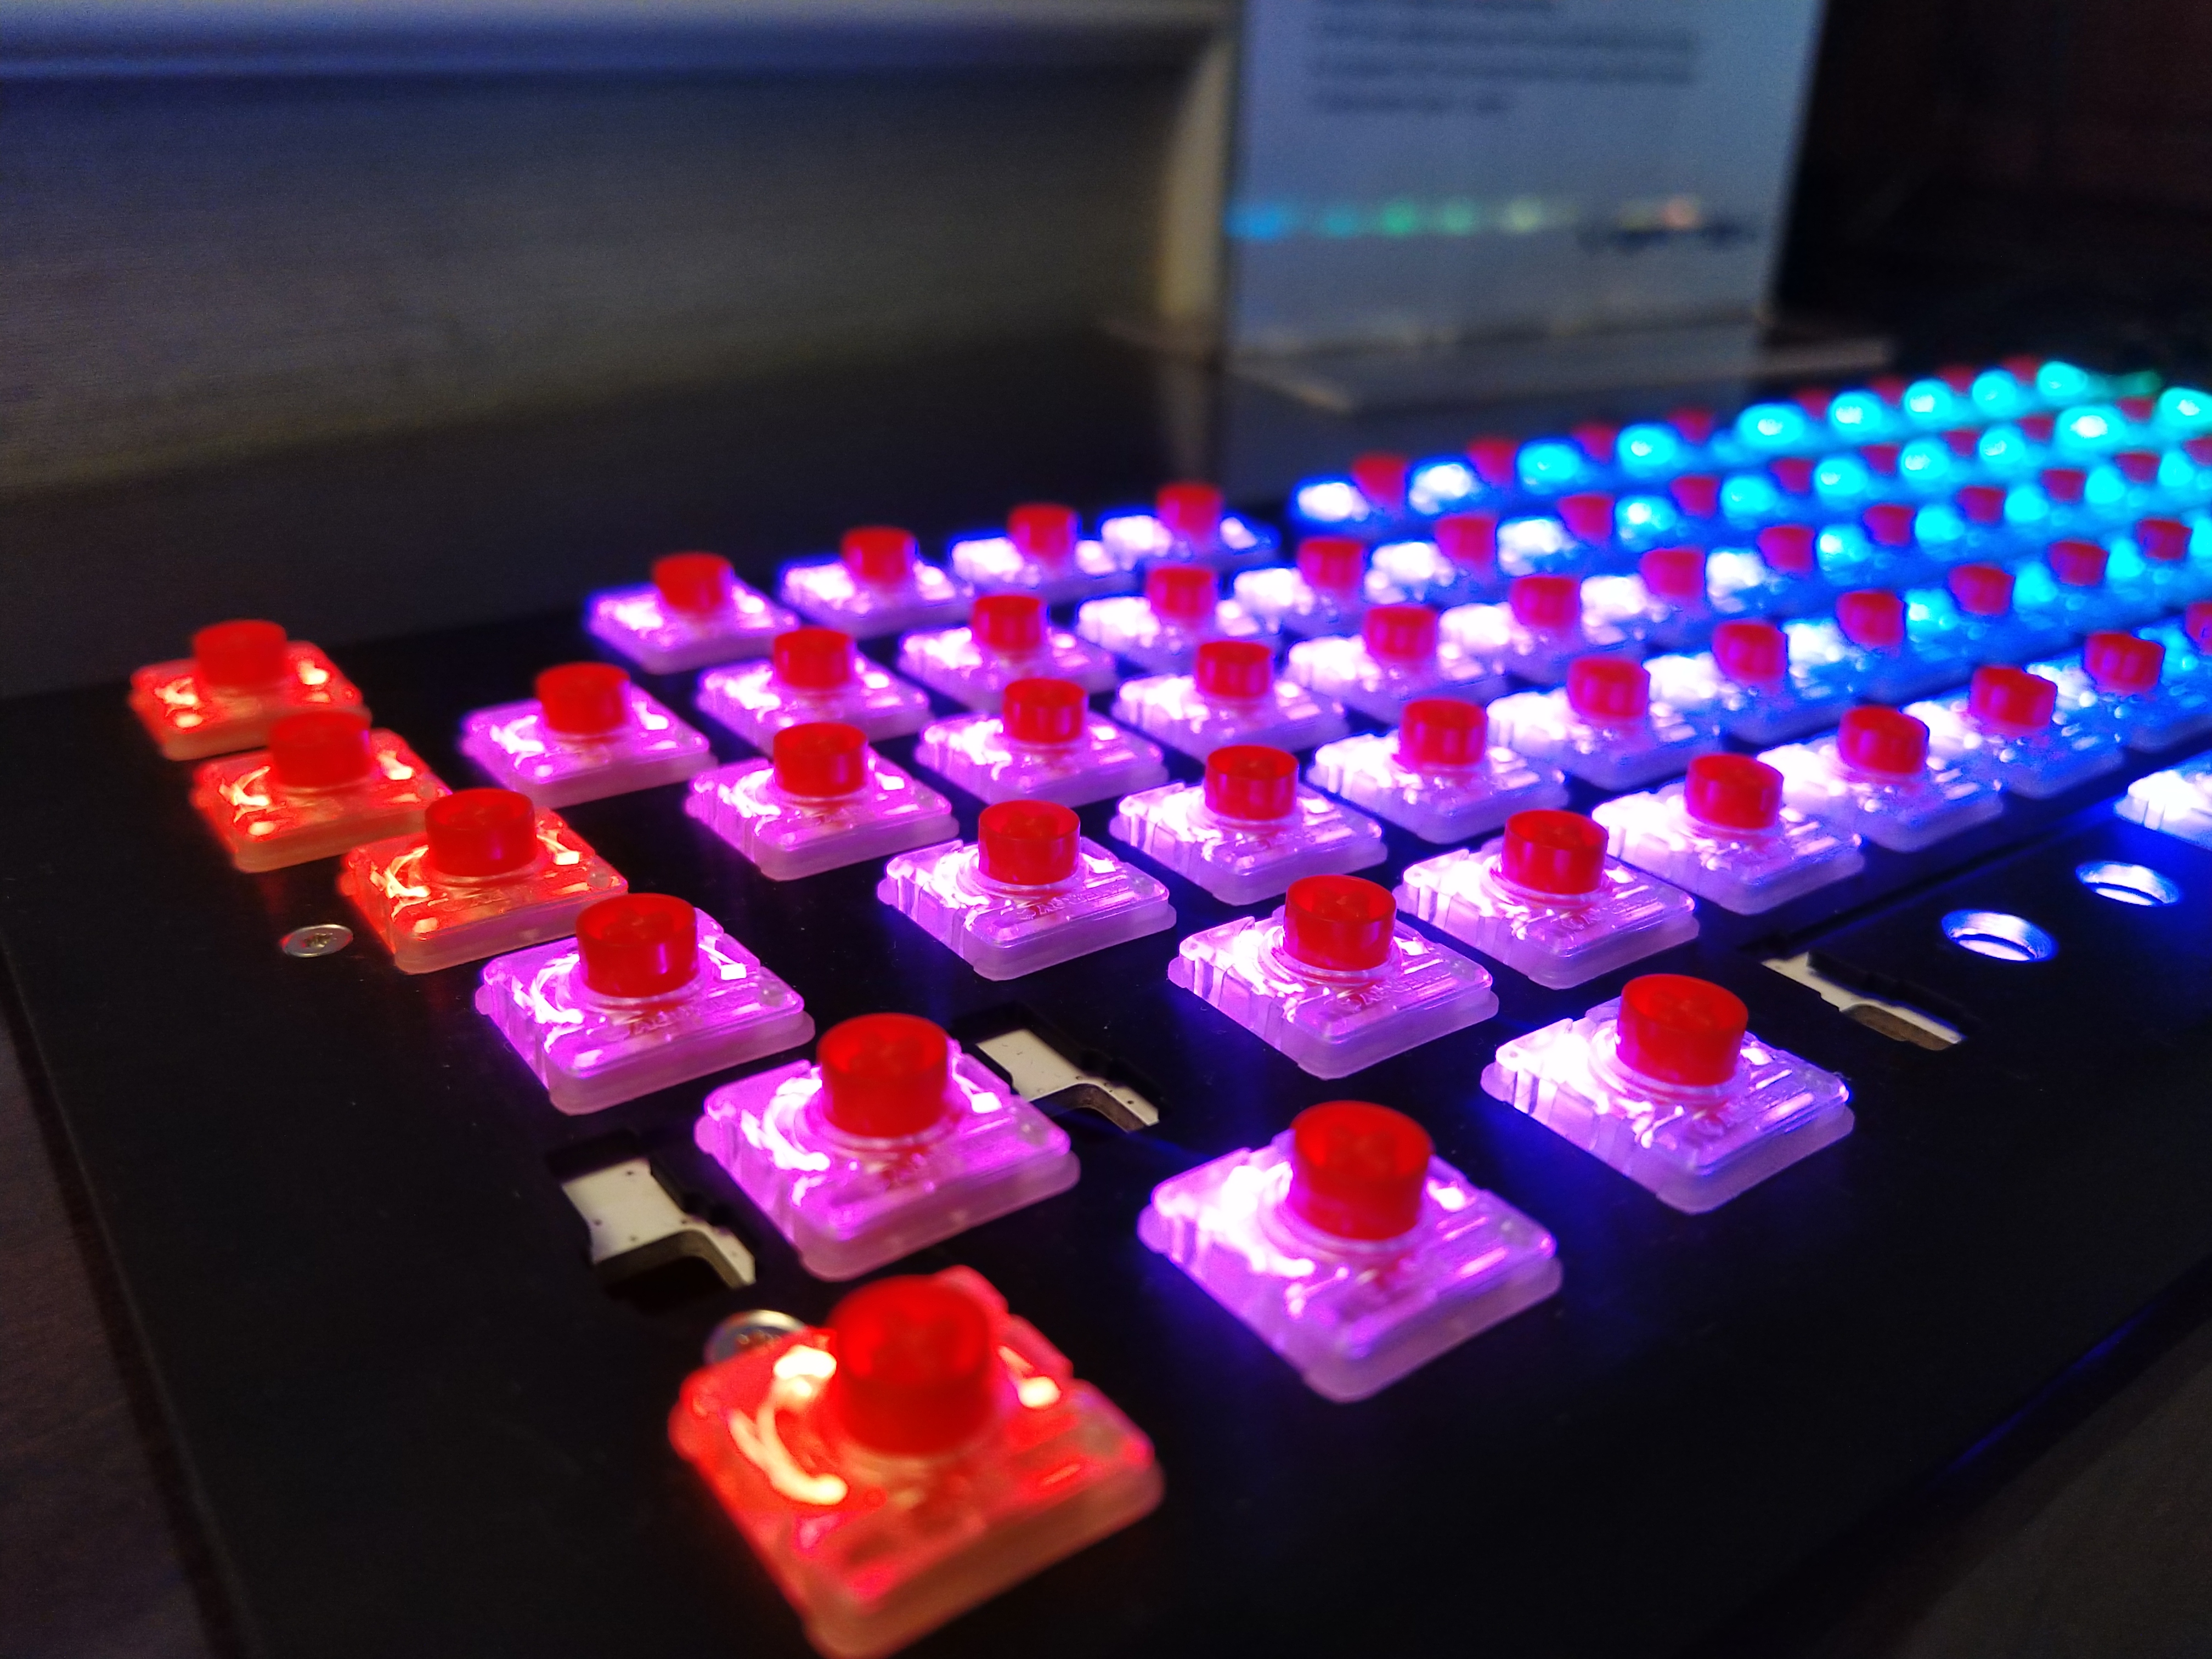
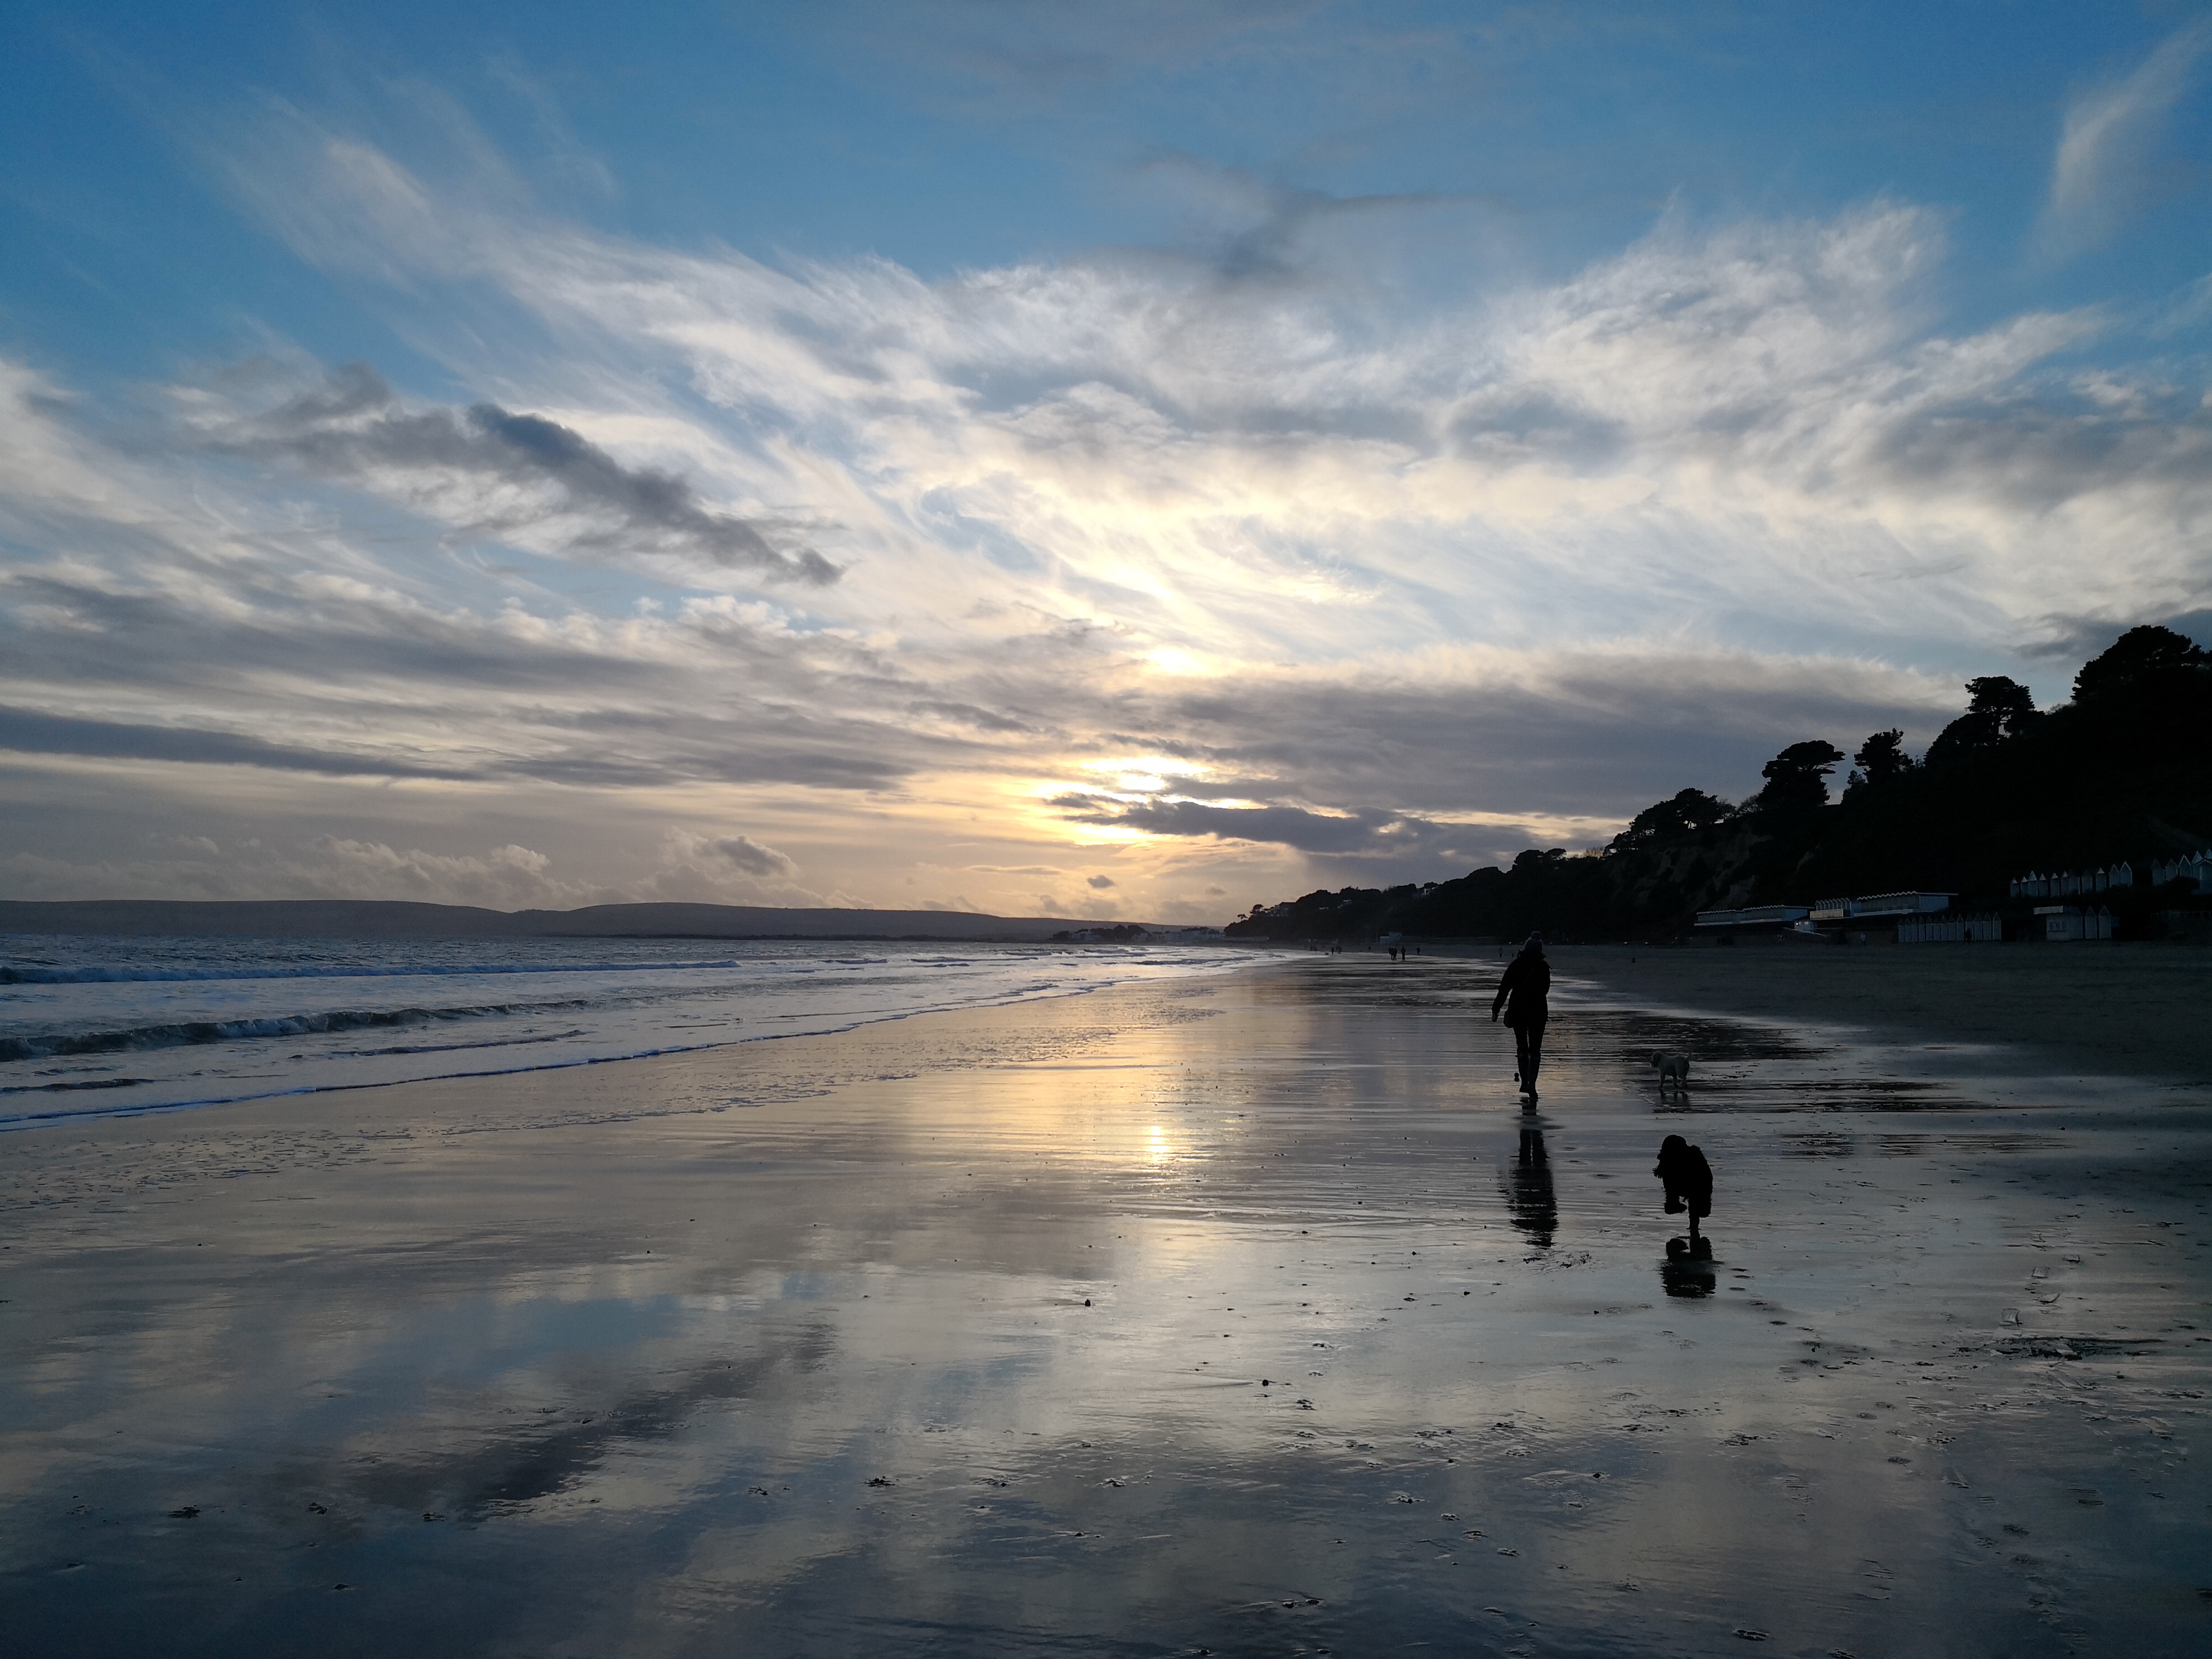
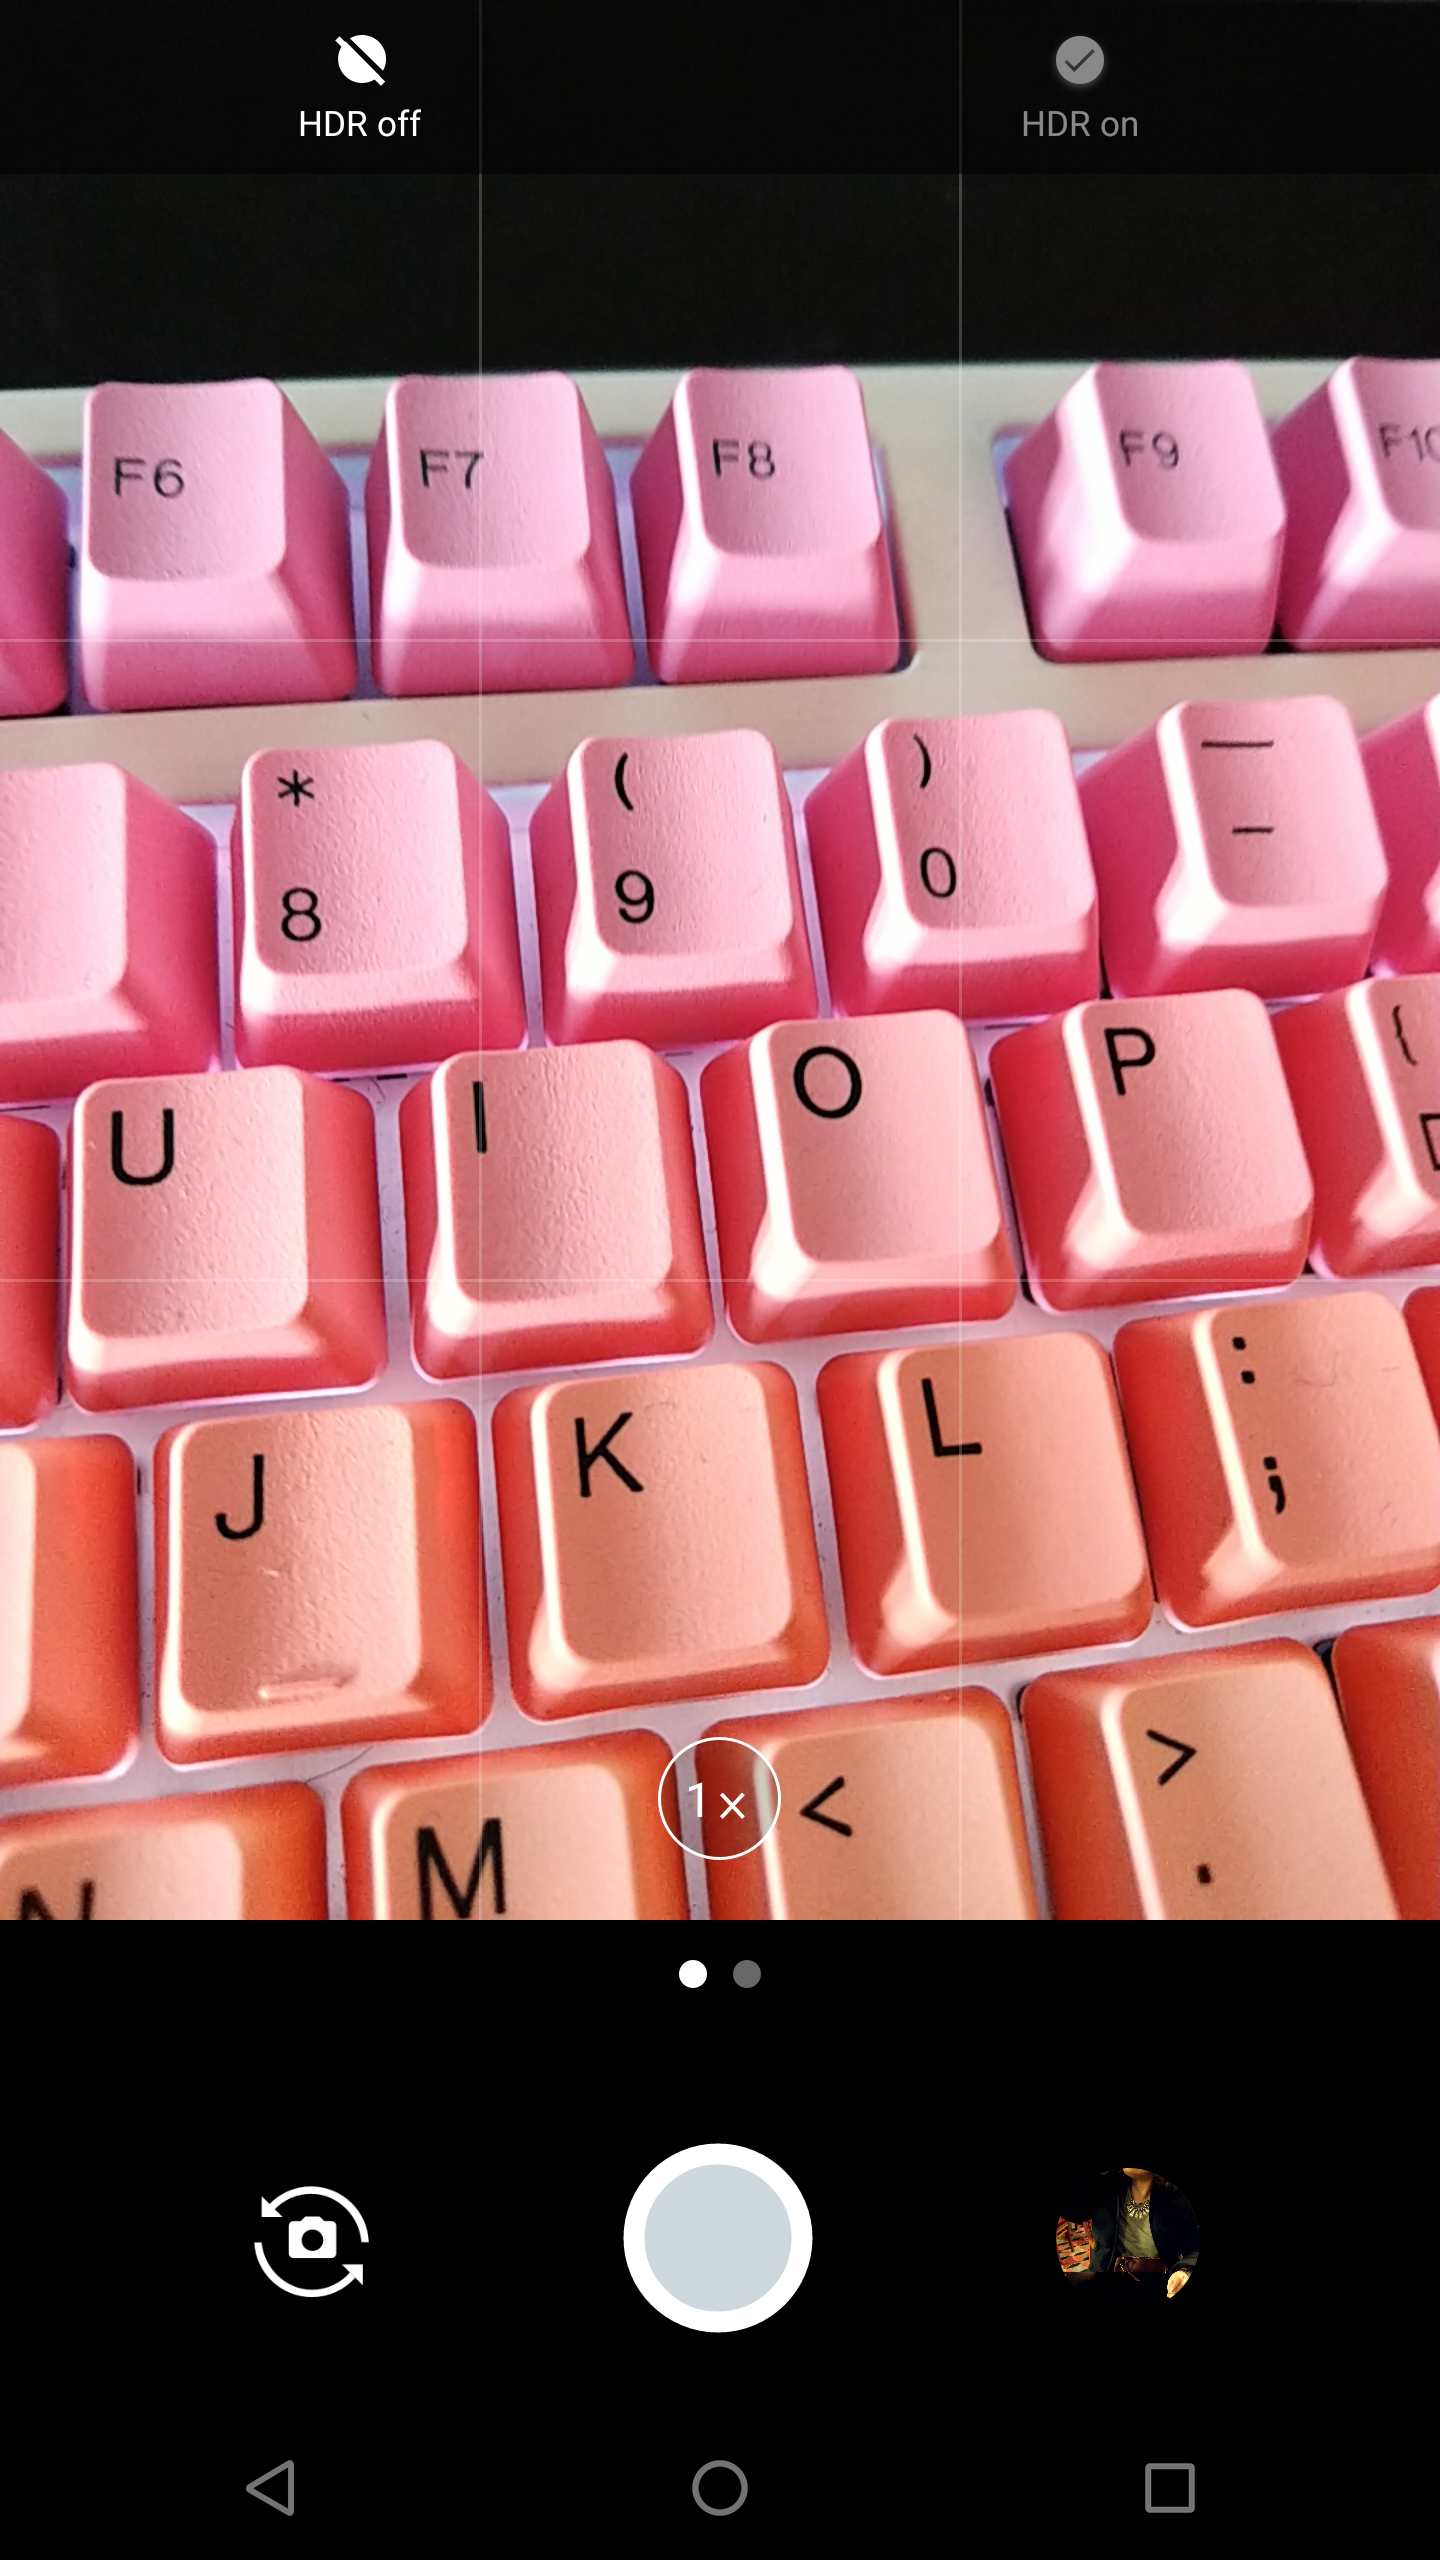
Lastly on the bottom right, we get to a Cherry keyboard showing off the company's latest switch. This image isn't too noisy, with ISO 175 and 1/33 sec parameters being used. The exposure is also quite pleasing, really showing off the keyboard's RGB lighting. However, if you look closely, there is really no area that is actually in focus – the switches on the left-hand side are certainly sharper than the ones further away, but you are still left wondering where the phone was actually trying to focus.
Low-light performance – secondary lens


Less words are needed for this section – low-light performance of the secondary lens is poor. As mentioned, this is because the lens has a narrower aperture, f/2.6, and that lets significantly less light in than the primary f/1.75 lens.
The image in the top-left is the most successful, with lovely colours actually, but there is subtle loss of detail than becomes evident when looking at the Wynn logo on the top of the hotel – you can see it is not very sharp.
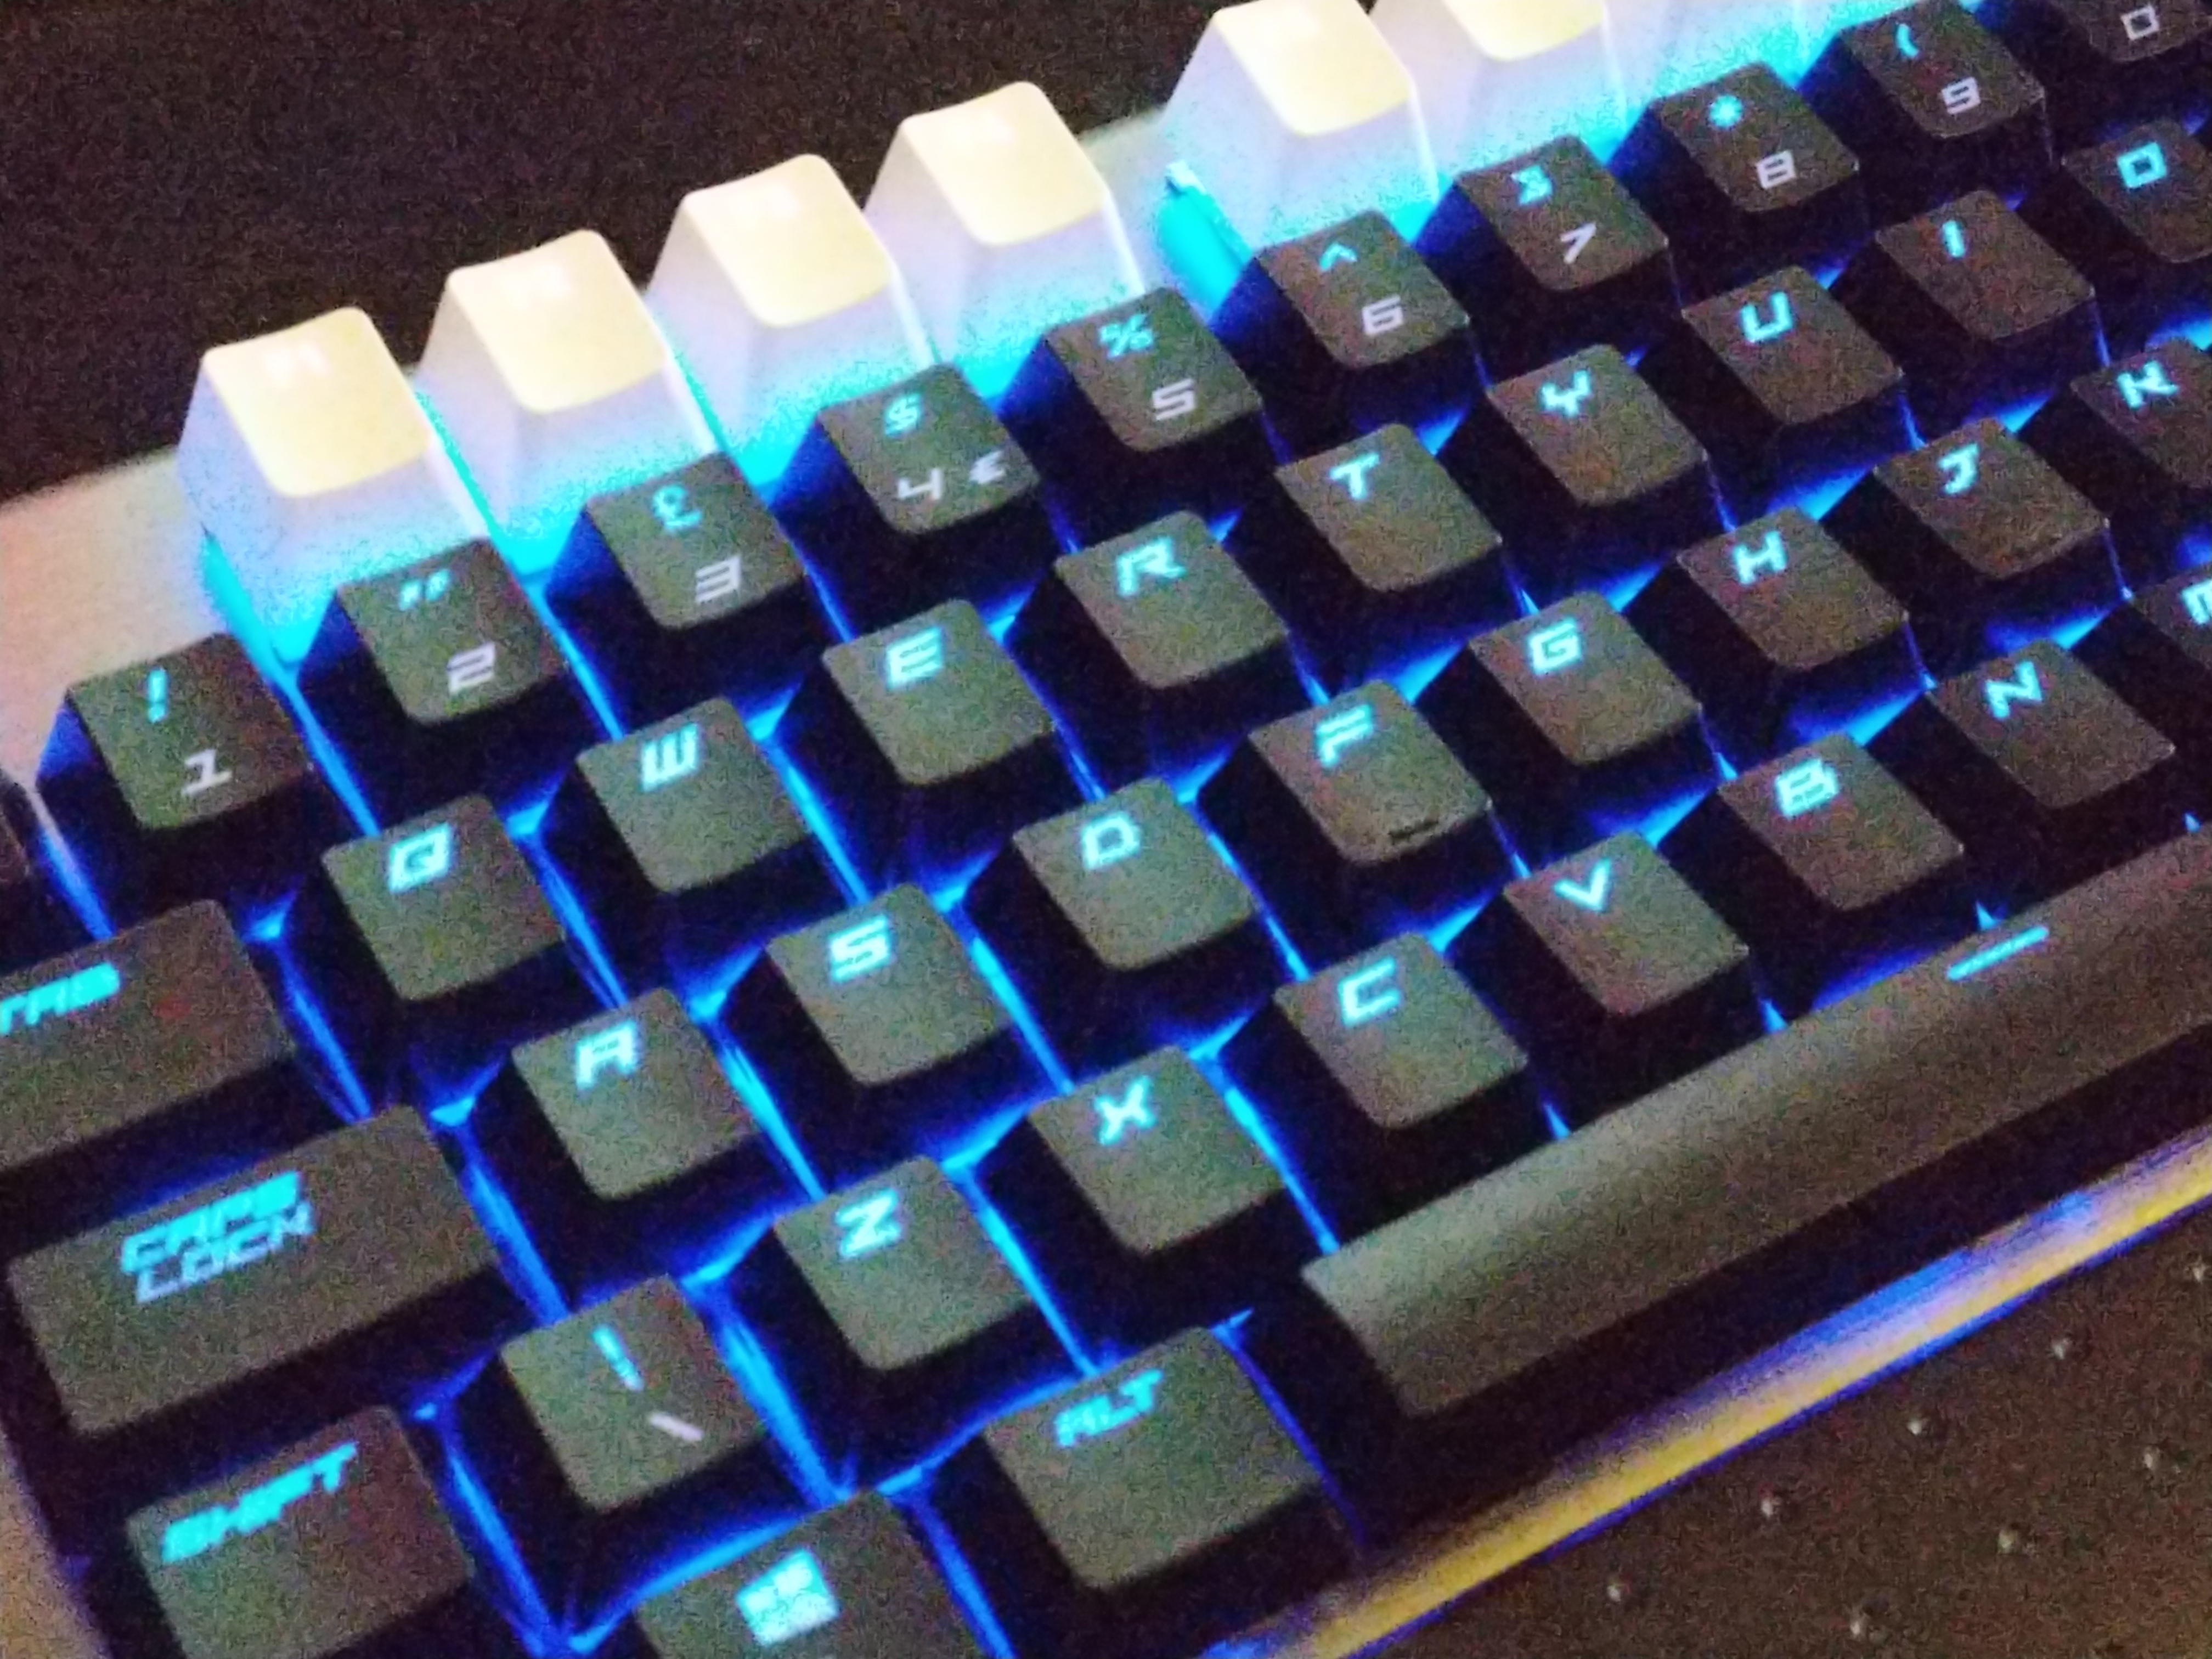
The rest of the images follow that trend, but in a far more obvious manner – noise is very apparent, with almost no sharpness to the images at all. The keyboard shot – taken in my office – for example, is absolutely dreadful, while the rather odd dog statue in The Venetian is also quite soft and fairly noisy.
On the whole, I would strongly advise against using the secondary lens in any low-light situation as the end result is almost always unusable.Below we present a sample gallery of images taken with the Razer Phone. These are a combination of shots taken using both the primary and the secondary lens using the default camera app. They have not been cherry-picked at all, but are a wide selection of the results I have been getting from the camera. The purpose of this is to give you a feel for the sort of quality you can expect from the camera as a whole, without cherry-picking the best images.
16-shot sample gallery


Note: if the above gallery is not displaying properly, please disable your ad blocker as they are known to interfere with our code.
The purpose of this gallery is to show that the Razer Phone can produce some quality shots with sharp detail and good exposures. However, it is equally capable of producing over-exposed, blurry images which are no good to anyone.
To be absolutely clear, all the images above were taken using the default Razer Phone camera app, with no adjustment to exposure at all – I simply wanted the camera to do all the work for me. And as I say, the results are a mixed bag.The last of our image comparisons, here we present 5 different shots taken on both the Razer Phone and the Huawei Mate 10 Pro. The reason we have chosen to compare these phones is pricing – both cost £699, so it will be interesting to see how the cameras stack up against each other.
For reference, the Razer Phone images are on the left-hand side. We used fully automated settings with both phones.

Razer Phone, left, compared with Mate 10 Pro, right
Razer Phone, left, compared with Mate 10 Pro, right
Razer Phone, left, compared with Mate 10 Pro, right
Razer Phone, left, compared with Mate 10 Pro, right

Razer Phone, left, compared with Mate 10 Pro, right
The first thing to note is auto-exposure – the Razer Phone's failings here quickly become apparent when compared with the Mate 10 Pro. In the first three images, the Razer Phone over-exposes and burn-in is introduced – the Mate 10 Pro, however, produces much smoother photos with no sign of burn-in. It's images are a bit darker, yes, but that can always be tweaked when we get to post-processing. The Razer Phone's overexposure is much more of a problem. You can lighten an image easily enough, but you can't put in detail that is not there in the first place.
That said, the Razer Phone can produce punchier colours – particularly noticeable in shot 4, where the Mate 10 Pro looks much more muted in comparison. This image was taken using the Razer Phone's zoom lens, and with the Mate 10 Pro we used the camera's ‘lossless 2x zoom' setting to replicate the Razer's zoom lens. Even though it is a good example of digital zoom, it is no match for proper optical zoom and there is noticeably more detail in the Razer Phone's image.
Overall, though, the Mate 10 Pro produces cleaner, more detailed images across the board. In image 5, for instance, the colours are more vibrant, while it is also better exposed. Speaking purely in-terms of automated camera quality, it has to be a win for Huawei here.As mentioned on the first page, Razer has updated the Razer Phone's software since the Phone launched – which has to be a good thing, as software was a big criticism of mine in our original review. Here, we take a look at the camera app as it is now, and talk about what difference the updates have made.
First of all, we have the addition of the lens switching button – the small 1x button which will change to 2x to let you know you're using the secondary lens now. That change is positive as you can now easily switch between the two lenses.
However, I have to say the rest of the ‘improvements' have not been that successful. For one, the shutter speed is still slow – it has improved, yes, but I can still be waiting one or two seconds for the camera to respond before an image is actually taken, and by that time it is often too late. In comparison to the Mate 10 Pro, the shutter delay there is simply non-existent, which highlights for me the fact that Razer still has work to do.
Similarly, taking a photo with HDR enabled still takes too long – once you press the shutter button, a progress wheel will start spinning, sometimes lasting as 5 seconds. Most of the time, this delay is closer to 2 seconds, but it's still too slow and I can't say I've noticed much improvement there.
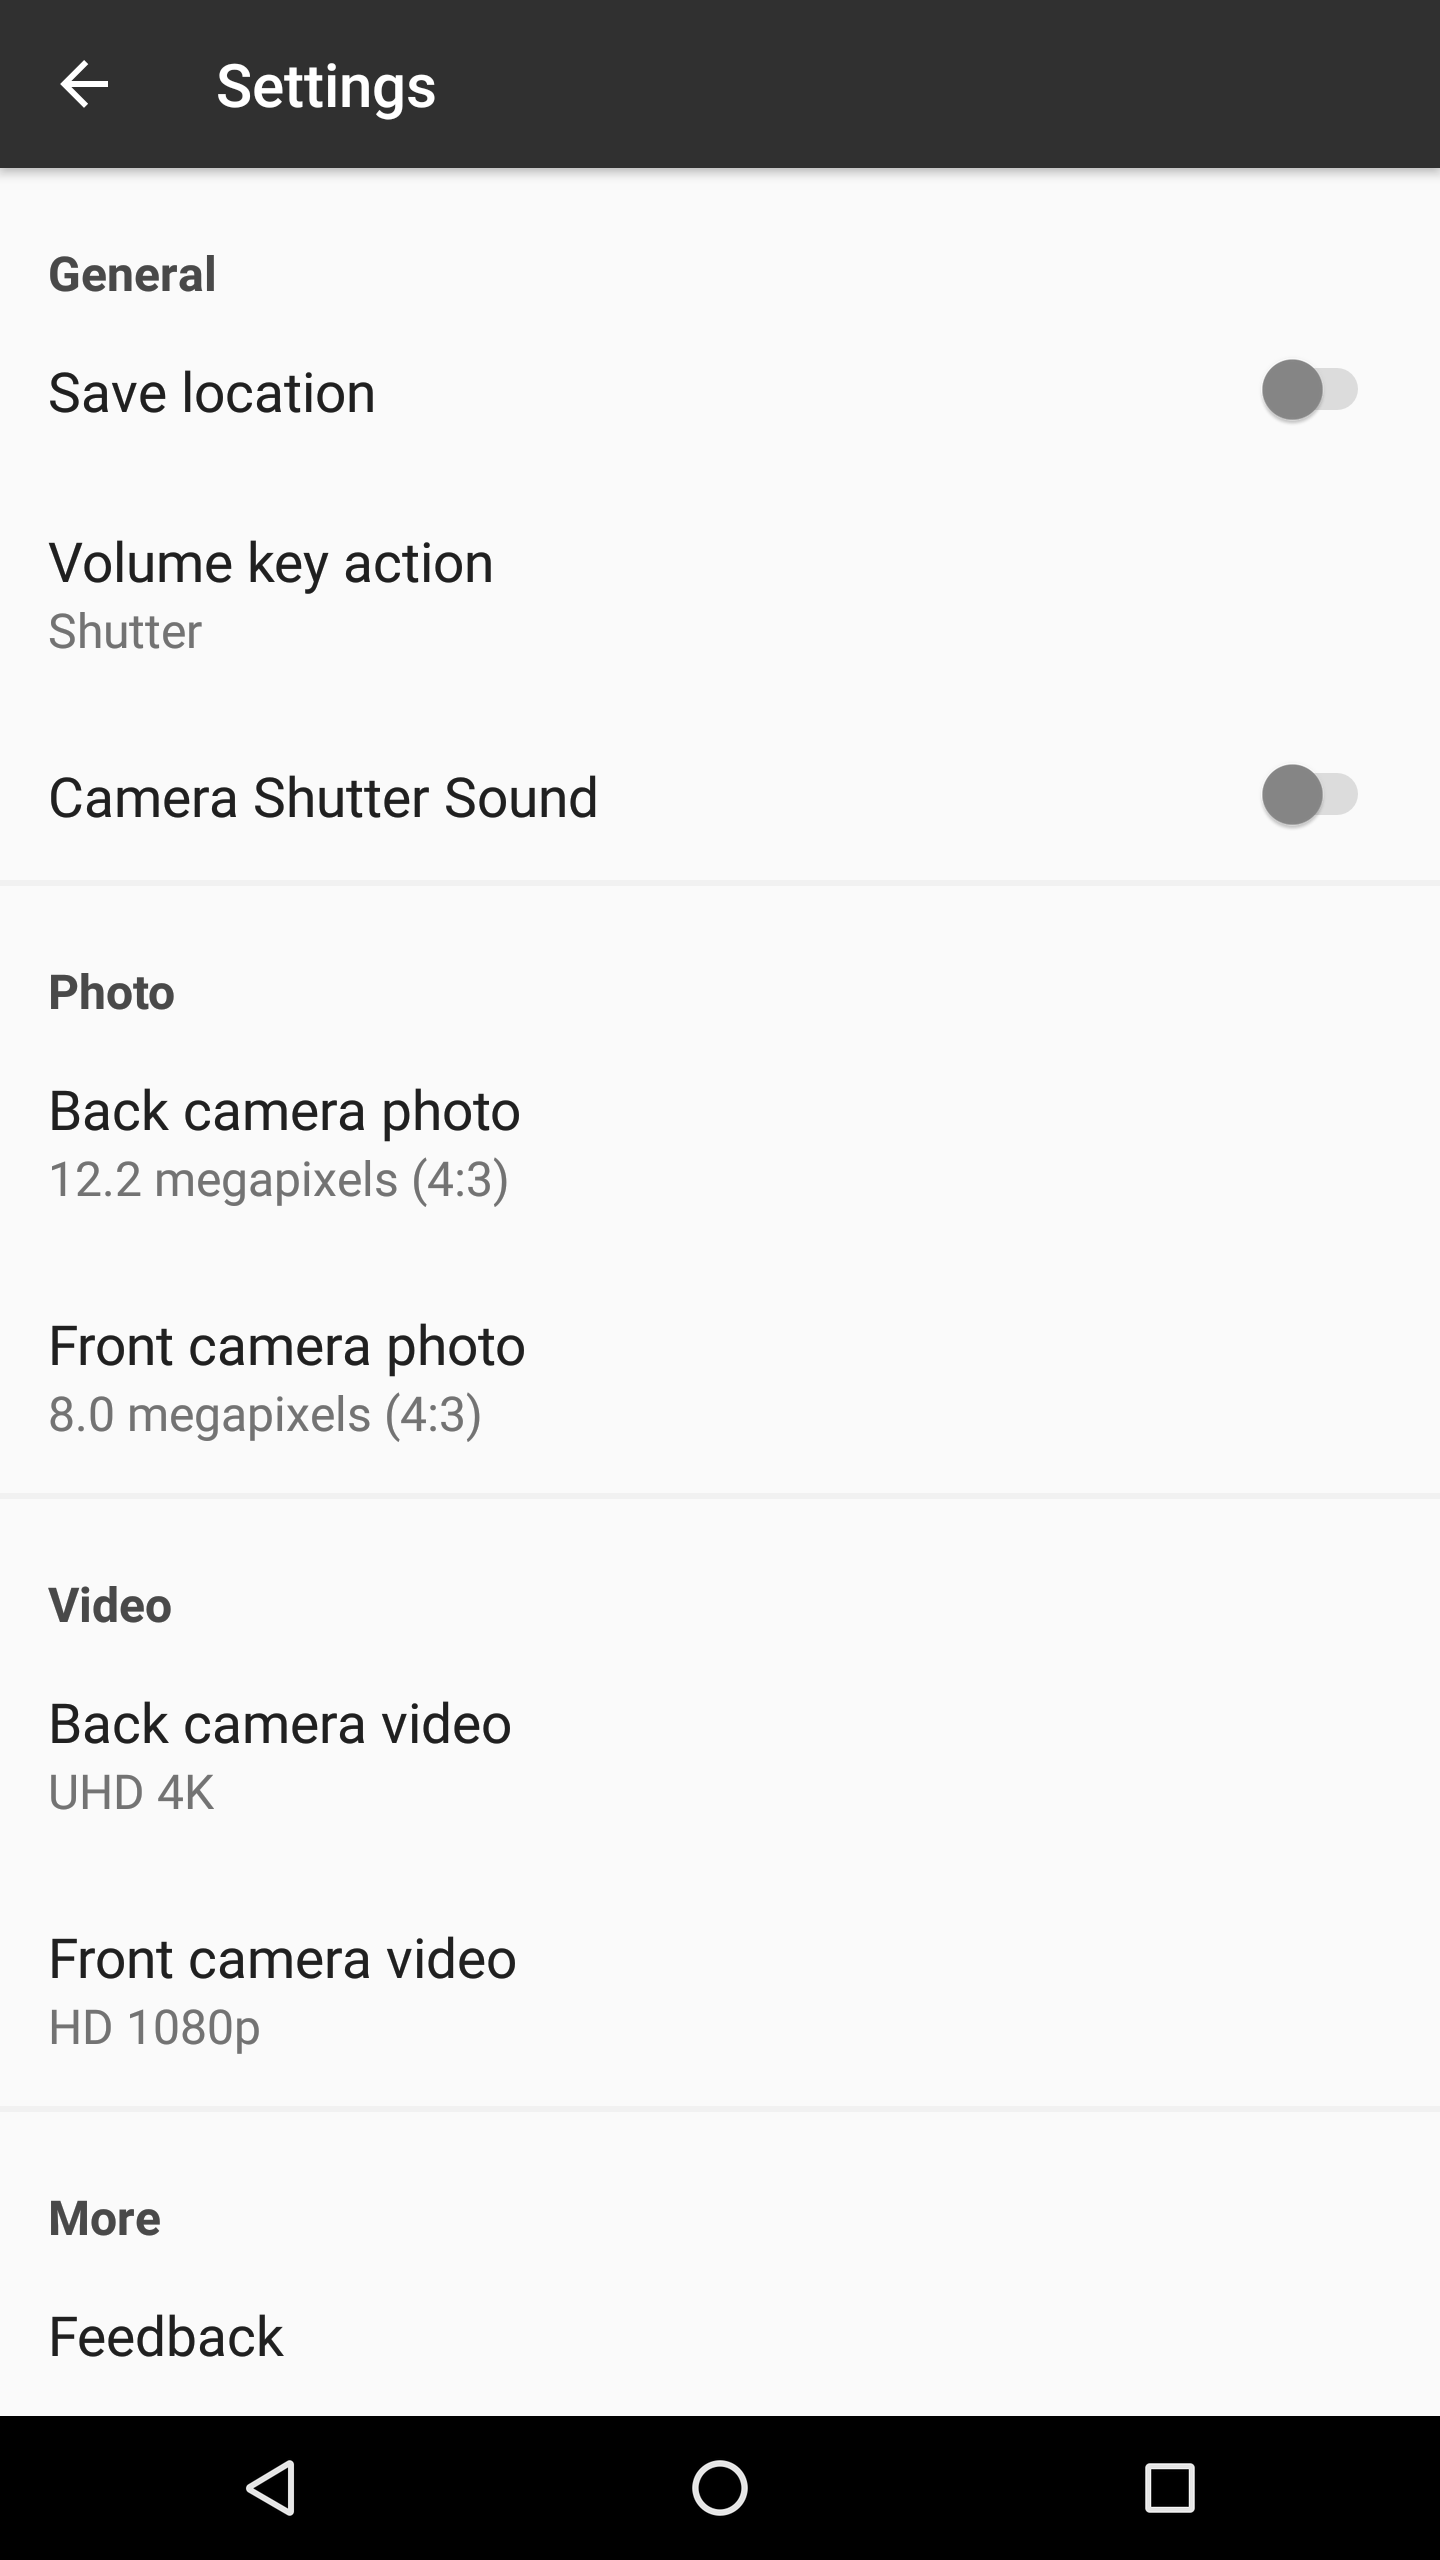
Other than that, the camera app is also very light on features. We have no panorama mode, no portrait mode, no time-lapse, no filters – and the list goes on. I can appreciate that Razer has been working to get the camera functioning as it should, with a focus on adding extra features later, but almost three months on from the phone's launch I would've hoped for more.
Overall, it is clear to me there is still a lot of work left to be done to get the software up to scratch. I would start by getting eliminating any delay after pressing the shutter button, while cutting the HDR processing time has to be a priority as well. At the same time, the app really needs more features as it is currently miles behind the competition.Having been using the Razer Phone for almost three months since its launch, we thought we'd come back and revisit the device – focusing on its weakest point, the camera.
Having taken three months worth of photos with the Razer Phone, I think what strikes me most – and what I have tried to convey in this article – is the ‘hit and miss' nature of the camera. One minute you might get a sharp, detailed and vibrant image, but the next minute you get something that is blurry, over-exposed and just unusable.
The primary f/1.75 lens is undoubtedly the better of the two and it is the one which produced the most consistent images. More often than not, images would come out pretty sharp, with decent colours and low levels of noise. Even then, however, there is still a tendency for photos to come out over-exposed, resulting in harsh burn-in across parts of the image.
The secondary f/2.6 lens does have the benefit of being a zoom lens – making it great if you want to punch-in without using digital zoom – but its narrow aperture really hurts image quality in low-light situations. In fact, even with semi-decent lighting, the lens really struggles to produce a sharp image and photos are often very noisy as a result. Unless the environment is perfect, we have to recommend just sticking with the primary, wide-angle lens.
The Razer Phone also struggles when pitted against the Huawei Mate 10 Pro – a comparison we made as both phones cost £699. The Razer Phone's images are consistently over-exposed when compared to the Mate 10 Pro, while the Huawei phone also offers significantly better low-light performance thanks to its dual f/1.6 lenses.
Lastly, the Razer Phone's software is still not up to speed. I have noticed an improvement with shutter response times, but there is still a noticeable delay so more works needs to be done there. HDR processing also takes a while, and actual features (such as portrait mode) are essentially non-existent.
So, what to make of the camera as an overall package? In short, for £699, its quality does leave a fair bit to be desired. Yes, the primary lens will produce decent images most of the time, but it is still far from perfect. With a faster shutter response time, I could recommend it as a solid ‘point and shoot' phone camera, but even then the secondary lens is disappointing, while the software still needs a lot of work.
To my mind, it is clear the camera was not a priority for Razer when designing the Razer Phone – the bulk of the phone's cost has gone towards the 120Hz 1440p display, the Snapdragon 835 and the 4000 mAh battery. It does become a bit of a trade-off, then – would you rather have excellent multimedia/gaming performance or a fast, reliable camera? I can't answer that question for you, but if this camera package was included on a more traditional phone that costs £699, I would definitely be disappointed.
You can buy the Razer Phone directly from Razer for £699 HERE. Be sure to check out our full review of the phone over HERE.
Discuss on our Facebook page over HERE.
KitGuru says: While the Razer Phone is an impressive device, the camera is ultimately not up to scratch. The primary lens can produce decent results, but it is too ‘hit and miss' to be considered reliable, while the secondary lens and software are also quite poor.

No camera software improvements tells you all you need to know about Razer’s projected support for this phone. Minimal. Avoid.
Si C you Obviously have not owned one 10/10 great phone for games and normal use people be patient for the new android update witch will bring out more for the camera including auto stabilization
Good, the owners deserve decent support! It’s not a cheap phone after all 😉