M.2 connector
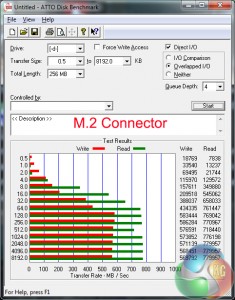
We use Plextor‘s fast M6e 256GB M.2 SSD to test the speed of a motherboard's M.2 connector. We reviewed the 512GB Plextor M6e (and its PCIe x2 adapter card) HERE. Unfortunately we do not have access to a PCIe 3.0-based SSD to fully test the M.2 connector’s performance limits.
Gigabyte's M.2 connector, which is capable of providing a 32Gbps link speed, had no problem powering our Plextor M6e PCIe SSD without any slowdowns.
SATA
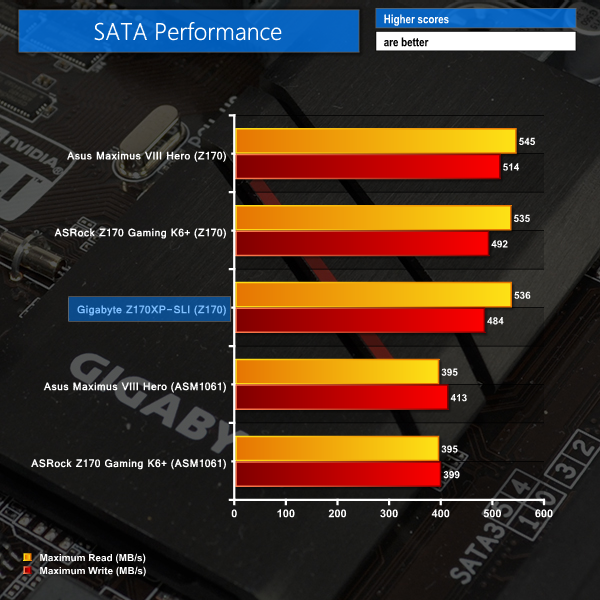
For SATA 6Gb/s testing we use a Kingston HyperX 3K (SandForce SF-2281) SSD.
Accounting for degradation in the operating state of our test SSD, SATA 6Gbps performance for Gigabyte's Z170XP-SLI is roughly where would expect it to be for ports fed by the Z170 chipset.
USB 3.0
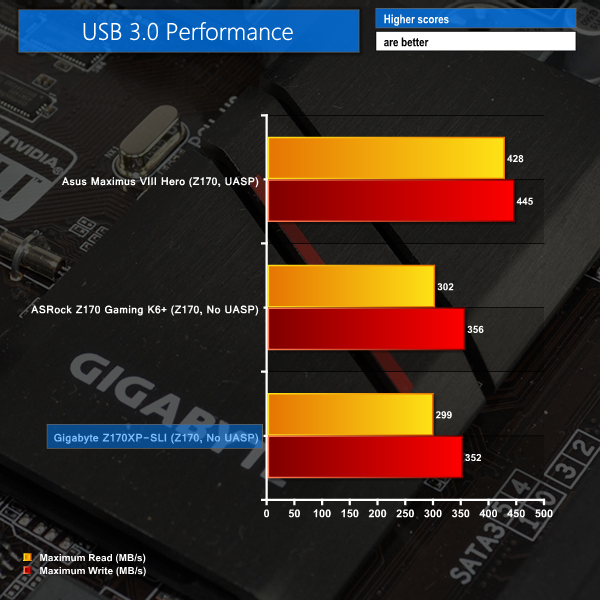
We tested USB 3.0 performance using the Kingston HyperX 3K SSD connected to a SATA 6Gb/s to USB 3.0 adapter powered by an ASMedia ASM1053 controller.
Using our Windows 7 test system, which is soon to be updated, USB 3.0 performance tops out at around 350MBps due to no UASP driver being present inside the older OS.
Audio
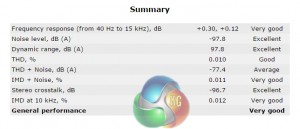
We use RightMark Audio Analyzer (RMAA) to analyse the performance of the motherboard’s onboard audio solution. A sampling mode of 24-bit, 192 kHz was tested.
According to RMAA, Gigabyte's audio solution on the Z170XP-SLI is Very Good. Dynamic range and noise level results are particularly strong.
 KitGuru KitGuru.net – Tech News | Hardware News | Hardware Reviews | IOS | Mobile | Gaming | Graphics Cards


