Intel's new Z390 chipset has pushed motherboard companies to refresh their entire Intel Z370 product portfolio, ASUS included. A lot has been learnt from the prior generation and during the last 12 months about a changing market appetite for high-quality VRM solutions and increased consumer awareness of technical elements of motherboard design. ASUS has released its new ROG Strix Z390-E Gaming motherboard into this market with a brave new slant on VRMs.
The new ASUS ROG Strix Z390-E Gaming has a distinctly different look to its predecessor, the ROG Strix Z370-E Gaming. There's new heatsinks designs all around for the CPU VRM, chipset and M.2, as well as some of the benefits of the new Z390 chipset over older Z370.
These include USB 3.1 support and 802.11ac WiFi direct from the chipset, whereas on Z370 these things had to be added separately at additional cost. That aside the feature level isn't all that different from its predecessor and ASUS pitches the “E” model as a mid-range option based on its asking price, around £220 UK and $240 USA at the time of writing.
The main change for ASUS with Z390 is a shift in VRM design that runs almost contrary to growing consumer understanding and media opinion of motherboard VRMs – that more real phases are better and doublers are better than no doublers. ASUS is moving away from having doublers on its VRMs to using less phases and doubling up the number of MOSFETs, drivers, inductors and capacitors per phase.
The way this takes shape on the ROG Strix Z390-E Gaming is with a 4+2 phase design that uses “8 phases worth” of MOSFETs, drivers, chokes and capacitors for those 4 CPU phases.
ASUS has avoided major controversy in this instance because consumers appear to have lost interest in the topic as it has happened so frequently. At present the company has opted out of advertising the VRM of this motherboard, and similar motherboards, as an 8 phase design. Though it has been rumoured online that ASUS was previously marketing these boards as “8 phase” products, before quietly amending the product pages, though we've seen no proof of this so they remain just rumours.
ASUS has been fairly quiet about the situation and why it has taken this approach but ASUS ROG motherboard R&D collaborator “Elmor” shared some information suggesting that this solution can actually be “better” than an 8 phase based on doublers.
The 8 phase solution based on doublers with interleaving is dubbed an “Extended 8-phase VRM” and the solution based on 4 PWM signals each with 2 phases worth of components per phase is labelled a “Twin 8-phase”. The testing results of the “Twin 8-phase” solution suggests an improved transient response and as a result less voltage drop between load switching.
With all that in mind it must be said that VRMs are clearly not the be all and end all, so let's see how the ASUS ROG Strix Z390-E Gaming handles itself under testing.
| ASUS ROG Strix Z390-E Gaming | |
| Form Factor | ATX, 30.5cm x 24.4cm |
| CPU Socket | LGA 1151 v2 |
| CPU VRM PWM |
ASUS ASP1400CTB (possibly a custom packaged International Rectifier Controller) in 4+2 phase configuration (no doubling on VCore phases so 2 MOSFETs and 2 Chokes per phase) |
| CPU VRM MOSFETs |
10 x On Semiconductor NCP302045 integrated driver and MOSFET packages (high & low side) |
| CPU VRM Capacitors and Inductors |
MIL 560uF 6.3v “5KY34” Capacitors 10 x Inductors |
| Chipset | Intel Z390 |
| Memory | DDR4, 4 DIMMs up to 64GB, up to 4266MHz+ with OC |
| On-board Graphics | Intel UHD Graphics (on supported CPUs) |
| Discrete Graphics | Up to 3-way AMD CrossFireX/Quad CrossFireX, Up to 2-way Nvidia SLI, Quad SLI |
| Expansion Slots | 3 x PCIe 3.0 16X slots (x16/x0/x0, x8/x8/x0, x8/x4/x4) 3 x PCIe 3.0 1X slots |
| Storage | 6 x SATA III (Intel Z390) 2 x M.2 (Slot 1* SATA III & PCIe 3.0 x4, 2280; Slot 2 PCIe 3.0 x4, 22110) *when slot 1 is used in SATA mode, SATA_2 port is disabled |
| USB | 5 x USB 3.1 (4 Rear (1 Type-C), 1 Front, via Intel Z390) 4 x USB 3.0 (2 Rear, 2 Front, via Intel Z390) 6 x USB 2.0 (2 Rear, 4 Front, via Intel Z390) |
| Networking | 1 x Intel I219V Gigabit Ethernet Intel Wireless-AC 9560 802.11ac 1733Mbps WiFi + Bluetooth 5.0 with MU-MIMO |
| Audio | Realtek ALC1220 7.1 channel HD audio |
| RGB | 1 onboard RGB lighting zone (rear I/O cover) 2 x 12V G R B headers 1 x 5V Digital Addressable header |
| Fan Headers | 7, all support 3/4 pin fans (1 x CPU, 1 x CPU_OPT, 2 x CHA, 1 x W_PUMP, 1 x AIO_PUMP, 1 x M2_Fan) |
| Rear I/O | 1 x DisplayPort 1.4 1 x HDMI 1.4b 1 x LAN (RJ45) port(s) 4 x USB 3.1 (3 x Type-A+1 x USB Type-C) 2 x USB 3.0 2 x USB 2.0 1 x Optical S/PDIF out 5 x Audio jack(s) 1 x ASUS Wi-Fi Module |
| UEFI | 1 x 128Mb UEFI AMI BIOS |
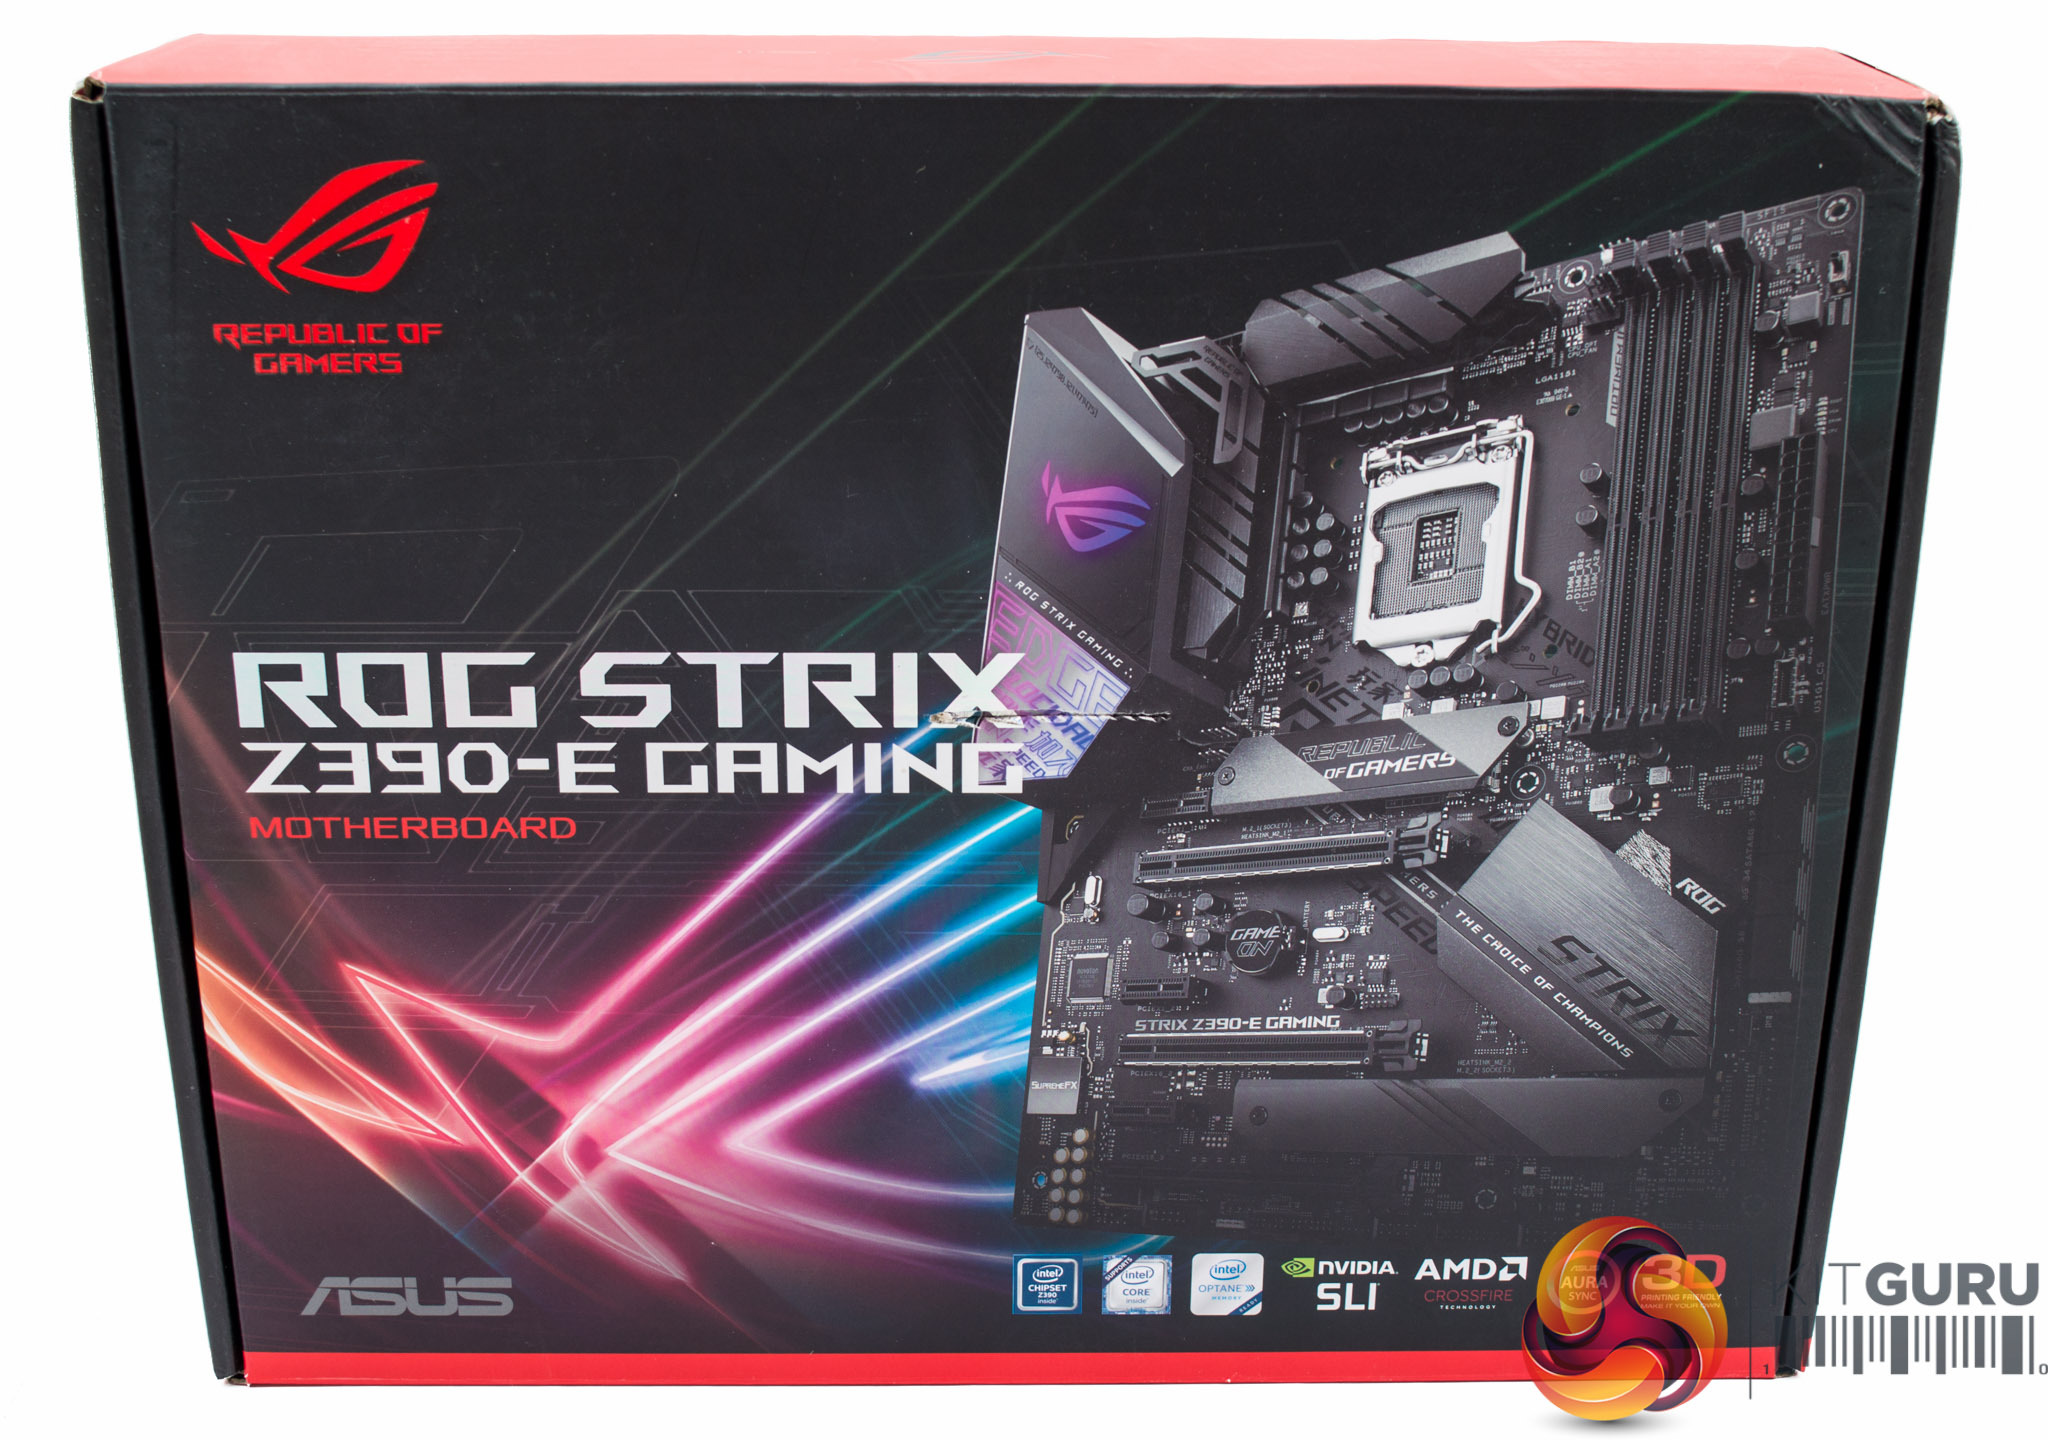
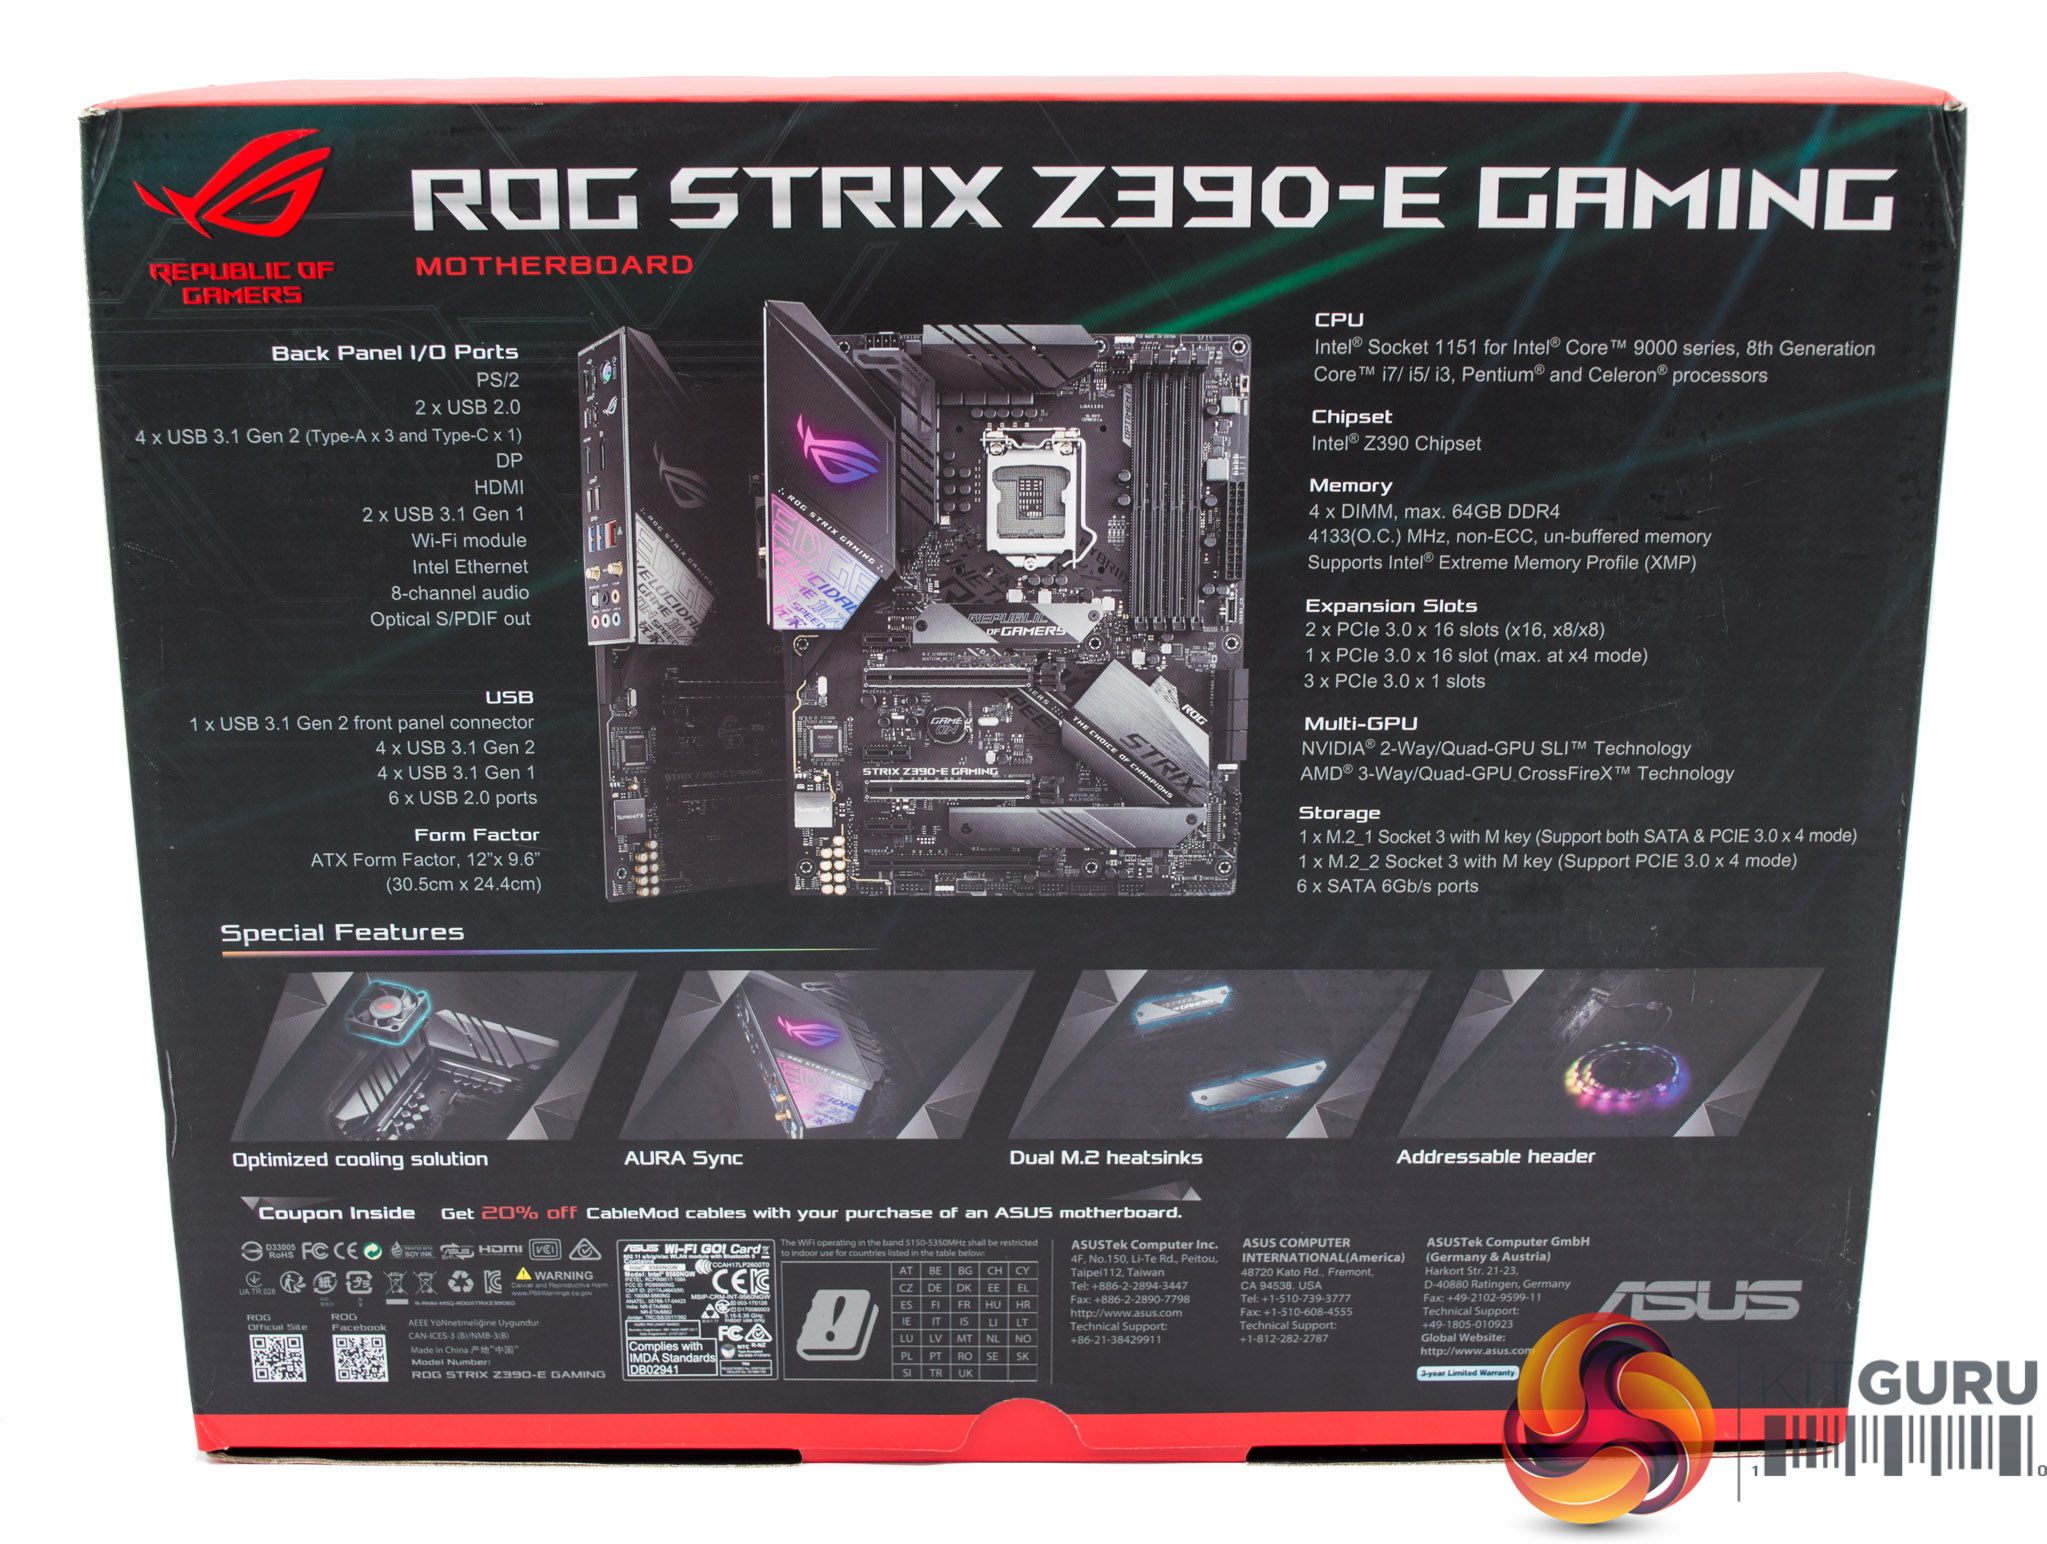
The packaging for the ASUS ROG Strix Z390-E Gaming highlights the main features as an “optimised cooling solution” for the VRMs, dual M.2 heatsinks and the RGB lighting options.
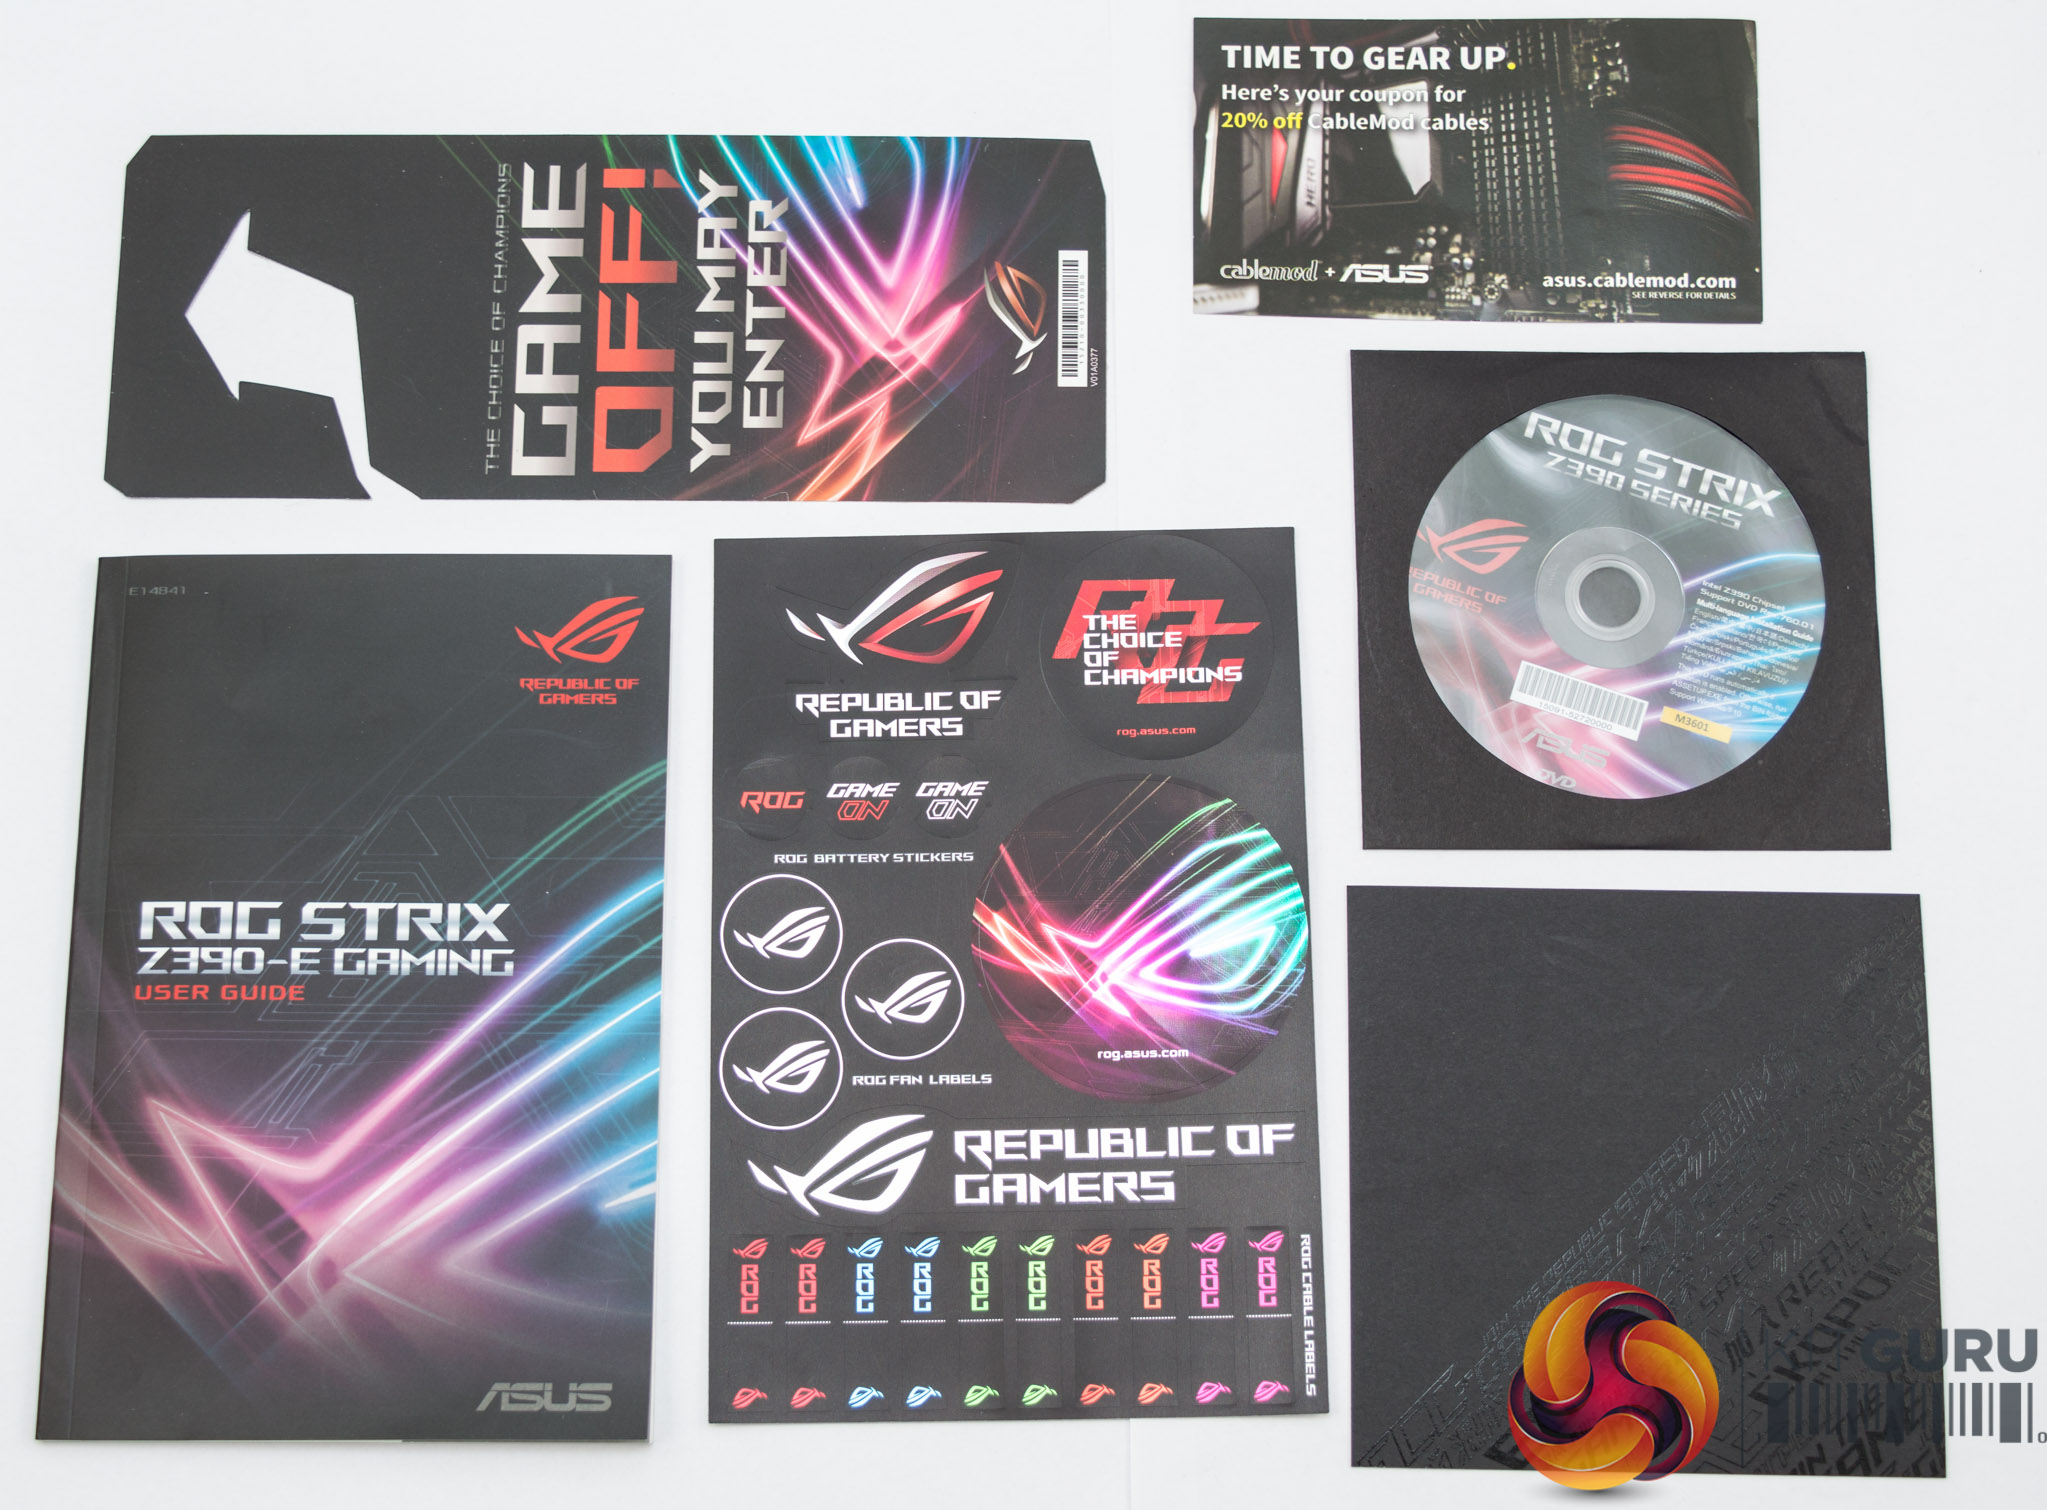
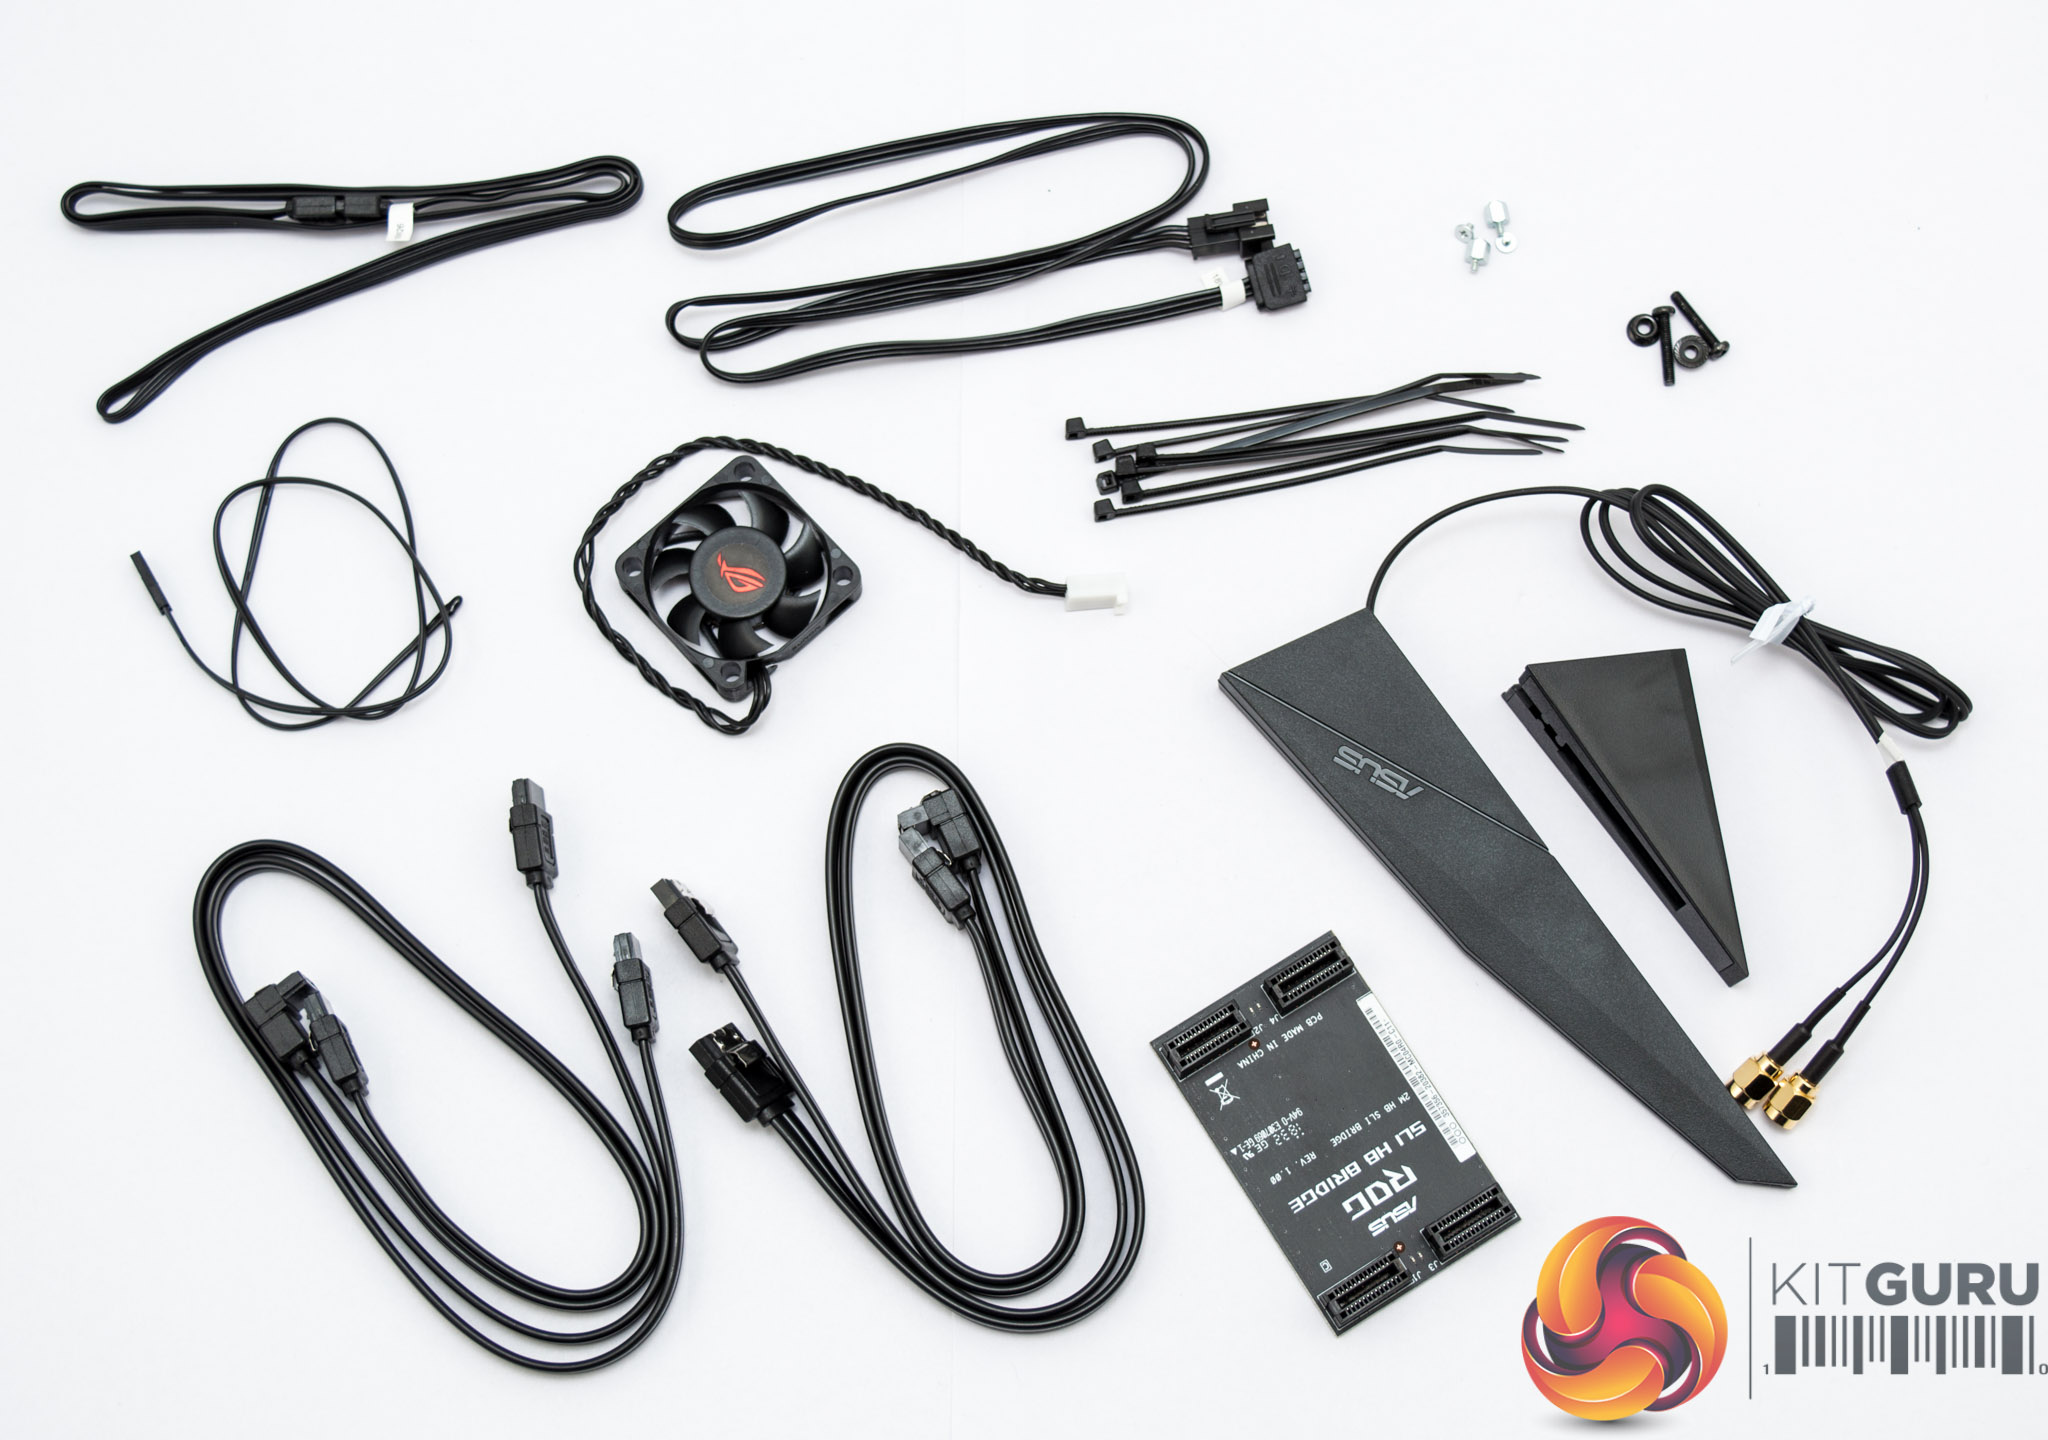
The accessory bundle is quite significant with a range of documentation, cable labels, a driver & utility DVD, CableMod voucher, ROG door hanger, four SATA cables, various LED extensions, a temperature sensor, a WiFi antenna, SLI HB bridge, cable/zip ties, M.2 mounting hardware and fan mounting hardware for the provided VRM fan.

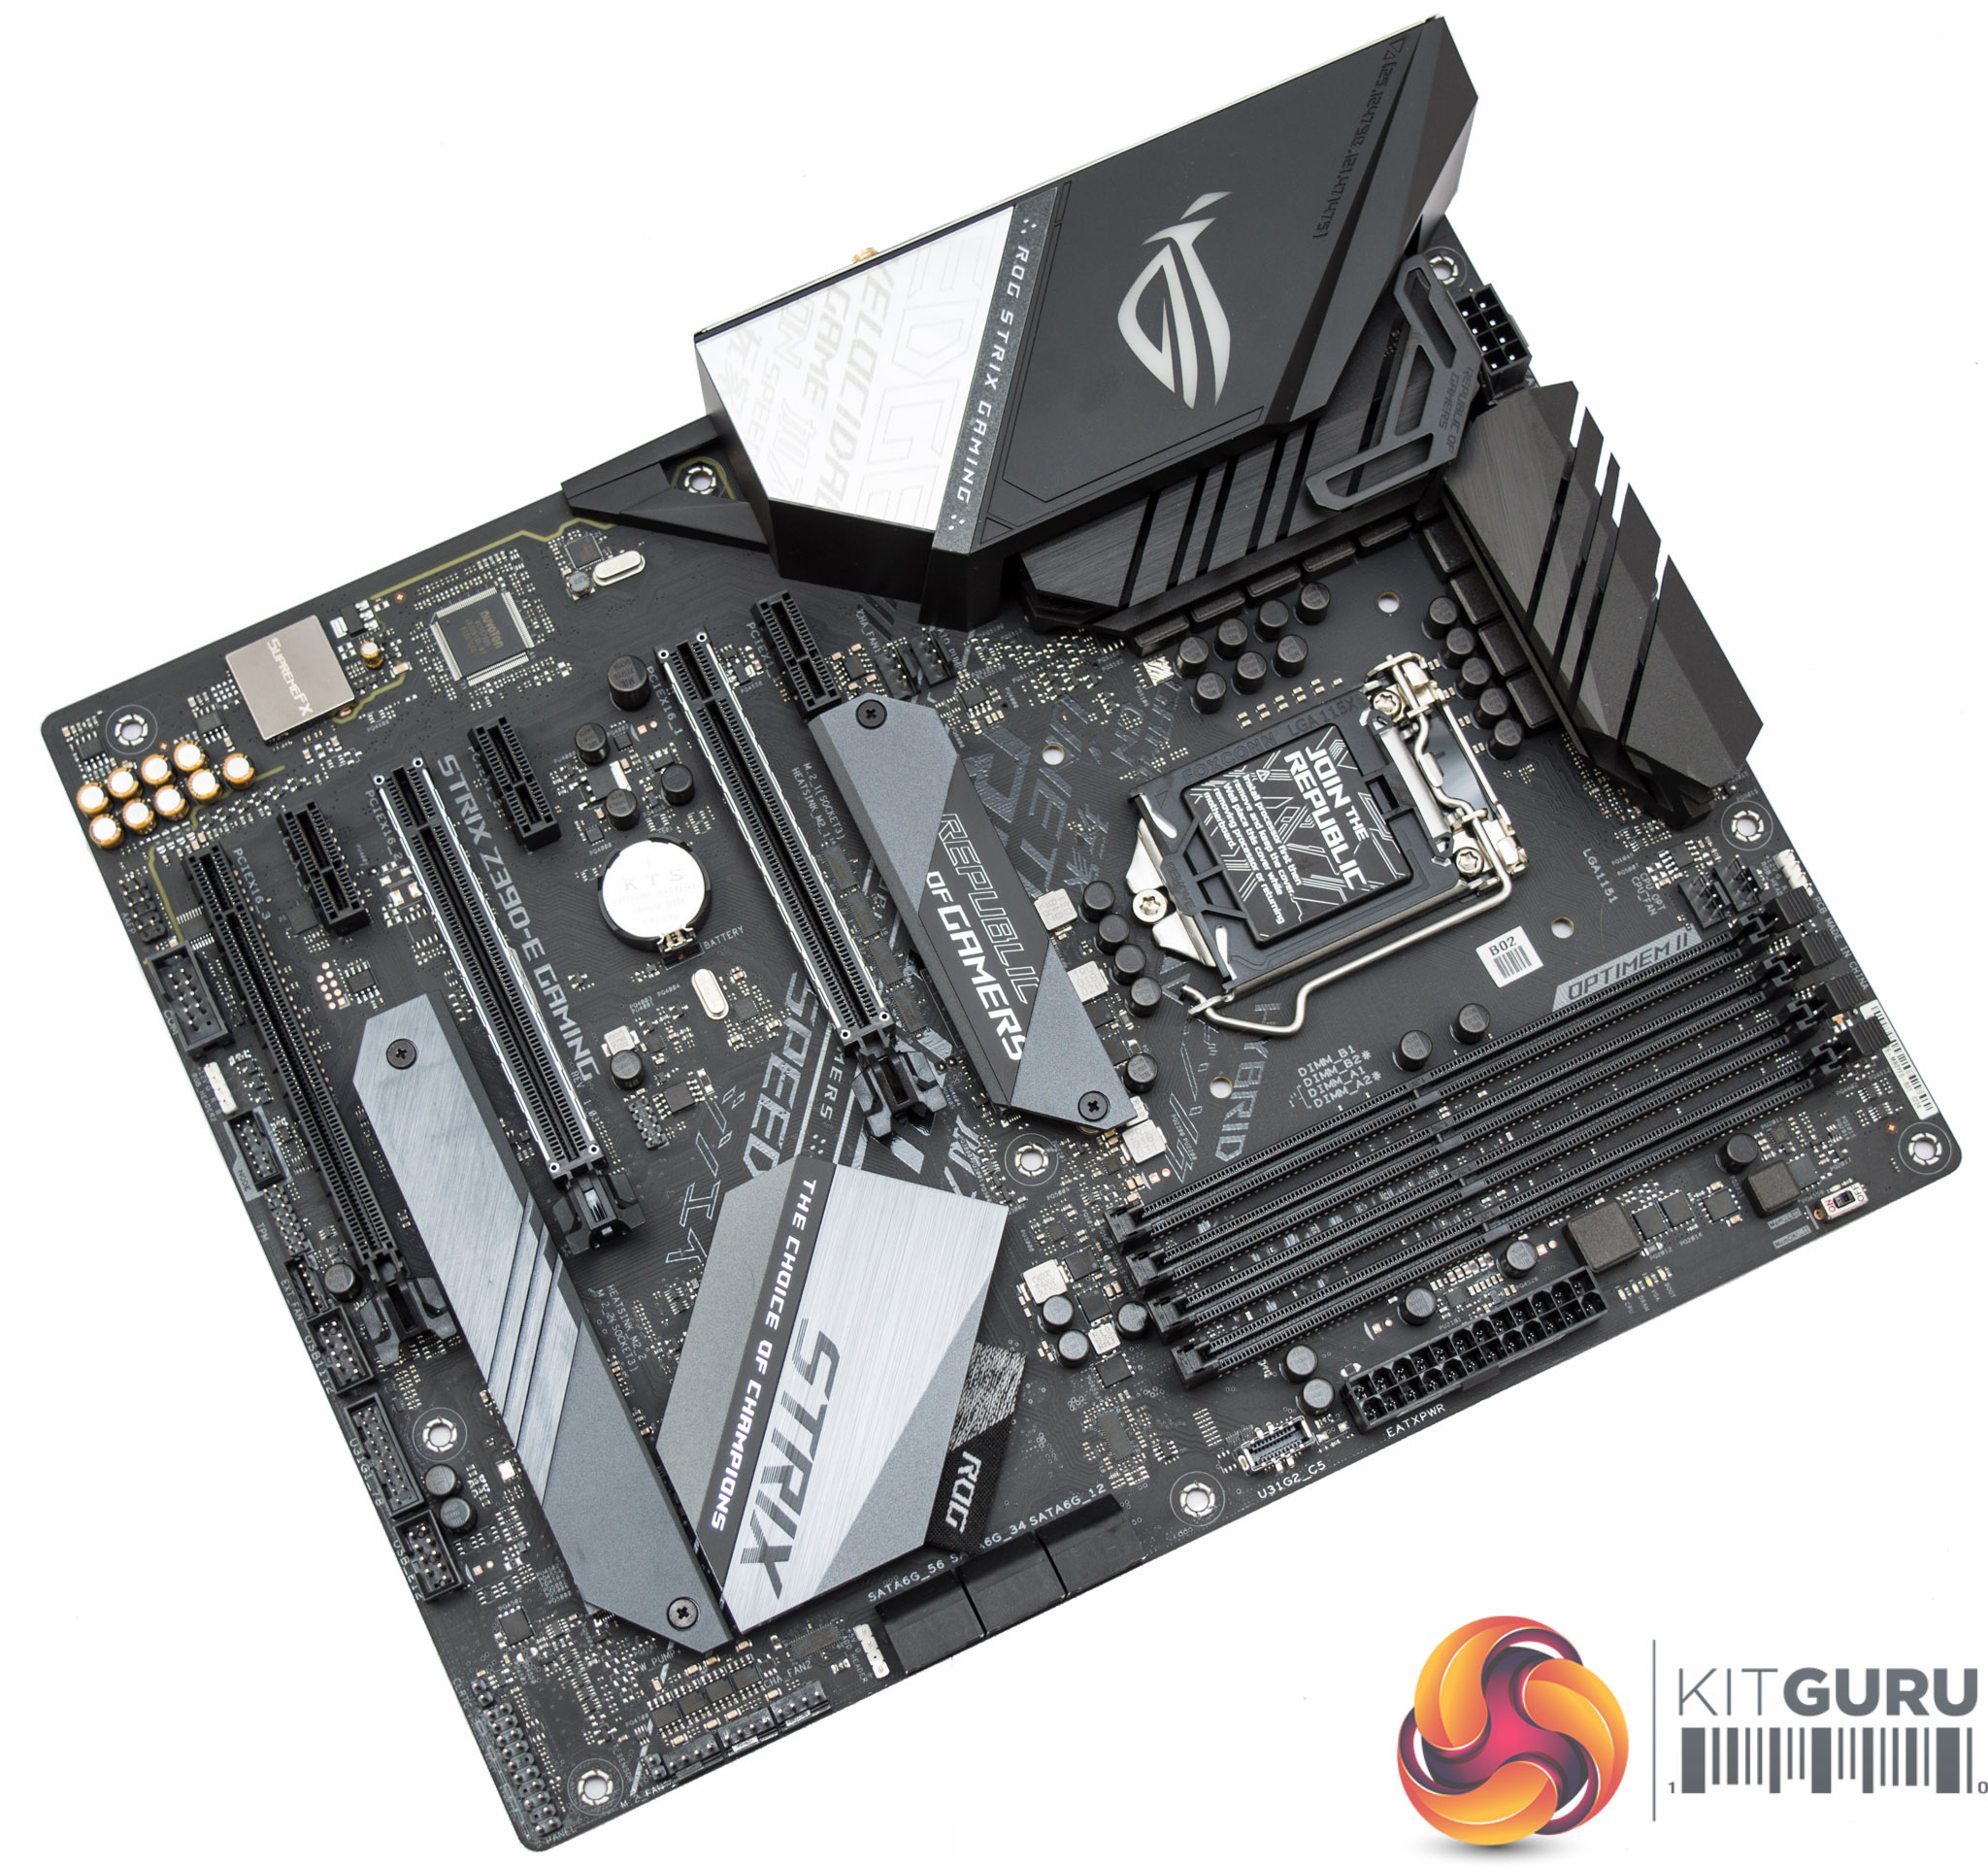
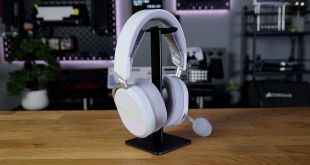
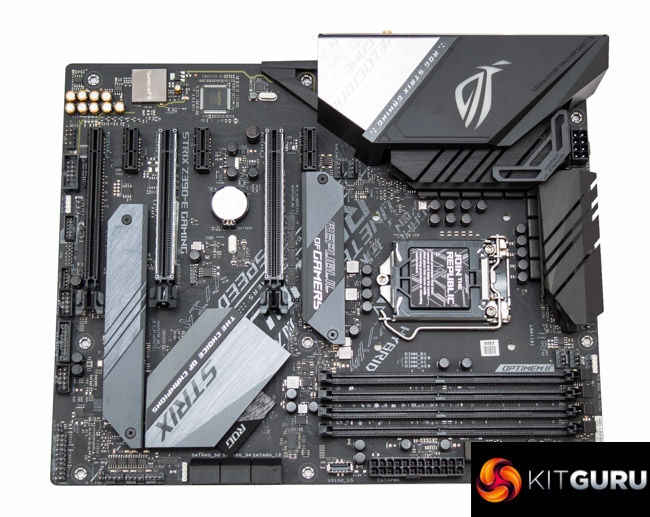
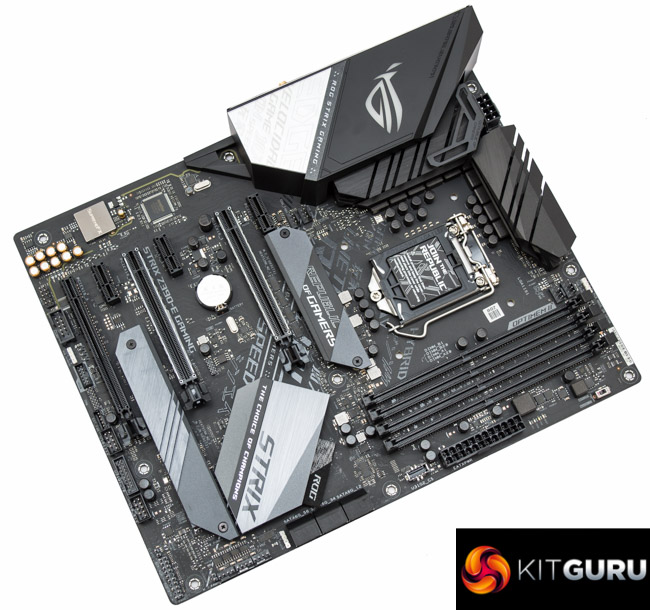
While the previous generation ASUS ROG Strix Z370-E Gaming went for a silver and off-white colour scheme, the new ASUS ROG Strix Z390-E Gaming is primarily black with some grey and silver accenting. The grey-ish accenting on the PCB of the Z370 model is gone and in its place is some “of questionable taste” writing on the central section of the PCB.
There is a single onboard RGB lighting zone which sits inside the rear I/O cover. Any additional RGB lighting connectivity has to be provisioned using the three onboard RGB headers. There is one 12v G R B header after the last PCIe lane (unshielded), one 12v G R B header next to the SATA port block and one 5v Digital header next to the CPU fan headers.
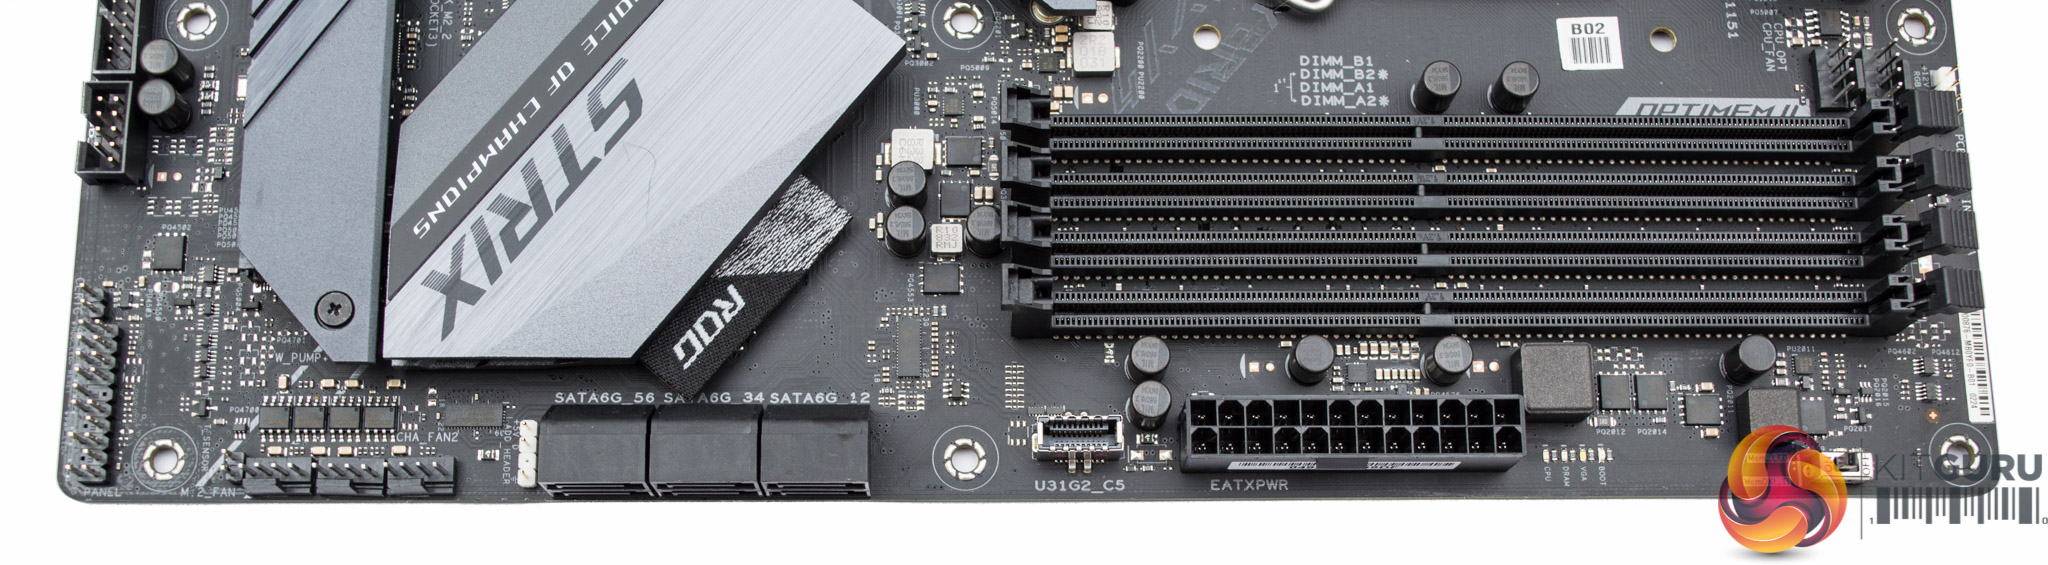
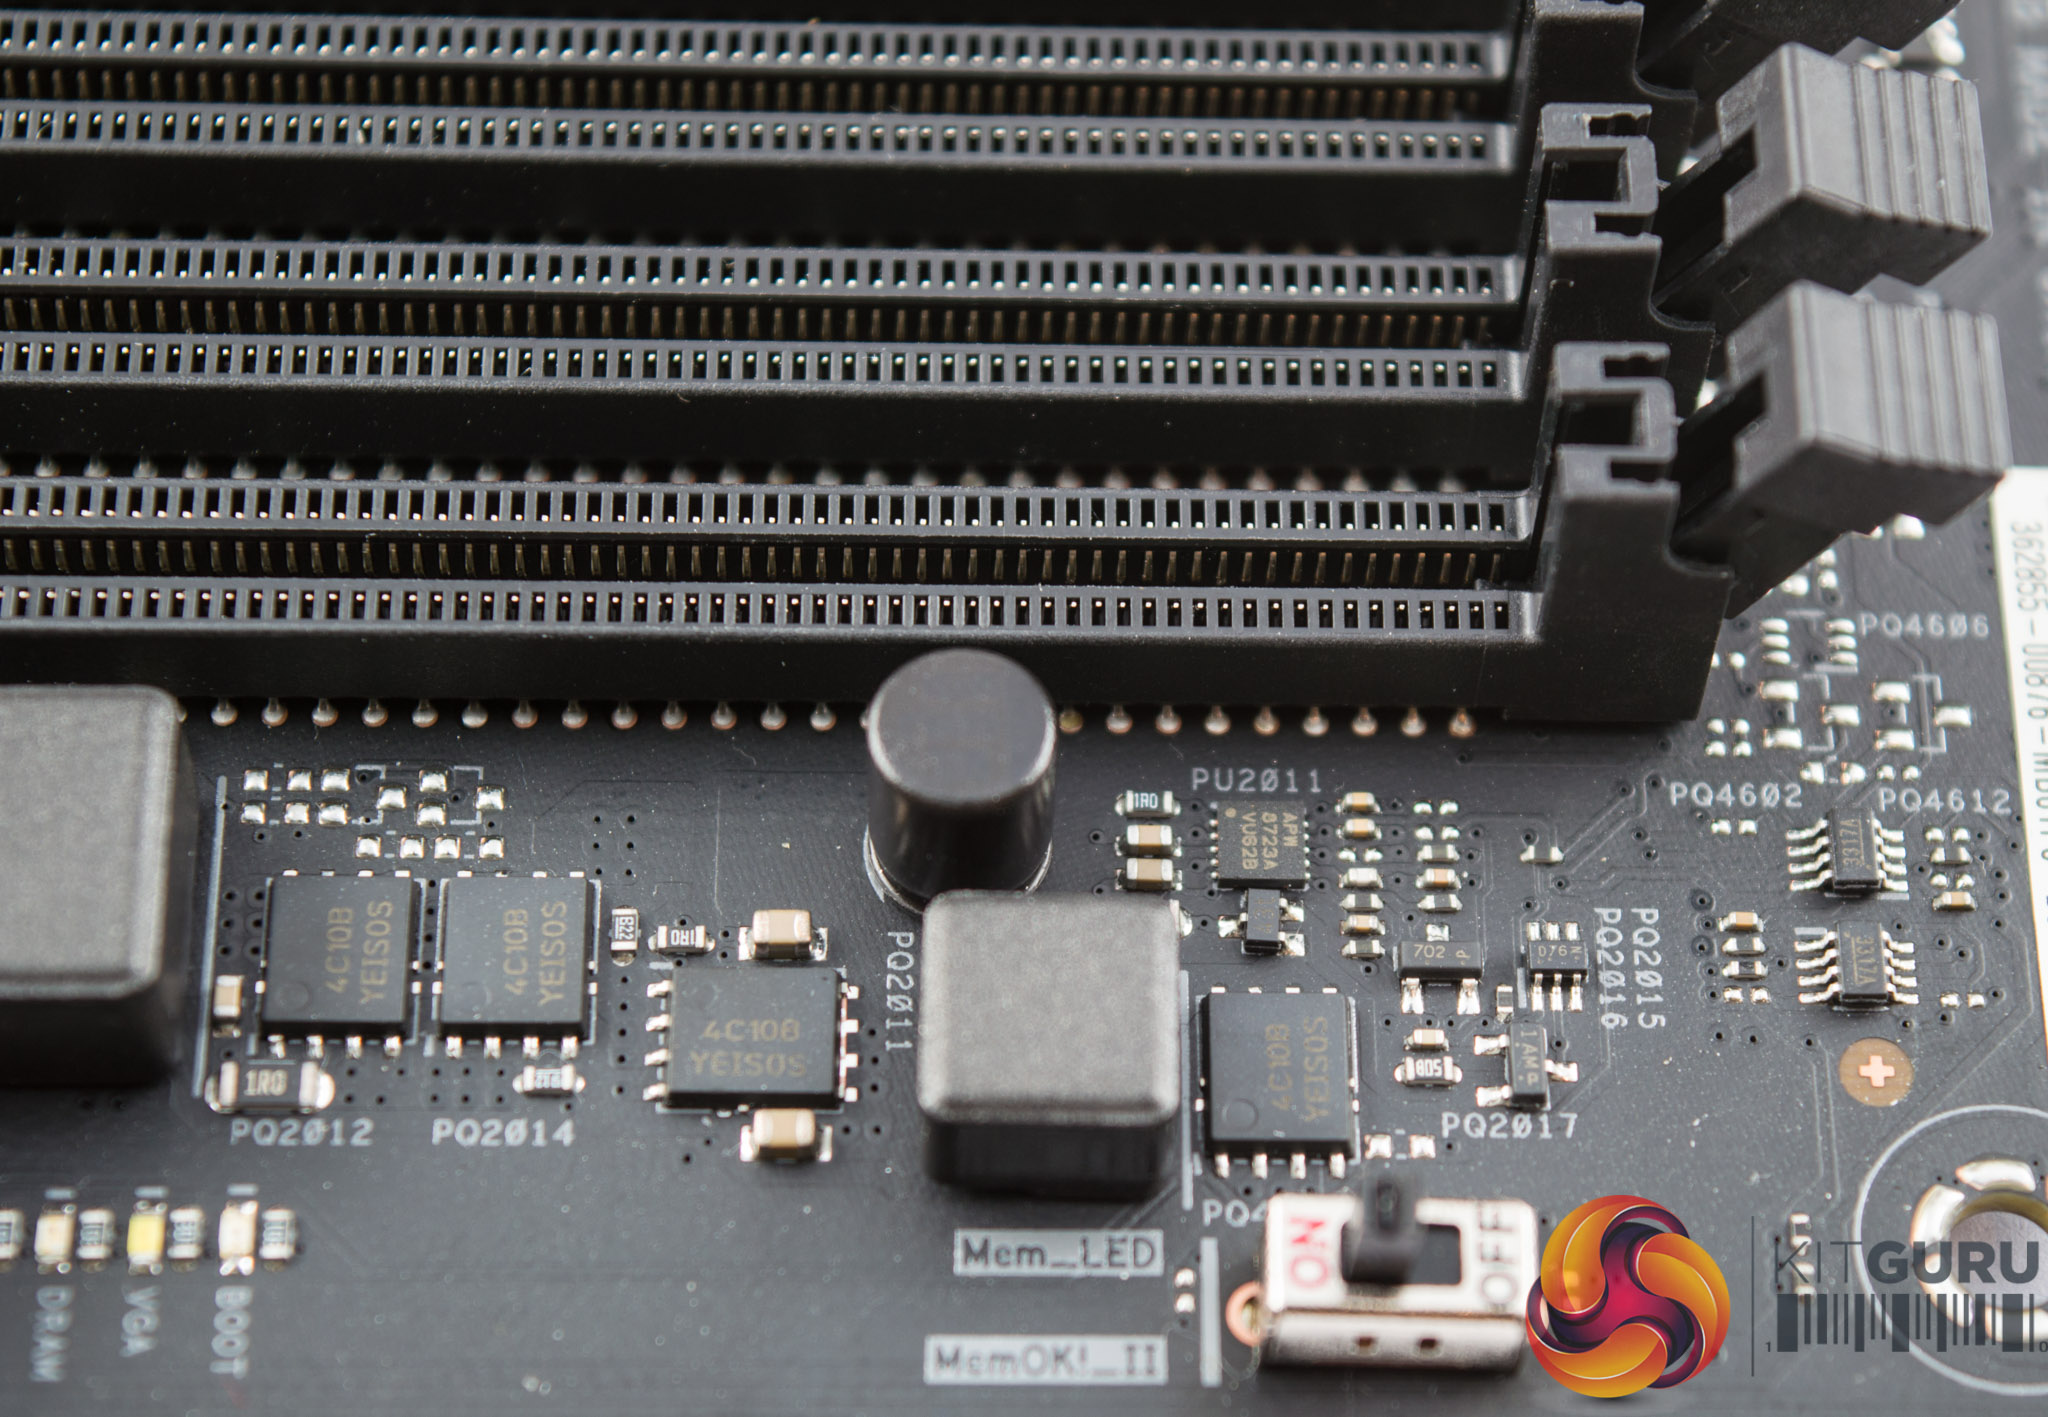
ASUS provides three fan headers in a row next to the block of six SATA ports. The USB 3.1 front panel header is located in between the SATA ports and 24 pin. In terms of diagnostics there is a MemOK switch and diagnostic LEDs available next to the 24 pin connection.
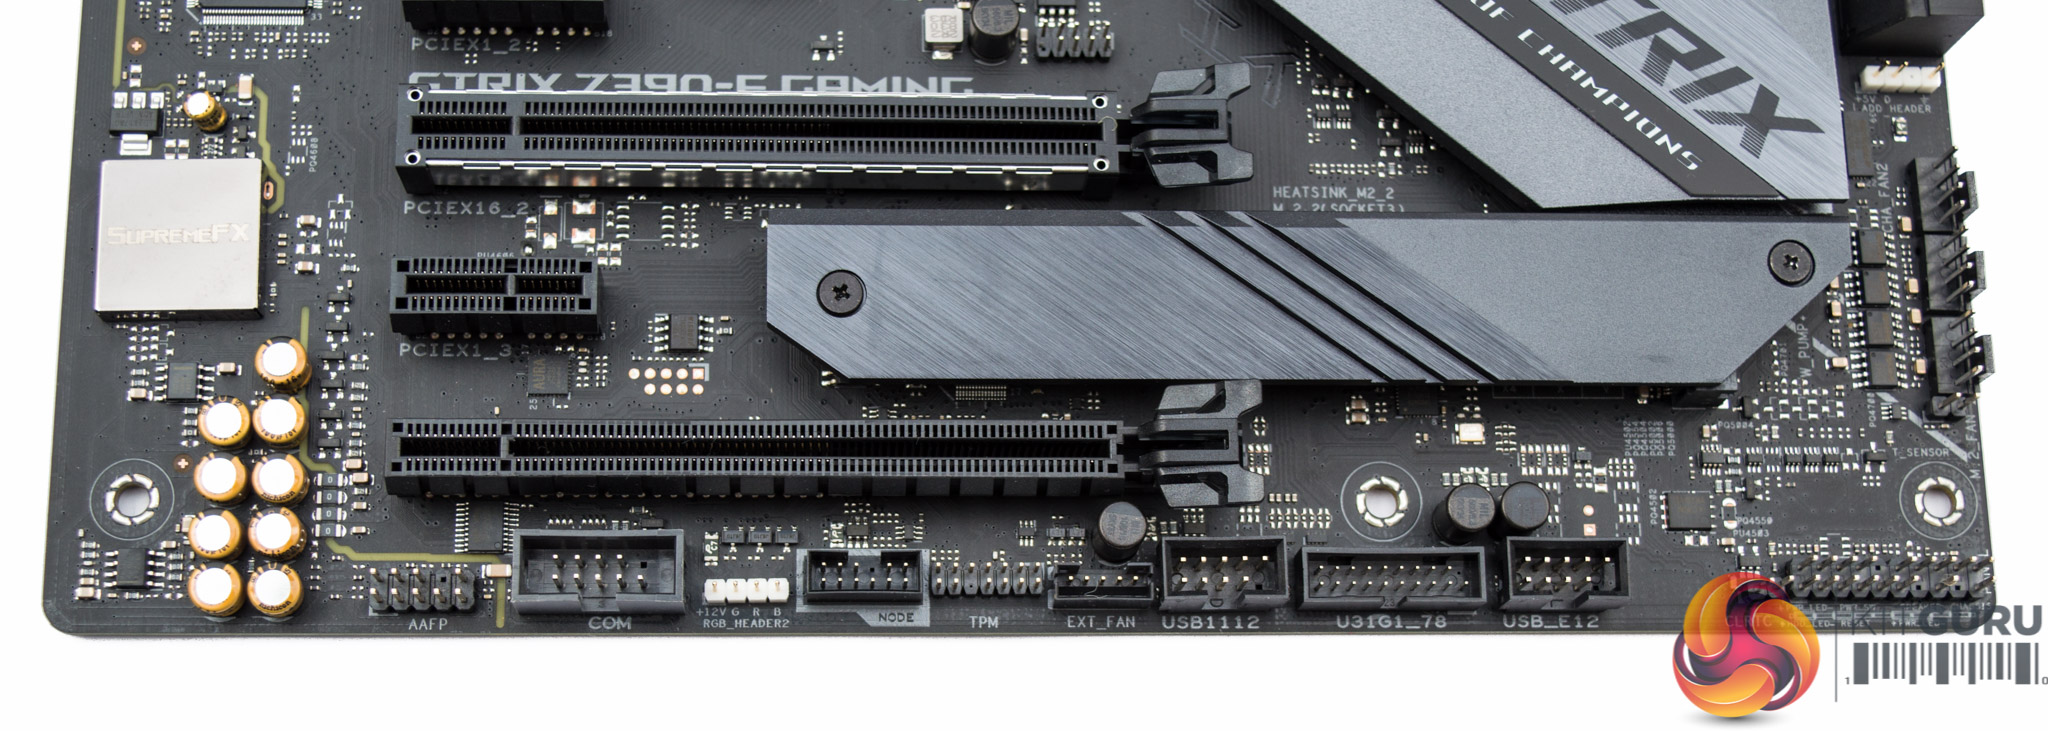
The lower section of the motherboard contains most USB connectivity as well as a 12v RGB header, the second 12v RGB header was next to the SATA block.
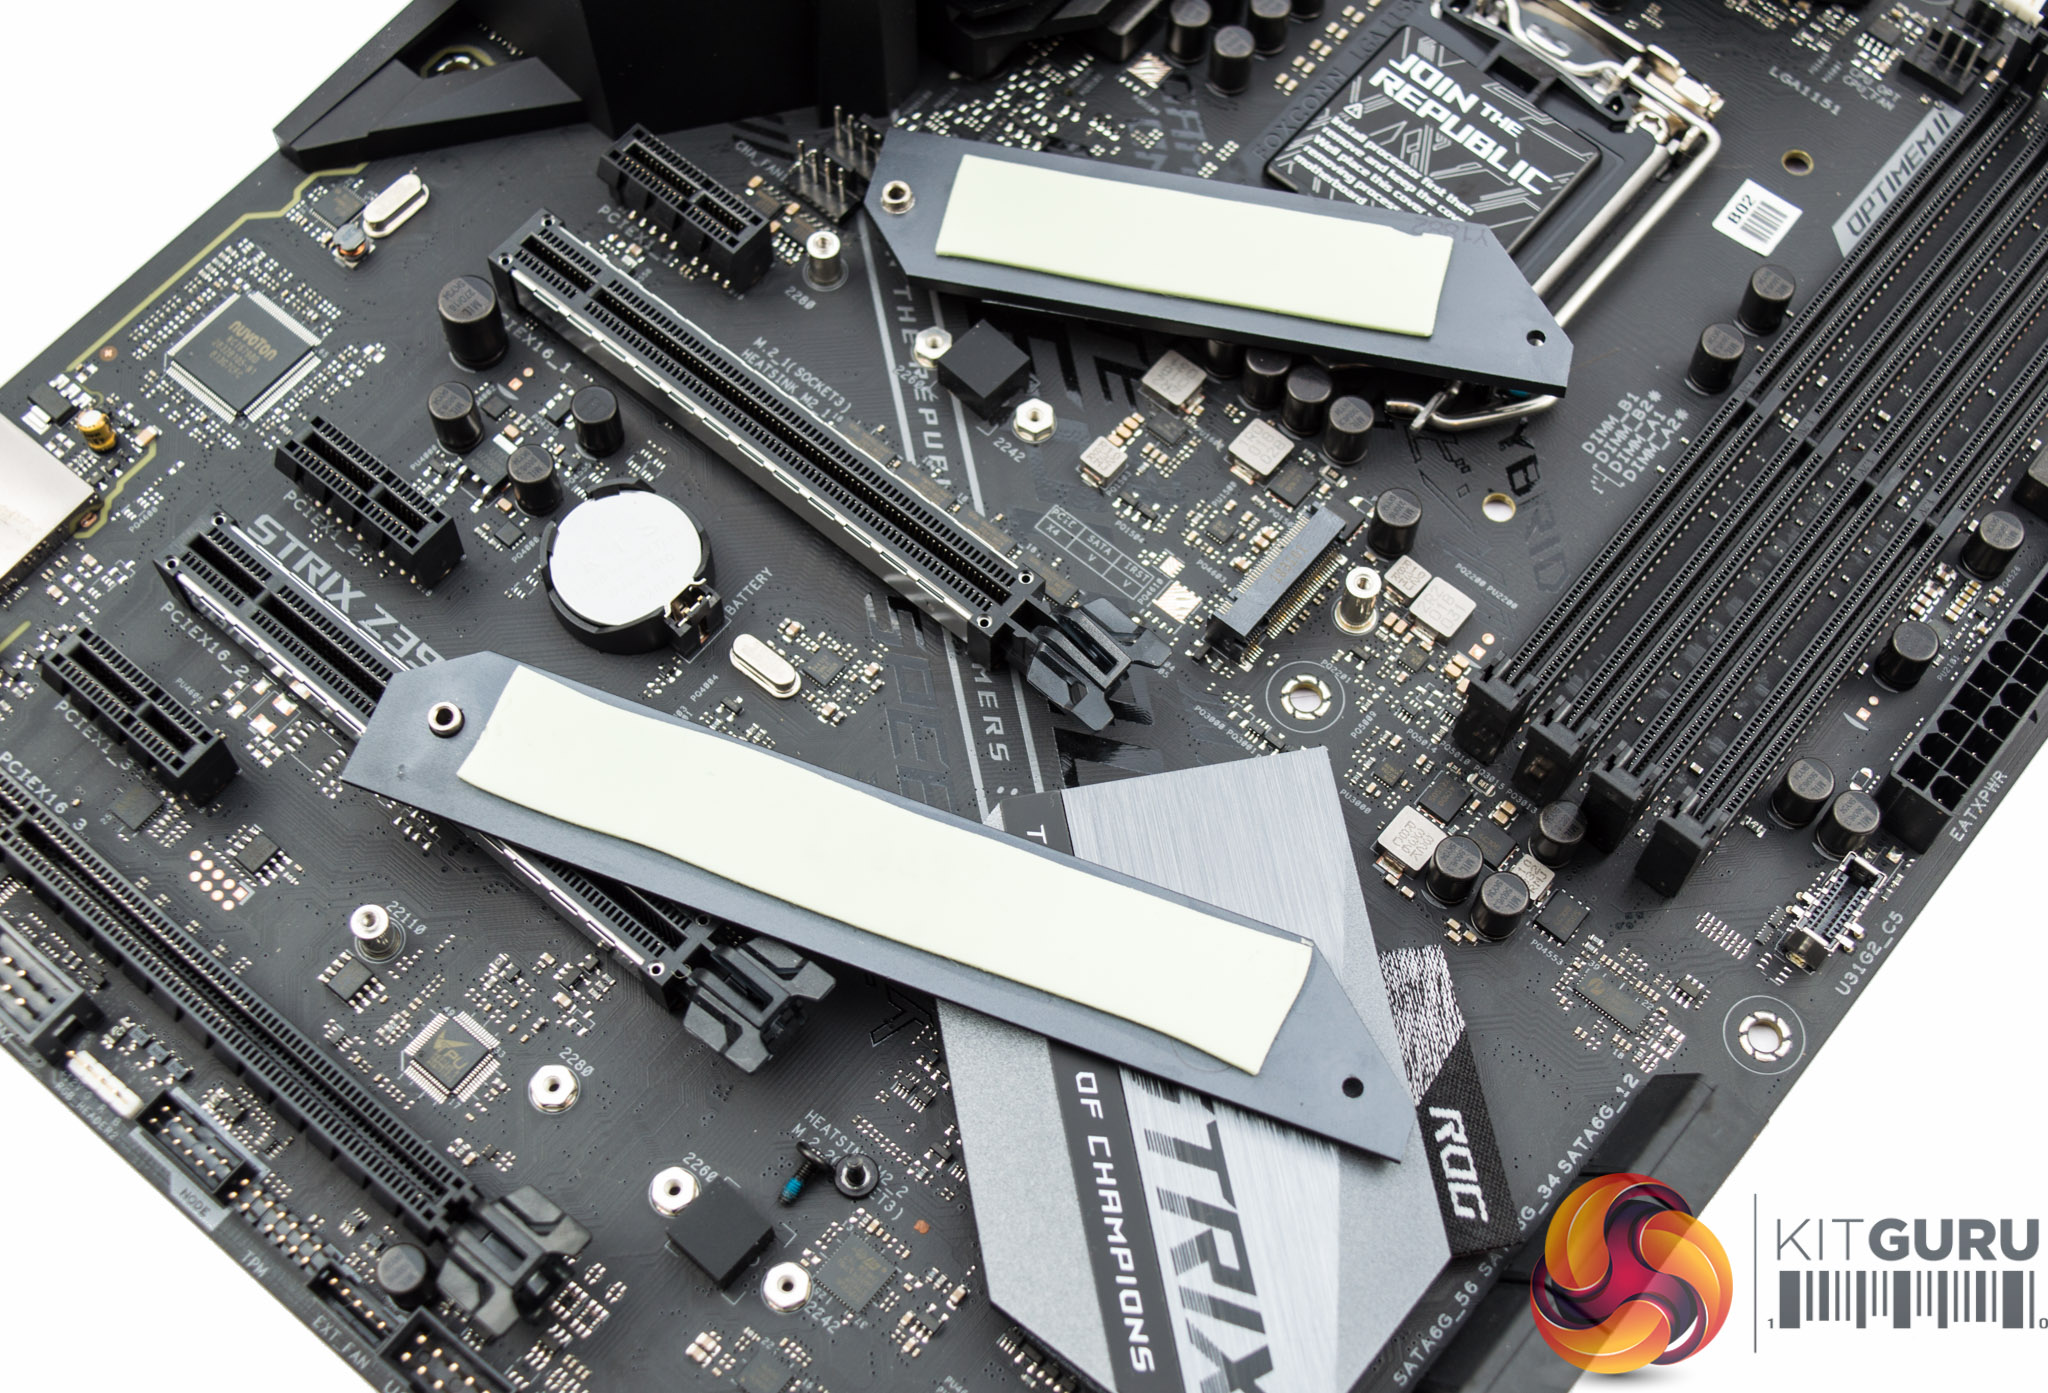
ASUS provide cooling heatsinks for both M.2 slots and both are purpose-built to fit the maximum length of each respective slot.
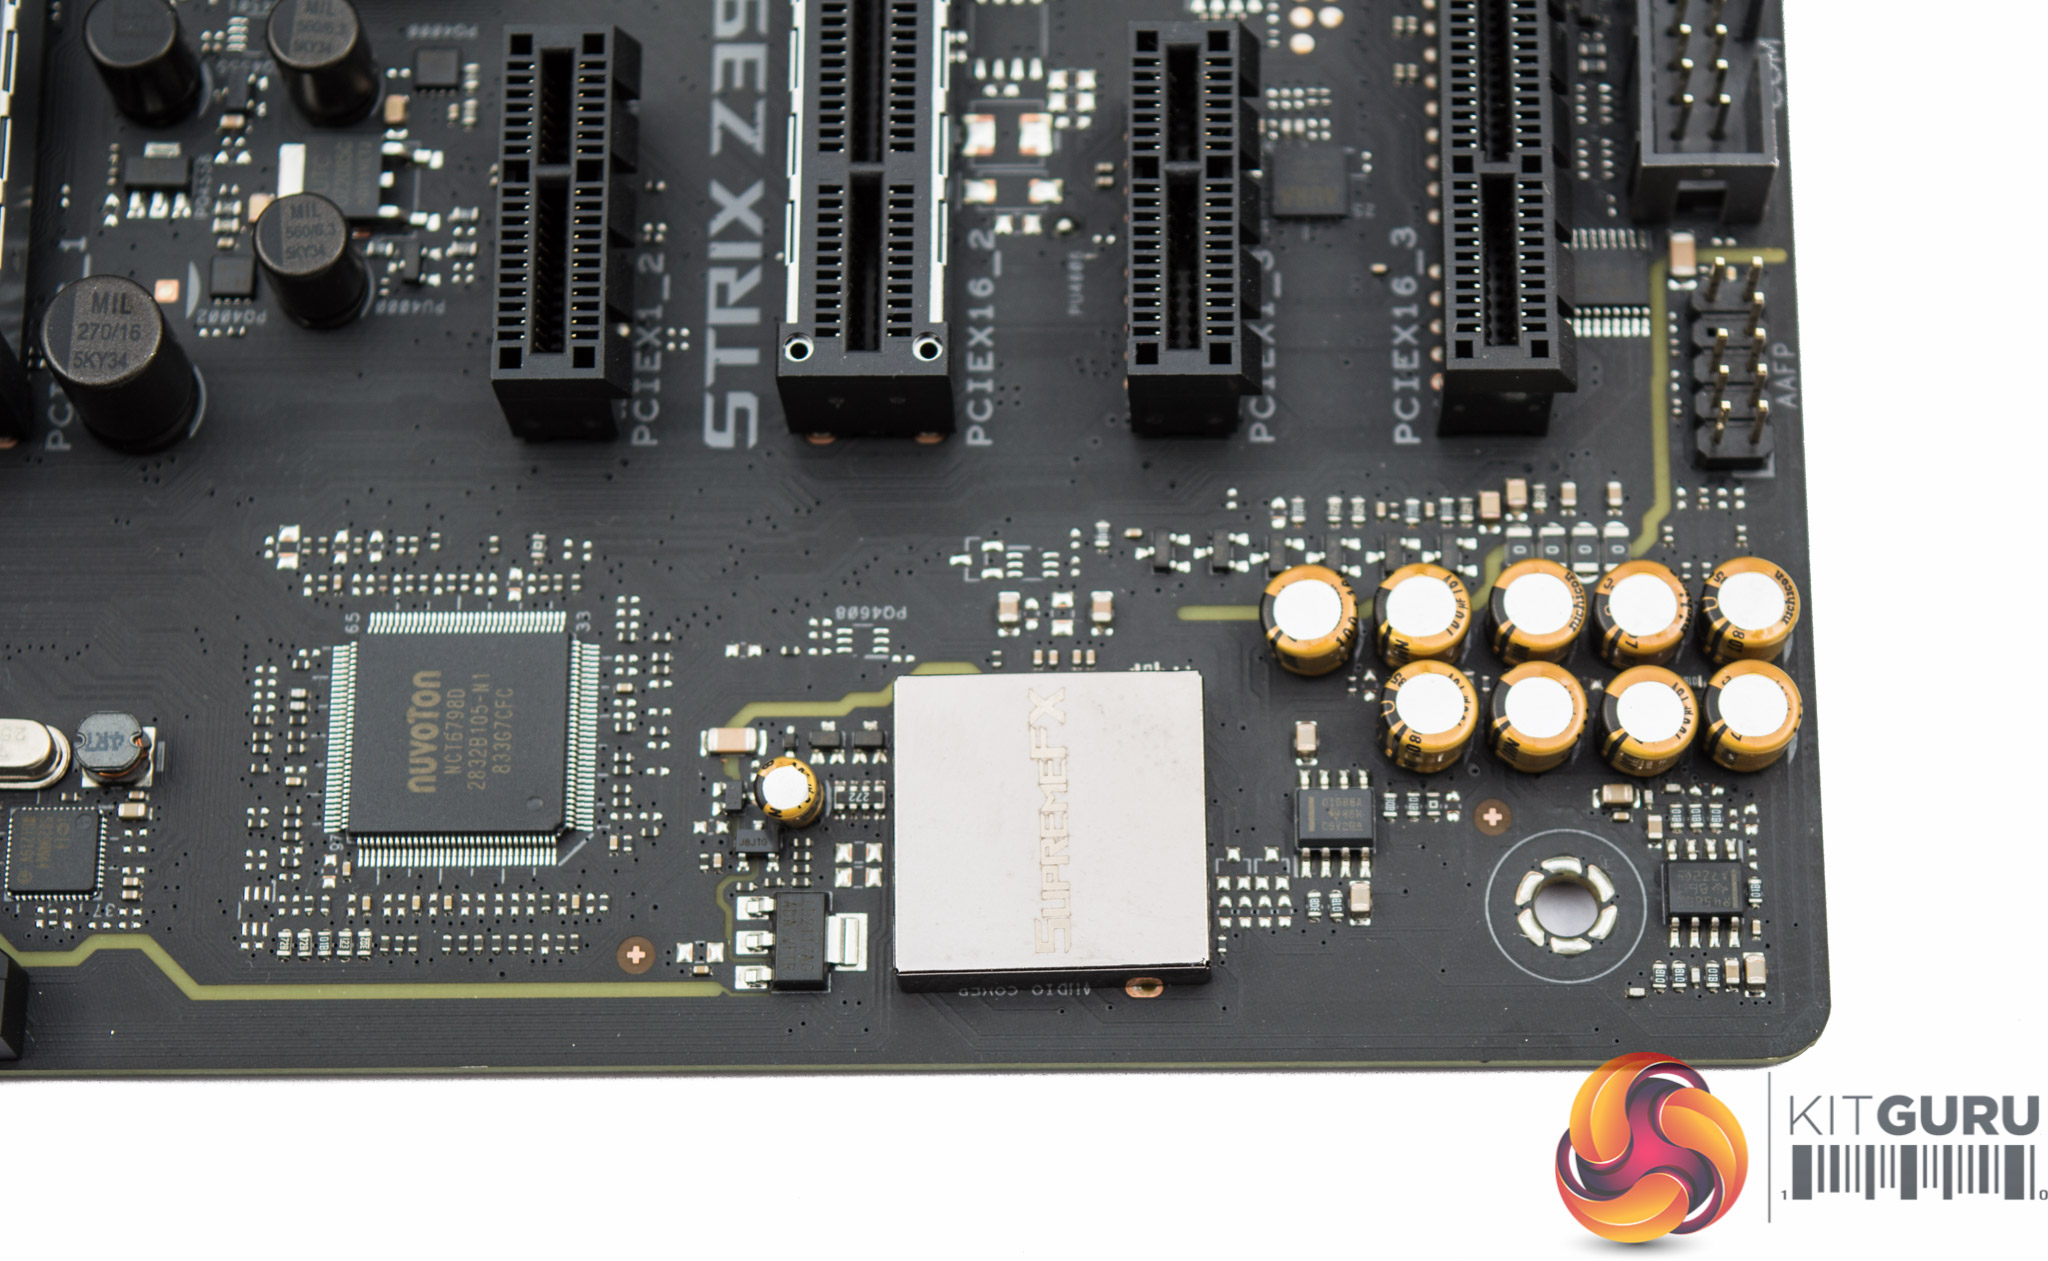
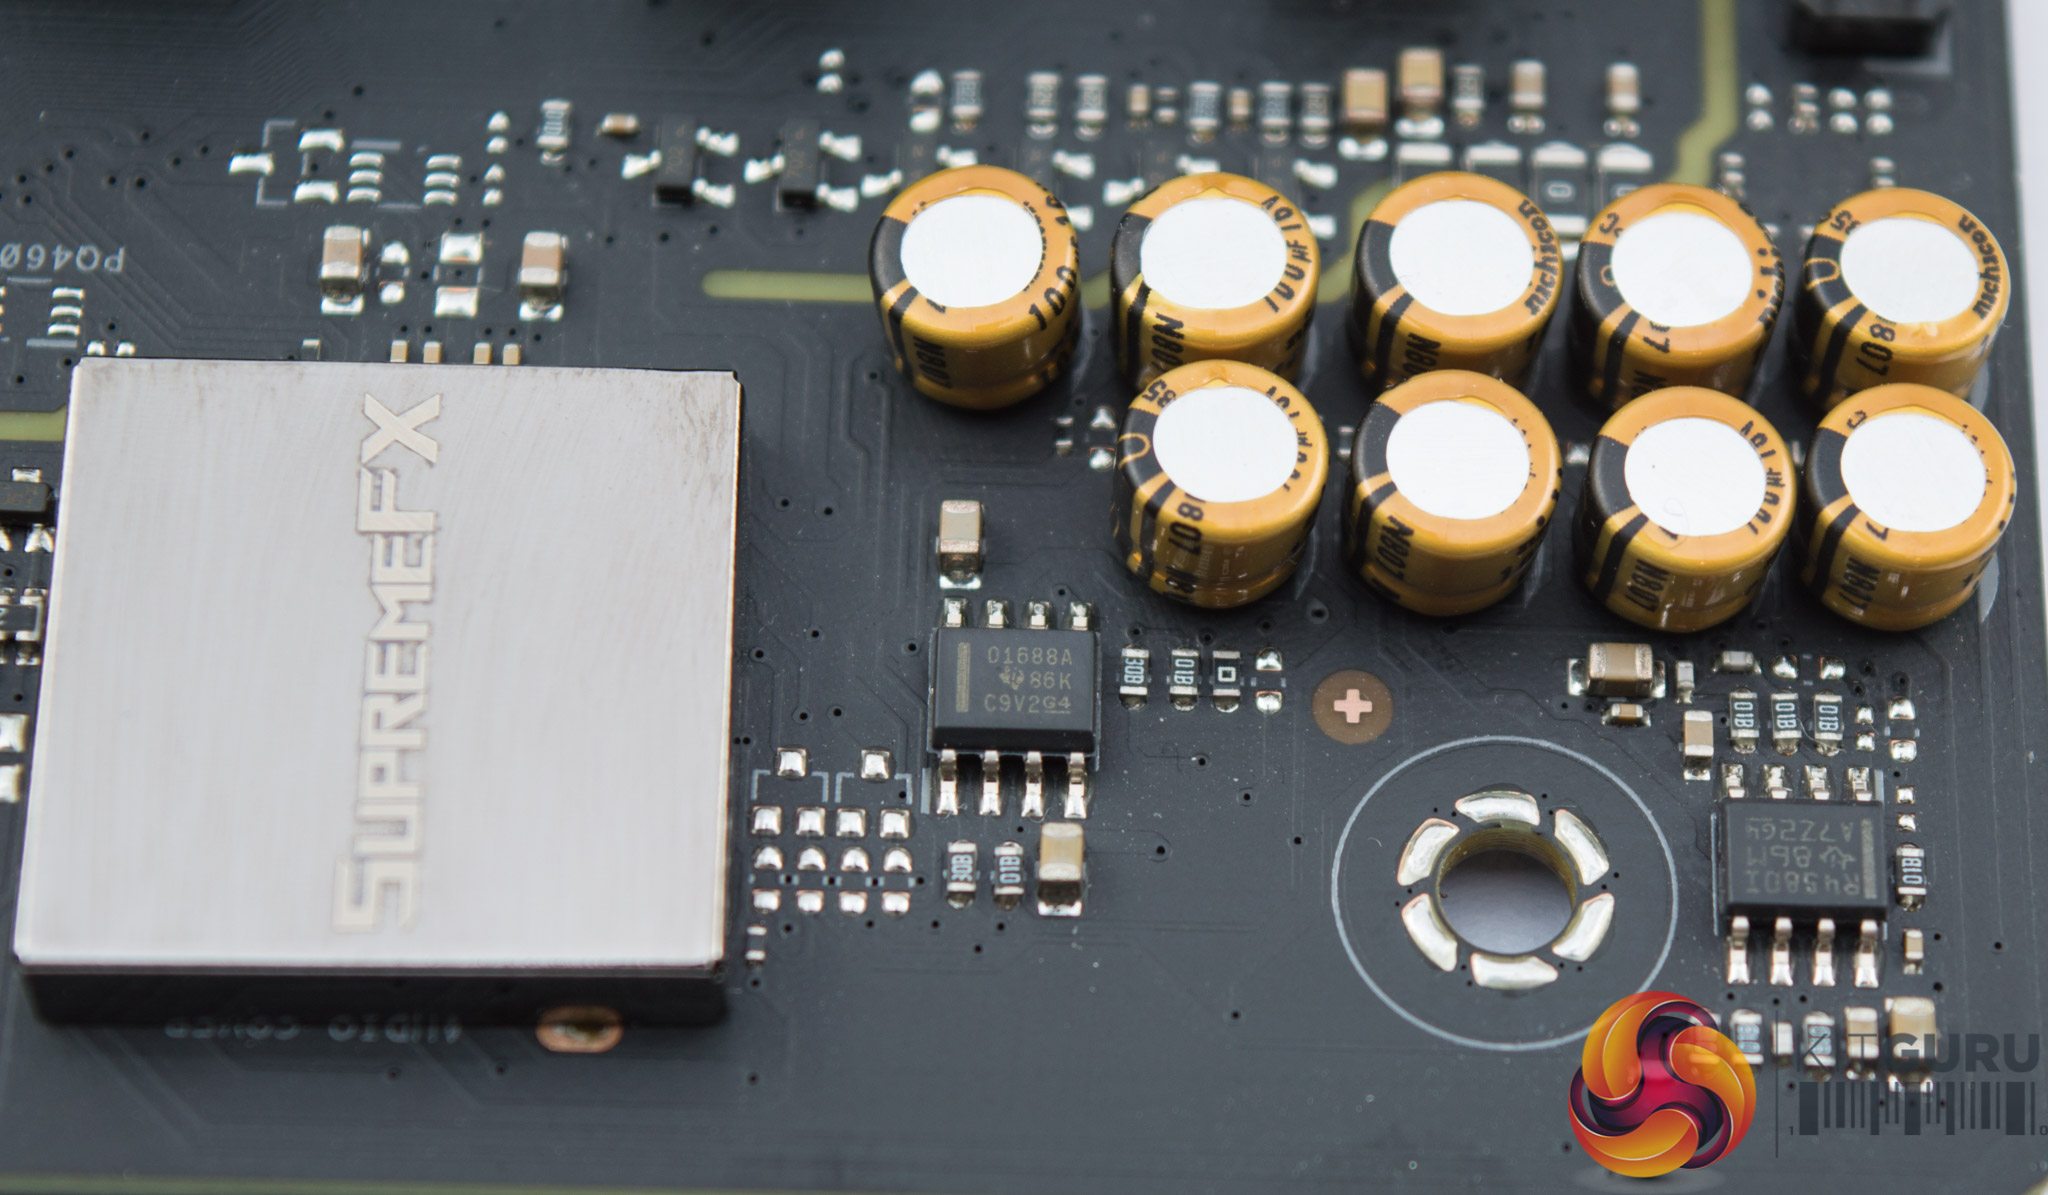
Audio is provided by a shielded Realtek ALC1220 codec within the SupremeFX package. There's dual operational amplifiers – Texas Instruments O(PA)1688A and RC4580(I) – alongside Nichicon Gold Series audio capacitors.
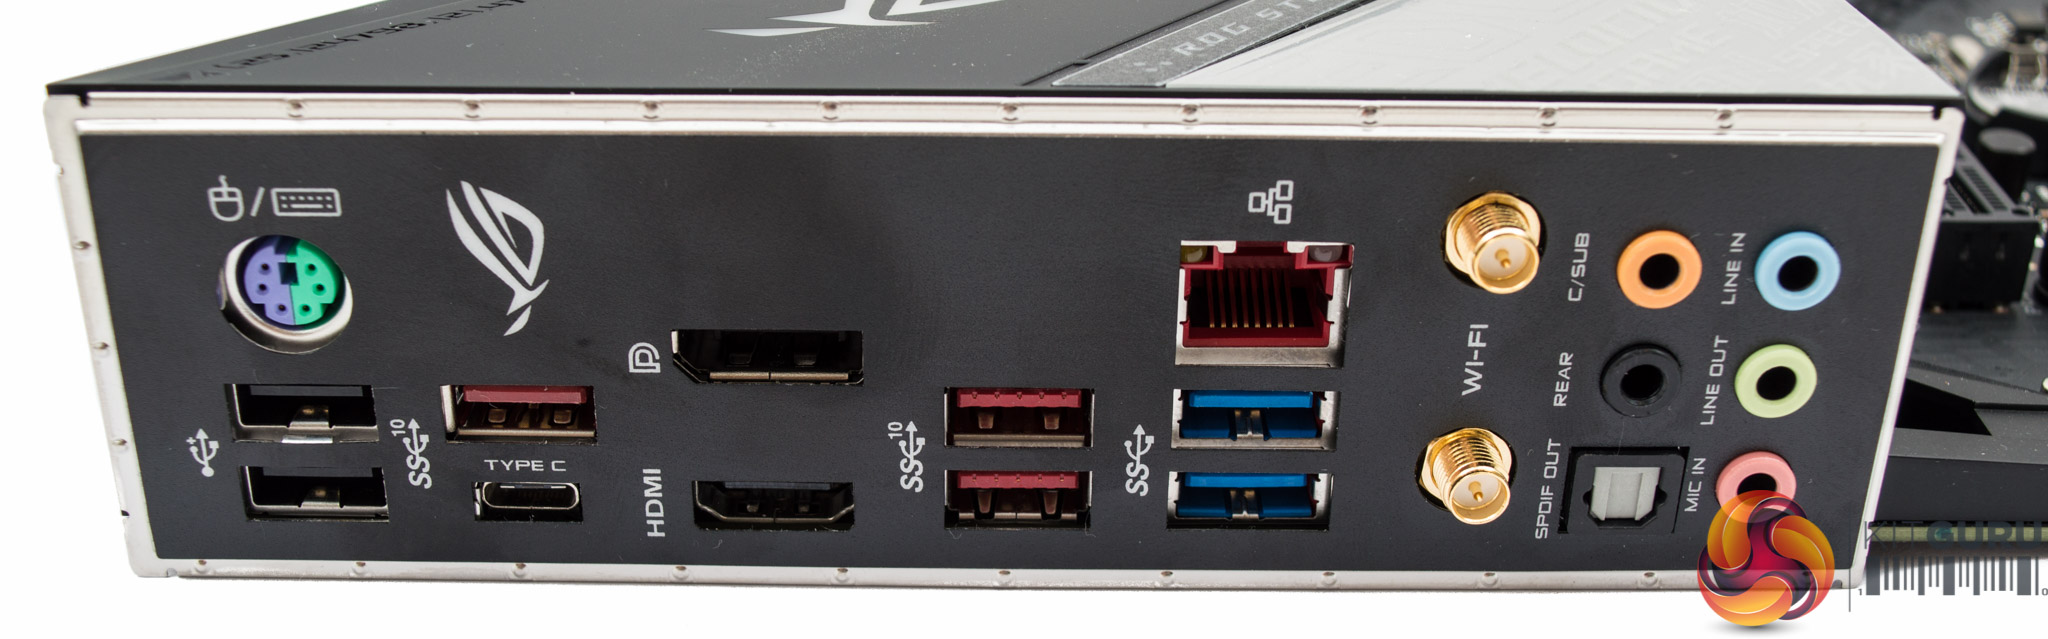
The rear I/O provides the following ports:
- 1 x DisplayPort 1.4
- 1 x HDMI 1.4b
- 1 x LAN (RJ45) port(s)
- 4 x USB 3.1 (3 x Type-A+1 x USB Type-C)
- 2 x USB 3.0
- 2 x USB 2.0
- 1 x Optical S/PDIF out
- 5 x Audio jack(s)
- 1 x ASUS Wi-Fi Module
The overall connectivity is good blend of “old” and new, with ample USB, display and sound options. Networking is somewhat average given many motherboards of this price segment are equipping dual Gigabit, but in practice dual-gigabit may not be that useful for most buyers.
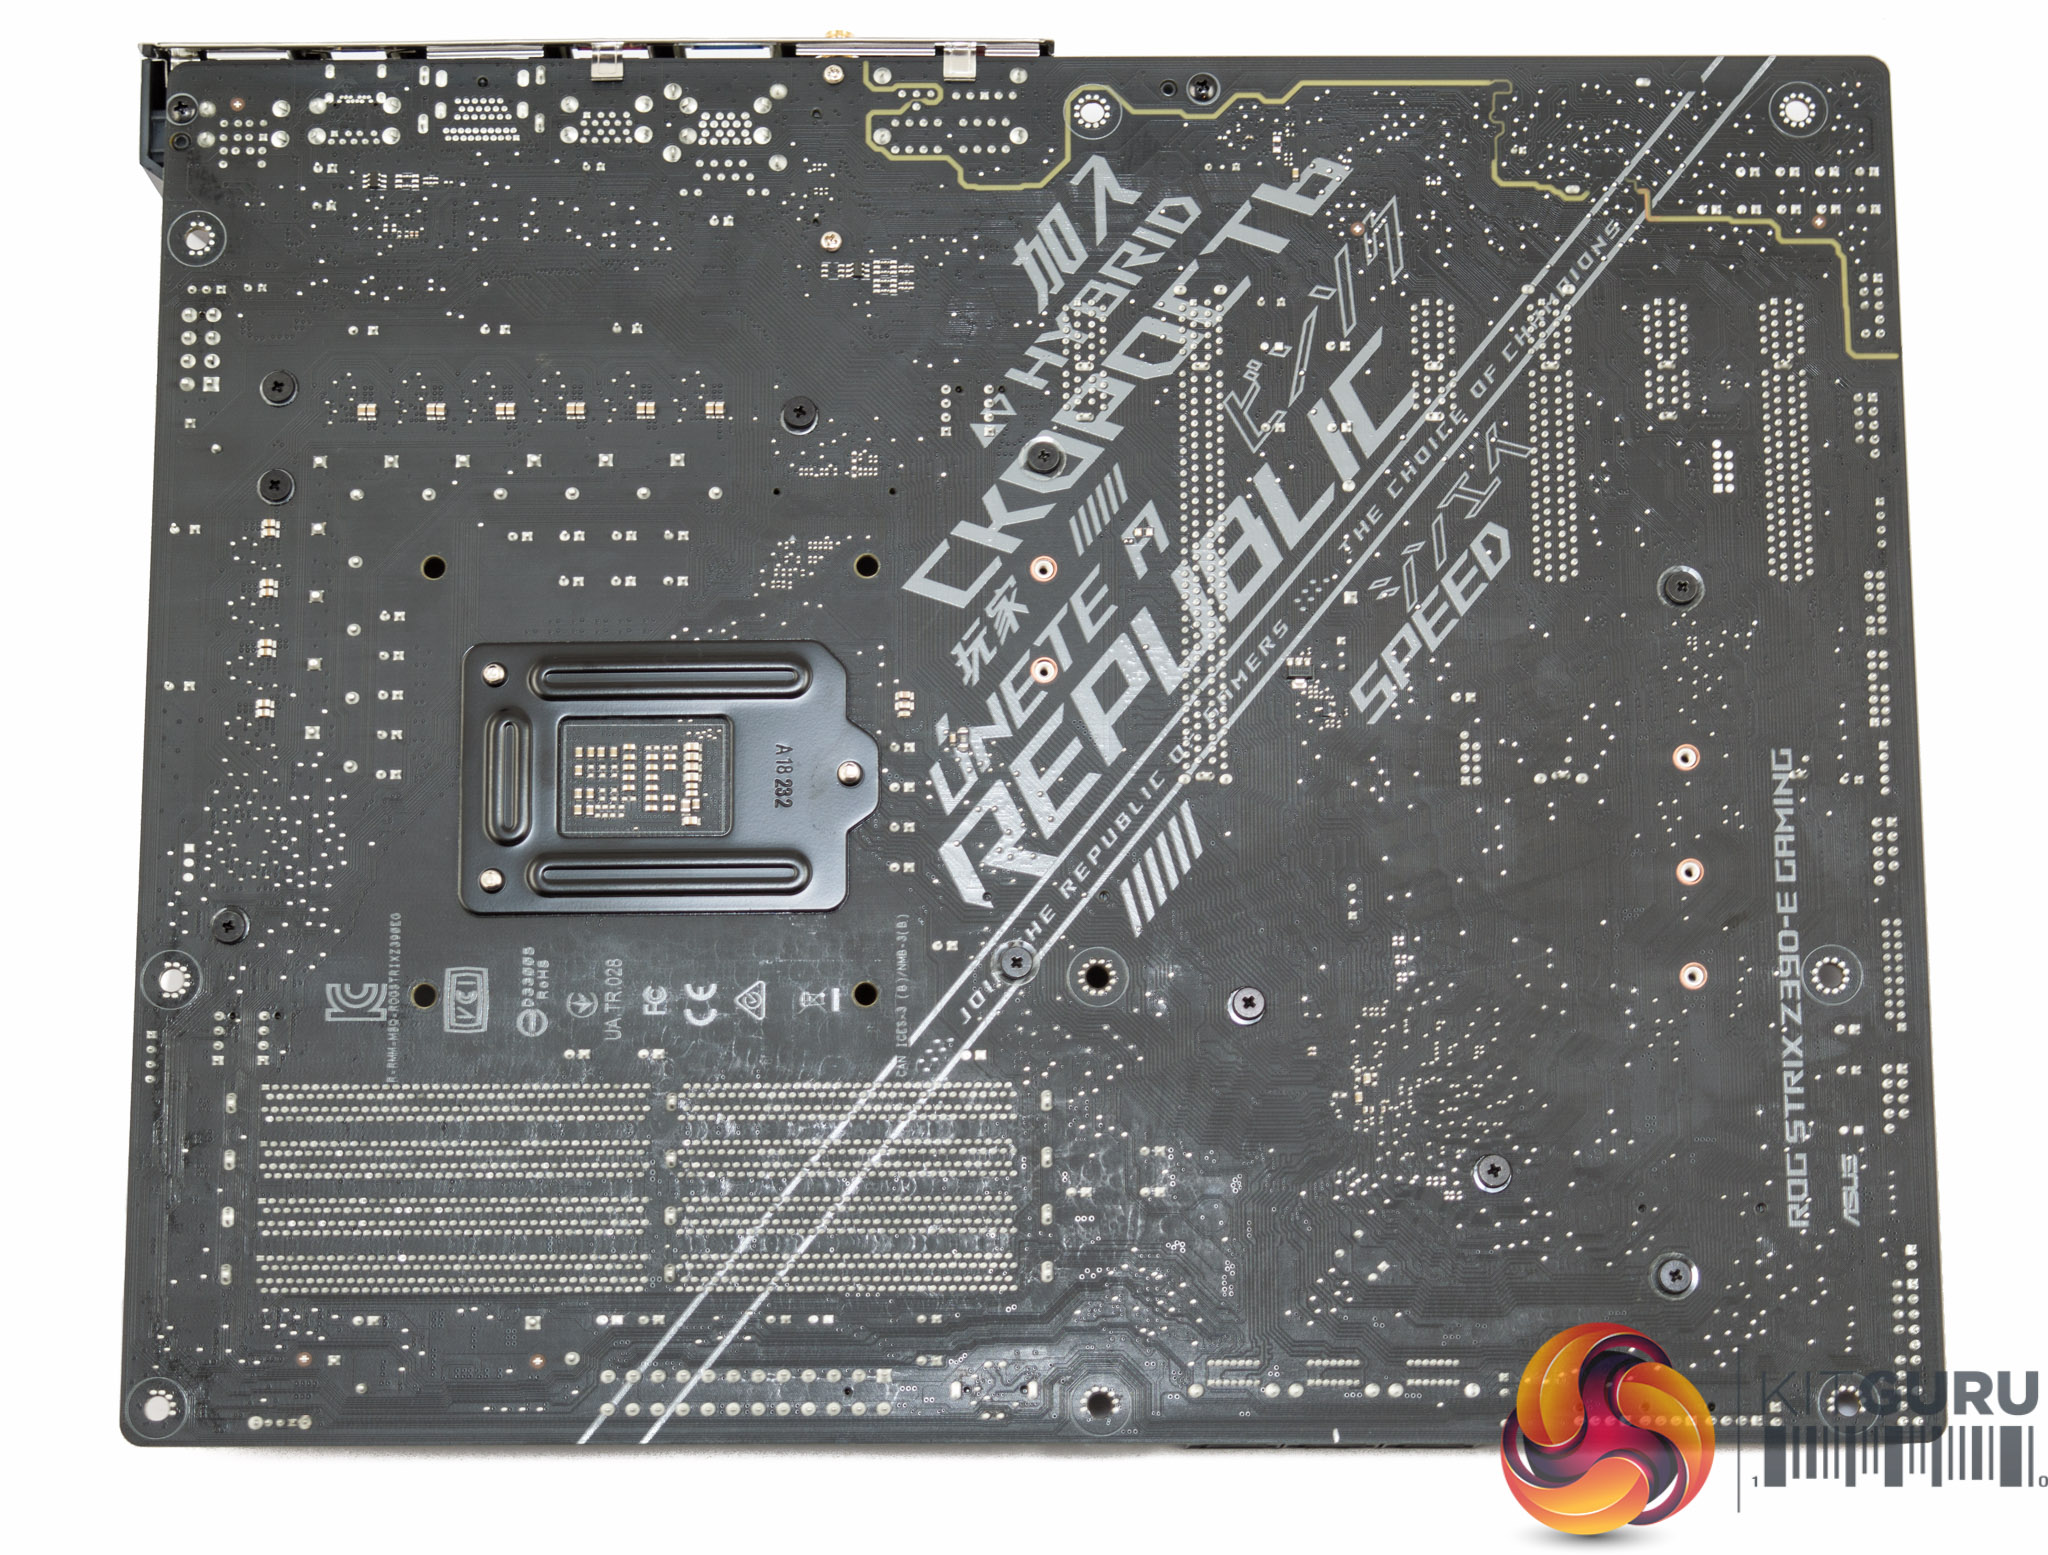
The underside of the motherboard shows only cross-head screws, good for maintenance and modification, while there are no doublers visible underneath the VRM area.
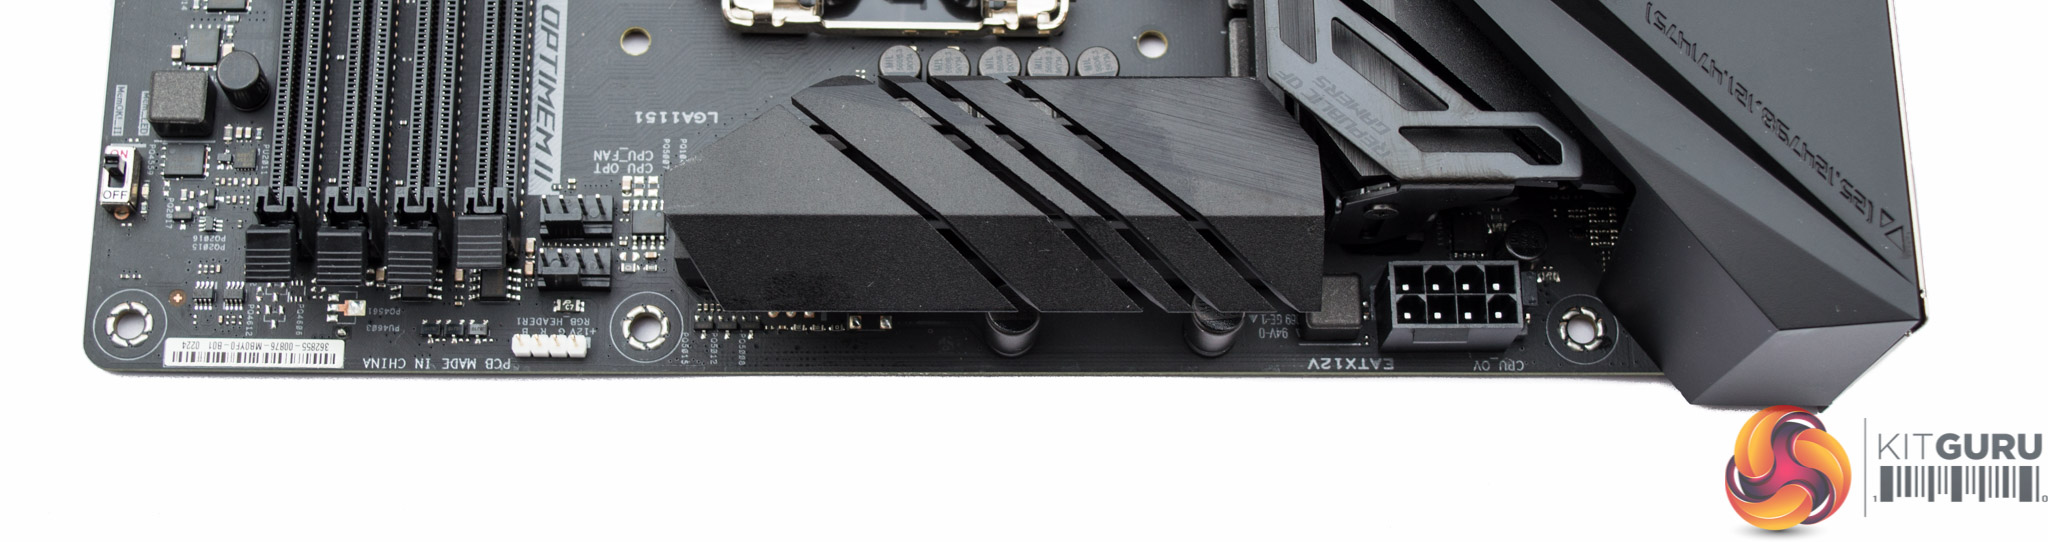
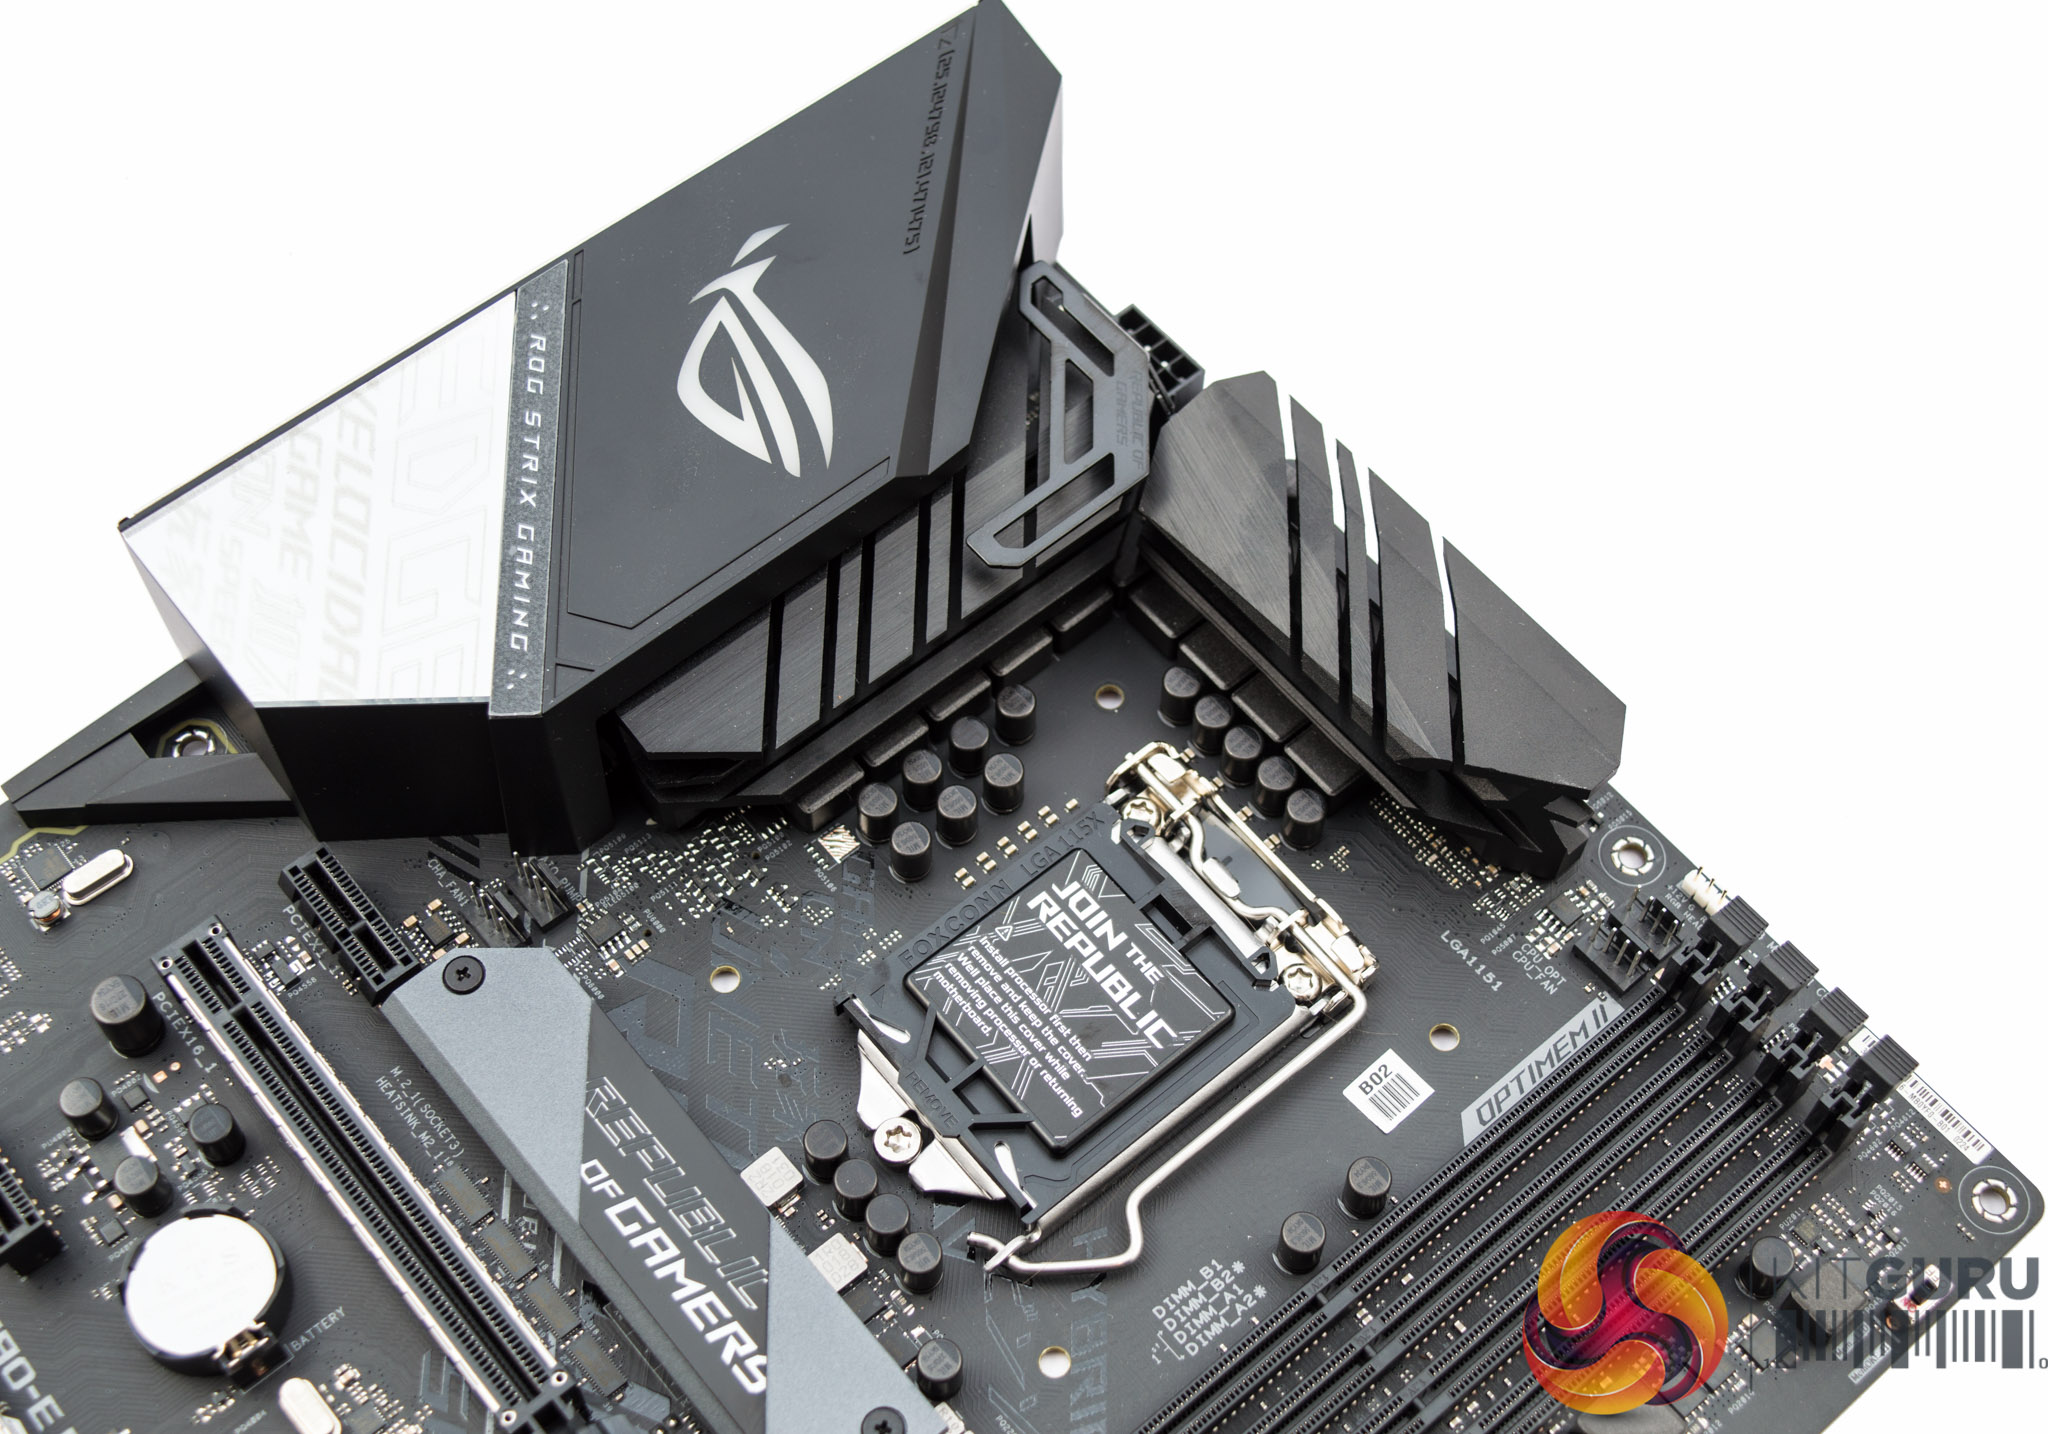
The CPU socket has two independent aluminium heatsinks to cool the VRM while power input is provided through a single 8 pin EPS. The bracket on the rear-most heatsink is to mount the optional 40mm fan provided in the accessory bundle. This would provide additional airflow to the VRMs, particularly important if engaging in high-voltage overclocking.
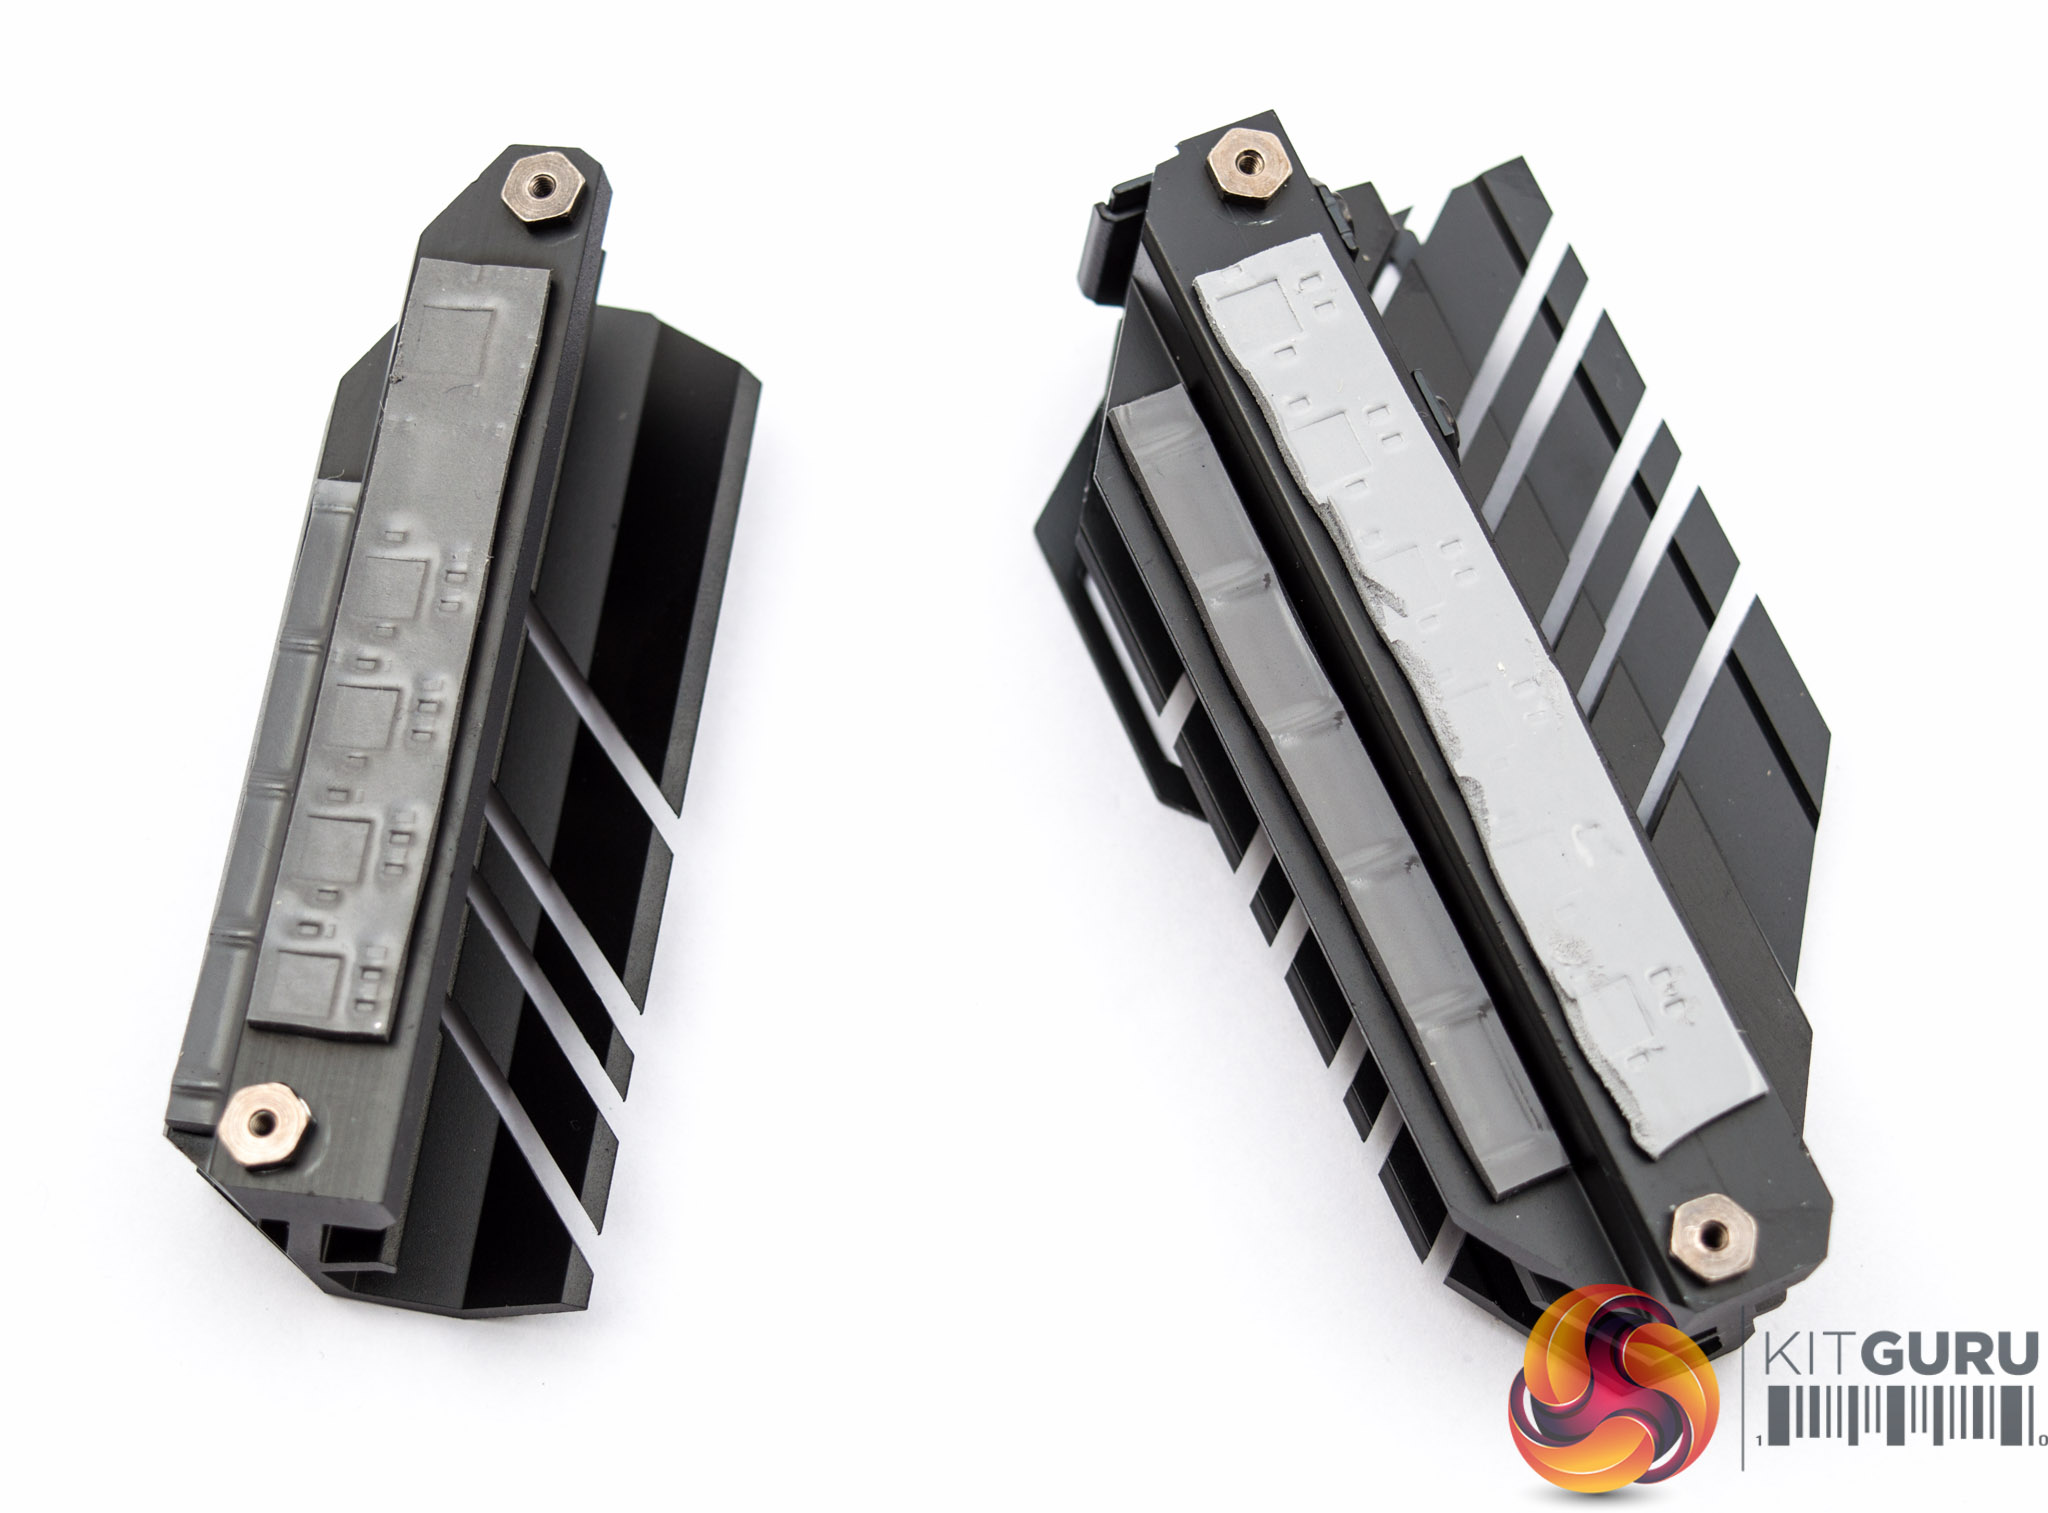
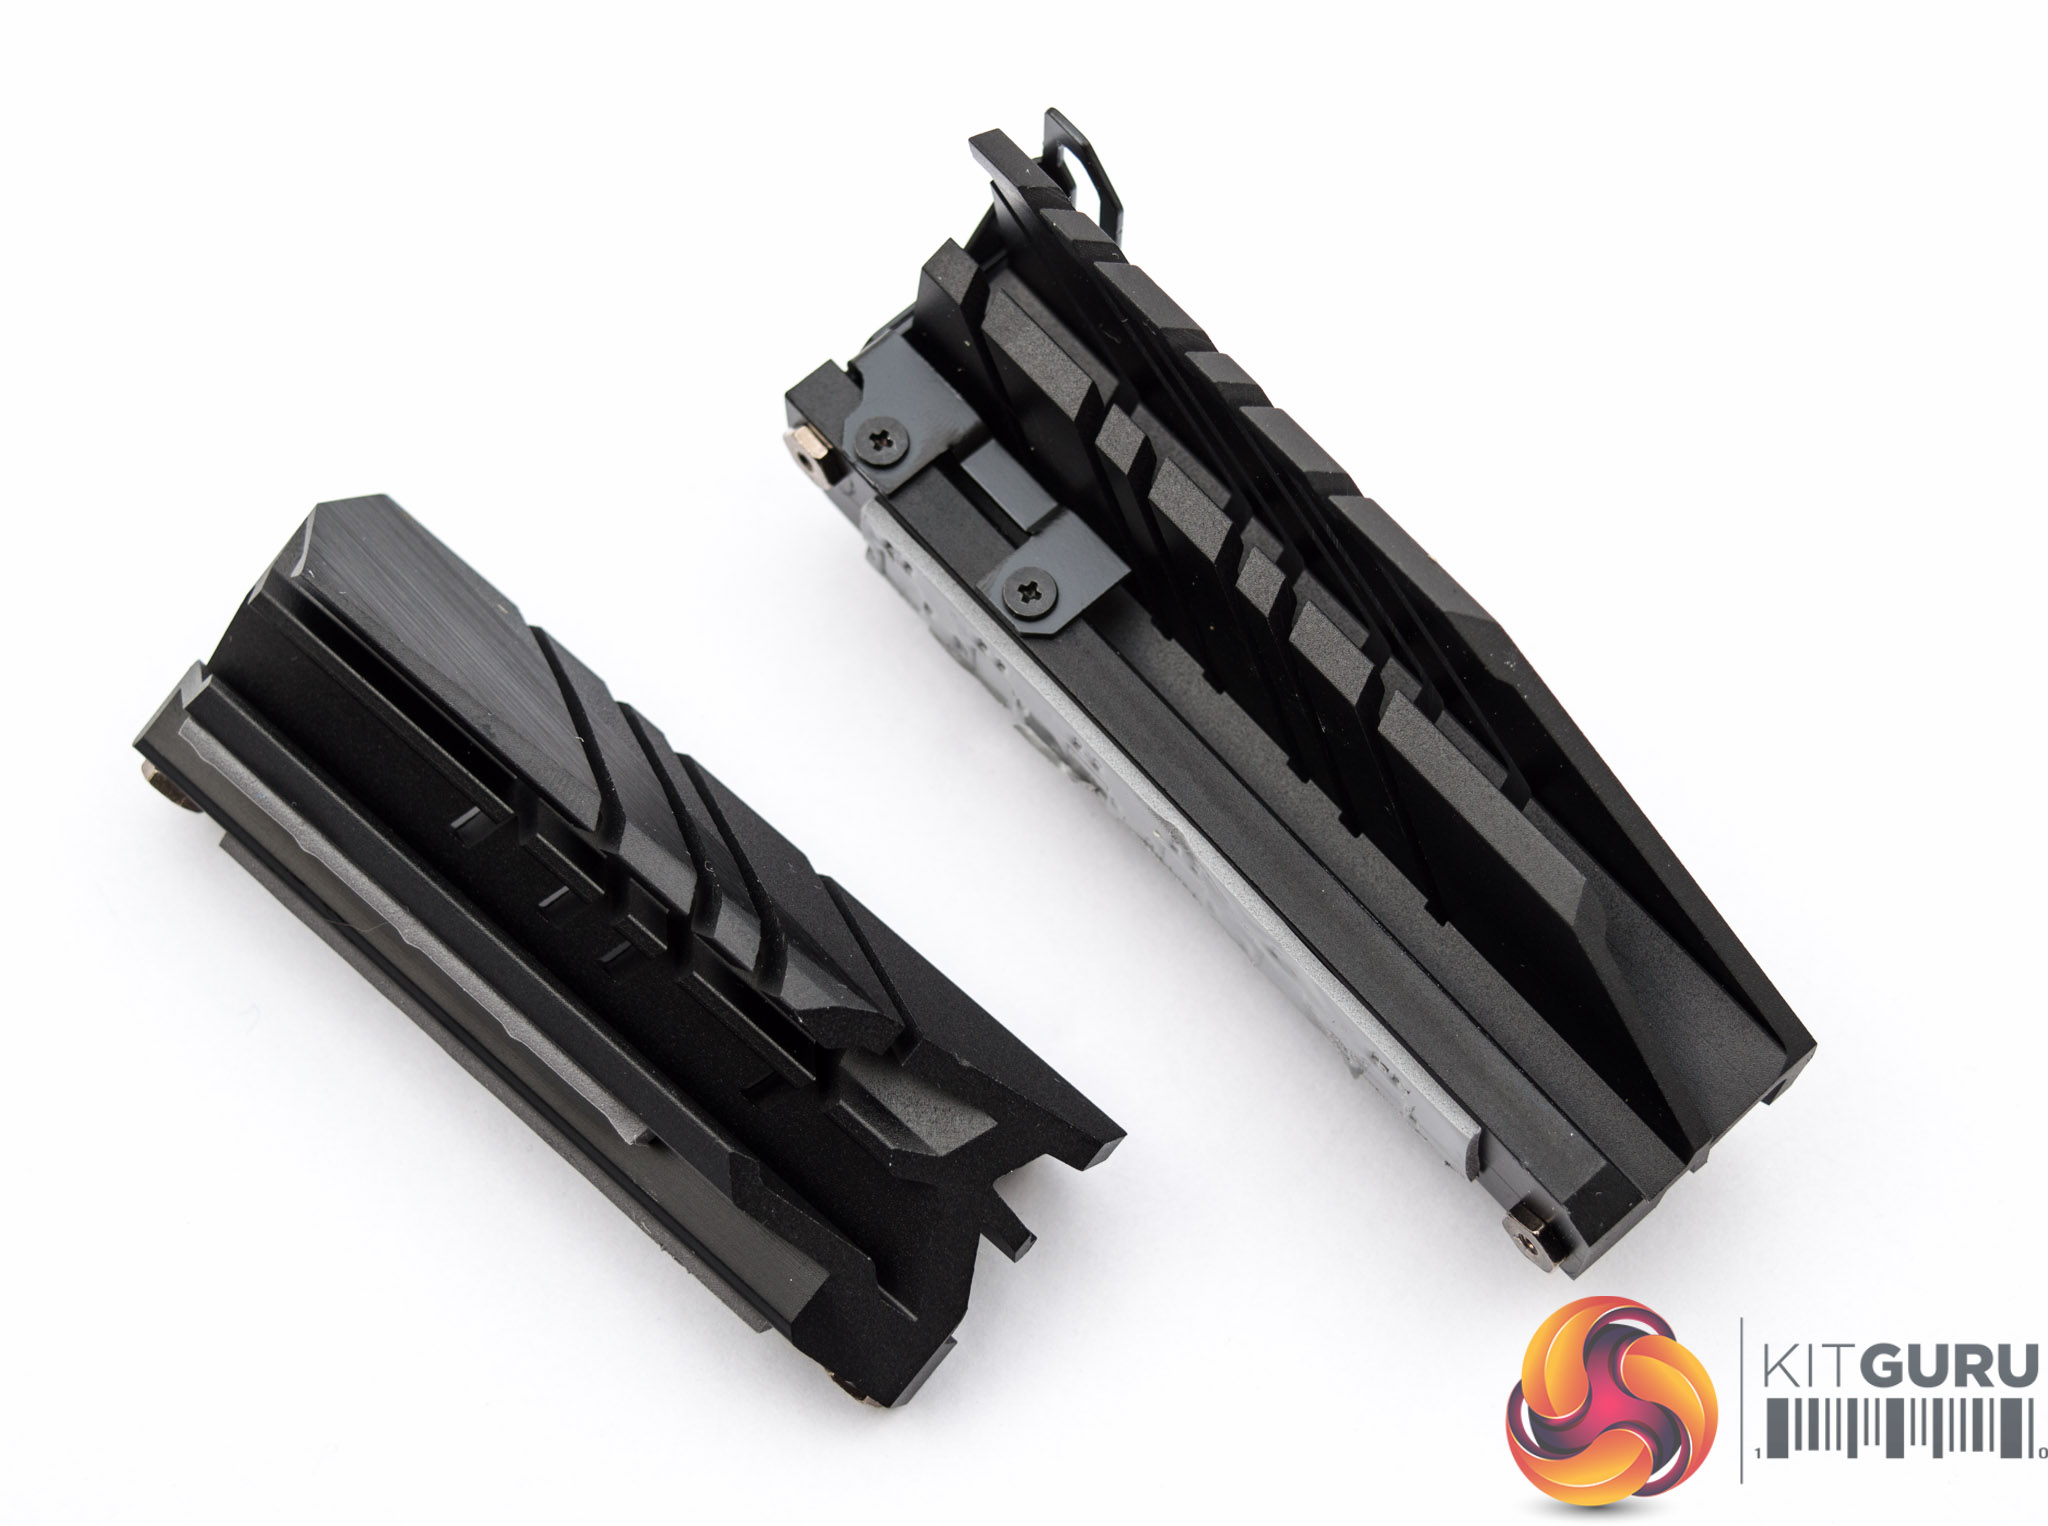
These two heatsinks are single aluminium blocks with thermal pads on the upper and lower segments to cool the inductors and MOSFETs respectively.
There is no heatpipe in either heatsink so the cooling solution is modest by any means, but the optional fan would help greatly in high-voltage overclocking scenarios.
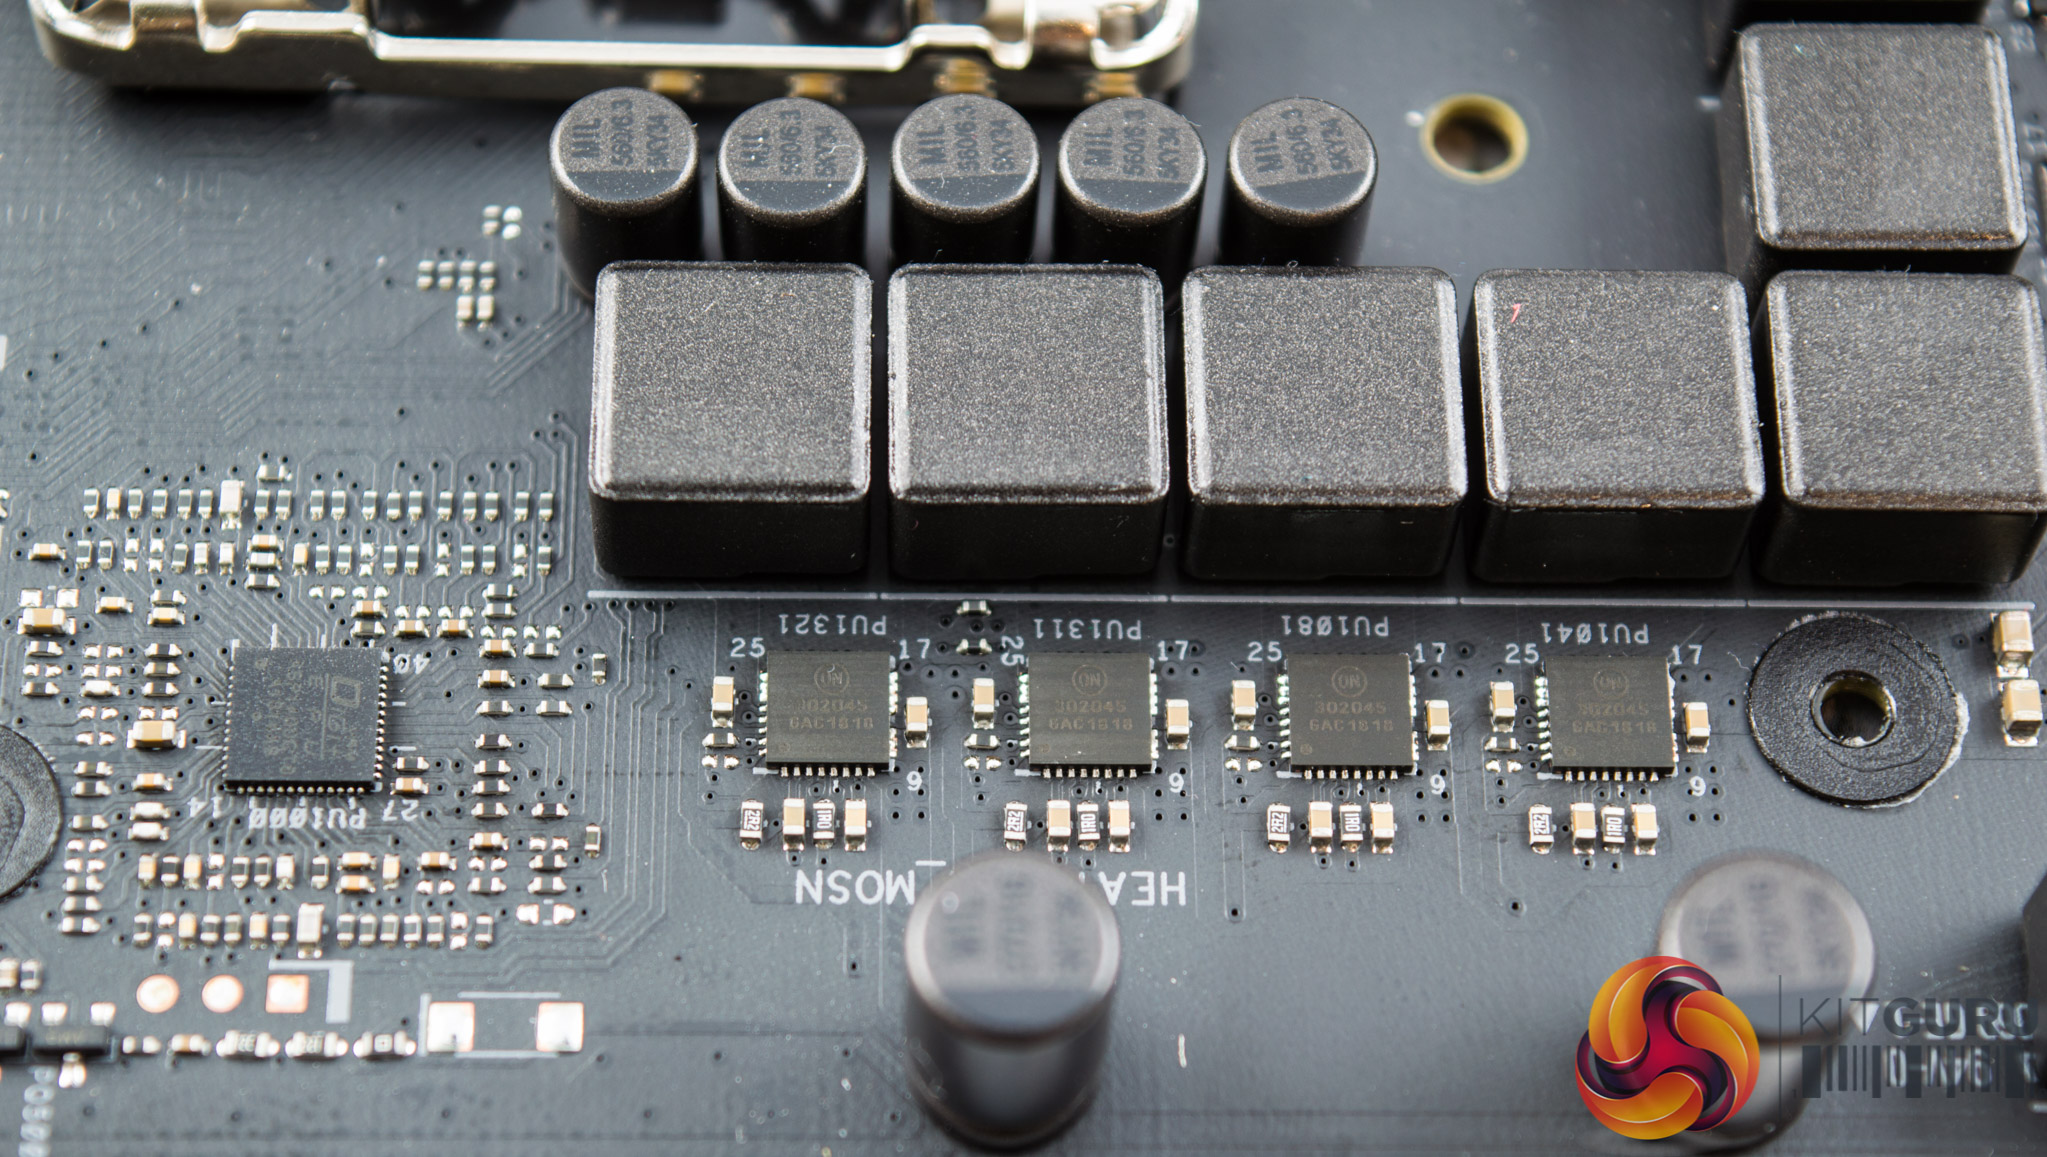
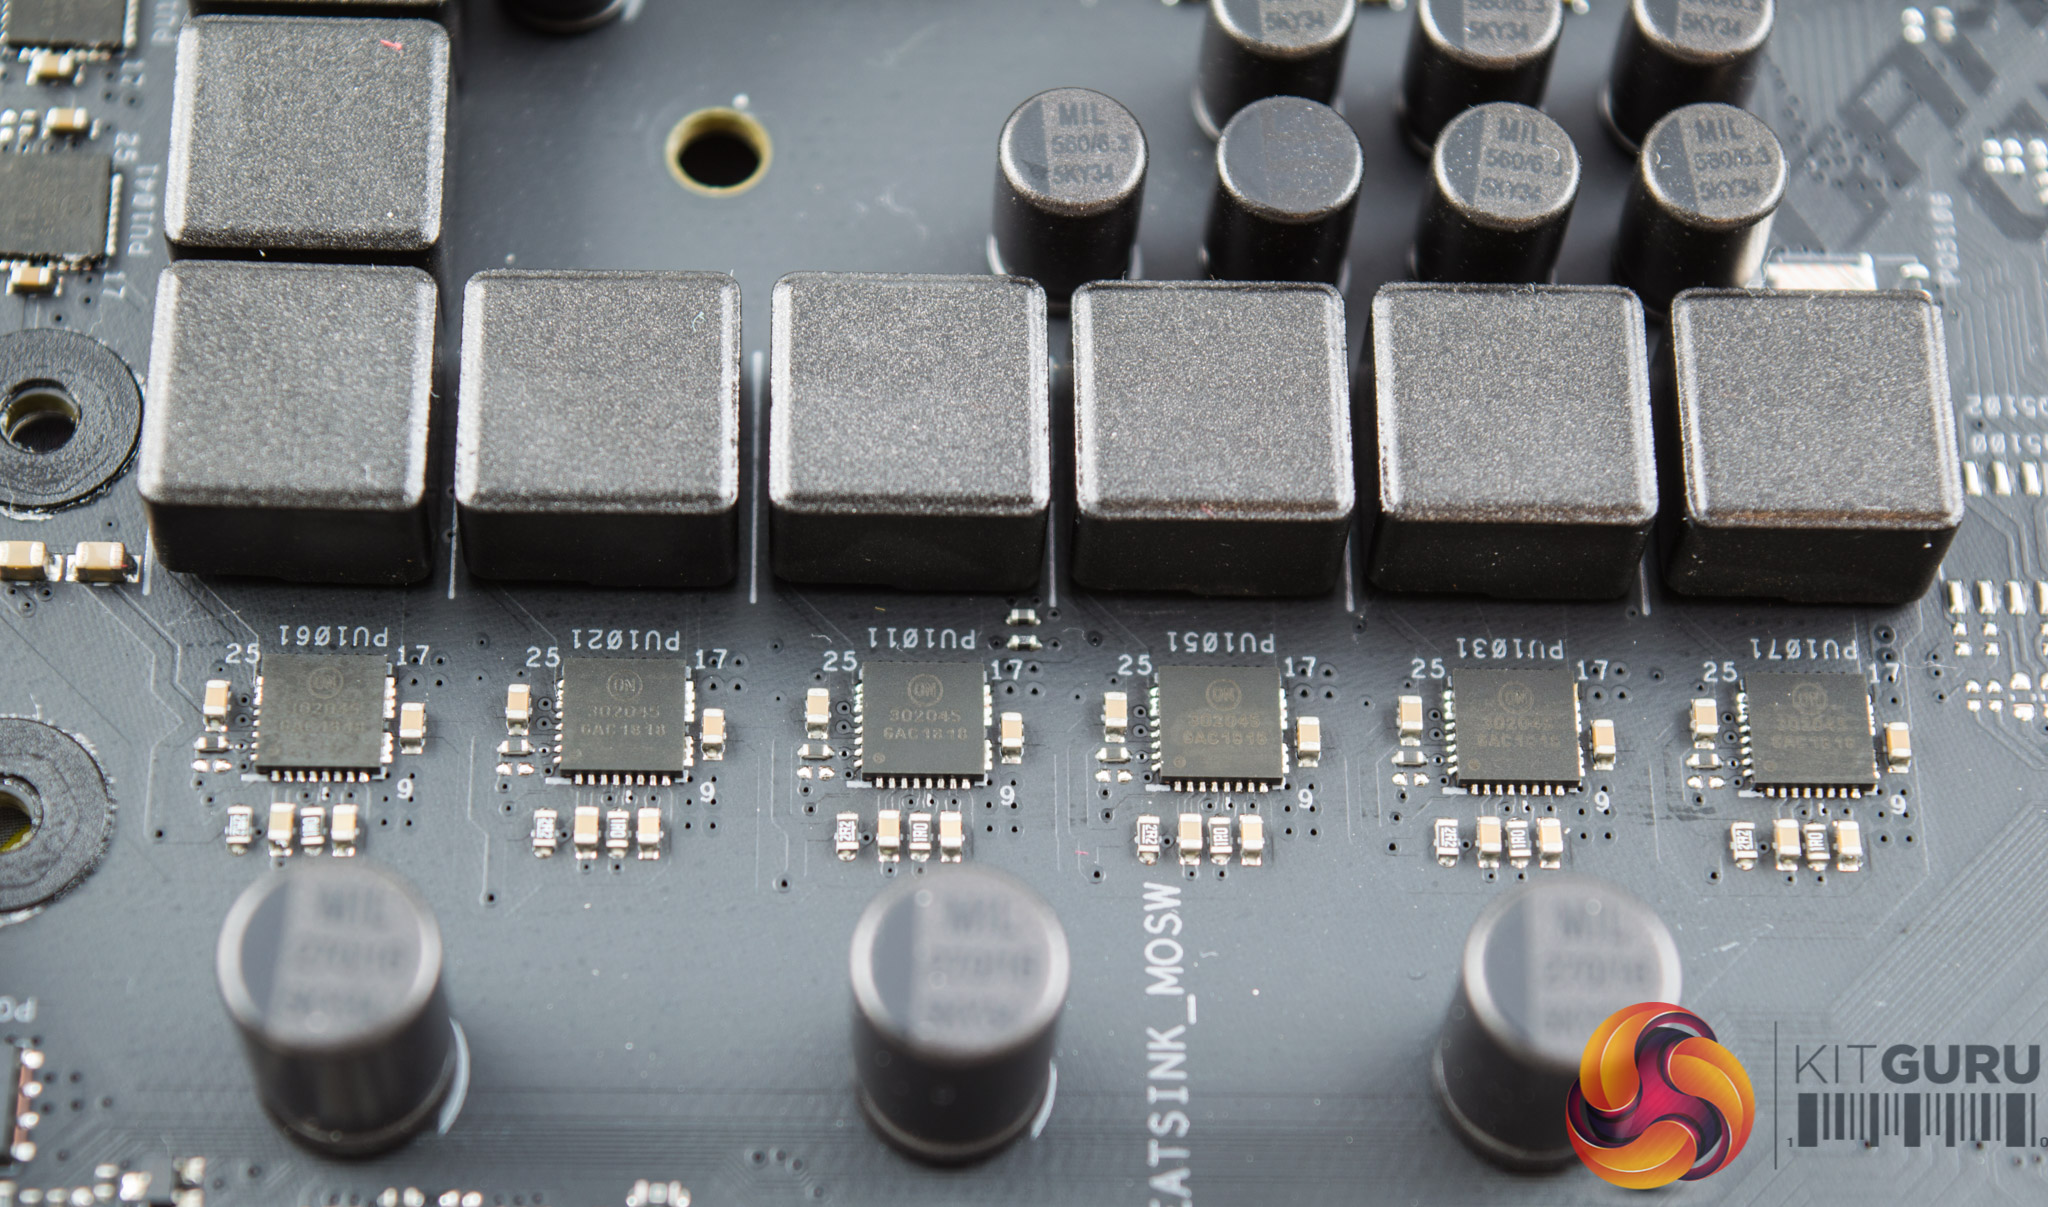
ASUS uses the same ON Semiconductor NCP302045 MOSFET package for every “phase”. This package integrates the high-side and low-side MOSFETs along with a MOSFET driver, it has an average current rating of 45-amps with a 75A peak.
The inductors are unmarked but are identical for all 10 MOSFETs and the Capacitors are marked “MIL 560/6.3 5KY34”, meaning the capacitors are 560uF and 6.3v units. ASUS claim, for both the MOSFETs and Inductors, “Superior chokes [inductors] and durable capacitors are engineered to resist extreme temperatures and provide up to 110% better performance than the industry standard.“
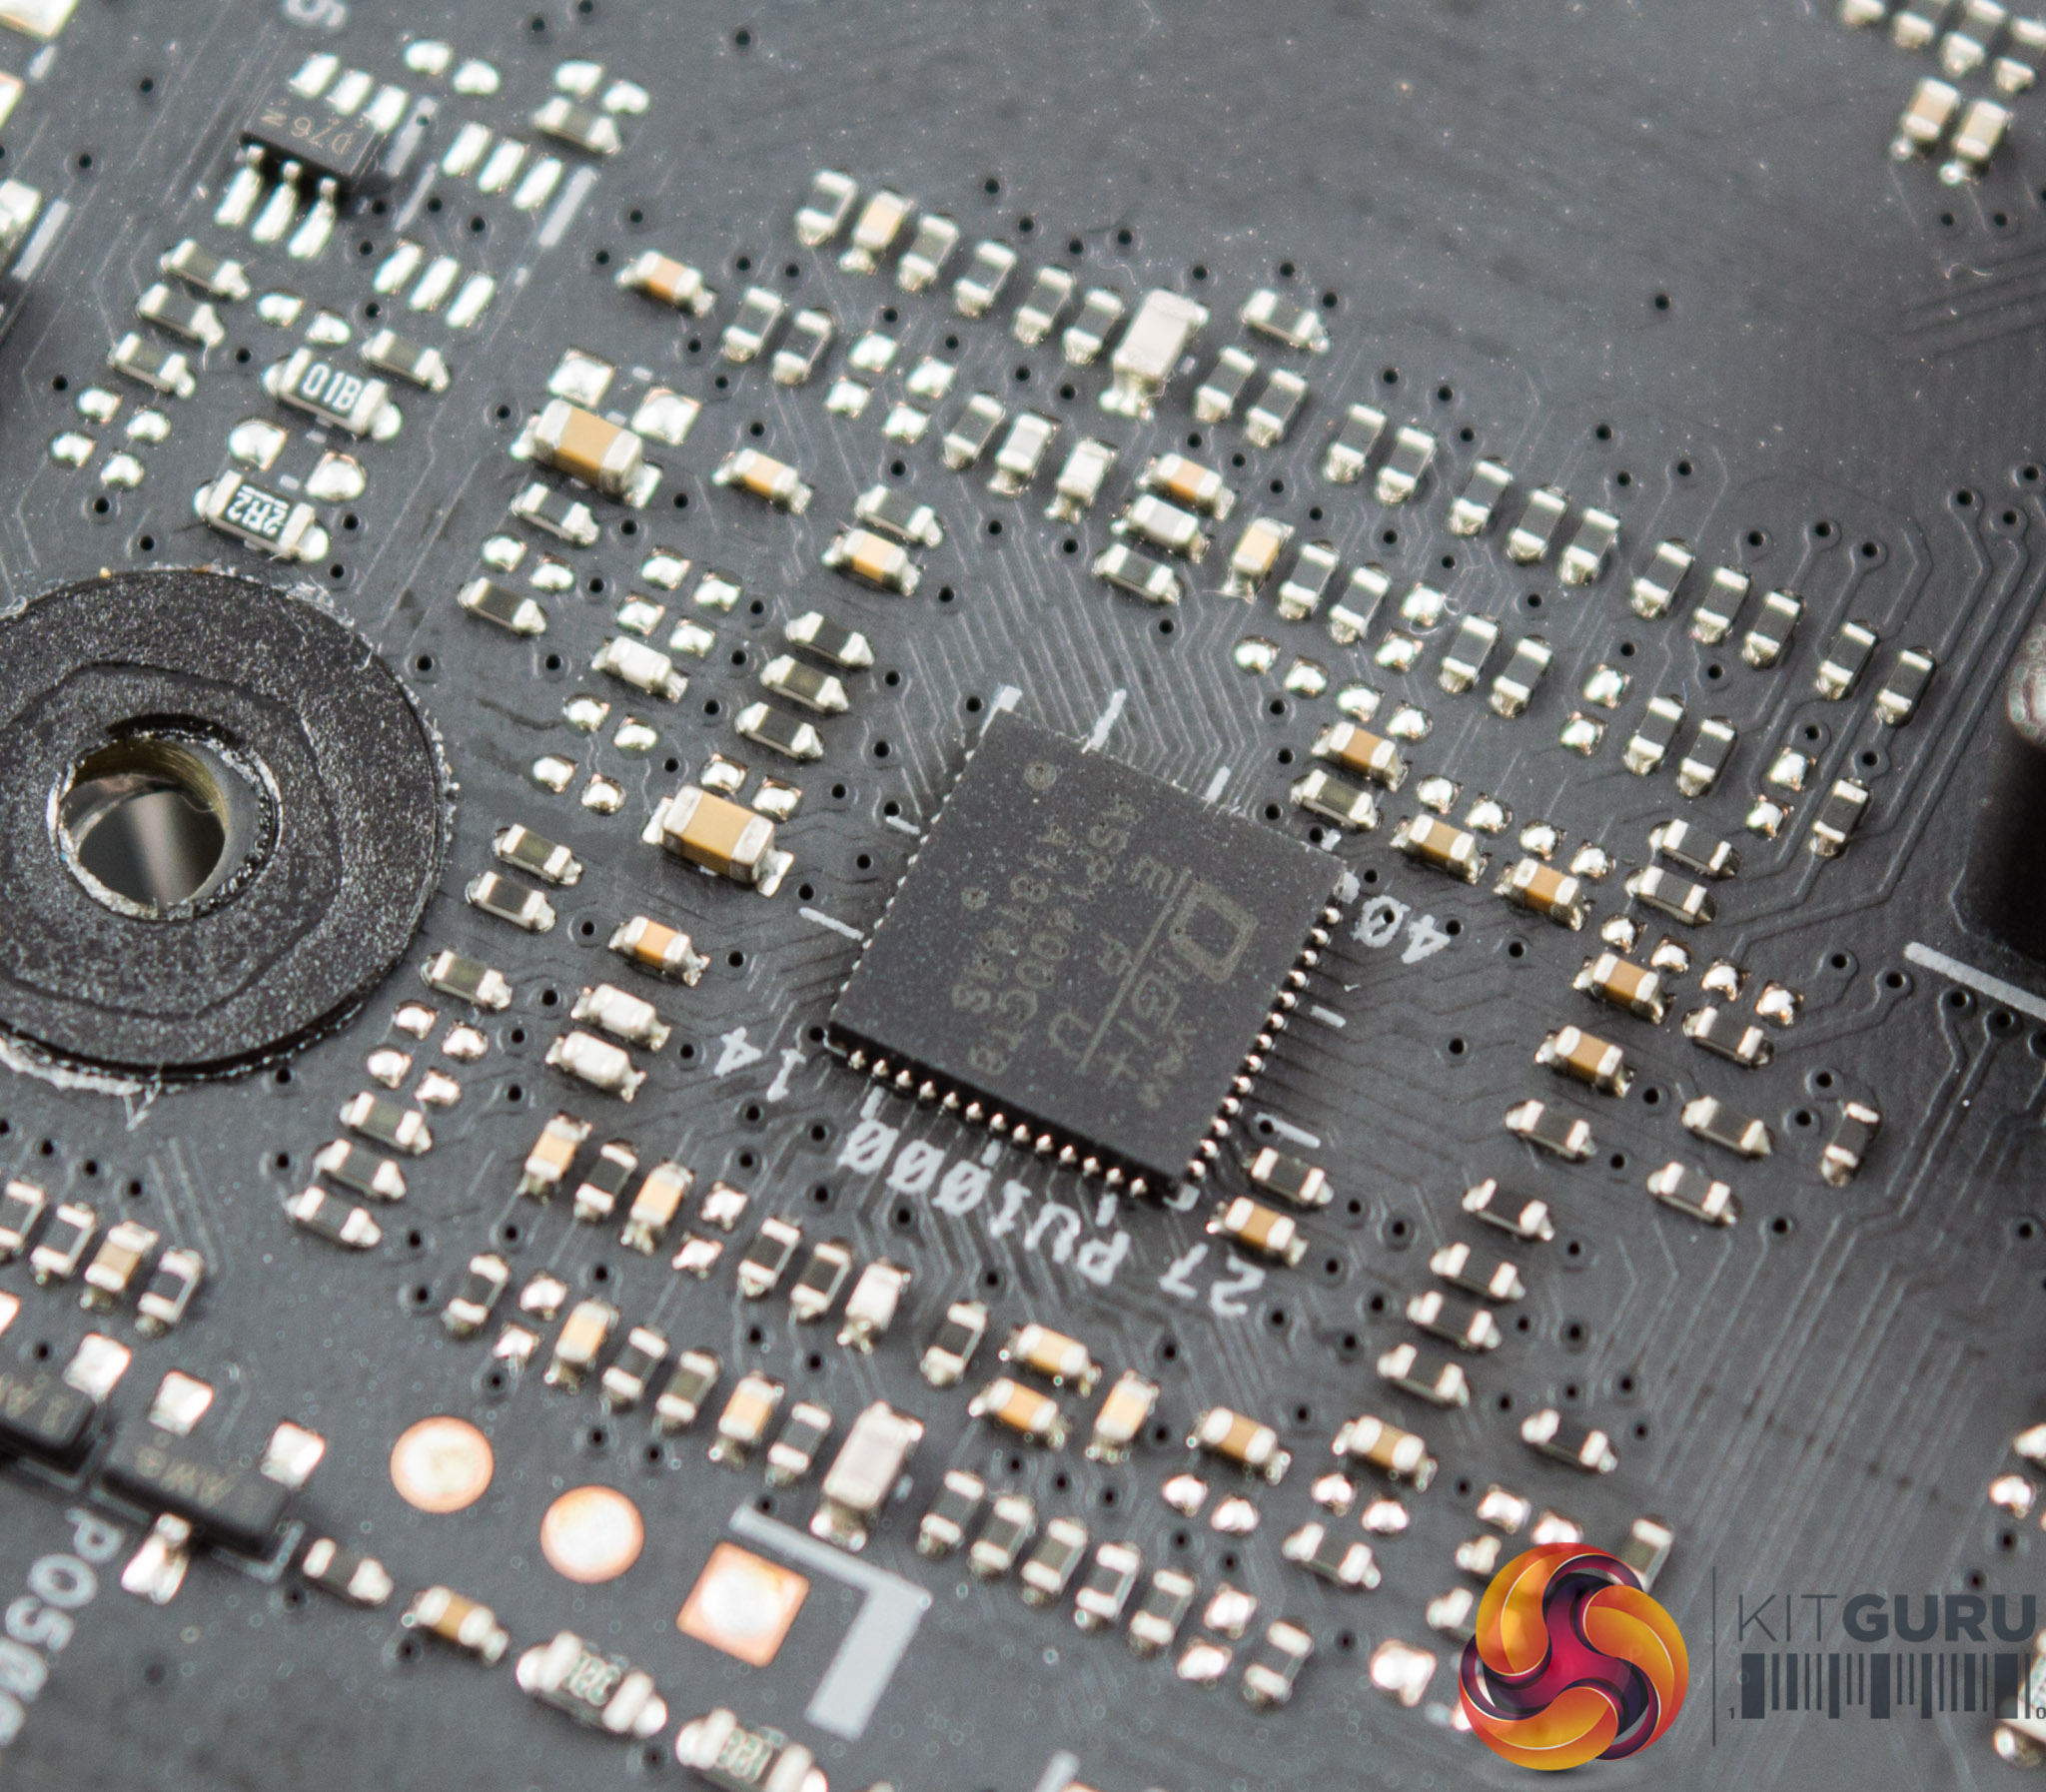
The PWM controller is marked ASP1400CTB and is a custom-packaged PWM controller for the “ASUS DIGI+ EPU”. It appears to have 53pins (14+13+13+13) which is less than an International Rectifier IR35201 (56pins) and more than an IR35203 (48pins). It's not clear if that means the controller is definitely not one of those units, or is a modified version of them specifically for use by ASUS.
One thing that does stand out is that ASUS has used this PWM controller on low-end motherboards in the past such as the ASUS ROG Strix H370-F Gaming and some B360 models. On the H370-F this controller was used with International Rectifier doublers which lends credence to the suggestion these are rebranded International Rectifier controllers.
To our knowledge this CPU PWM controller operates in a 4+2 phase mode with 2 MOSFETs, Inductors and drivers per VCore phase, with single components for the iGPU phases. That is 8 phases worth of components for the 4 VCore phases and then 2 “normal” phases for the iGPU phases. Even so, there appears to be no definitive proof that the 2 iGPU phases are not the same as the VCore phase – one PWM phase with twice the components of a normal phase.
As we've discussed at the beginning, the move to a 4-phase for the CPU VRM is controversial given the criticism motherboard companies faced in prior generation chipsets over misleading VRM marketing, particularly Gigabyte. Furthermore, the higher power demands of the new Coffee Lake refresh CPUs, such as the i9 9900K, mean a stronger VRM is important now more than ever.
By anyone's standards, this ASUS VRM is a mid-range solution and higher up the ASUS stack there are more capable VRM solutions and better VRM cooling on offer. Thankfully, the addition of higher-end MOSFET/driver packages mean it qualifies as better than the average motherboard and most overclocking enthusiasts will still find the design quite capable.
The memory VRM seems to be running off an Anpec APW8723A PWM controller with four ON Semiconductor 4C10B MOSFETs, it looks like a single phase solution but it is difficult to tell. There are a number of other Anpec APW8732A and APL5337 controllers with ON Semiconductor MOSFETs scattered around the motherboard that could also be responsible for the memory, VCCIO, VCCSA or chipset power delivery systems.
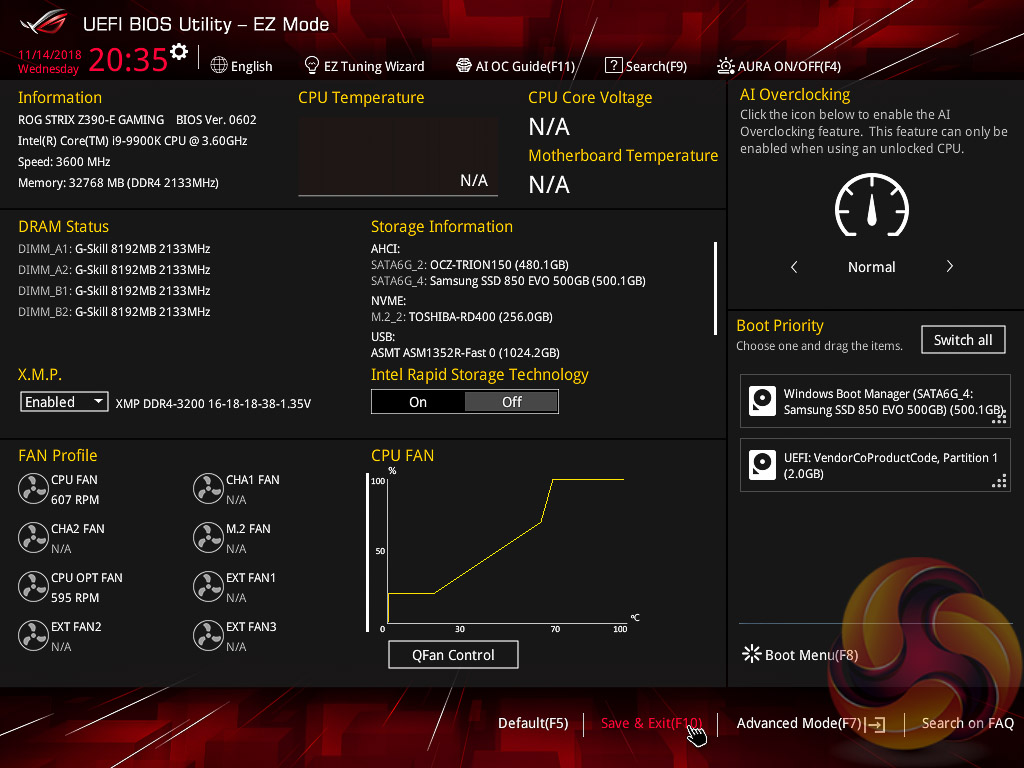
The ASUS UEFI enters straight into the EZ Mode splash screen which has a selection of frequently used settings including XMP profiles, boot device order and fan speeds. Pressing F7 takes the user into the advanced section of the UEFI but there are some additional tools that can be accessed from the splash screen such as Q-Fan Control, EZ System Tuning and AI Overclocking.
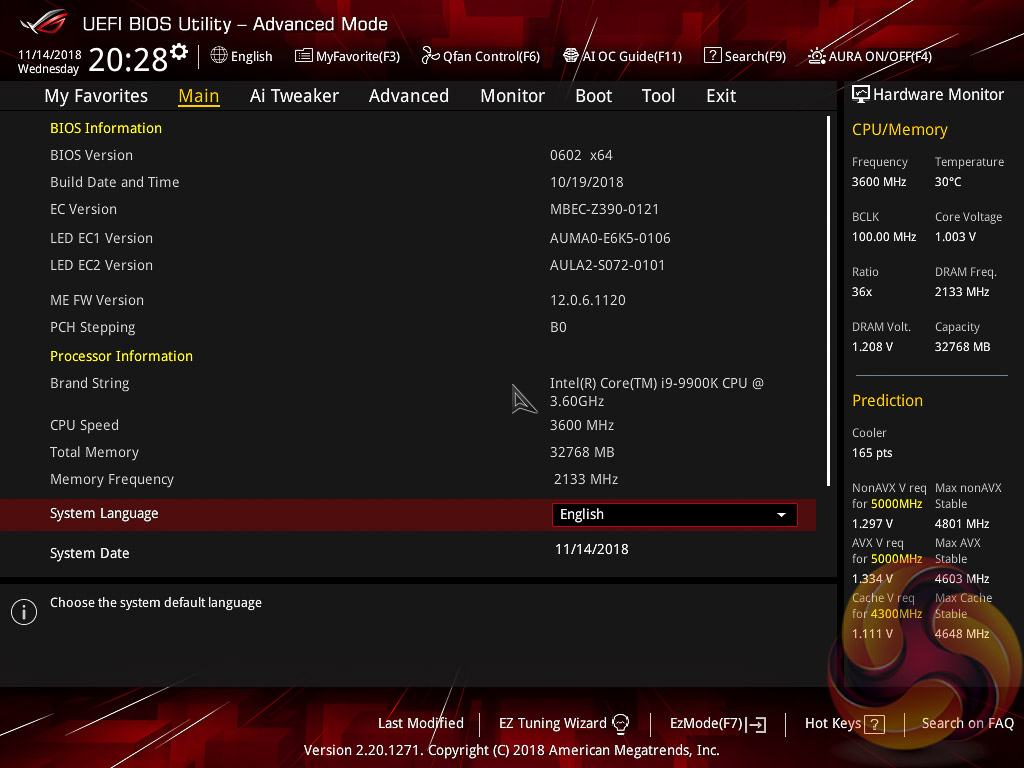
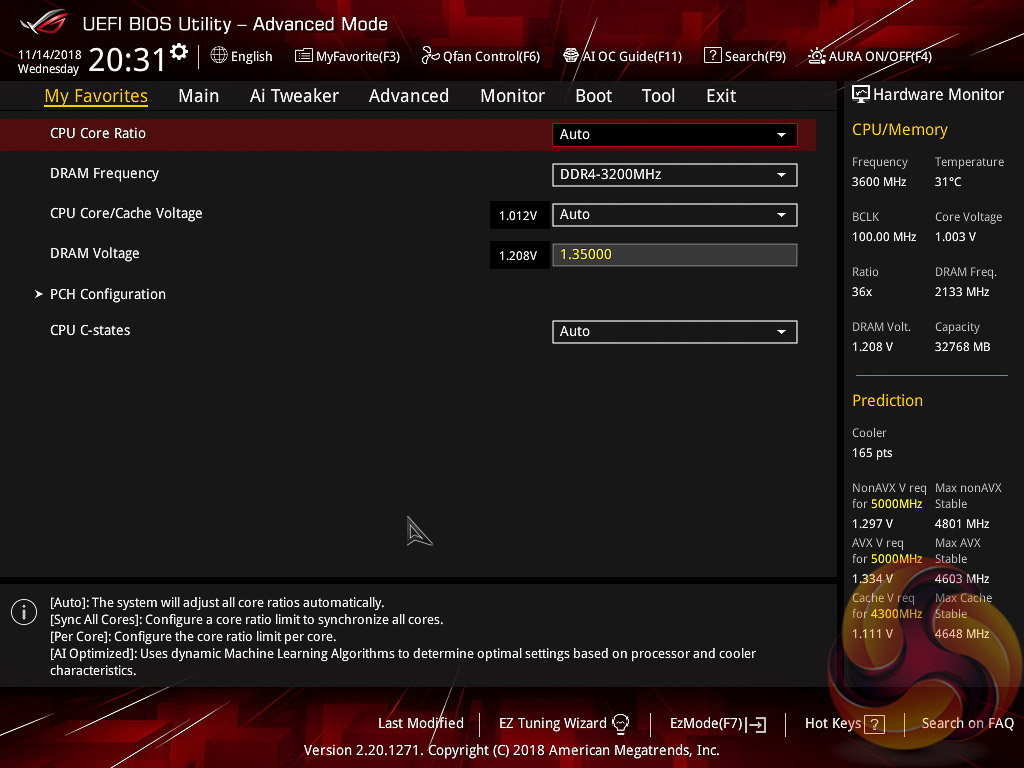
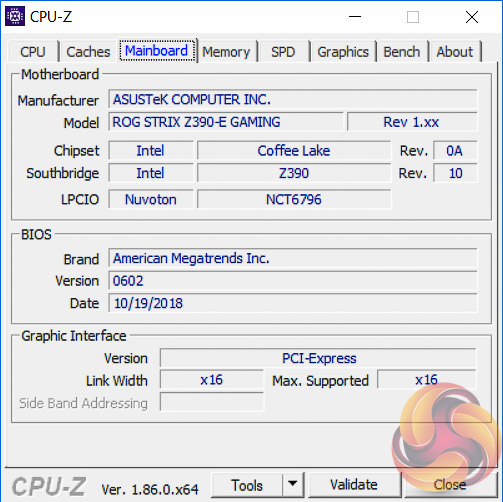
The first tab is MyFavorites which stores the most frequently accessed UEFI settings. The next tab, Main, contains detailed processor and BIOS version information.
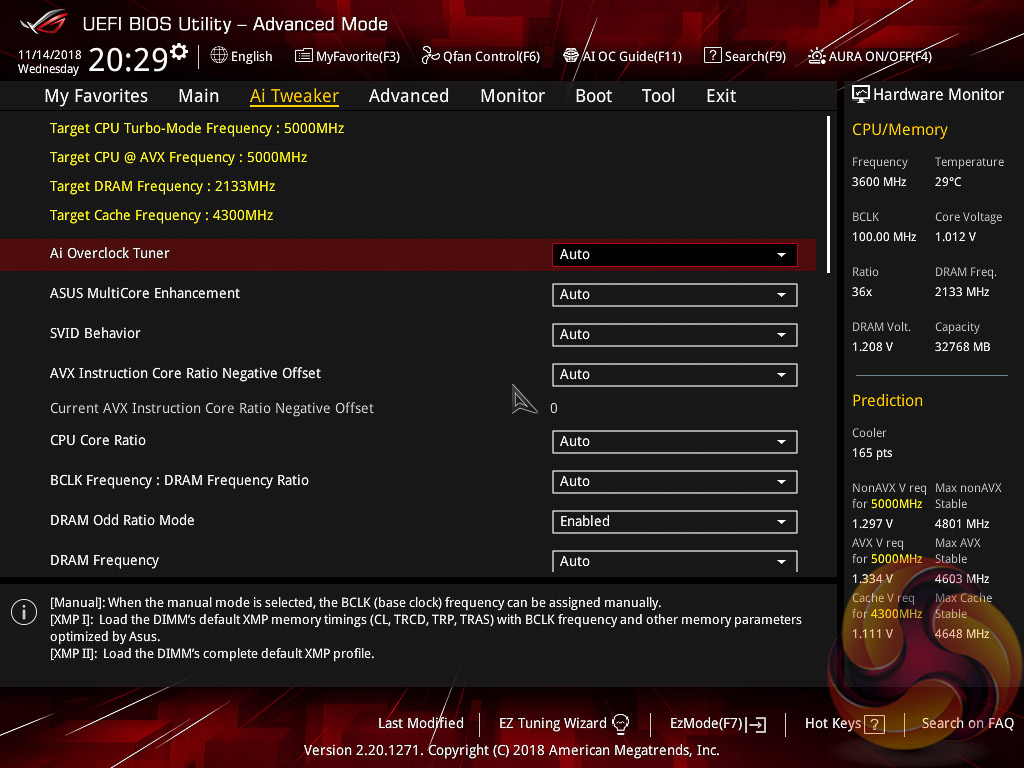
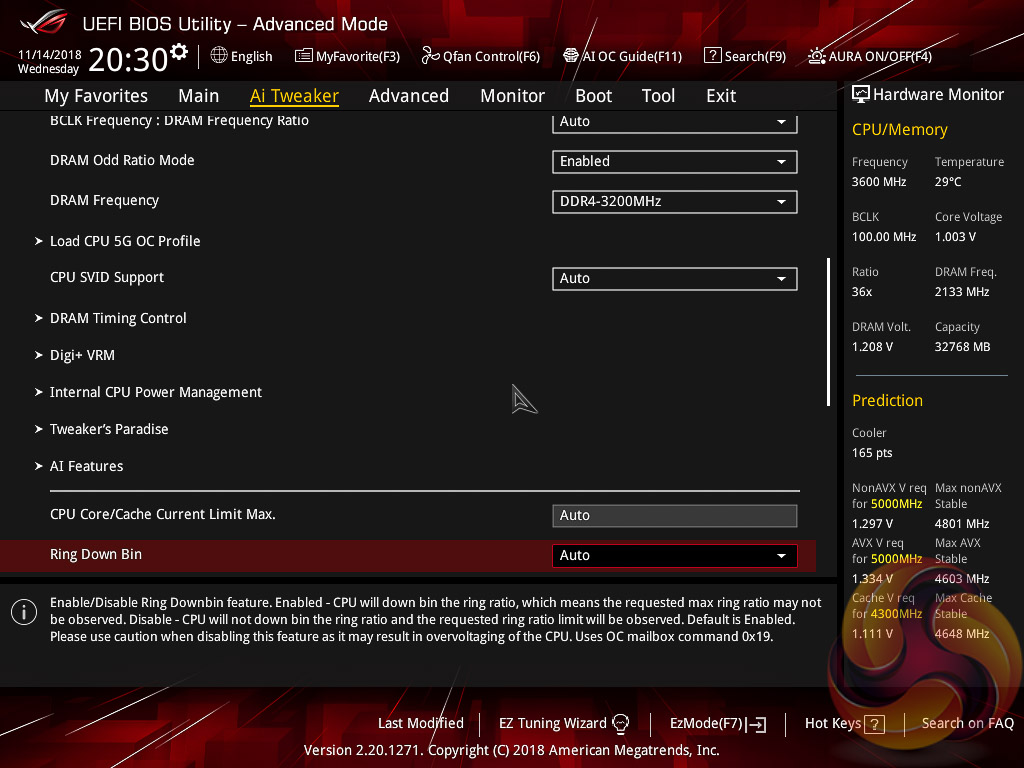
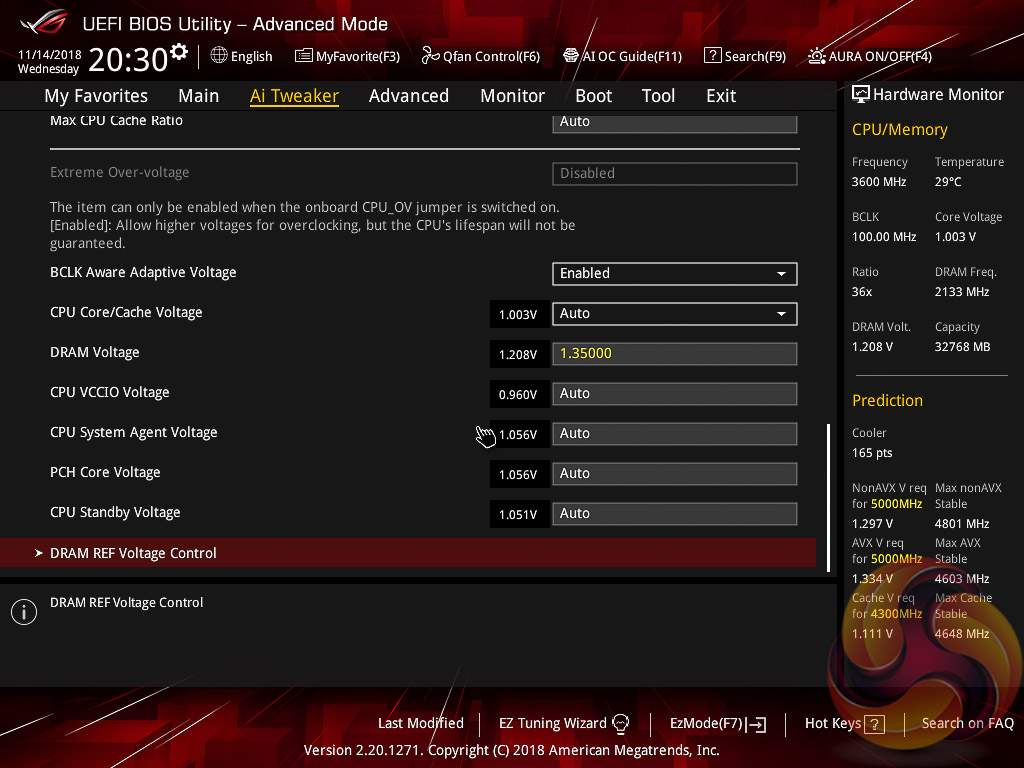
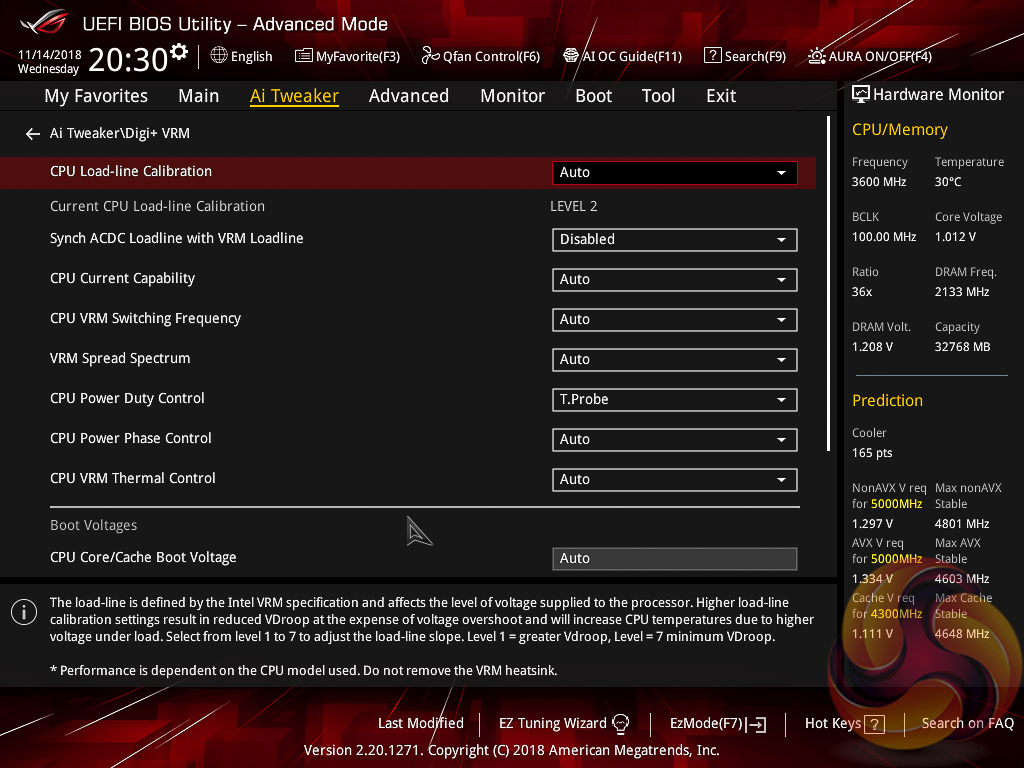
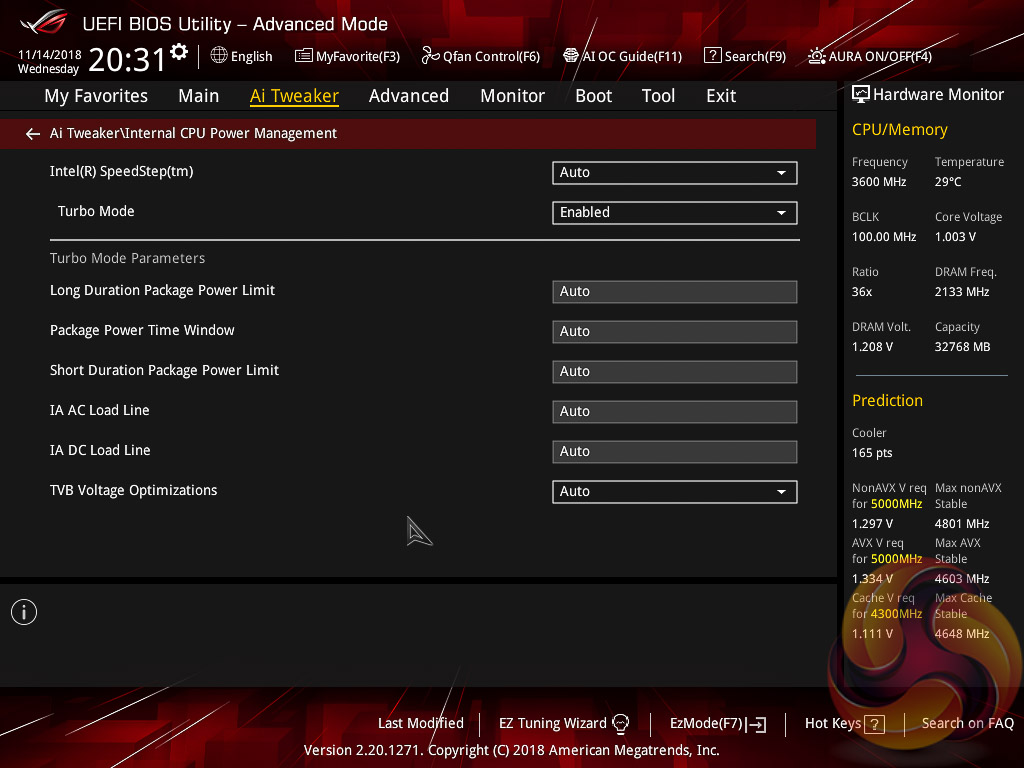
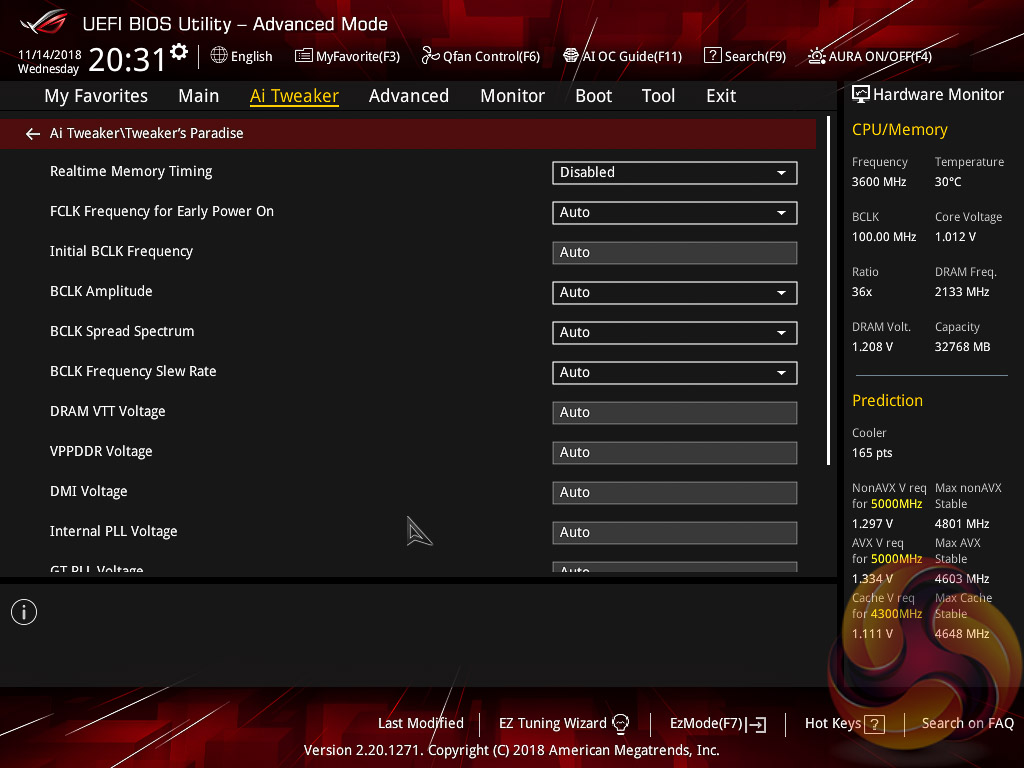
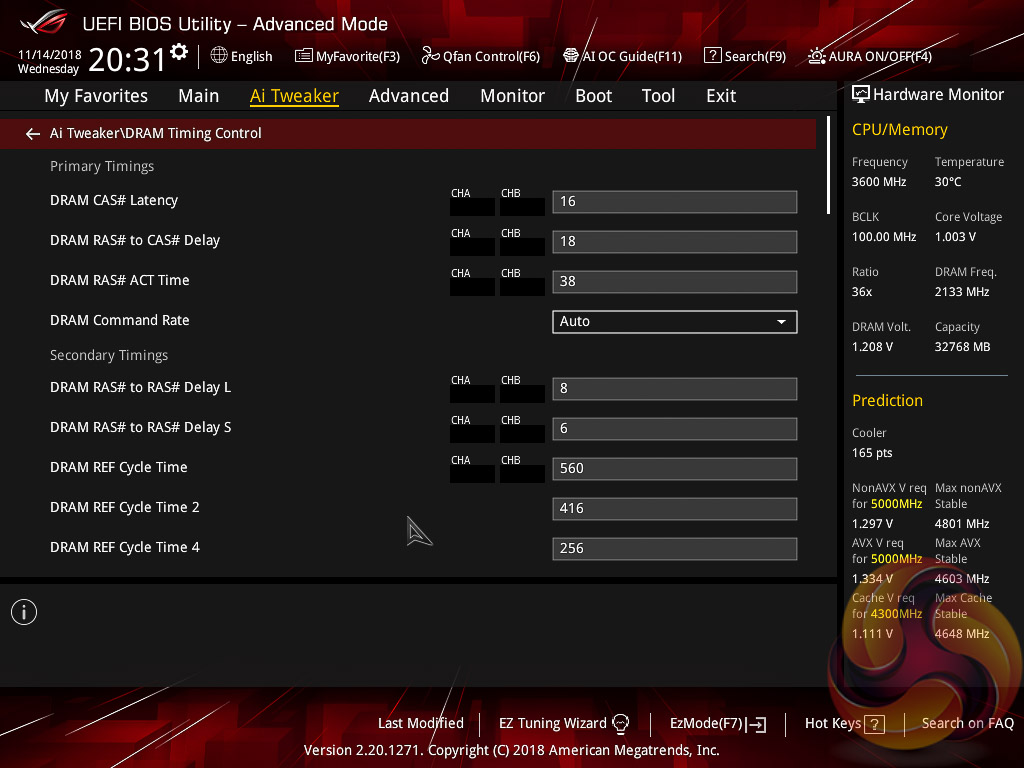
AI Tweaker is the UEFI tab which contains the vast majority of performance tuning settings pertaining to the CPU and DRAM. From here you can set XMP profiles, overclock the CPU, set all the various voltages and voltage operation modes, change the Load Line Calibration (LLC) and considerably more.
LLC has 8 levels, using a 0-based index, with 0 being the least aggressive and 7 the most. The voltage modes include manual, adaptive and offset. Unlike MSI, ASUS does not offer combined voltage modes such as override + offset.
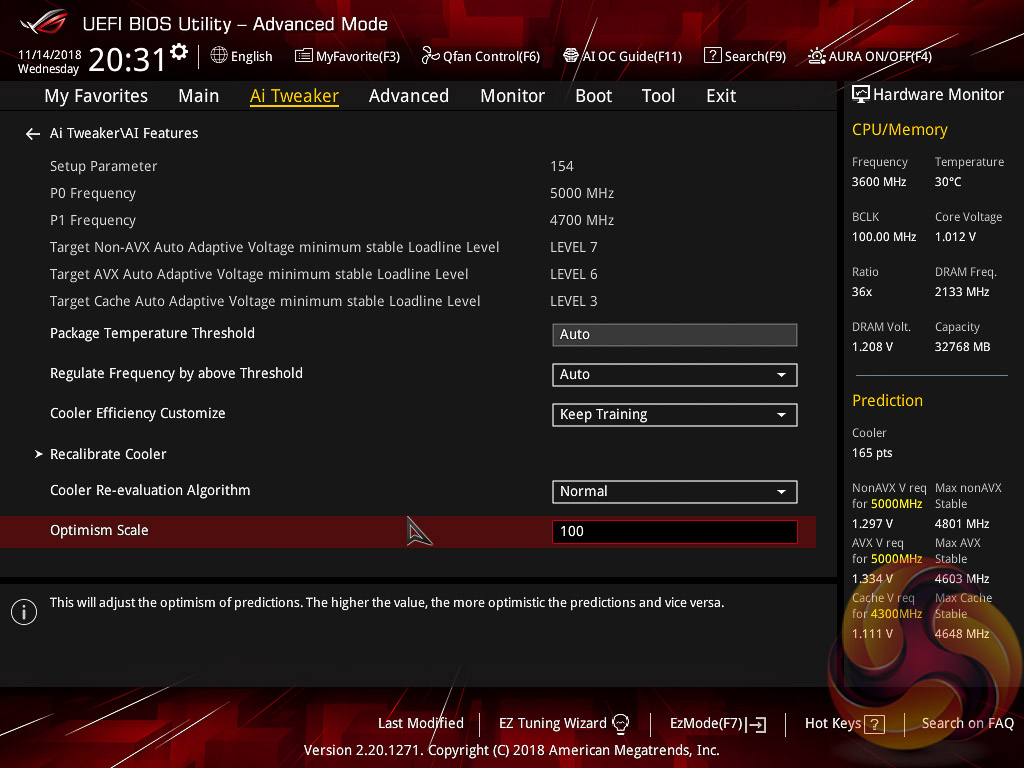
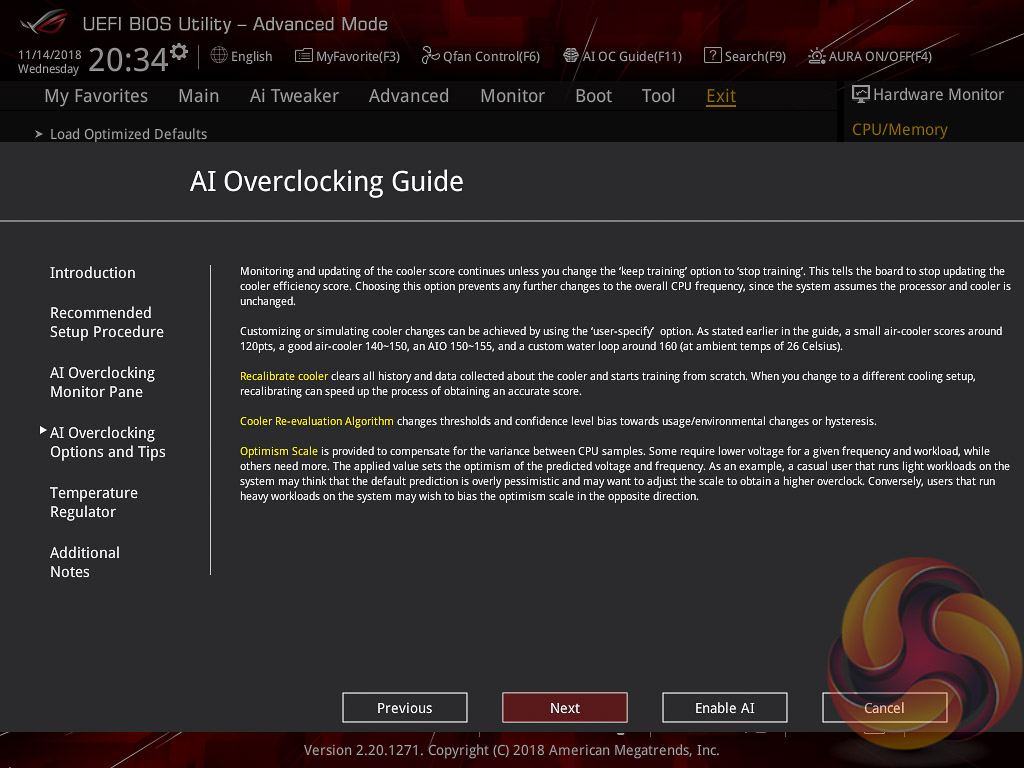
ASUS has implemented a new “AI” overclocking feature which can be enabled through the “AI OC Guide” window (F11). This has an “optimism scale” associated with it which will determine how adventurous the target overclock will be, there's also a cooler calibration test which effectively tests “how good” your CPU cooler is before attempting higher voltages. The scale ranges from 50, least optimistic, to 150, most optimistic, with 100 being the default.
There's also a feature called “SVID behaviour” which affects the level of input voltage the CPU will use at a given voltage. There's an option to run this as “best-case”, “typical”, “worst case” or “Intel's Fail Safe” scenarios but effectively what it means is that, in that order, power consumption goes from lowest to highest. A best-case scenario assumes a high-quality chip that requires less power to operate, and Intel's fail safe is the opposite.
In practice, manually setting the CPU VCore overrides the SVID behaviour but anyone who just dials in a 50x multiplier for 5GHz and leaves the voltage to auto, would be affected by the SVID behaviour. This is also relevant when using Adaptive and Offset VCore modes since those modes will add or subtract voltage from the VCore based on the SVID set voltage, so a higher or lower the baseline level set by the SVID behaviour will affect the final VCore under load.
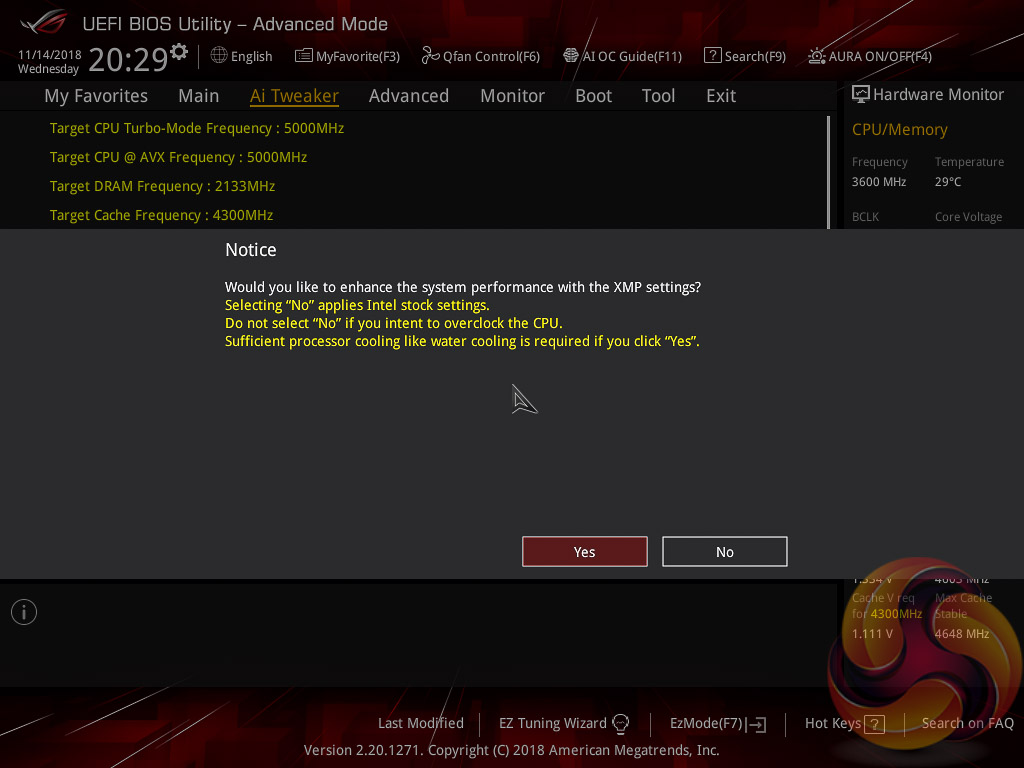
The UEFI provides a clear warning that when enabling XMP there is a choice to opt out of enhanced Turbo functionality and stick to Intel’s default CPU specification, particularly pertinent for Intel's new i9 9900K which can consume large amounts of power. The same also applies for the memory specification which ASUS claim can be enhanced (XMP I) instead of sticking to the complete XMP profile (XMP II).
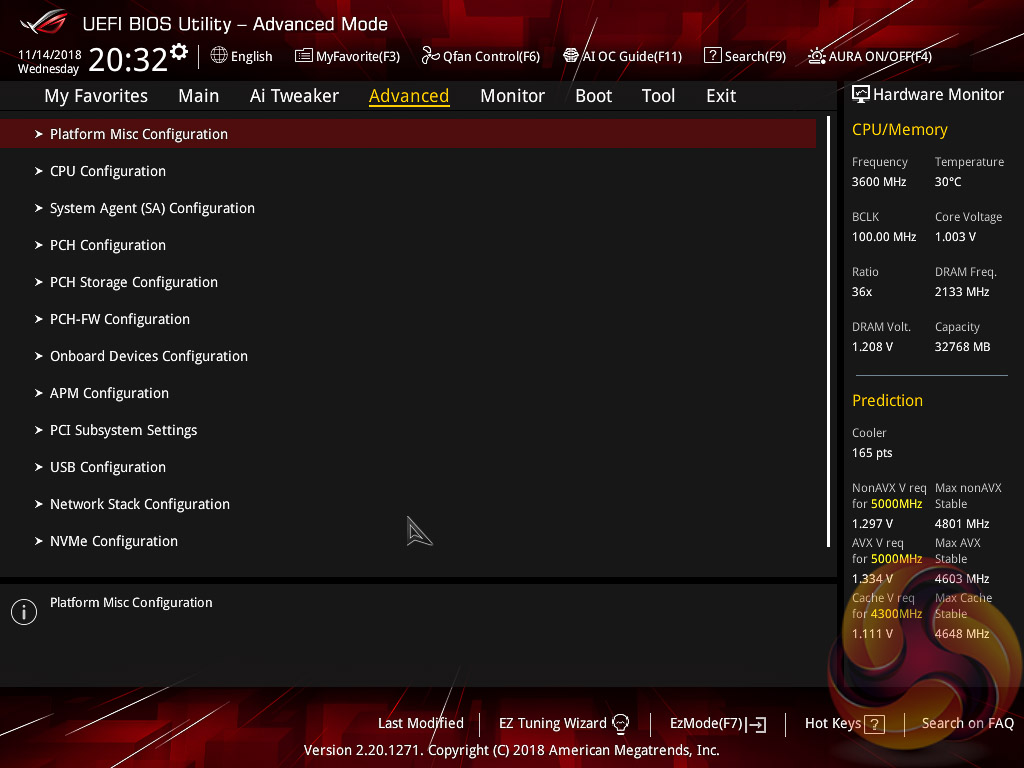
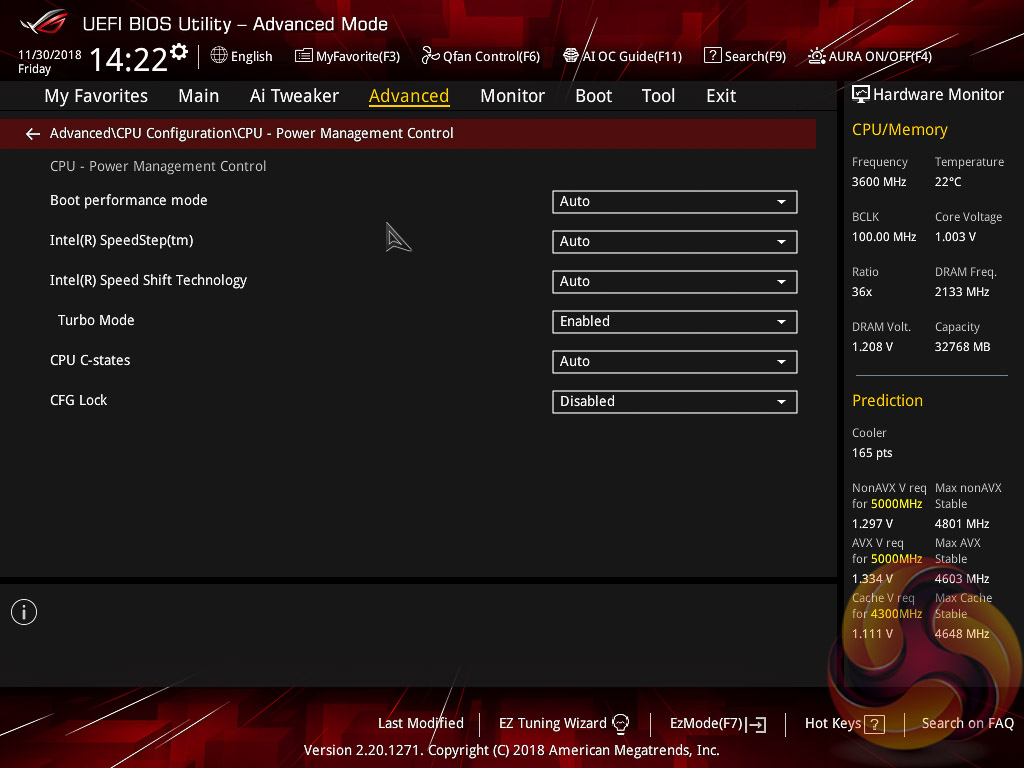
There is a significant selection of performance and compatibility parameters to be found under the Advanced section should the need arise. As well as a number of other peculiar settings related to the functions of onboard devices, LEDs, USB and storage controllers and more.
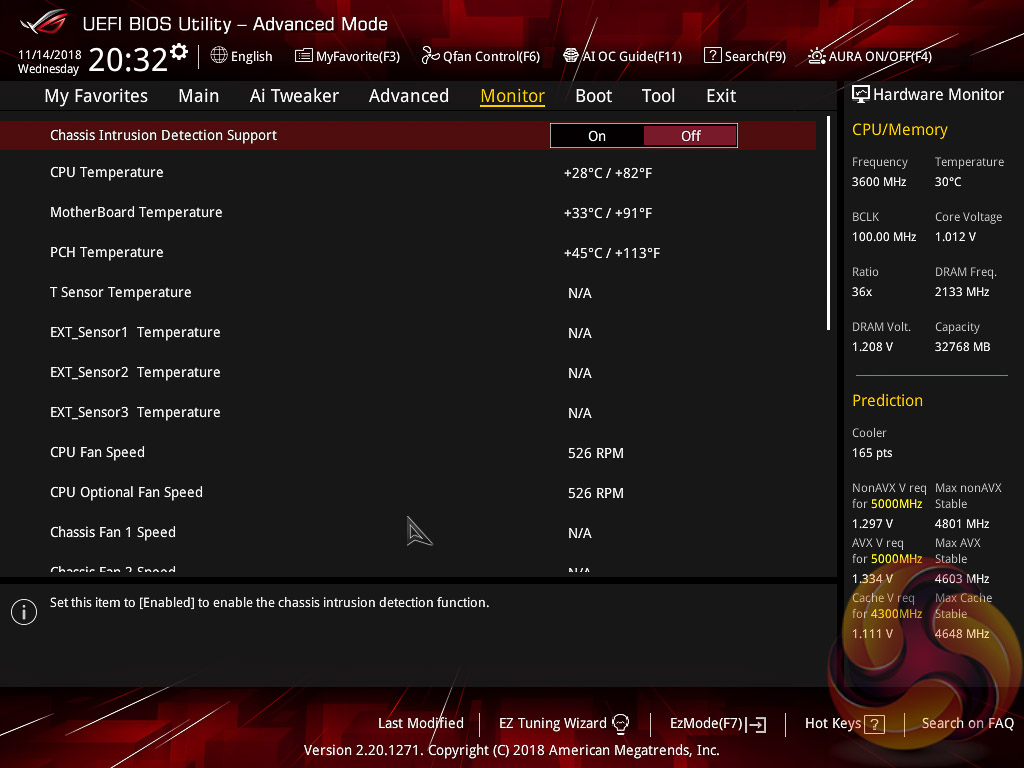
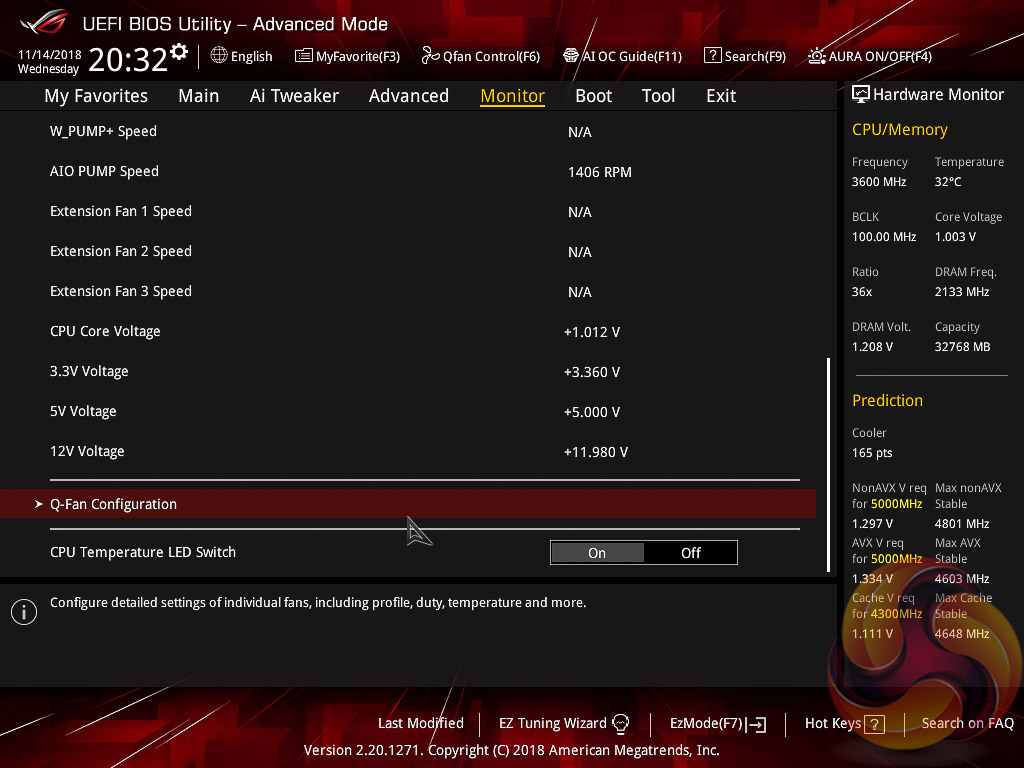
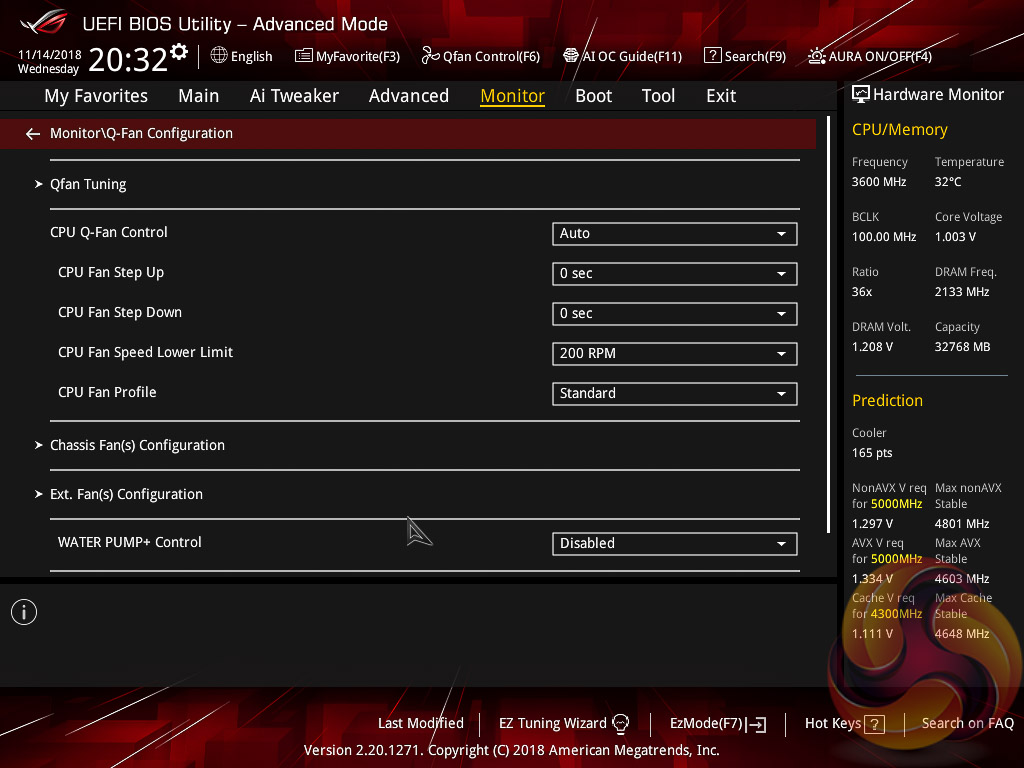
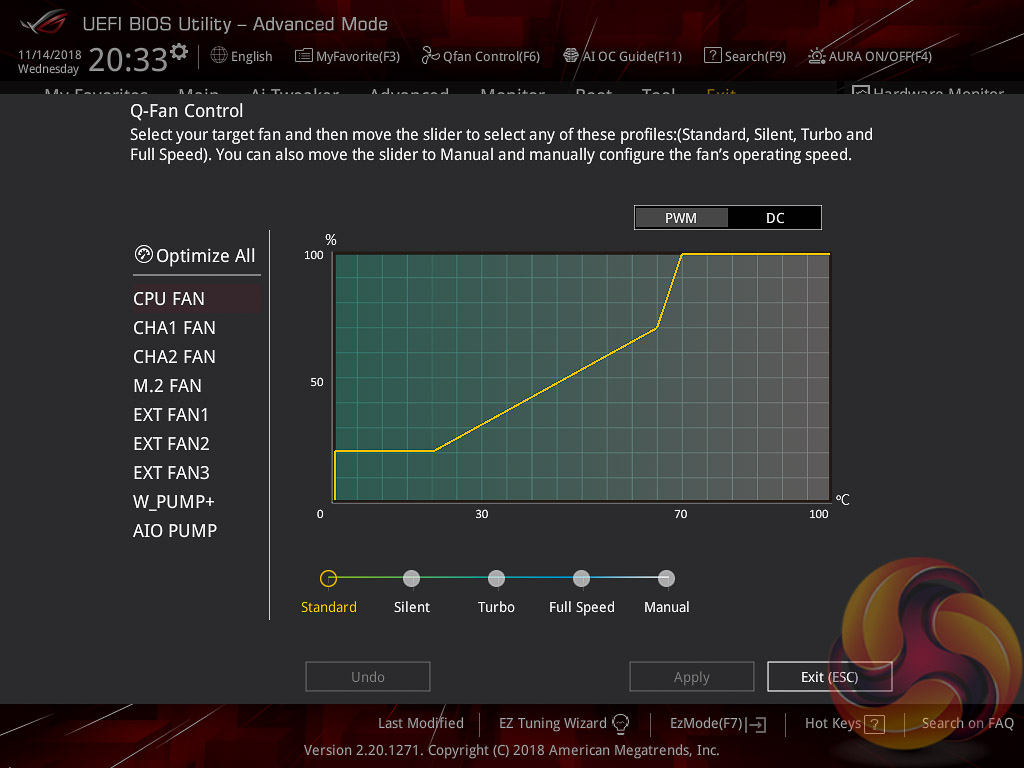
The Monitor tab will allow you to instruct the UEFI how to handle temperature data from the various sensors as well as what to do with fan speed profiles. For example where a fan speed profile is temperature dependent you can choose which temperature sensor to use. If you purchase the optional ASUS Fan Extension card that can also be configured from within this section.
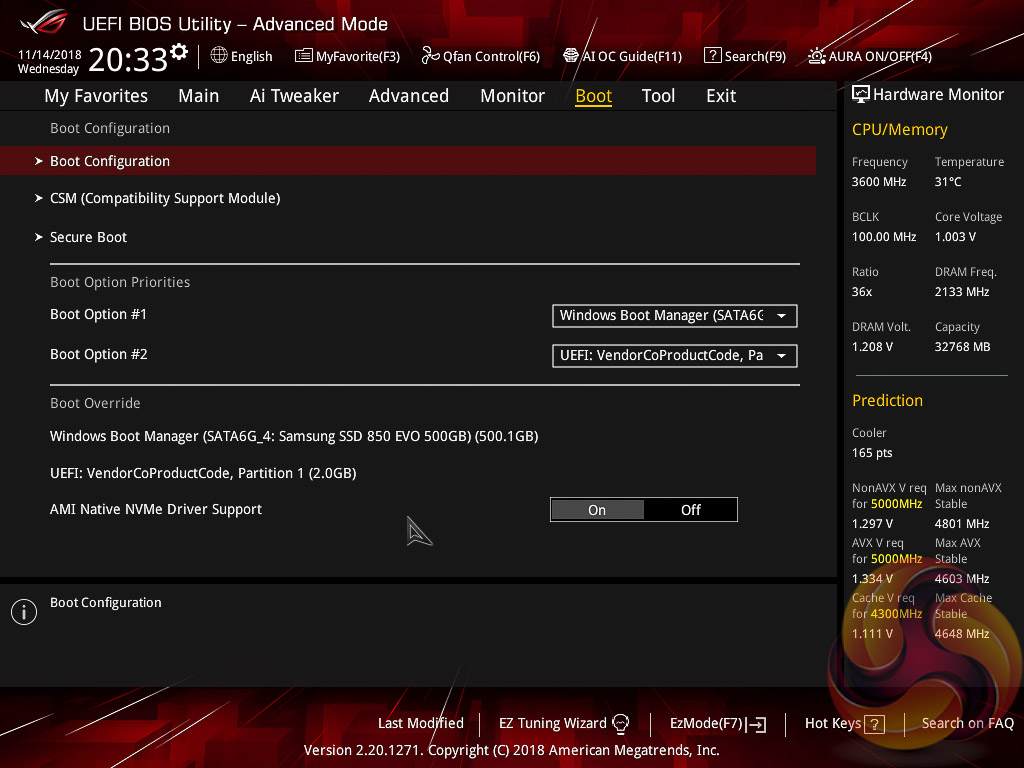
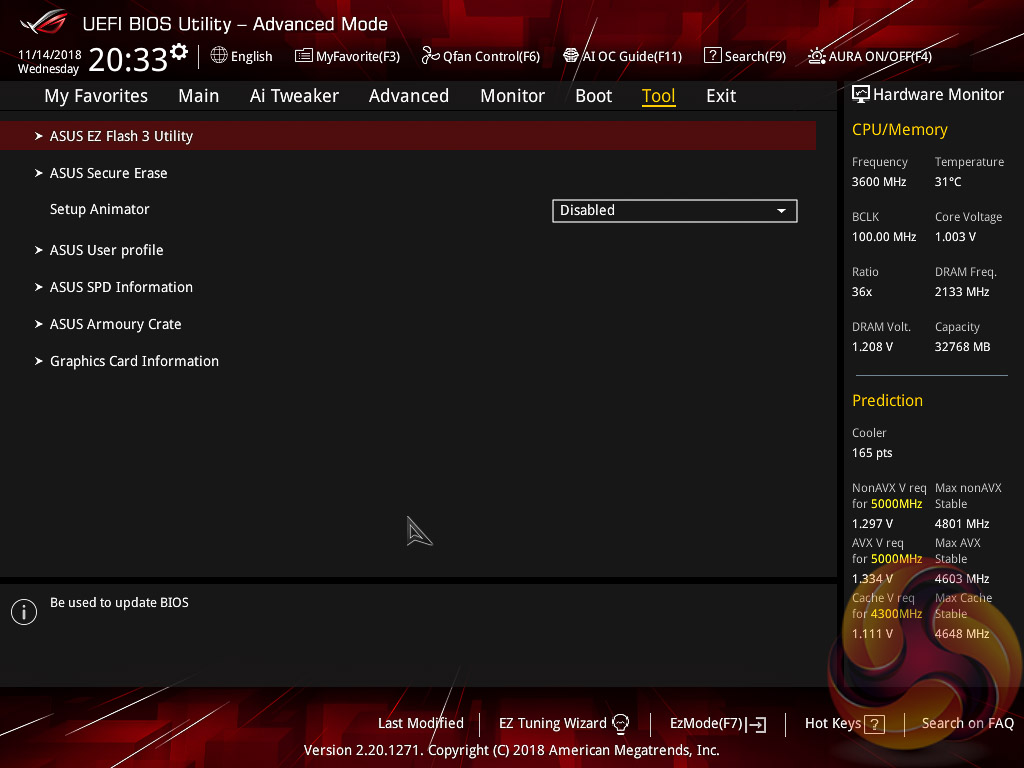
The Boot tab is as expected in delivering the key boot options such as secure boot, boot priority and boot compatibility options. Users needing to update the UEFI (via the EZ Flash Utility), save, import or export BIOS settings, or secure erase a storage drive should refer to the Tool tab.
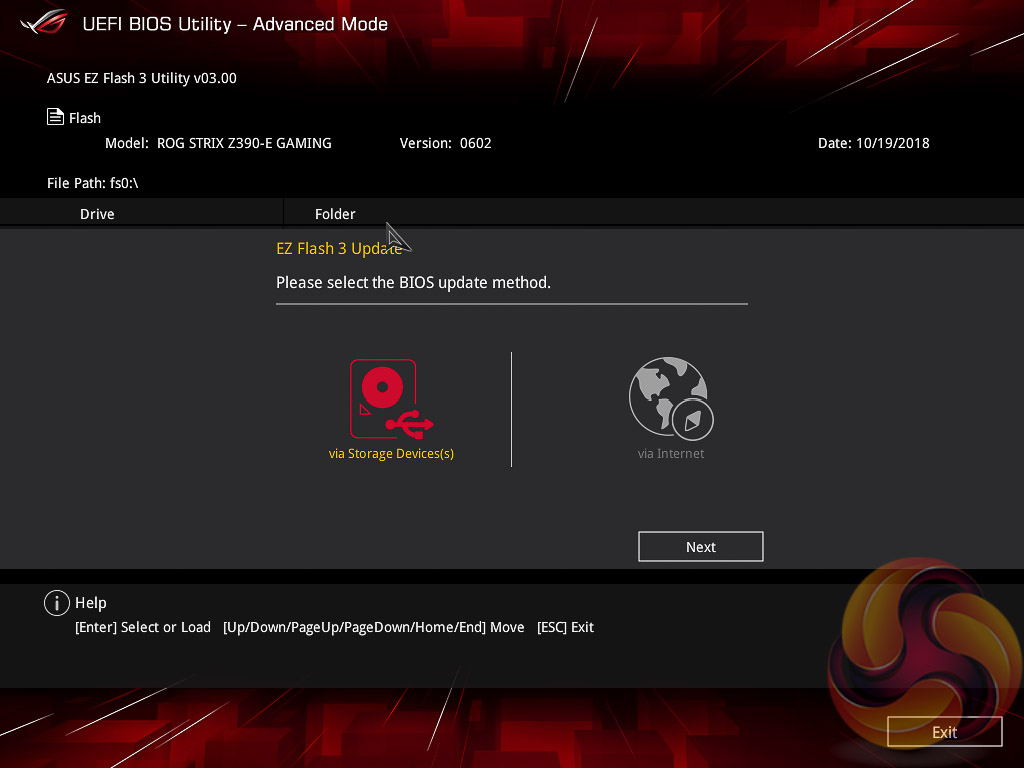
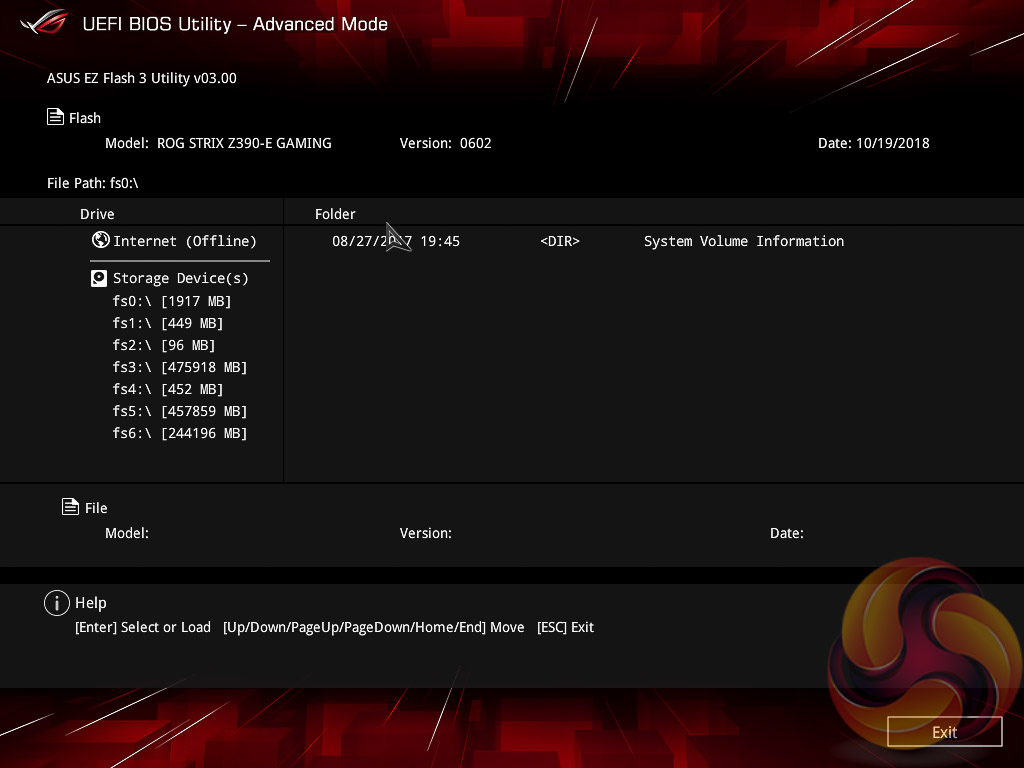
The EZ Flash utility is very simple to use and allows the UEFI to be updated from either a local disk or the internet over the Intel I219V Gigabit Ethernet adapter.

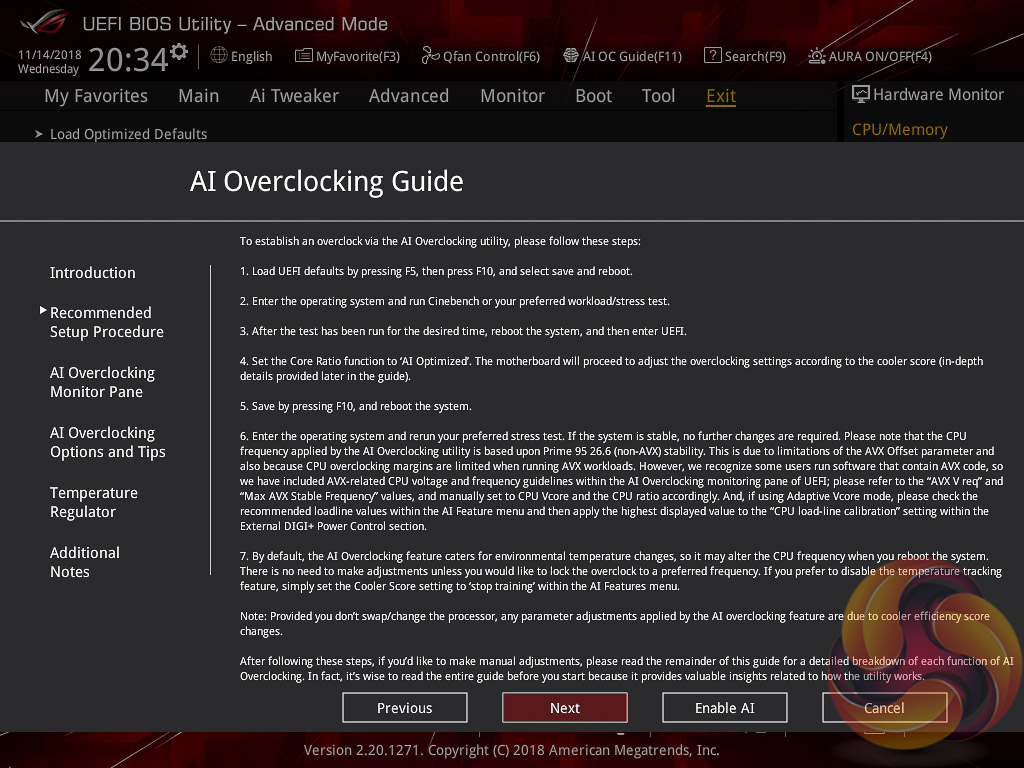

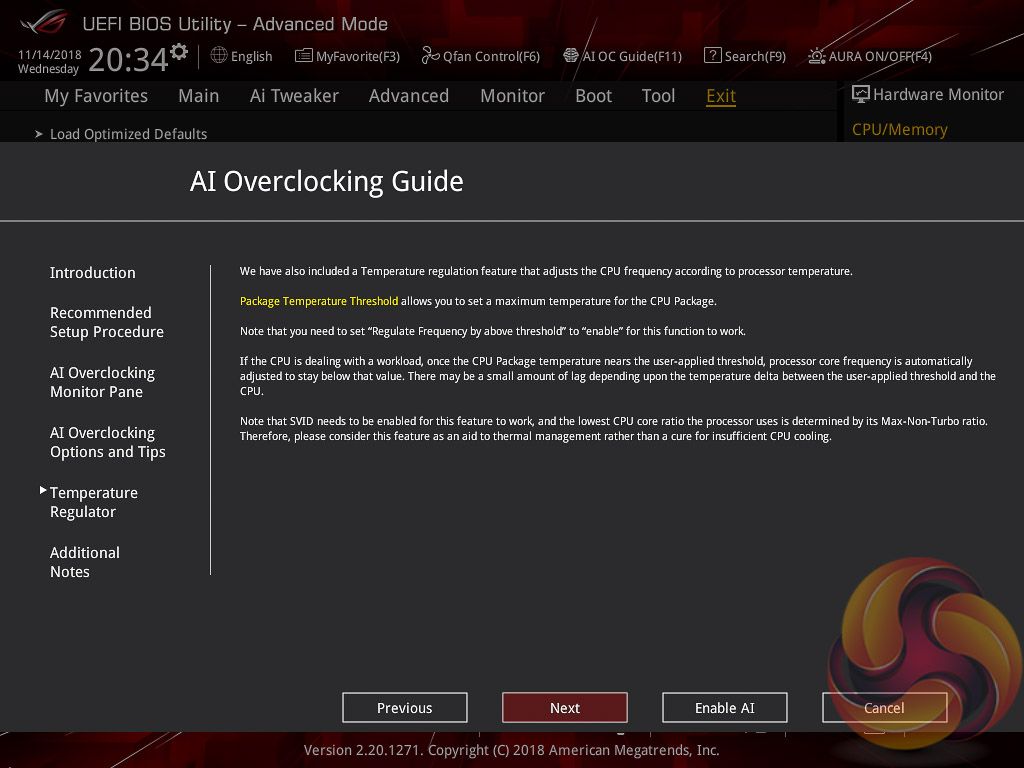
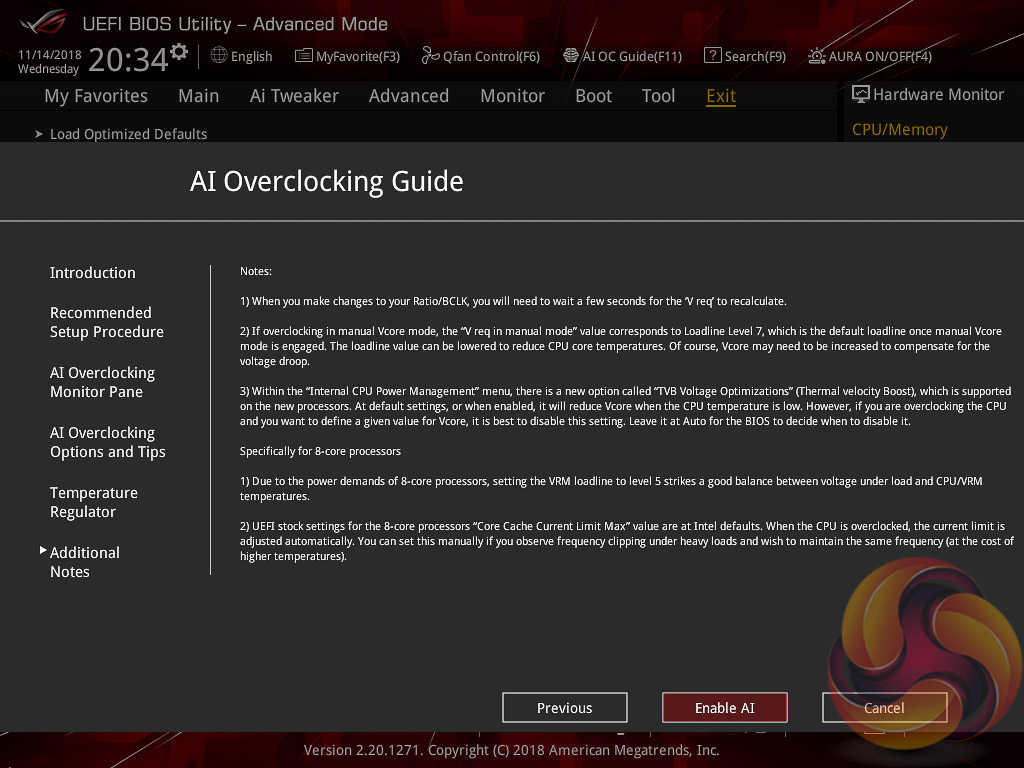
The ASUS AI Overclocking replaces the previous EZ Tuning Wizard for automated overclocking, and also takes its F11 hotkey in the UEFI environment. This is an improved version of EZ Tuning Wizard that takes into account thermal data, i.e. the effectiveness of the CPU cooler, when overclocking.
ASUS claims they have developed a “proprietary algorithm” which tests the quality of the CPU and mixes that with the capability of the CPU cooler to give a better result. When we enabled this using “100” optimism after calibrating our CPU cooler we got a 166 points score for the CPU cooler, with a “4.8GHz” turbo mode for non-AVX workloads and 4.6GHz with AVX and 4.65GHz cache. The light load result was 5GHz while the heavy load result was 4.8GHz, all using 1.204~1.257v (non-AVX/AVX) for the CPU and 1.1v for the Cache.
Changing optimism to the max, 150, scored us a result of 5.5GHz non-AVX, 5.4GHz AVX, 5.4GHz cache and 5.5/5.5 GHz light/heavy with 1.436~1.438v (non-AVX/AVX) and 1.041v (cache). (un)surprisingly enough, this didn't boot!
In most cases the result will be “improved” over the peculiar results EZ Tuning Wizard used to deliver – with painfully high voltages for relatively low clocks – but taking the time to tune the overclock yourself based on some research for your circumstances would still be the better way.
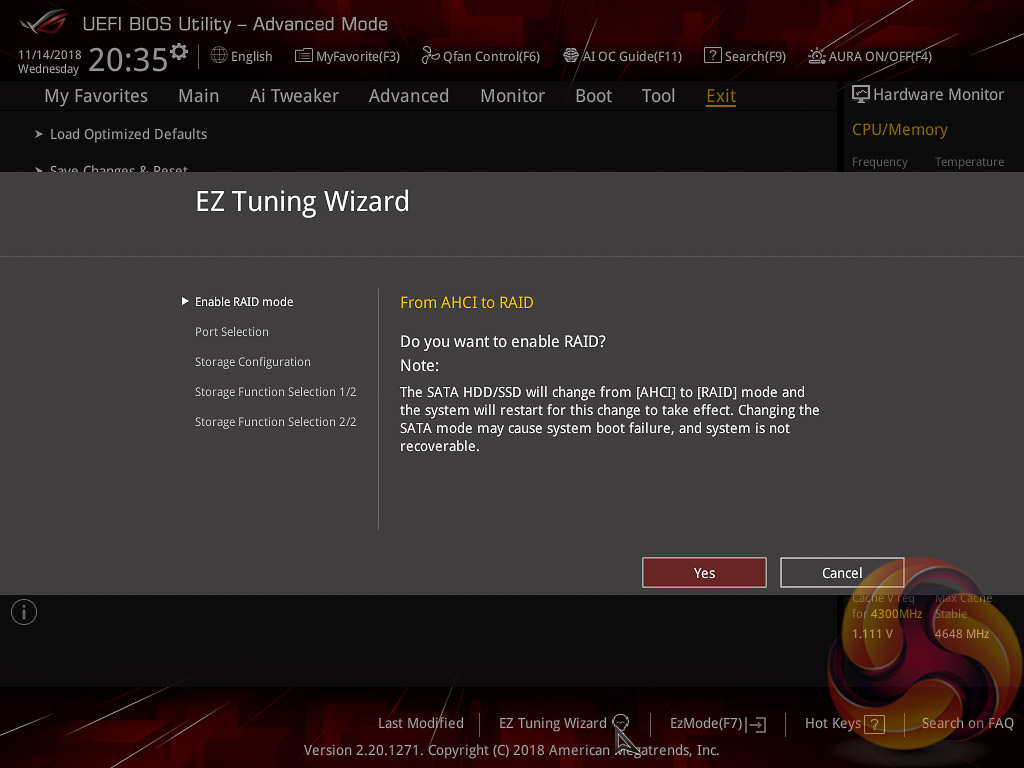
The EZ Tuning Wizard has been relegated to just being for RAID setup and configuration, like on the H370 platform where overclocking isn't supported. This used to be the “automated overclocking” utility until ASUS replaced it with the “AI Overclocking” guide.
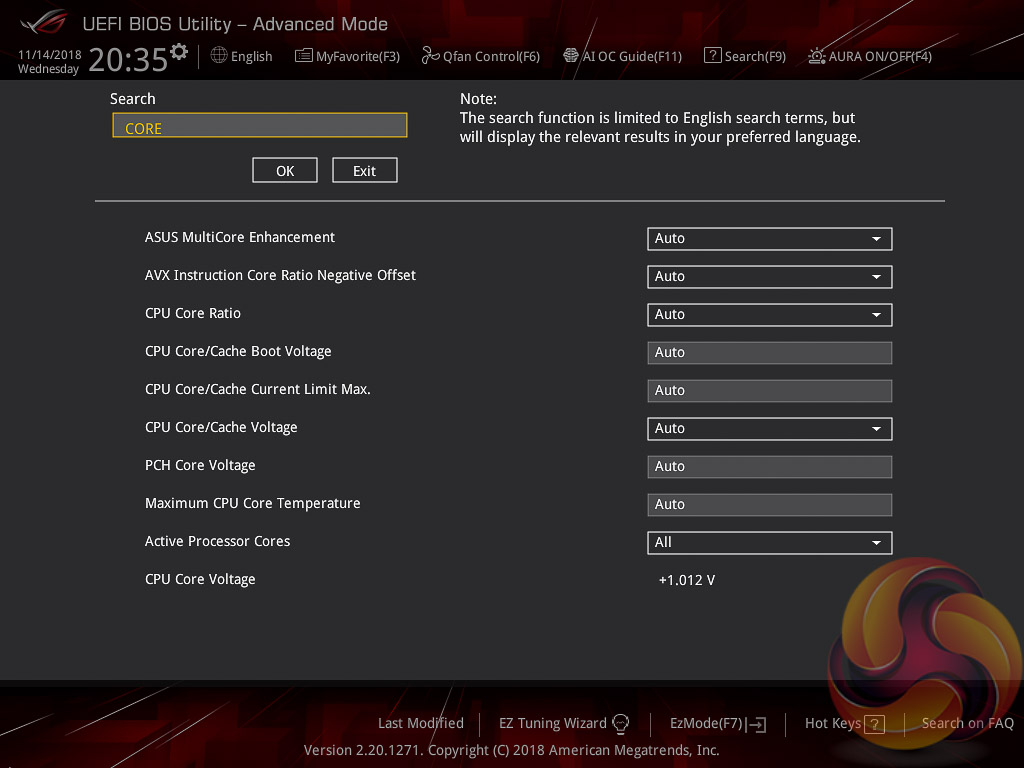
The search function allows a text string to be searched against all the UEFI parameters. It isn’t a smart search so doesn’t have an auto-fill function and will not find similar items to your search string i.e. M.2 when M2 is searched.
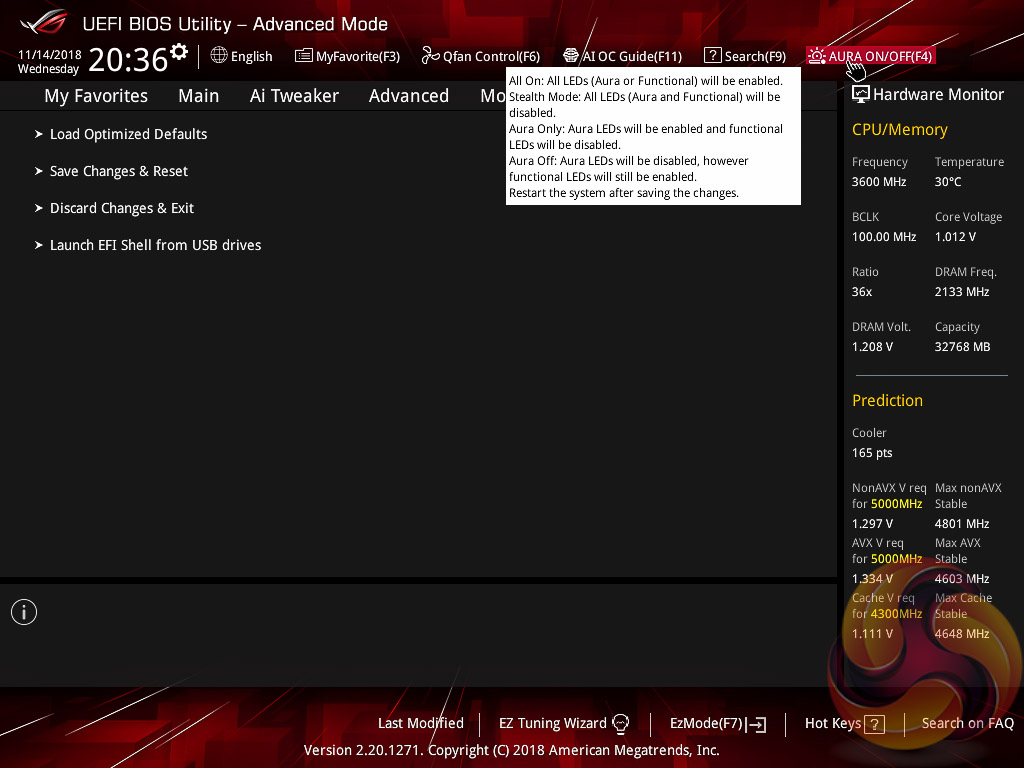
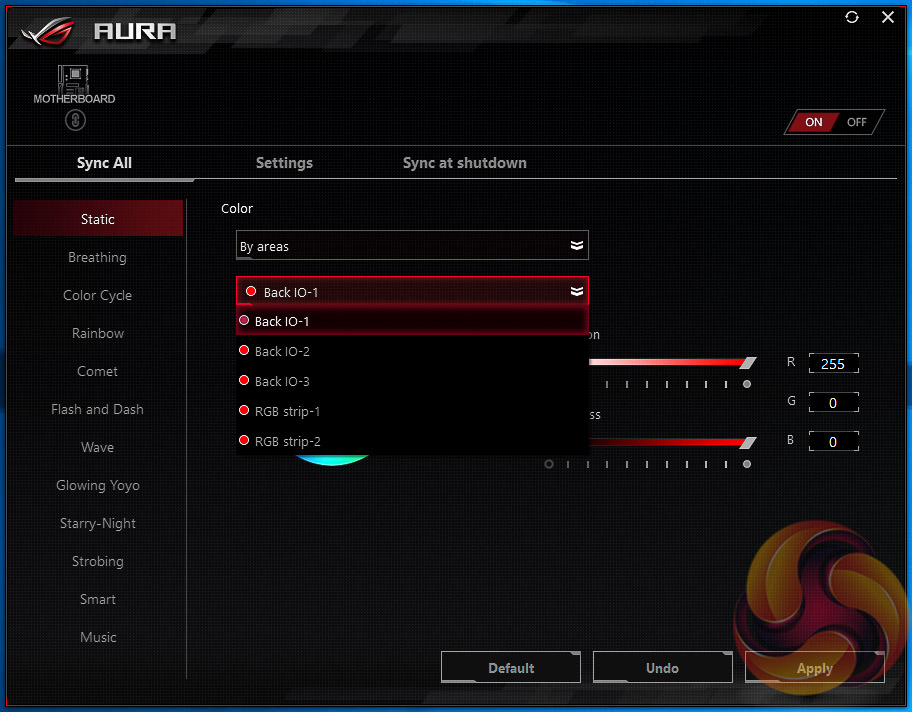
ASUS has some basic AURA RGB controls from within the BIOS that are variations of “on” and “off”. There is companion AURA RGB software to go with the motherboard that is used for the colour and lighting customisations.
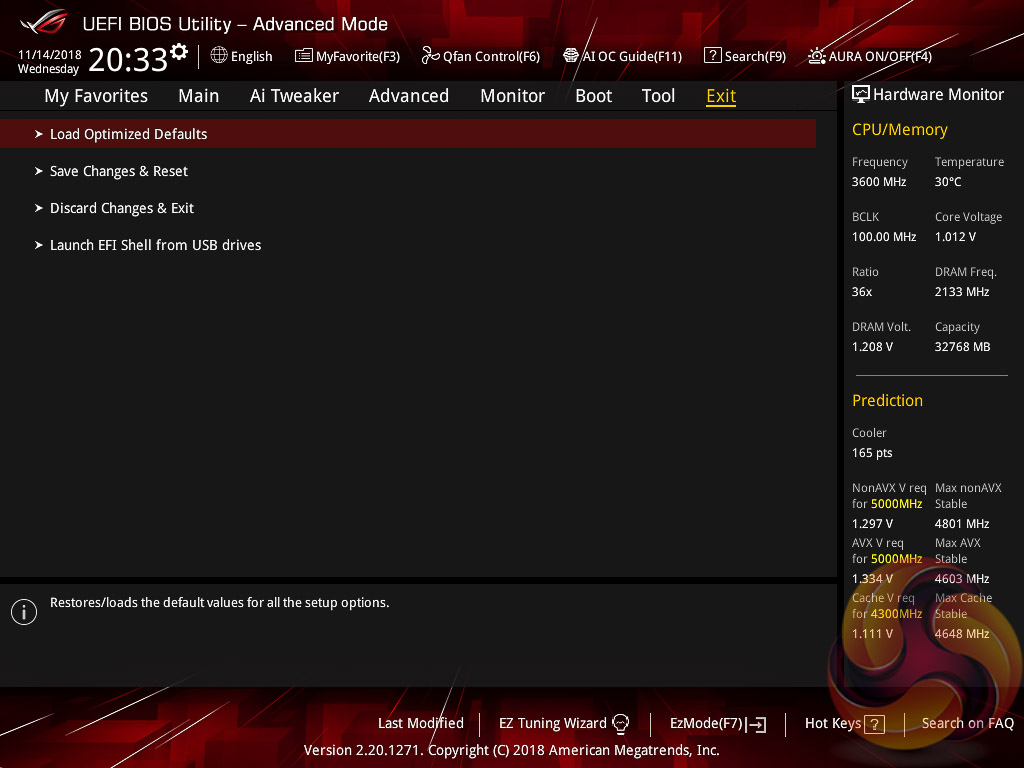
The Exit tab is fairly self-explanatory and helpfully provides a summary of changes upon exit.
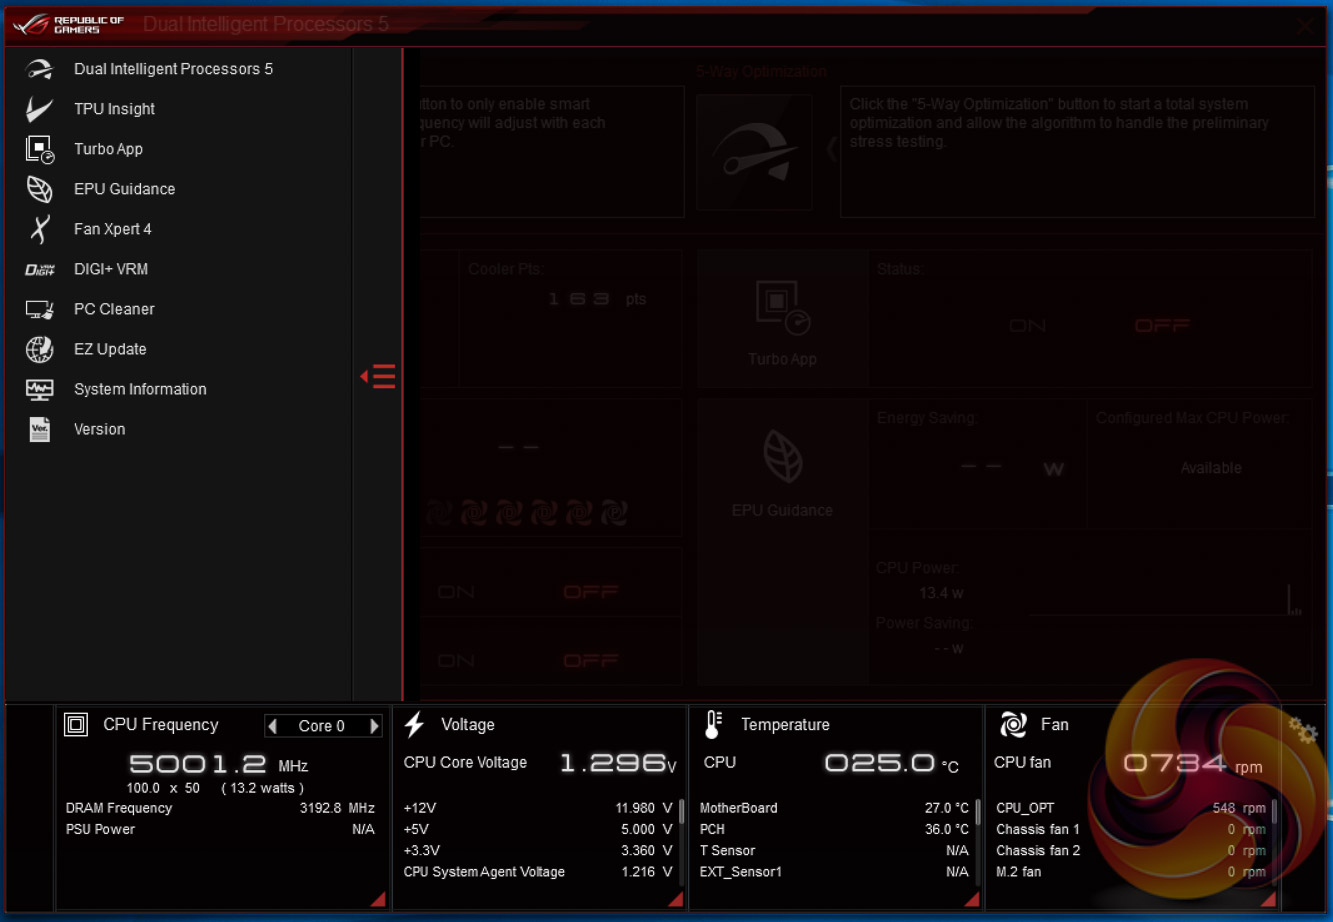
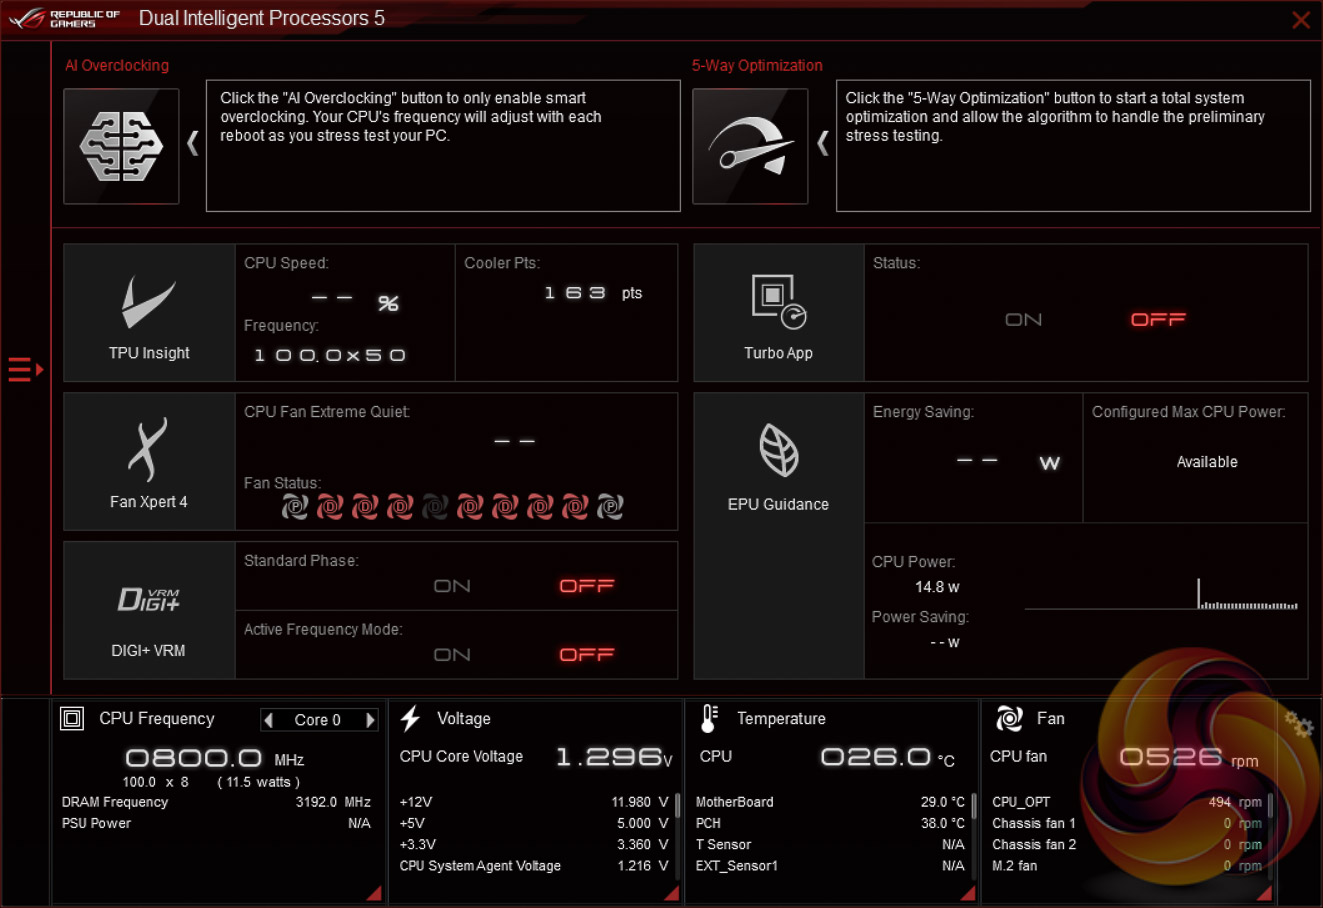
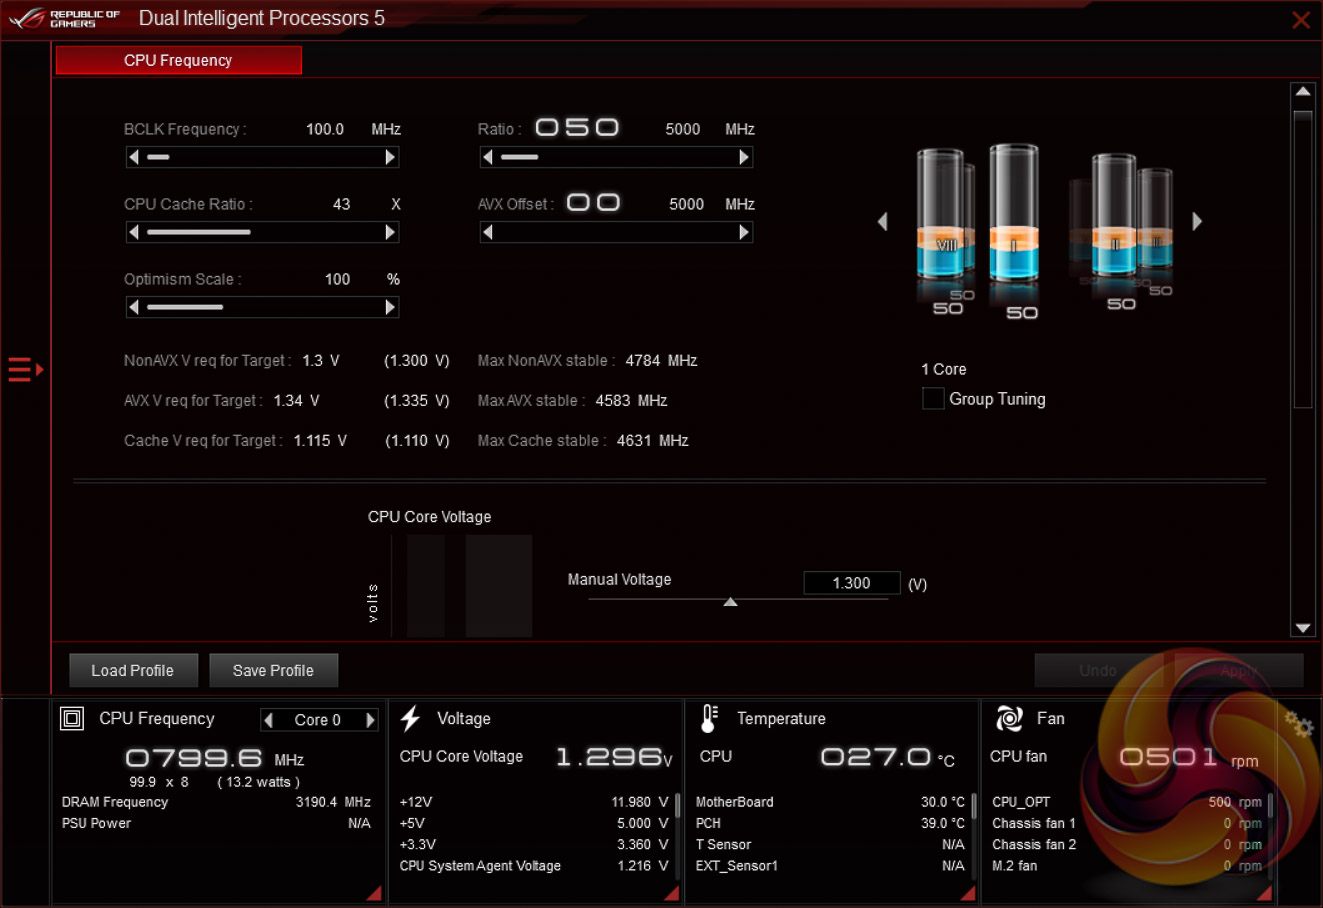
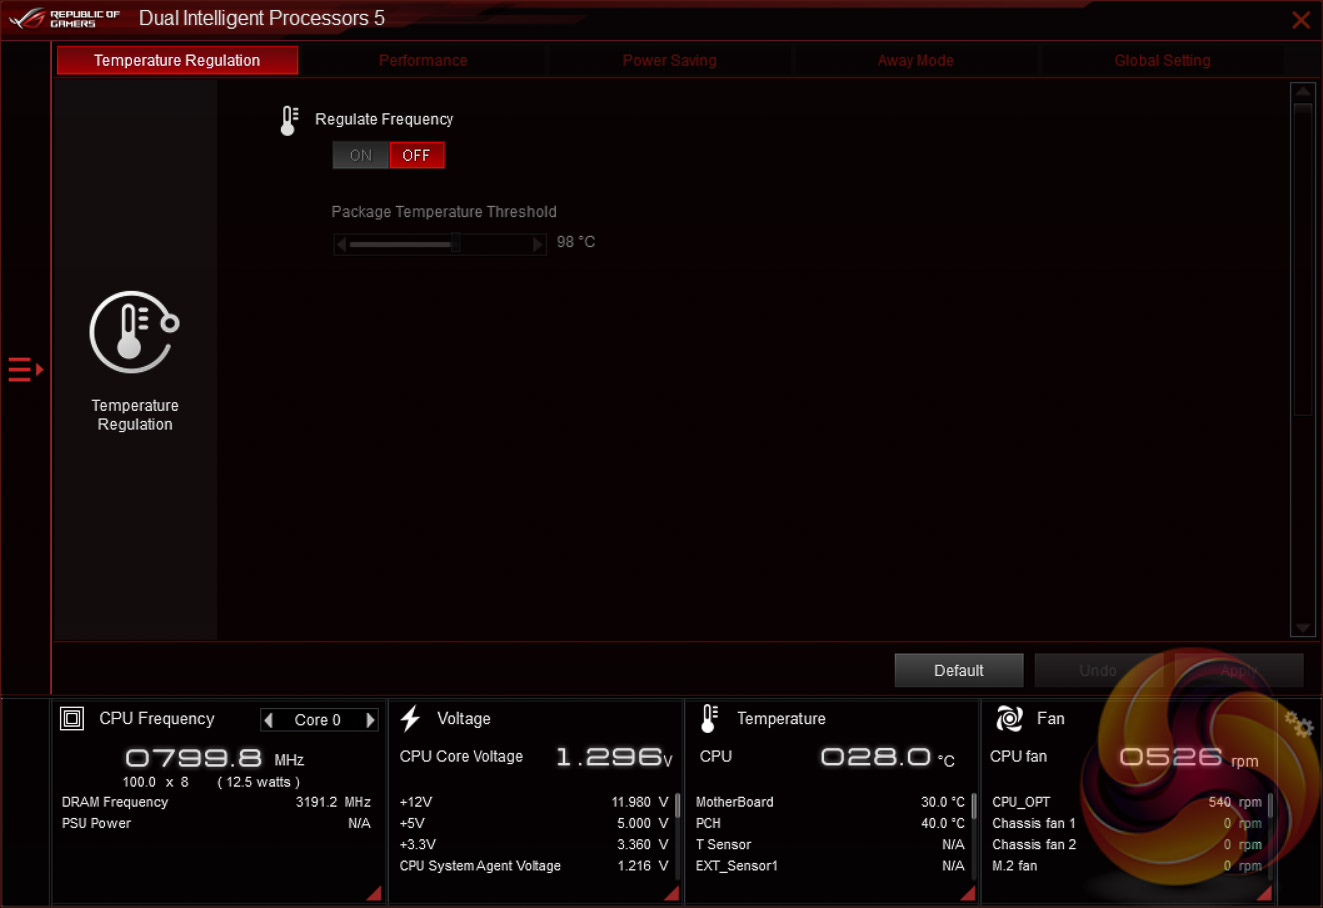
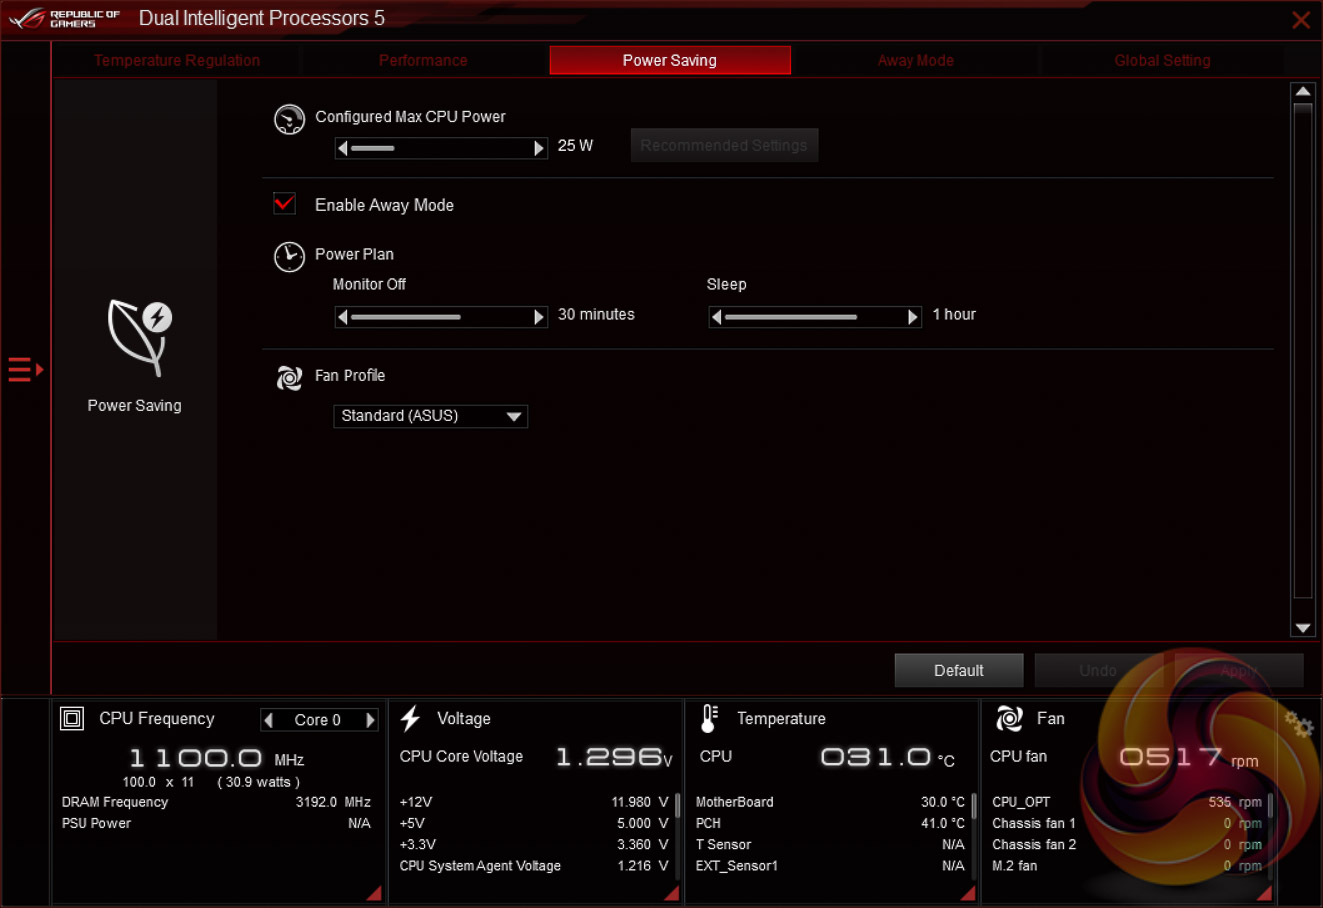
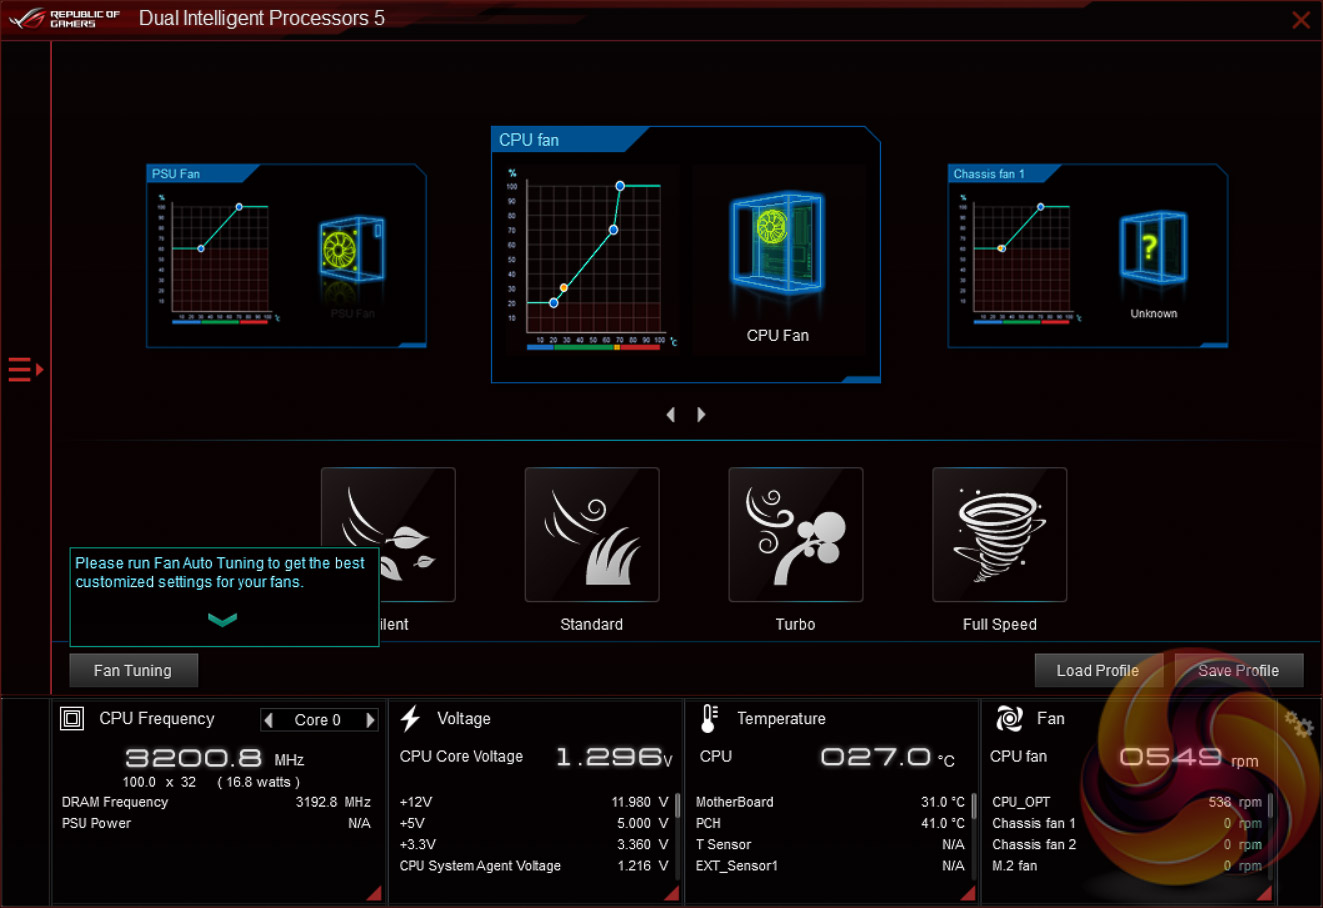
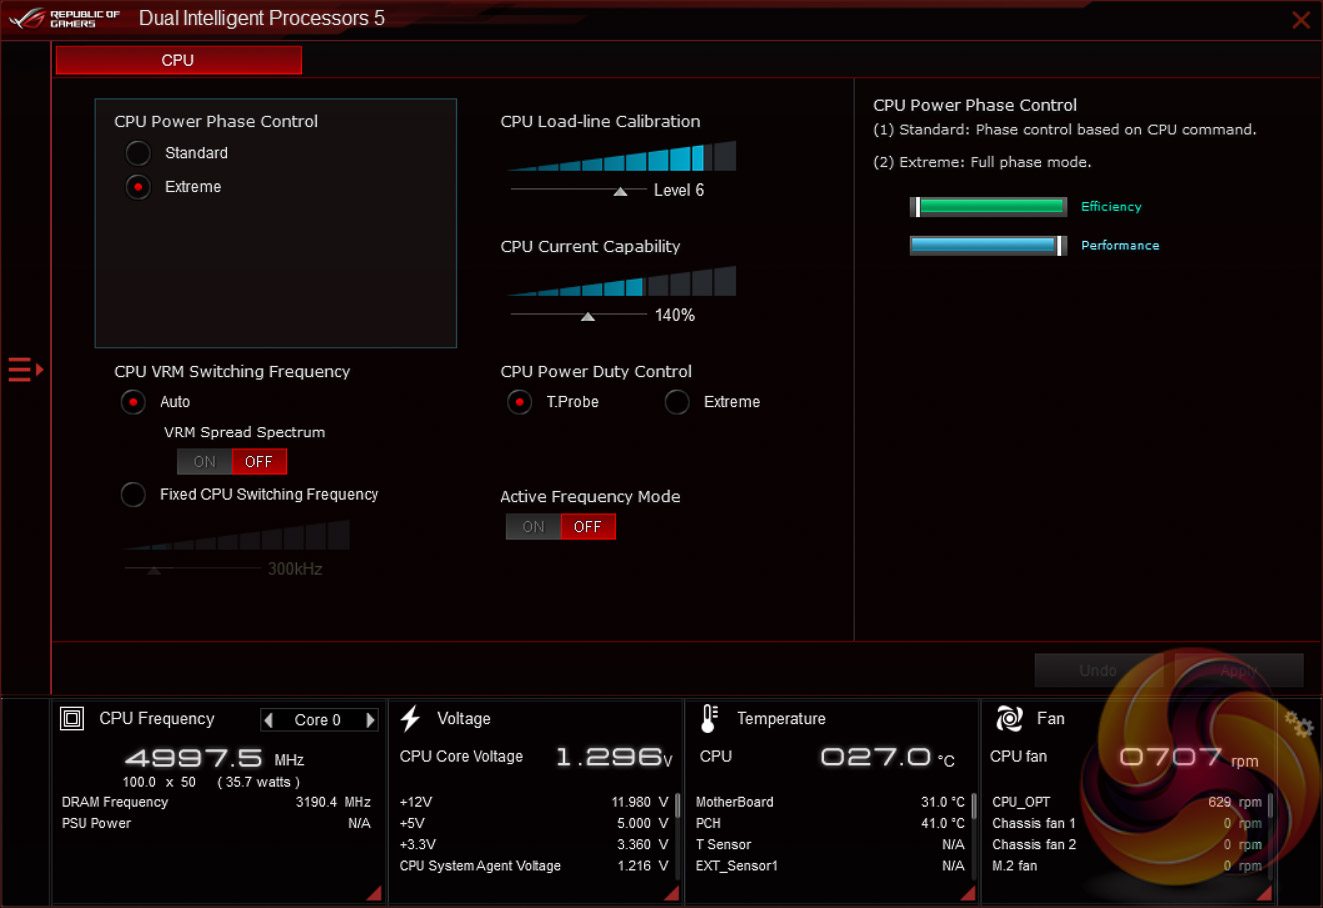
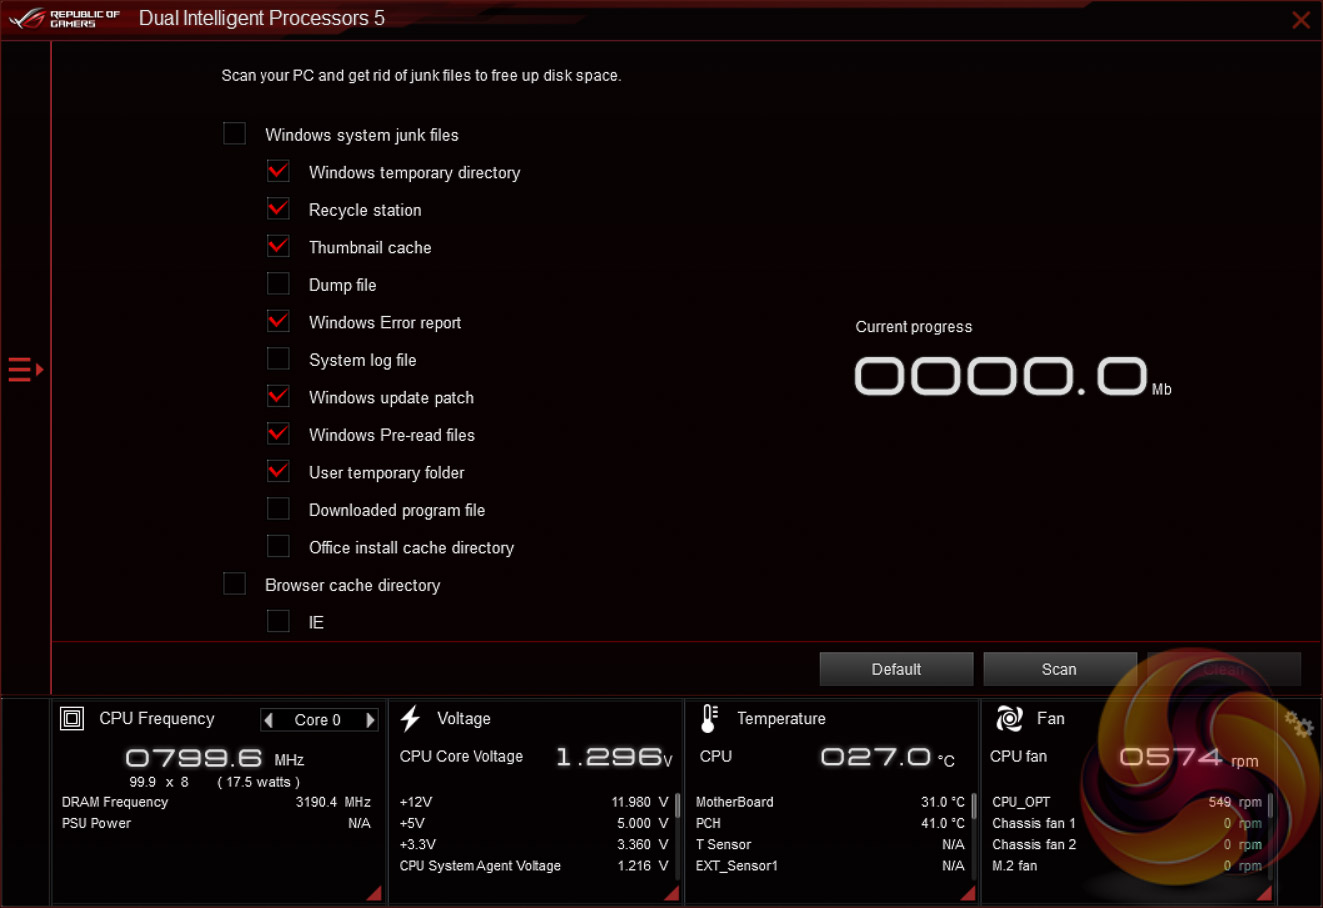
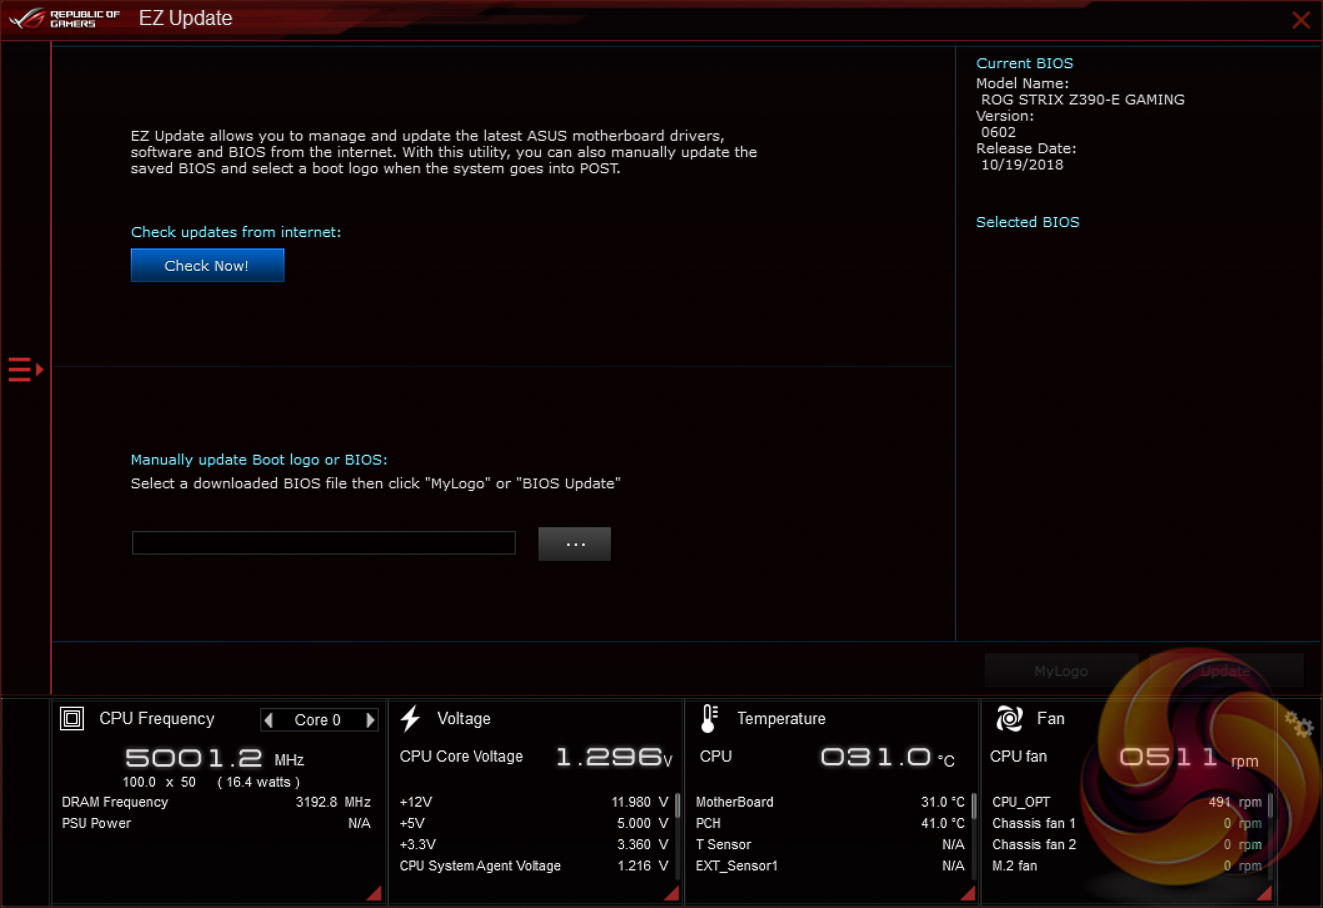
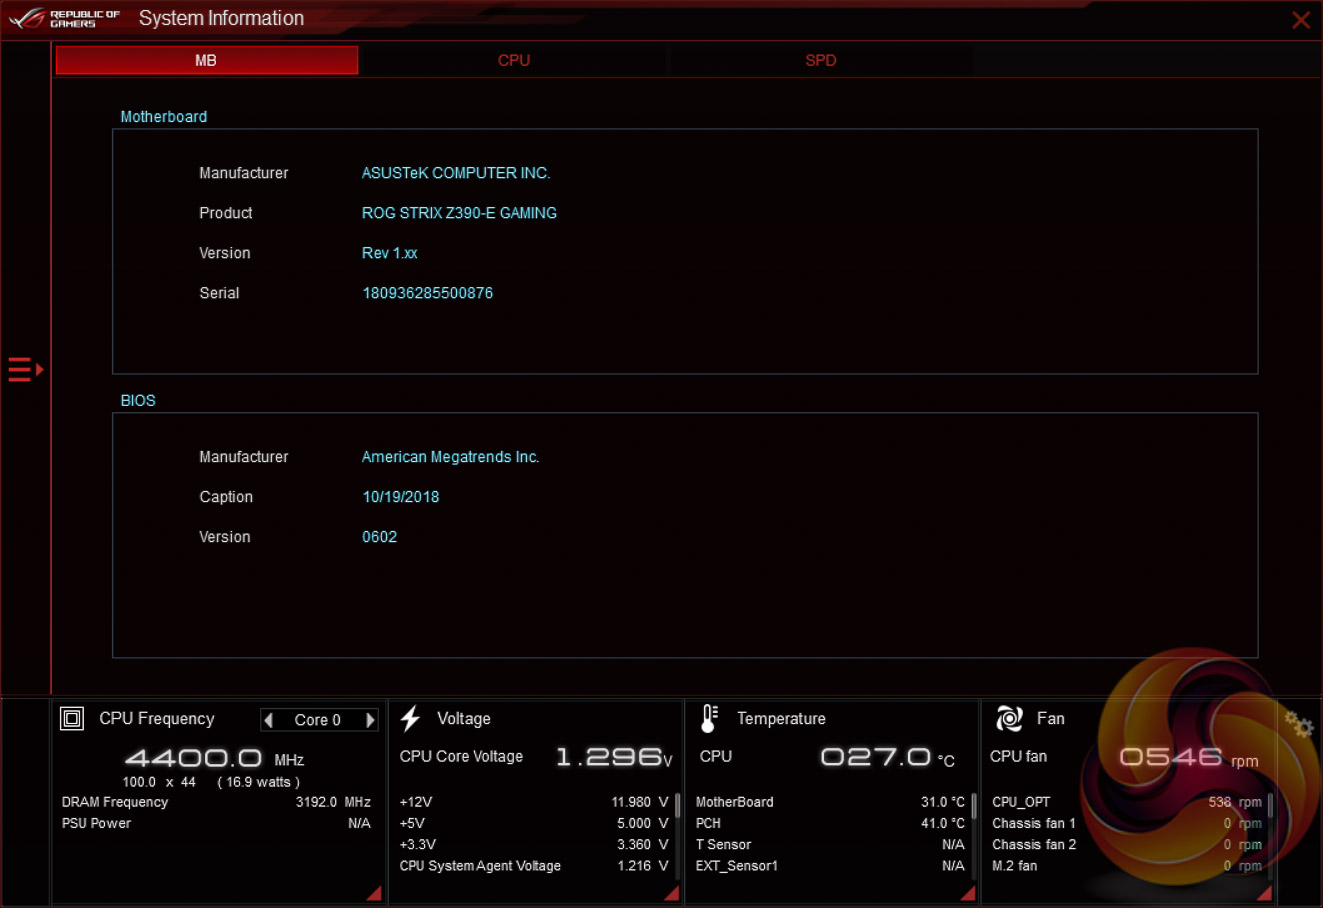
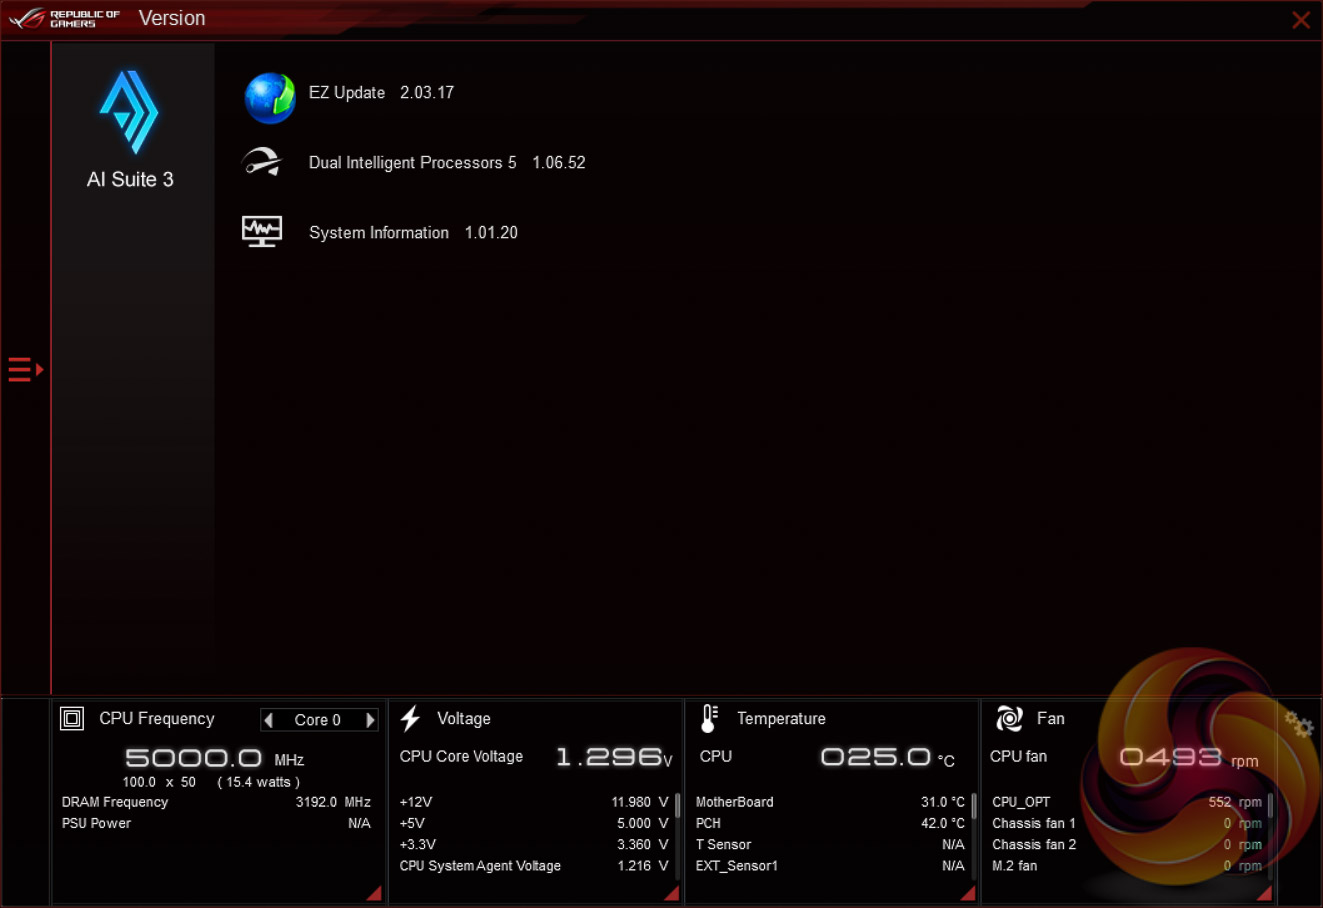
The main software utility for the ASUS motherboard range is the multi-function AI Suite III or Dual Intelligent Processors 5. It contains within it a significant number of utilities including the EPU and TPU, the Turbo App for core and application-specific turbo behaviour, Fan Xpert 4, on-the-fly overclocking support, a cleaning utility and an ASUS software updating tool.
The functionality of the new ASUS automated overclocking utility is also built into this ASUS application, for those with a desire to make use of it.
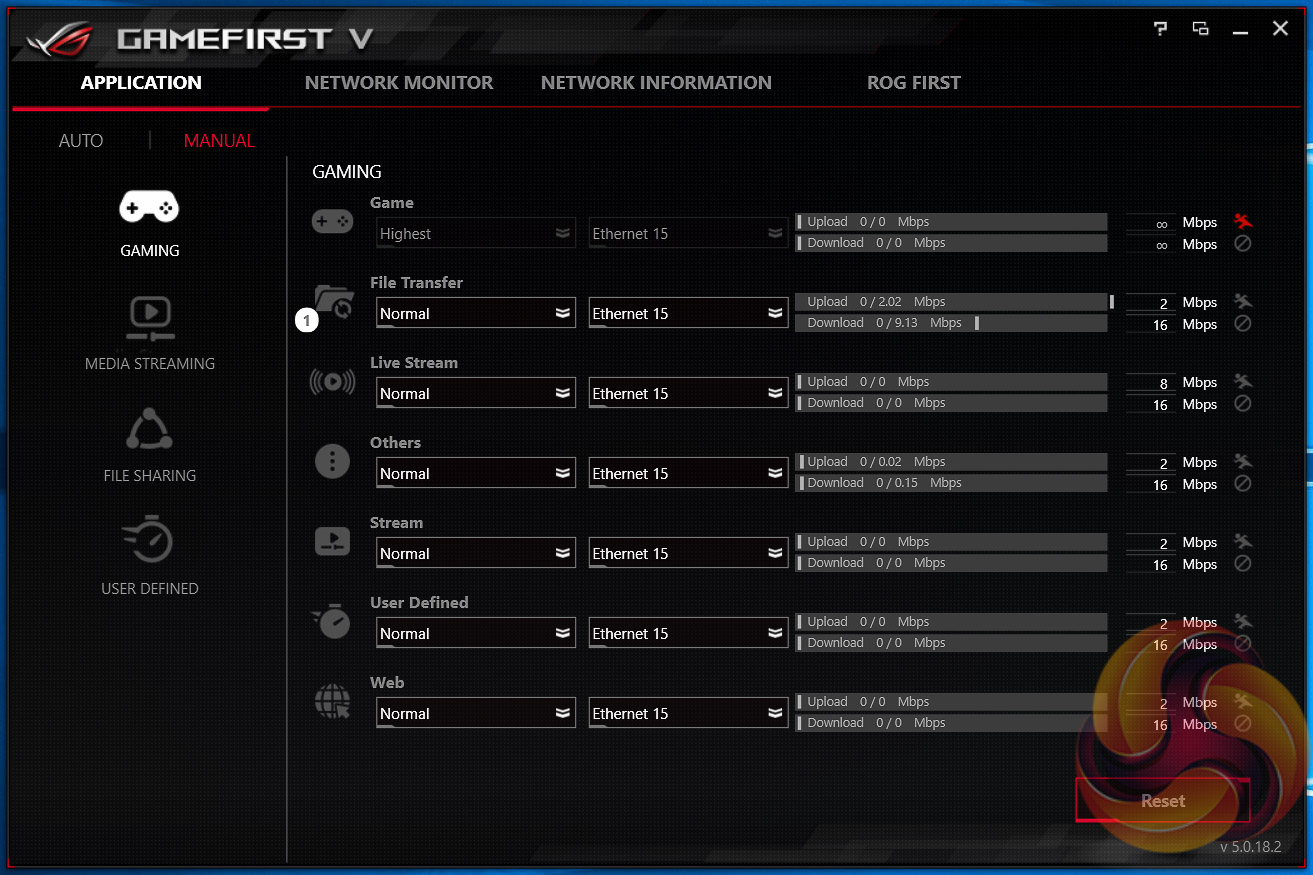
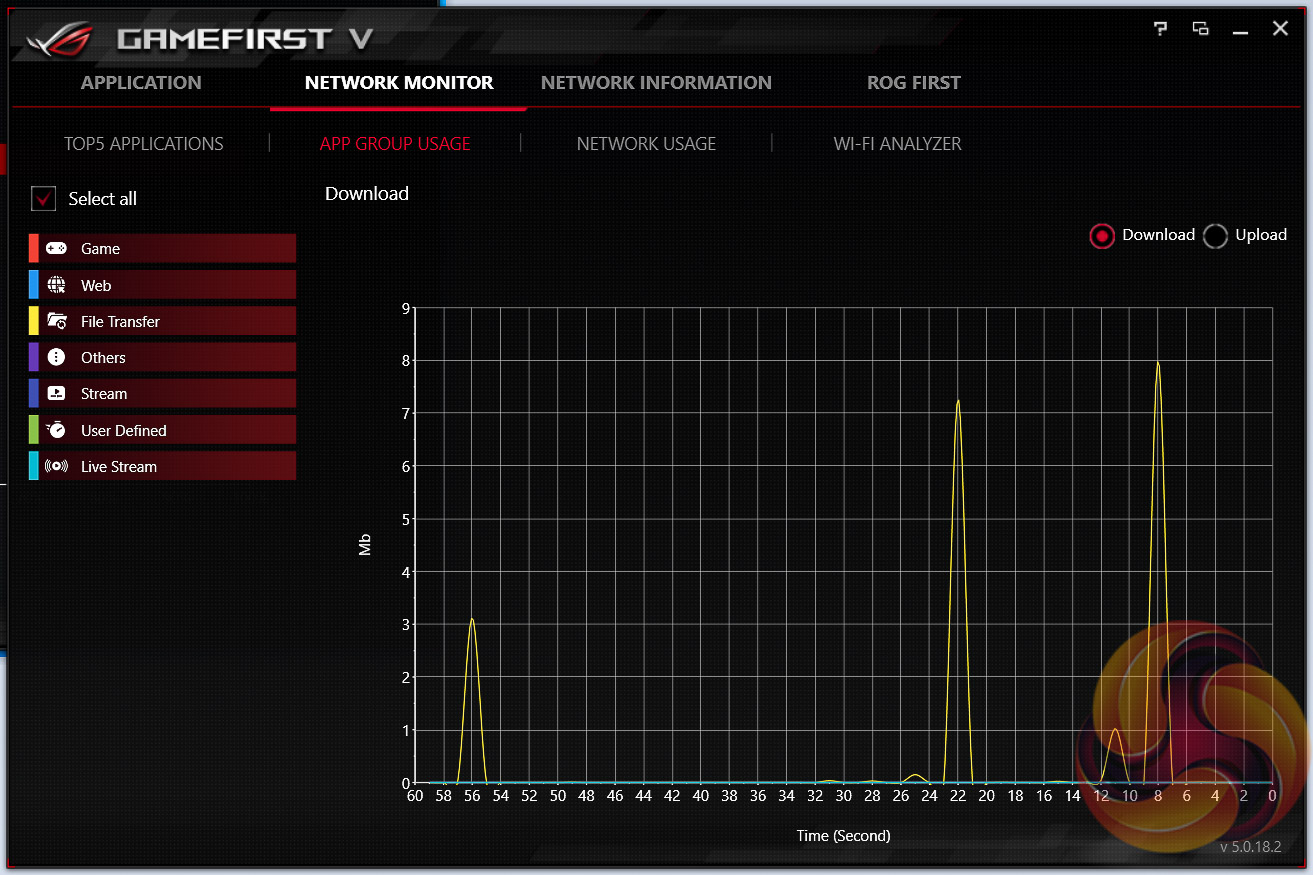
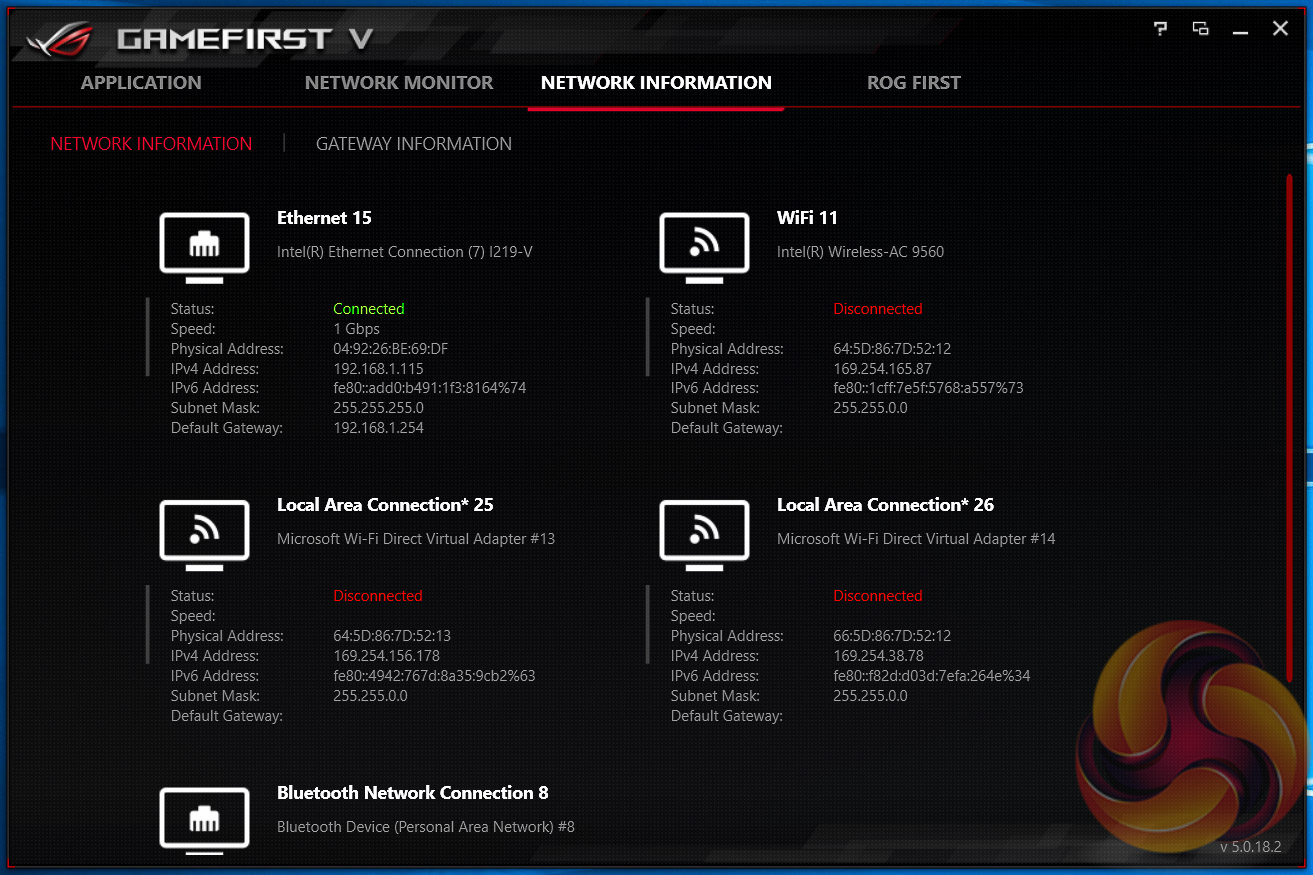
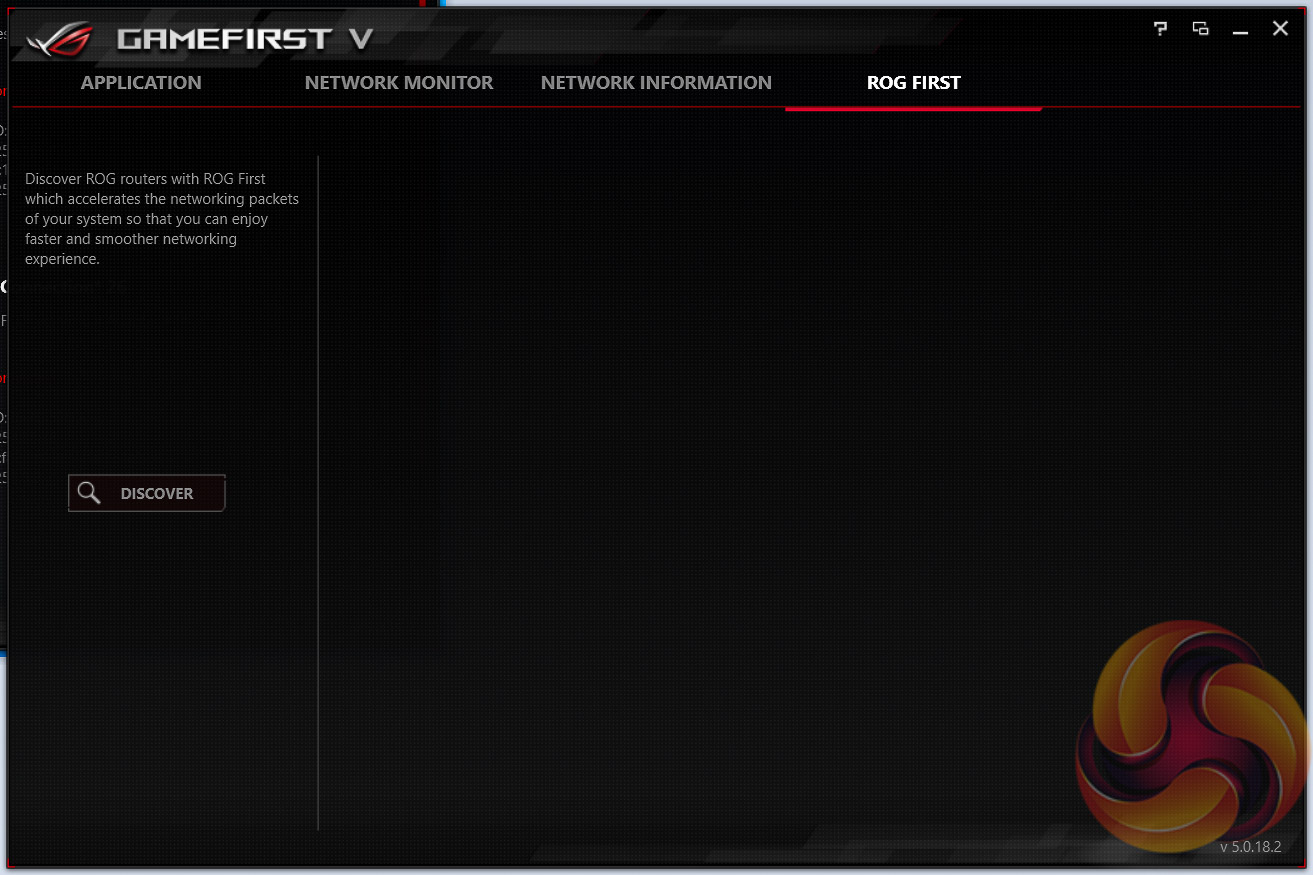
GameFirst V is the latest iteration of the ASUS network management software, launched alongside Z390. It's functionality hasn't changed a great deal since iteration 4 – it's still packet prioritisation and traffic shaping software. It supports Multi-Gate teaming which allows the WiFi and wired connections to be used at the same time, and to prioritise different applications to use each for different things. It sounds novel but most people are hampered by the speed of their internet connection before the way their PC manages network traffic.
This is how ASUS describe the latest iteration: “GameFirst V is the ROG-exclusive tool that optimizes network traffic for faster, lag-free online gaming. Team your gateways, keeps tabs on bandwidth-hogging apps and make adjustments on the fly.”
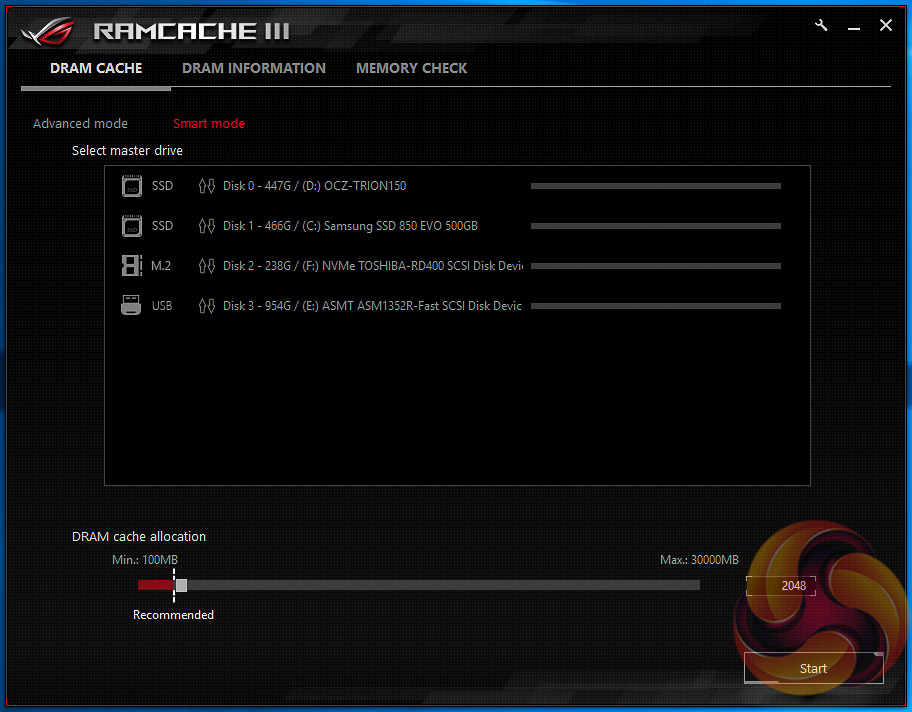
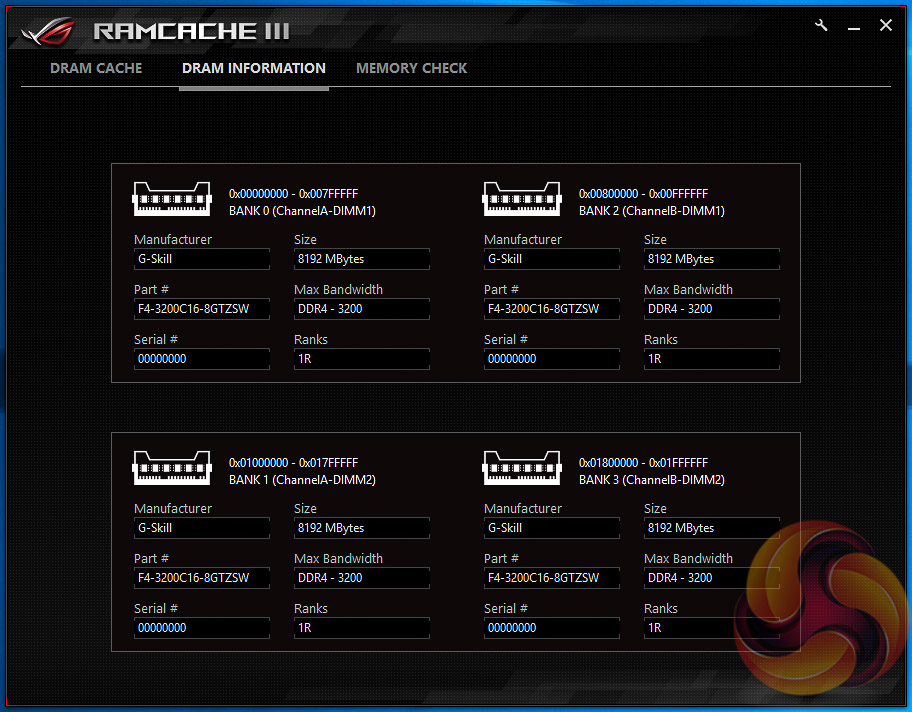
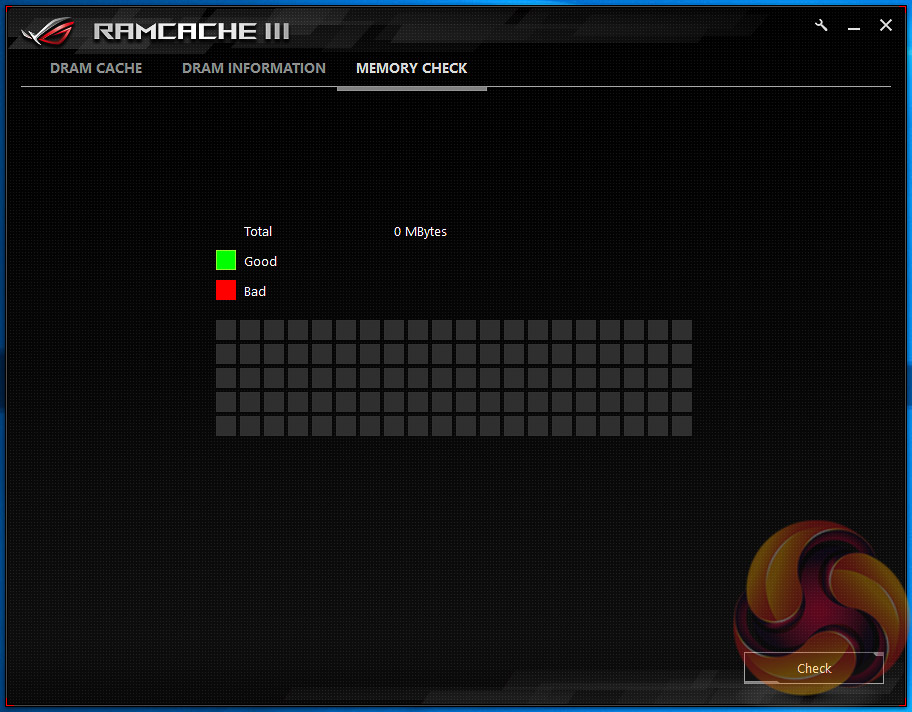
ROG RamCache III has also moved on to a new generation with Z390, up from version II prior. Not much appears to have changed aside from the addition of a memory testing application and a different graphical user interface. The ROG RAMCache III software aims to help with program loading and file transfers of regularly accessed data.
Users simply need to set aside the amount of RAM they would like for caching and the RAM Cache III software handles everything else behind the scenes when in Smart mode. There is an advanced mode that gives some additional parameters for user-control of the software’s behaviour if smart mode doesn’t suffice.
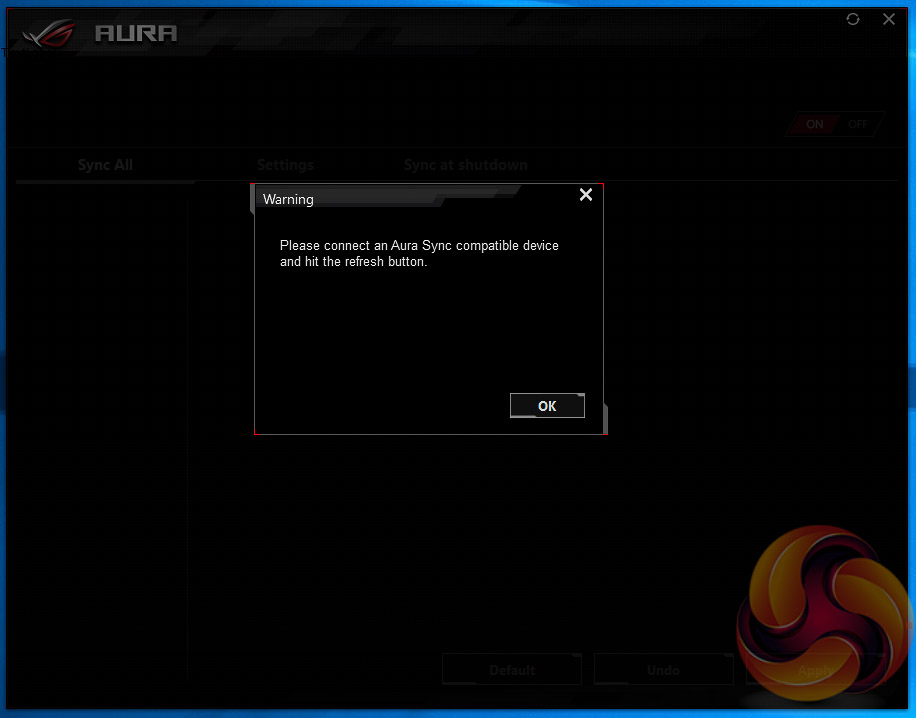
The ASUS AURA RGB software provided on the product page just didn't work during our testing, we tried all versions available on the ASUS product page, the version on the ASUS utility DVD and tried each of those in combination with all the UEFI versions available on the product page. The error message we recorded each time was “Warning, Please connect an Aura Sync compatible device and hit the refresh button.” – clicking the refresh button made no difference.
ASUS UK worked with us to try and troubleshoot the issue but they were unable to replicate it and according to their testing the motherboard we had used worked fine with AURA software version 1.07.22. Even after being sent a second sample and using a clean install of Windows 10, we were unable to get that software to work.
After scouring through the Republic of Gamers forums we came across a post that suggested older versions of AURA RGB had less problems and worked where newer versions did not. The version in question was 1.06.17 and it worked a treat, the direct download link to this version is here should you encounter the same issues as we did.
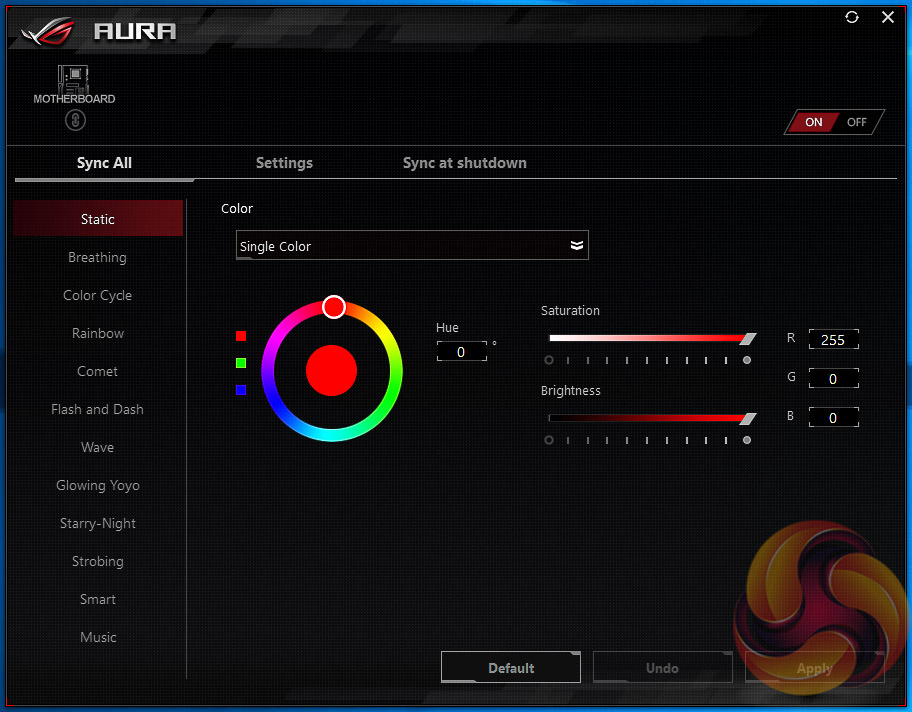
Compatibility problems aside, the functionality of ASUS AURA RGB is fine and works as expected, though we are unsure if version 1.07.22 brings significantly more benefits or features over 1.06.17.
The ASUS AURA RGB software has gone through several iterations of redevelopment since KitGuru first assessed it and it is now a fairly slick application. The range of LED modes available to choose from is comprehensive and LED strips can be managed independently of the onboard LEDs.
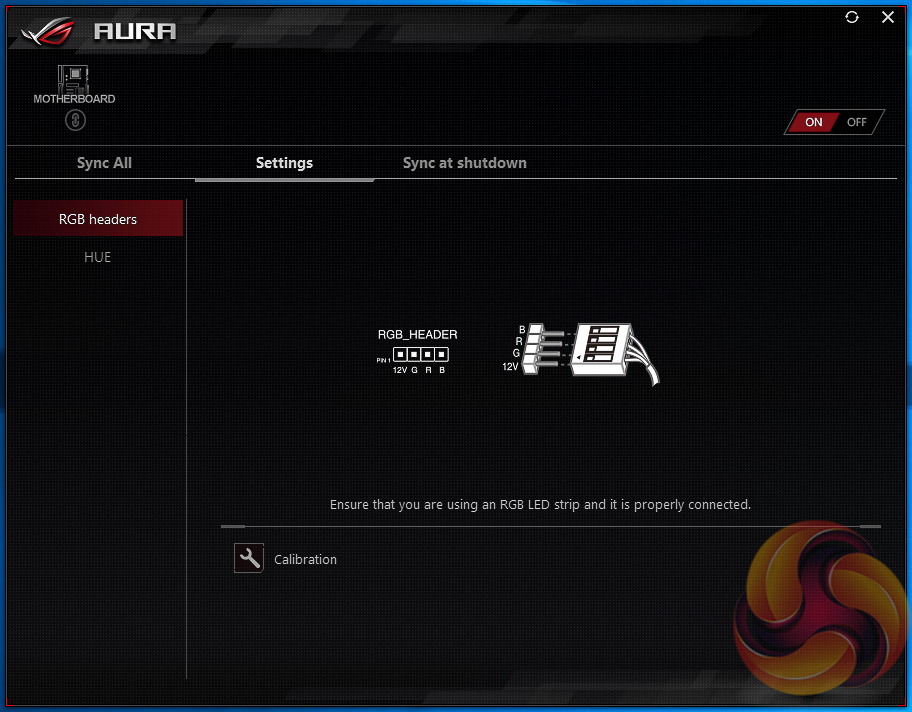
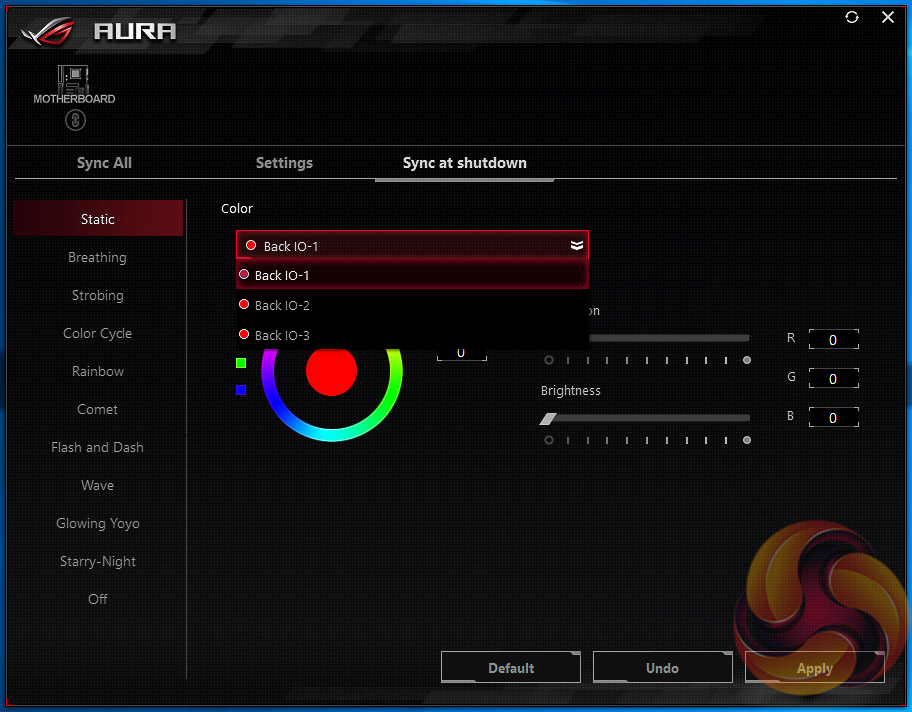
The settings tab details a few more compatibility options such as for calibrating RGB LED strips, integrating a Hue Bridge (Phillips Hue product integration) and the “Sync at “tab allows users to specify the “turned off” (standby power after shutdown) behaviour of the motherboard’s RGB LEDs.
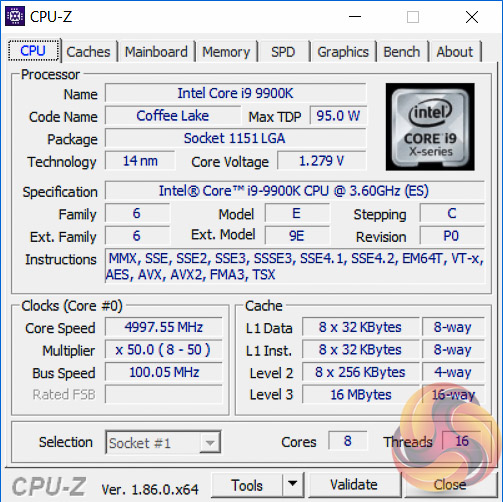
We will be outlining the ASUS ROG Strix Z390-E Gaming motherboard's performance with the Intel Core i9 9900K CPU, 32GB* of 3,200MHz G.Skill Trident Z DDR4 memory and a Gigabyte GTX 1080 G1 Gaming.
*16GB for mini-ITX motherboards, 32GB for all other motherboards.
Z390 Motherboard Test System:
- Processor: Intel Core i9 9900K with Default Intel Turbo Behaviour where supported (varies depending on thermal and power conditions)
- Memory: 32GB (4x8GB*) G.Skill Trident Z XMP/DOCP/AMP (3,200MHz** 16-18-18-38 @ 1.35V), *2x8GB for mini-ITX motherboards
- Graphics Card: Gigabyte GeForce GTX 1080 G1 Gaming.
- System Drive: Samsung 850 EVO 500GB SSD
- CPU Cooler: Corsair H100i V2 with Two ML120 Pro Fans.
- Power Supply: Seasonic Platinum 760W SS-760XP.
- Operating System: Windows 10 Pro 64-bit
Comparison Z390 Motherboards:
- ASRock Z390 Phantom Gaming 9
- ASUS ROG Strix Z390-E Gaming
Drivers and UEFI:
- Intel 10.1.17695.8086 chipset drivers
- Nvidia GeForce 416.34 VGA drivers
- ASUS UEFI 0602 (19/10/2018)
Tests:
- Cinebench R15 – All-core CPU benchmark (CPU)
- SiSoft Sandra 2018.9.28.28 – Processor Arithmetic Test (CPU) and Memory Bandwidth Test (Memory)
- 7-Zip 18.05 x64 – Built-in 7-Zip benchmark test (CPU)
- AIDA64 Engineer 5.98.4800 – System cache & memory benchmark and stress test (Memory and Power Consumption)
- 3DMark v2.5.5029 64 & TimeSpy v1.1 – Time Spy (1440p) test (Gaming)
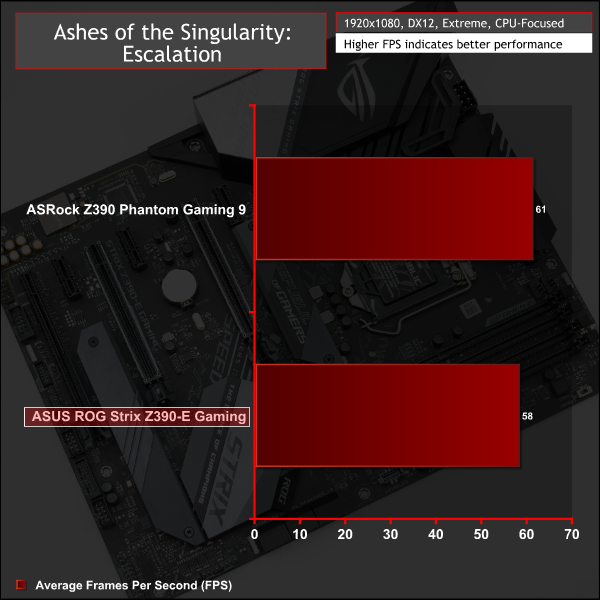
- Ashes of the Singularity: Escalation – Built-in benchmark tool CPU-Focused test, 1920 x 1080, Extreme quality preset, DX12 mode (Gaming)
- Deus Ex: Mankind Divided – Built-in benchmark tool, 1920 x 1080, Ultra quality preset, DX12 mode (Gaming)
- ATTO 3.05 – M.2, USB 3.0, USB 3.1, and SATA 6Gbps transfer rates (Motherboard)
- Rightmark Audio Analyzer 6.4.5 – Record and playback test using a line-in to line-out loopback with a 3.5mm audio cable (Motherboard)
- HWiNFO 5.91.3560 – System sensor monitoring during stress test (Power Consumption)
- Cybenetics Powenetics v2.2.0.0 – 12v EPS monitoring during stress test (Power Consumption)
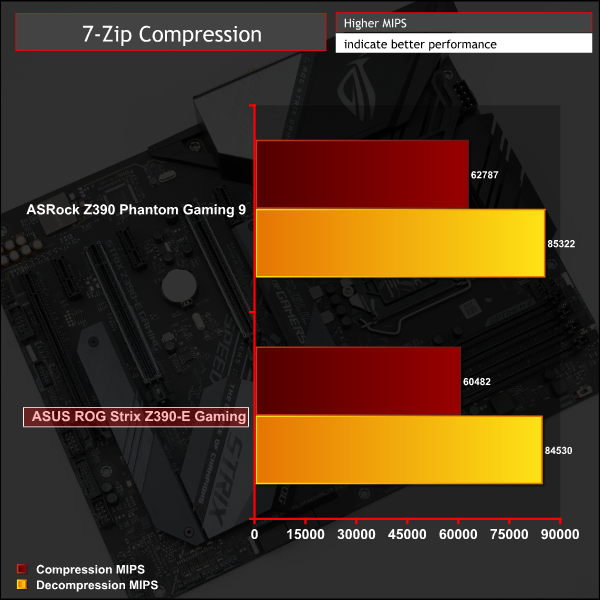
7-Zip
7-Zip is an open source Windows utility for manipulating archives. We measure the Total Rating performance using the built-in benchmark tool. The test stresses all CPU cores to 100% and shows an affinity for memory bandwidth.
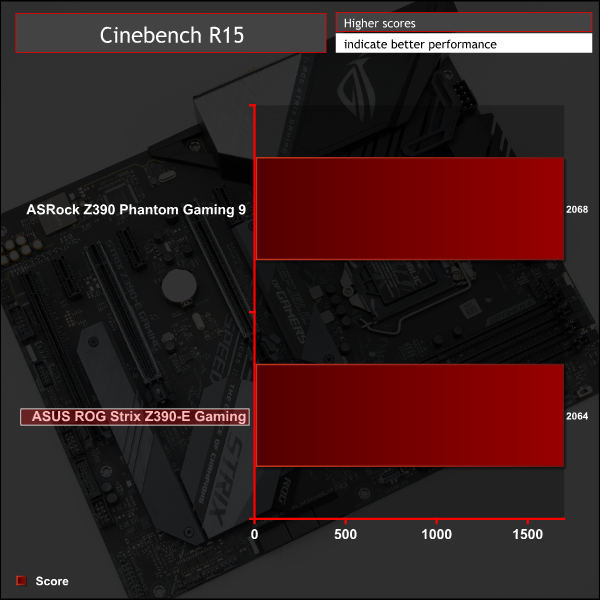
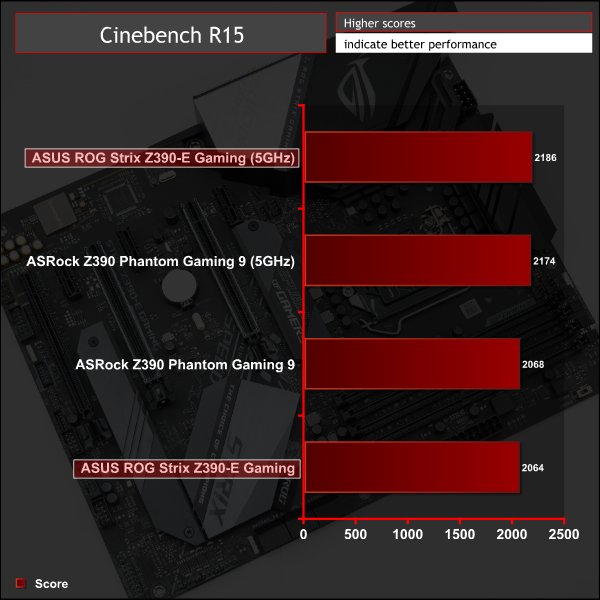
Cinebench R15
Cinebench is an application which renders a photorealistic 3D scene to benchmark a computer’s rendering performance, on one CPU core, all CPU cores or using the GPU. We run the test using the all core CPU mode.
Sandra Processor Arithmetic
SiSoft Sandra 2018 is a multi-function utility program that supports remote analysis, benchmarking and diagnostic features for PCs, servers, mobile devices and networks. We run the application’s processor arithmetic test to gauge the CPU performance on each tested motherboard.

CPU performance is variable between the two motherboards since ASRock has tweaked the Turbo duration settings to ensure the CPU runs faster for longer, at the expense of power consumption. ASUS, on the other hand, abides to Intel's Turbo duration when you select no to the enhanced Turbo and XMP options.
In shorter benchmarks, 7 Zip and Cinebench, it isn't so noticeable but in longer tests, SiSoft Sandra 2018 Processor Arithmetic, it is obvious.
For a rough guide of how CPU performance compares to other platforms please see our most recent reviews for the following platforms:
B450/X470 (Ryzen 7 2700)
Z370 (Intel Core i7 8700K)
X299 (Intel Core i9 7900X)
Please note software and driver versions have changed hence why we caution that results are not directly comparable.
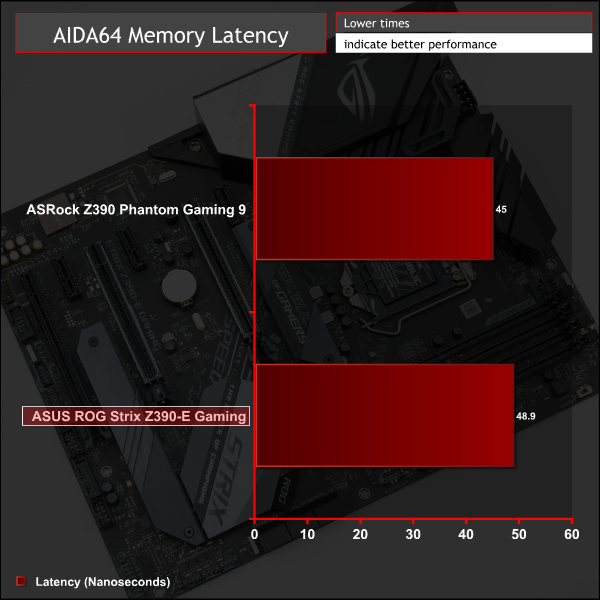
AIDA64 Engineer
AIDA64 Engineer is a multi-featured software suite for diagnostics, stress testing, benchmarking, software auditing and various other measurement parameters. We use AIDA64 Engineer to benchmark memory throughput and latency.
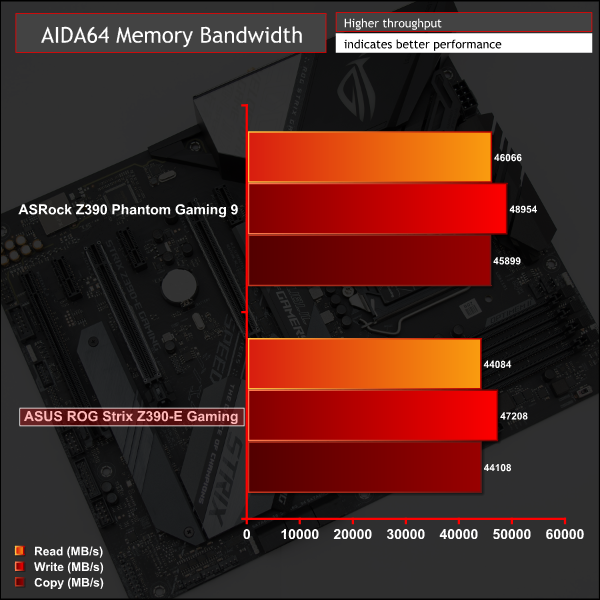
Sandra Memory Bandwidth
SiSoft Sandra 2018 is a multi-function utility program that supports remote analysis, benchmarking and diagnostic features for PCs, servers, mobile devices and networks. We use the SiSoft Sandra memory bandwidth test to provide a set of memory bandwidth results.
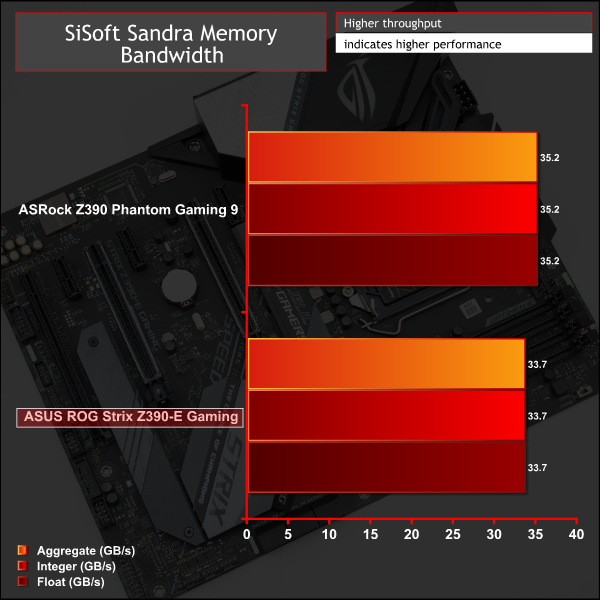
The previously mentioned CPU Turbo settings that cause the ASRock motherboard to operate the CPU faster, with higher power consumption, carry over to the memory tests too. Additionally, ASUS offered a choice of optimising memory parameters when selecting an XMP profile, which ASRock did not.
As such it seems the slightly better memory performance on the ASRock motherboard in memory tests is also a result of optimisation done by ASRock that the user is not consulted on.
For a rough guide of how memory performance compares to other platforms please see our most recent reviews for the following platforms:
B450/X470 (Ryzen 7 2700)
Z370 (Intel Core i7 8700K)
X299 (Intel Core i9 7900X)
Please note software and driver versions have changed hence why we caution that results are not directly comparable.
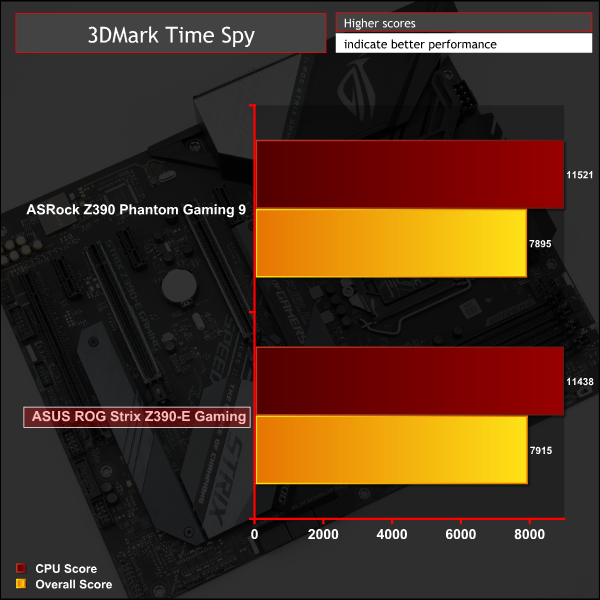
3DMark
3DMark is a multi-platform hardware benchmark designed to test varying resolutions and detail levels of 3D gaming performance. We run the Windows platform test and in particular the Time Spy benchmark, which is indicative of high-end 1440p PC Gaming.
Ashes of the Singularity: Escalation
Ashes of the Singularity: Escalation is a Sci-Fi real-time strategy game built for the PC platform. The game includes a built-in benchmark tool and was one of the first available DirectX 12 benchmarks. We run the CPU-focused benchmark using DirectX 12, a 1080p resolution and the Extreme quality preset.
Deus Ex: Mankind Divided
Deus Ex: Mankind Divided is an action role-playing stealth video game released in August 2016. A built-in benchmark utility is included and we test using the Ultra quality preset and the DirectX 12 API at a 1080p resolution.
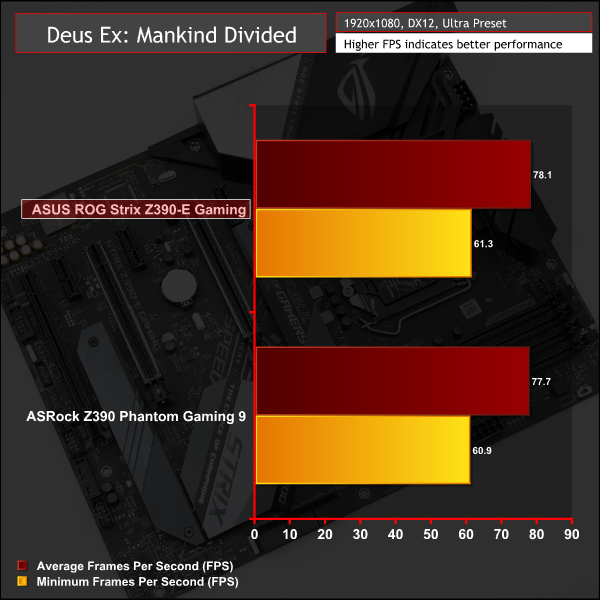
GPU performance varies only slightly with the main cause of the performance difference the previously mentioned CPU and memory tuning that ASRock does as part of the “auto” settings. ASUS gives the users the chance to opt out of that when setting the XMP profile. It's important to note that the difference in performance between motherboards, as a general rule, doesn't mean one motherboard is “faster” or “better” than the other, just operating using a different set of parameters or power constraints.
For a rough guide of how gaming performance compares to other platforms please see our most recent reviews for the following platforms:
B450/X470 (Ryzen 7 2700)
Z370 (Intel Core i7 8700K)
X299 (Intel Core i9 7900X)
Please note software and driver versions have changed hence why we caution that results are not directly comparable.
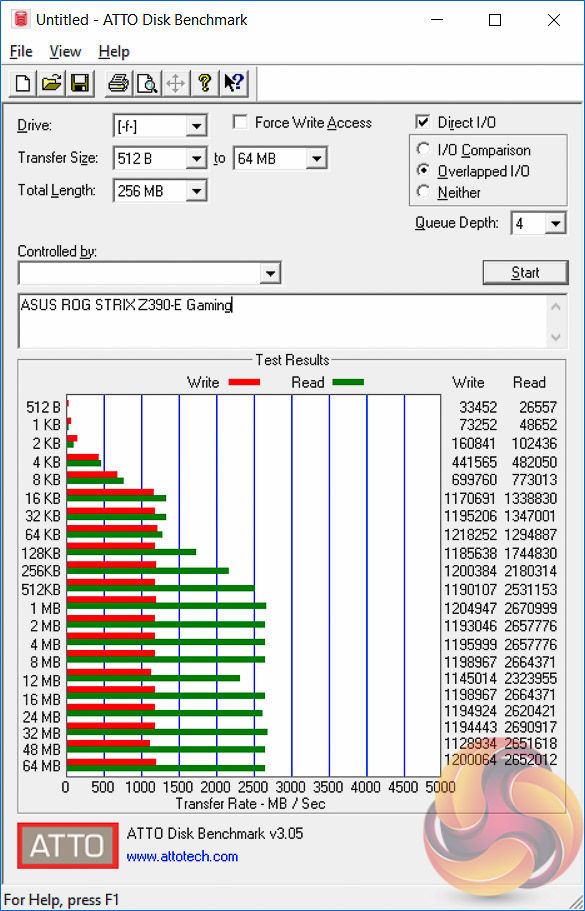
ATTO Disk Benchmark
The ATTO disk benchmark is a Windows-based utility for testing storage performance of any storage drive or controller. We use the default benchmark setup.
M.2 PCIe Performance
For M.2 testing we use a Toshiba OCZ RD400 256GB M.2 PCIe NVMe SSD.
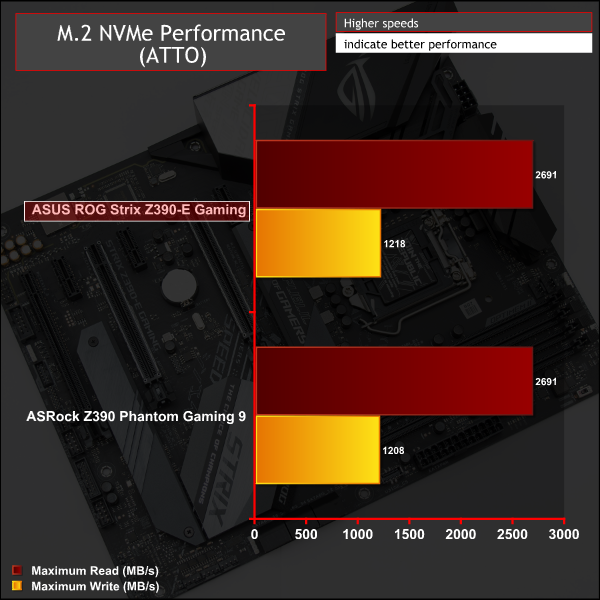

M.2 performance is as expected for the 32Gbps PCIe 3.0 X4 link and the M.2 heatsink does a good job of keeping thermals out of the throttling zone, even under prolonged (10 minutes +) stress testing. Temperature and performance results were identical, within margin of error, for the second M.2 slot which is also cooled and also supports a PCIe 3.0 X4 link.
USB Performance
We test USB 3.0 and 3.1 performance using a pair of Transcend SSD370S 512GB SSDs in RAID 0 connected to an RaidSonic Icy Box RD2253-U31 2-bay USB 3.1 enclosure powered by an ASMedia ASM1352R controller.
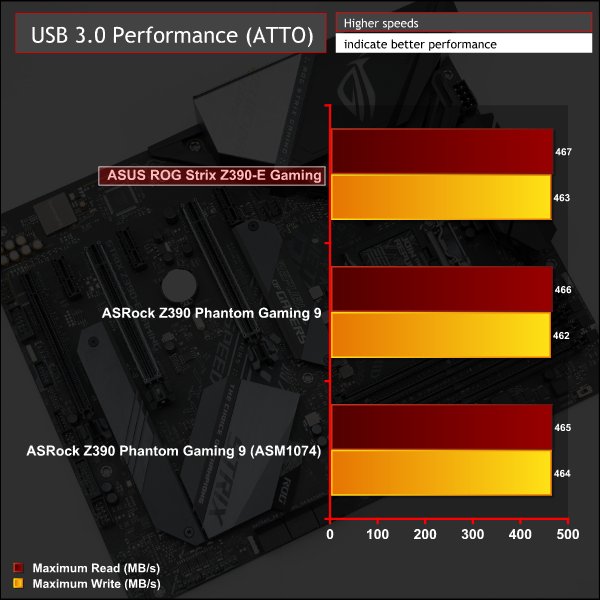
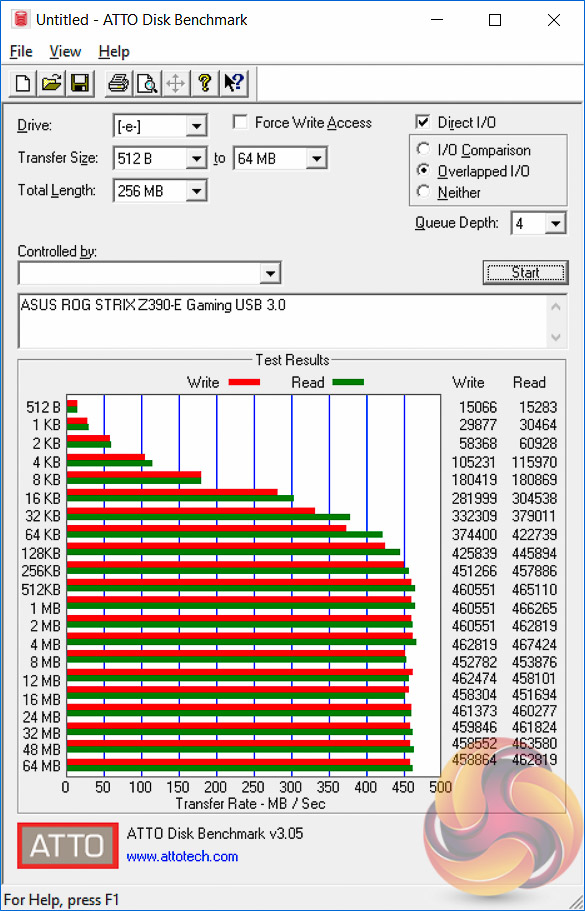
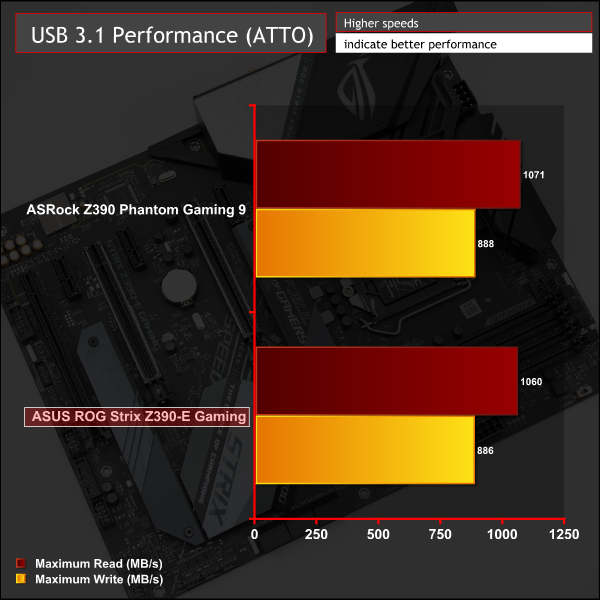
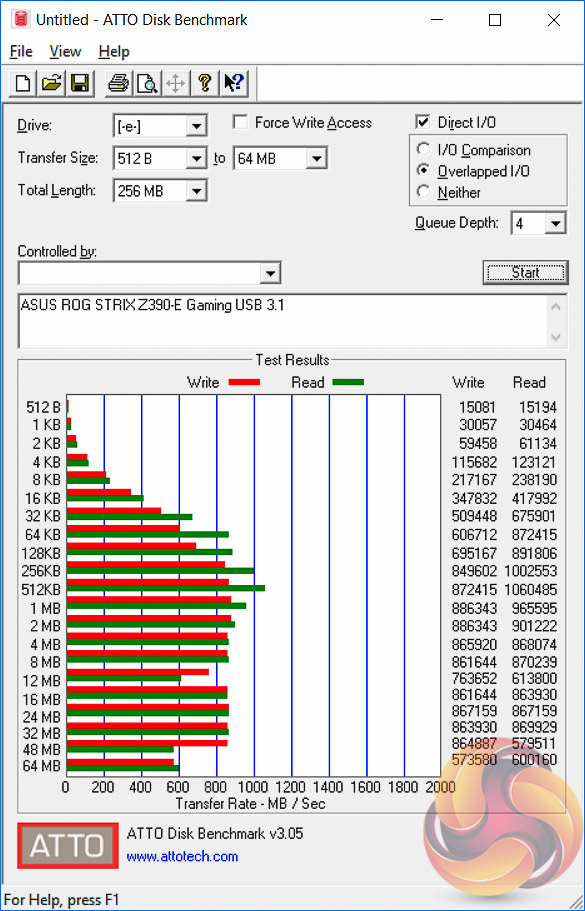
USB 3.0 and 3.1 performance were par for the course.
SATA III 6Gbps Performance
For SATA 6Gbps testing we use an OCZ Trion 150 480GB SSD.
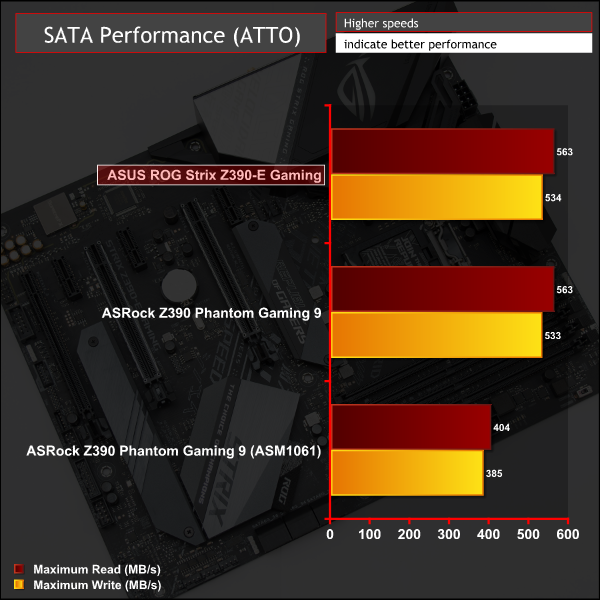
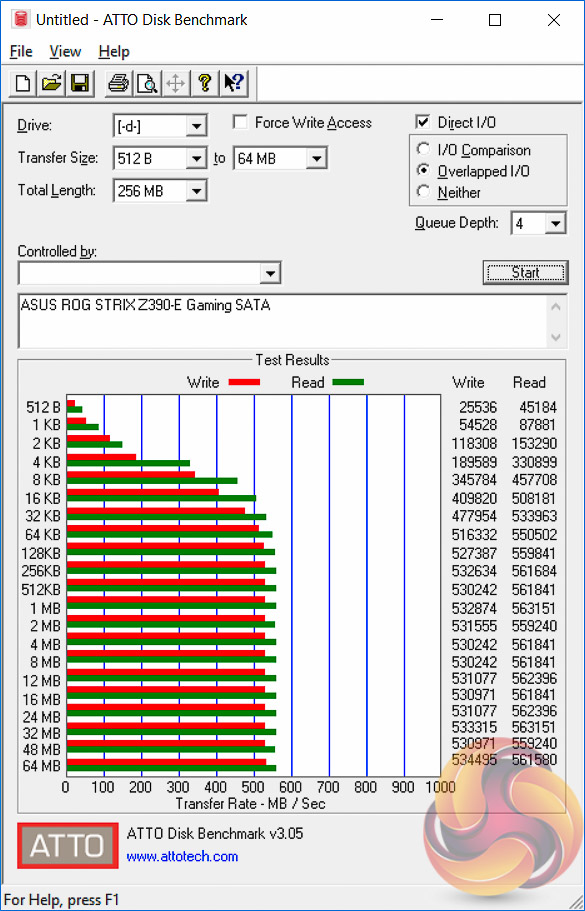
SATA III performance is nothing out of the ordinary.
Audio
Rightmark Audio Analyser is a freeware benchmarking utility designed to objectively test the performance characteristics of audio solutions. We setup a line-in line-out loop and execute the record/playback test before generating the results report you see below. A sampling mode of 24-bit, 192 kHz is tested where available. If unavailable the closest alternative operating mode available is used and clearly marked.
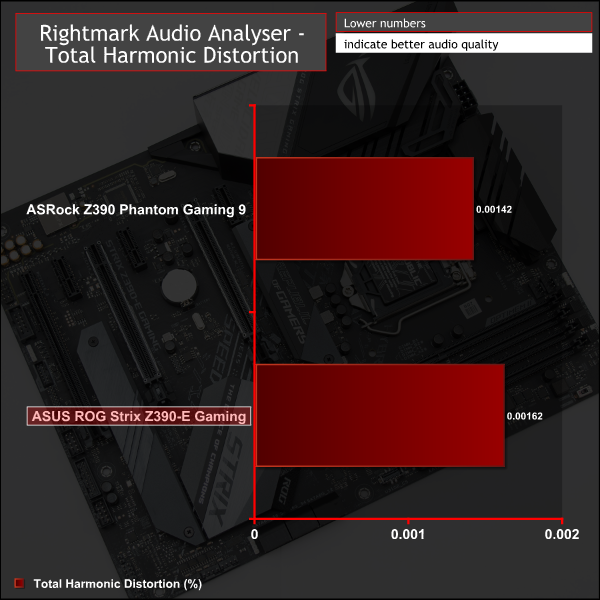
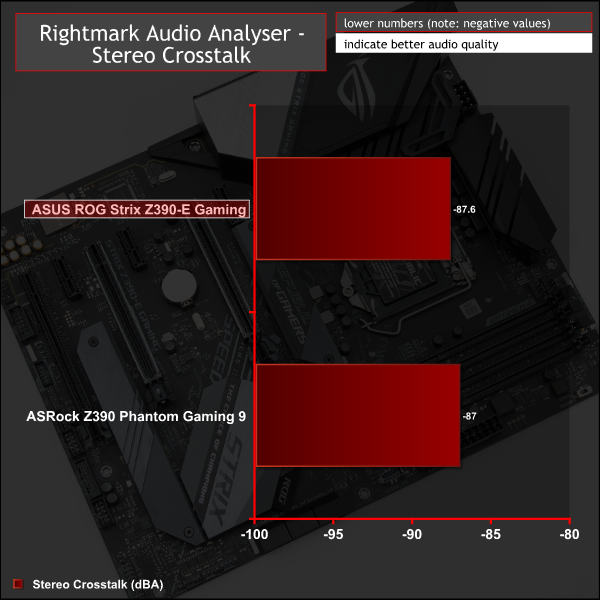
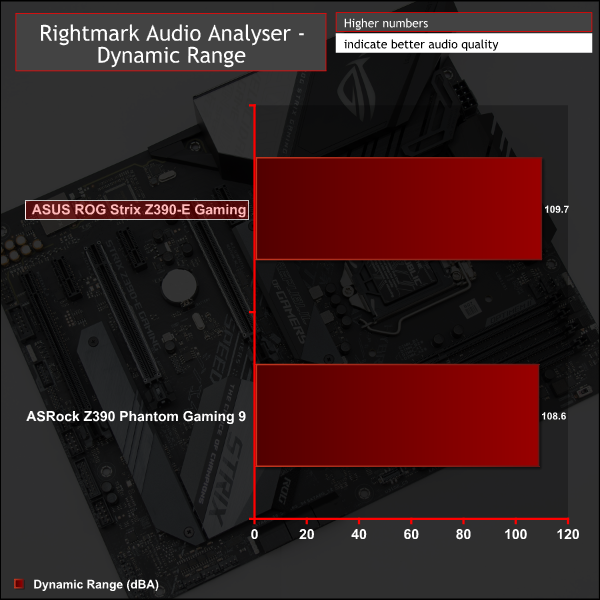
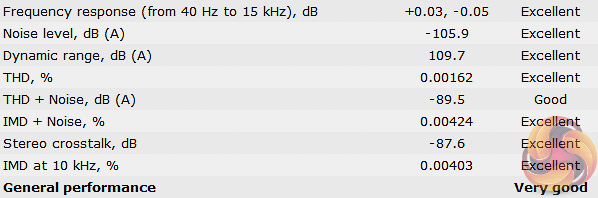
The audio performance of the Realtek ALC1220 codec is excellent and this test just confirms it. ASUS has implemented the codec well for a mid-range motherboard and the dual operational amplifiers is a nice touch for headphone users too.
Manual CPU Overclocking:
To test the ASUS ROG Strix Z390-E Gaming motherboard’s CPU overclocking potential, we set the CPU core voltage no higher than 1.3V and push for the highest stable clock speed. We maintain the DRAM frequency at 3200MHz to take memory stability out of the overclocking equation.
Our particular CPU is not stable at 5.1GHz even with 1.45v. The final stable overclock for almost all Z390 motherboards we may test should be 5GHz, unless there is something particularly wrong with the VRM that limits the voltage or power it can supply. In the case of the ASUS ROG Strix Z390-E Gaming it achieved 5GHz at 1.3 volts with no issues at all.
Motherboard Sensors
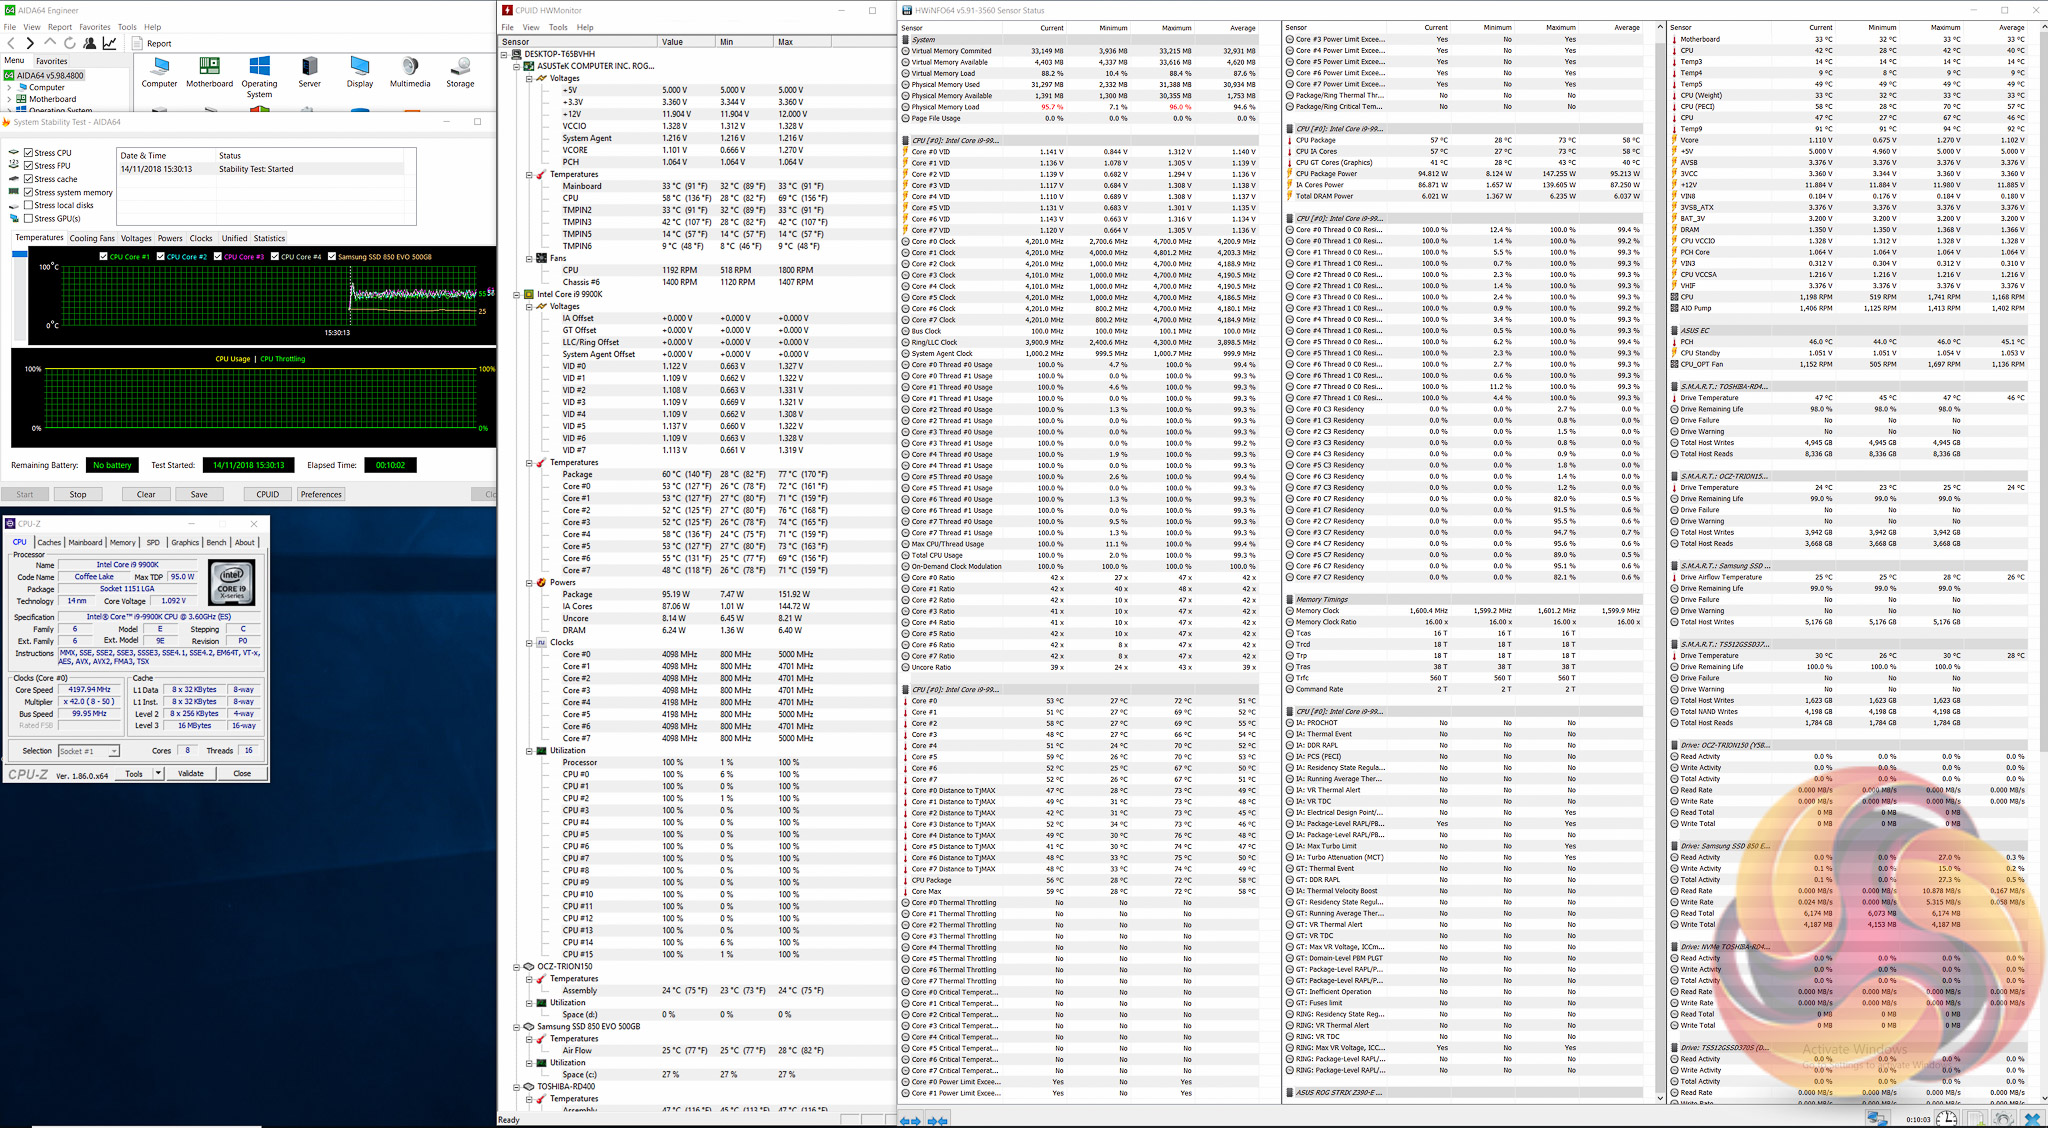
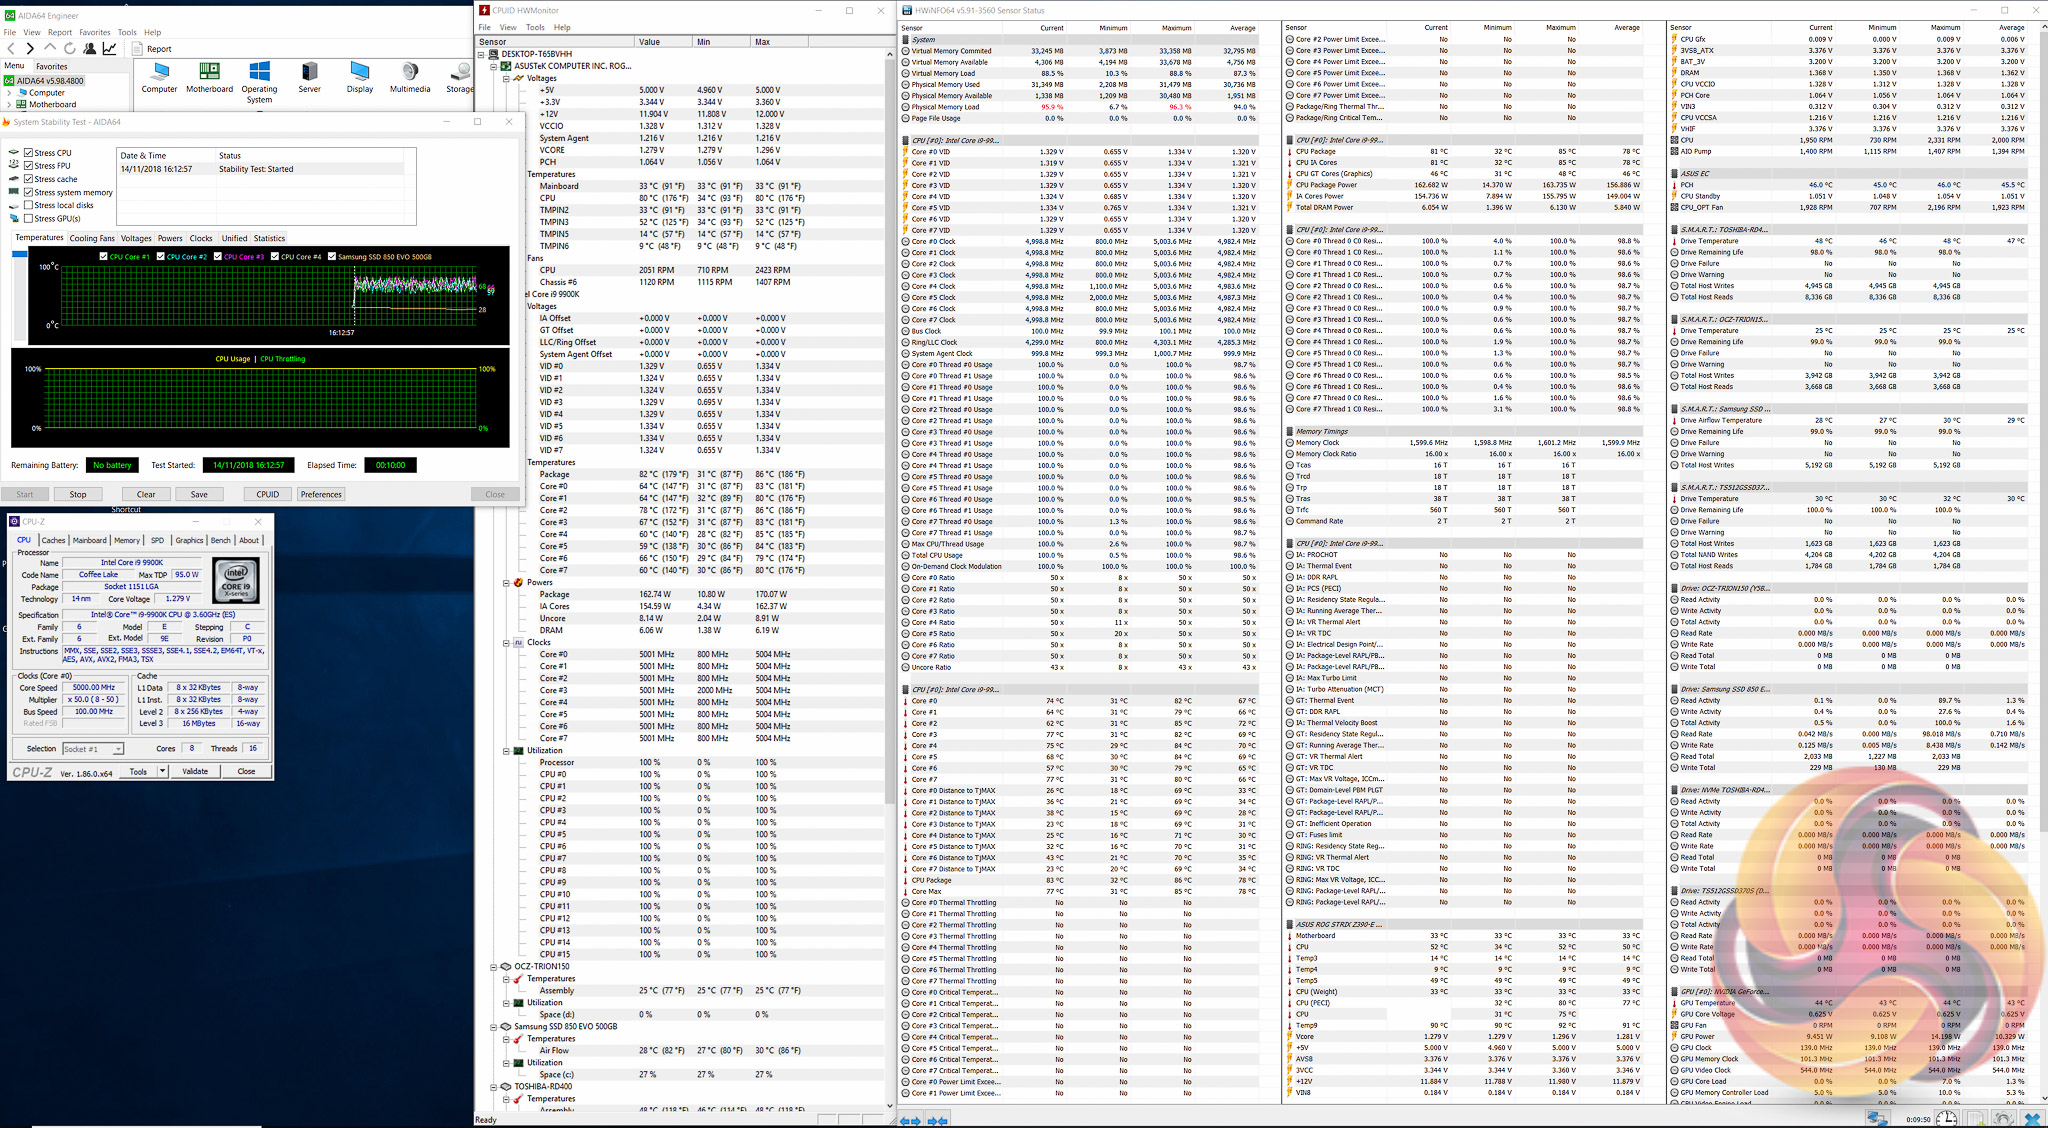
There's no temperature sensor marked as being for the VRM, so it's not possible to confirm the state of the VRM temperatures during testing.
Overclocked Performance
Performance scaled with frequency. On this motherboard where the CPU can follow Intel Turbo guidance the gains from overclocking in longer benchmarks would be more noticeable (effectively going from 4.2GHz all core turbo to 5GHz), since overclocking takes the CPU beyond Intel’s specification. However, if you'd been using the enhanced Turbo mode before overclocking, the jump to a 5GHz all-core frequency would be hardly noticeable.
System Power Consumption
We leave the system to idle on the Windows 10 desktop for 10 minutes before taking a reading. For CPU load results we run AIDA64 CPU, FPU, Cache and Memory stress tests and take a reading after 10 minutes. The power consumption of our entire test system (at the wall) is shown in the chart.
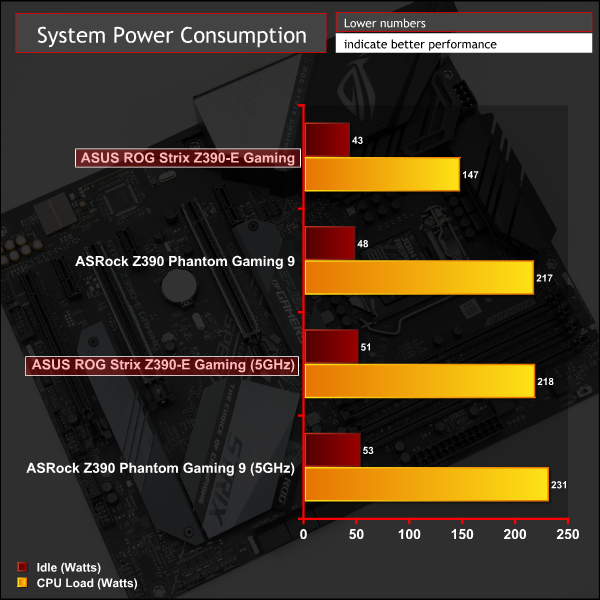
Due to ASUS allowing the Intel i9 9900K to run at Intel specification, with user input, the stock numbers are considerably lower than the ASRock motherboard. However, when overclocking the gap almost disappears.
The VCore did drop to 1.28v, despite setting 1.3v in the UEFI, when overclocking – hence why the overclocked power consumption for the ASUS motherboard is slightly lower. This is down to the Auto LLC settings and it was possible to override this by using a more aggressive LLC option.
12-volt EPS Power Consumption
During the 10-minute stress test as specified above, we record the direct CPU power consumption drawn through the EPS 8-pin socket using modified EPS 8-pin cables that have a Tinkerforge Voltage/Current 1.0 bricklet intercepting and monitoring the power flow from the power supply. That bricklet then reports its data to a Tinkerforge Master Brick. All the data collected by the Tinkerforge Master Brick is passed into an external laptop over a USB connection and analysed in the Cybenetics Powenetics Project software.
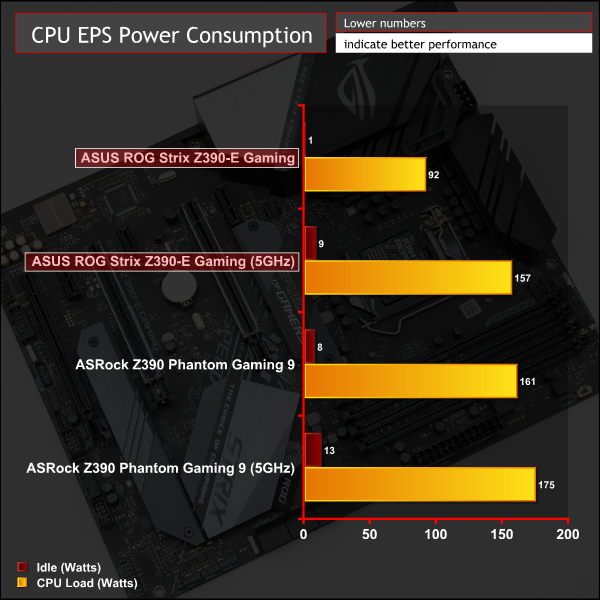
Stock CPU power consumption represents approximately 3% for idle and 69% for load of the system total, when adjusted for PSU efficiency*.
Overclocked CPU power consumption represents approximately 18% for idle and 80% for load of the system total, when adjusted for PSU efficiency*.
*Approximate Seasonic SS-760XP PSU efficiency at:
- 50-watts: 86%
- 125-watts: 89%
- 200-watts: 90%
The Powenetics software provides the power consumption at 12v input (pre-CPU VRM), and the CPU provides the power consumption (CPU IA Cores Power) after the CPU VRM has translated the power into a useful format (post-VRM). Based on this we can provide a rough estimate of VRM efficiency and “wasted” energy that likely translates into heat.
- Stock: 87-watts reported by CPU, 92-watts recorded, approximately 95% efficient and 5-watts of heat output.
- Overclocked: 149-watts reported, 157-watts recorded, approximately 95% efficient and 8-watts of heat output.
The mid-range Republic of Gamers motherboards from ASUS have always been a safe and reliable choice for their respective platforms and the ASUS ROG Strix Z390-E Gaming does nothing to buck that trend.
By no means is this the most affordable motherboard on the market for its performance and feature set, but the ROG brand has never been about hitting budget price points. Indeed, the Z390-E Gaming is about a sensible blend of features and connectivity, built into a refined package that would cater for majority of prospective Z390 buyers and PC Gamers.
It's mid-range in most senses with a standard amount of connectivity, ample USB of all generations, six SATA III ports, dual M.2, wired and wireless networking, high quality audio and some onboard diagnostics for a trouble-free building experience. The aesthetic design is pleasing, almost neutral, and there is ample RGB connectivity for customisation.
The VRM design, even after all the discussion that has surrounded it, appears to be a solid VRM implementation that delivers ample power for the overclocking needs of the majority of prospective buyers. Our testing found them to be stable – no performance, power or thermal throttling under extended loading – and perfectly sufficient for getting the most out of our CPU, as well as efficient.
While we weren't able to record any VRM temperatures, ASUS caters to the temperature-conscious audience with the provision of a small fan to provide additional airflow over the VRM areas. The heatsinks are sizeable enough and given a decent ambient airflow level within a suitable PC case, there shouldn't be overheating regardless of whether the extra VRM fan is used.
One issue that we found was that the AURA RGB software didn't work during our review testing. ASUS UK provided sufficient evidence that it was able to get the same software configuration working with the sample we encountered problems with. Thus we can likely put this down to an undiscovered compatibility quirk with our particular setup such as the Windows 10 image we were using, any automatic updates Windows had applied, some of the drivers or applications we benchmark with or some other unknown incompatibility.
We did, however, notice that older versions of AURA RGB software, 1.06.17 in particular, worked where the new versions on the product page download didn't. Given the rather lengthy 18-page-and-growing forum thread on issues with version 1.07.22 we suspect that more users might encounter problems with newer versions than the older ones. ASUS evidently has some software development work still to do to make the AURA application more robust.
The fact the VRM is “only” a 4-phase for the VCore, even if it has 8 phases worth of components, may continue to be a sticking point to many prospective buyers where the number of phases being higher is seen as better, and doublers are seen as better than no doublers.
The conclusion for the ASUS ROG Strix Z390-E Gaming isn't that different to the Z370 equivalent – this is a good overall motherboard but it feels slightly light on features given its price point and is low on excitement and innovation for something that carries the ROG banner.
![]()
The ASUS ROG Strix Z390-E Gaming has a retail price of £227.99 in the UK at Overclockers UK and is usually sold with a 3 year warranty.
In the USA it can be had for $239.89 at Amazon and usually has a 3 year warranty.
Pros:
- Ample fan headers
- Good USB provision
- LED expansion headers
- Onboard WiFi
- Dual cooled M.2 slots
- Diagnostic LEDs, MemOK switch
- Neutral styling
- High quality audio implementation
- Supplementary VRM fan accessory
Cons:
- “only” a 4-phase VRM
- Only one onboard RGB lighting zone
- compatibility issues with new versions of AURA RGB software
KitGuru says: The ASUS ROG Strix Z390-E Gaming is a safe, sensible and well-built mid-range motherboard for Intel's new Z390 chipset, if a little expensive.